Tabla de contenido
Publicidad
Idiomas disponibles
Idiomas disponibles
Enlaces rápidos
Publicidad
Tabla de contenido

Resumen de contenidos para KTM 78113900100
- Página 1 LEFT HAND BRAKE KIT .201 78113900100 3.213.625 KTM Sportmotorcycle GmbH Husqvarna Motorcycles GmbH Stallhofnerstraße 3 Stallhofnerstraße 3 *3213625* A-5230 Mattighofen A-5230 Mattighofen www.husqvarna-motorcycles.com www.ktm.com...
- Página 2 3 DEUTSCH Wir freuen uns, dass Sie sich für dieses Produkt entschieden haben. Unser hochwertiges Qualitätsprodukt ist rennerprobt und wurde speziell für sportliche Herausforderungen entwickelt. Eine korrekte Montage des Produktes ist unerlässlich, um ein Maximum an Sicherheit und Funktionalität gewährleisten zu können. Bitte befolgen Sie daher die Montageanleitung oder wenden Sie sich an Ihren autorisierten Fachhändler.
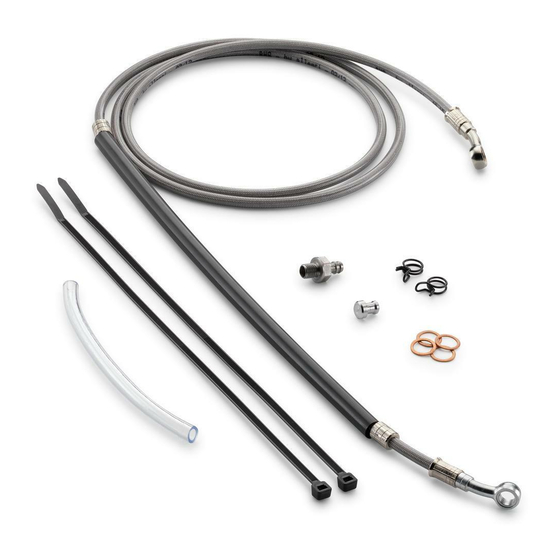
- Página 3 Lieferumfang: 1x Bremsleitung (1) x Kupfer Dichtring (2) 1x Schlauch (3) 2x Klammer (4) 1x Schlauchtülle 1x Blindverschluss (6) 4x Kabelbinder (7) Vorarbeiten - Sitzbank abnehmen. - Kraftstofftank ausbauen. - Startnummerntafel oder Scheinwerfermaske mit Scheinwerfer - Schrauben (8) entfernen, Deckel (9) abnehmen. - Bremsflüssigkeit aus dem Behälter mit einer Entlüftungsspritze (nicht im Lieferumfang) absaugen.
- Página 4 - Hohlschraube (11) lösen und Original-Bremsleitung von hinterer Bremszange demontieren. - Steckverbindung (12) des Bremslichtschalters trennen. - Schrauben (13) entfernen und hinteren Bremszylinder (14) mit Bremsleitung abnehmen. - Schraube (15) entfernen und Fußbremshebel (16) demontieren. Montage - Bremsleitung mit Original-Hohlschraube (11) und zwei Dichtringe (2) an der hinteren Bremszange befestigen (15 Nm).
-
Página 5: Rechtliche Bestimmungen
- Bremsleitung links entlang des Rahmens (siehe Skizze) verlegen. - Bremsleitung am Ausgleichsbehälter der linken Armatur befestigen (15 Nm). HINWEIS: Darauf achten, dass die Bremsleitung nicht geknickt wird oder mit heißen Bauteilen in Berührung kommt. - Bremsleitung und Schlauch mit Kabelbindern (7) sichern. Nacharbeiten - Startnummerntafel oder Scheinwerfermaske mit Scheinwerfer montieren. - Página 6 Scope of supply: 1x brake line (1) x copper seal rings (2) 1x hose (3) 2x clamps (4) 1x hose nozzle 1x blank plug (6) 4x cable binders (7) Preparations - Take off the seat. - Remove the fuel tank. - Disassemble the start number plate or the headlight mask with the - Remove the screws (8) and take off the lid (9).
- Página 7 - Unscrew the banjo bolt (11) and remove the original brake line from the rear brake caliper. - Disconnect the plug-in connection (12) of the brake light switch - Remove the screws (13) and take off the rear brake cylinder (14) with the brake line.
-
Página 8: Final Steps
- Route the brake line on the left along the frame (see figure). - Attach the brake line to the compensating tank of the left mounting (15 Nm). NOTE: Ensure that the brake line is not kinked and does not come into contact with hot components. -
Página 9: Operazioni Preliminari
Volume della fornitura: N. 1 tubazione del freno (1) anelli di tenuta in rame (2) N. 1 tubo flessibile (3) N. 2 fermagli (4) N. 1 boccola per flessibili N. 1 tappo cieco (6) N. 4 fascette serracavi (7) Operazioni preliminari - Rimuovere la sella. - Página 10 - Svitare la vite cava (11) e smontare la tubazione del freno originale dalla pinza del freno posteriore. - Scollegare il connettore (12) dell’interruttore luce di stop. - Svitare le viti (13) e rimuovere il cilindro del freno posteriore (14) con la tubazione del freno.
-
Página 11: Disposizioni Di Legge
- Disporre la tubazione del freno a sinistra lungo il telaio (vedi disegno). - Fissare la tubazione del freno sul vaso d’espansione del comando sinistro (15 Nm). NOTA: Verificare che la tubazione del freno non si pieghi e che non venga a con- tatto con componenti caldi. - Página 12 Étendue de la livraison : 1x Durite de frein (1) x Bague d’étanchéité en cuivre (2) 1x Flexible (3) 2x Clip (4) 1x Embout 1x Bouchon (6) 4x Serre-câble (7) Travaux préliminaires - Déposer la selle. - Déposer le réservoir à carburant. - Démonter le porte-plaque frontale ou la plaque-phare avec le phare - Retirer les vis (8) et enlever le couvercle (9).
- Página 13 - Desserrer la vis creuse (11) et démonter la conduite de frein d’origine sur l’étrier de frein arrière. - Débrancher la fiche de connexion (12) du contacteur de feu de stop. - Retirer les vis (13) et déposer le cylindre de frein arrière (14) avec la con- duite de frein.
-
Página 14: Dispositions Legales
- Faire passer la conduite de frein à gauche le long du cadre (voir la figure). - Fixer la conduite de frein sur le réservoir de compensation de l’armature de gauche (15 Nm). REMARQUE : Veiller à ne pas plier la conduite de frein ou à ne pas la mettre en contact avec des composants chauds. -
Página 15: Trabajos Previos
Volumen de suministro: 1 tubo del freno (1) anillos de hermetizado de cobre (2) 1 manguera (3) 2 grapas (4) 1 espiga 1 tapón ciego (6) 4 cintas sujetacables (7) Trabajos previos - Quitar el asiento. - Desmontar el depósito de combustible. - Desmontar la placa portanúmeros o la cubierta del faro con el faro - Retirar los tornillos (8) y quitar la tapa (9). -
Página 16: Montaje
- Soltar el tornillo hueco (11) y desmontar el tubo del freno original de la pinza de freno trasera. - Desconectar el conector (12) del interruptor de la luz de freno. - Retirar los tornillos (13) y quitar el cilindro del freno trasero (14) con el tubo del freno. -
Página 17: Trabajos Posteriores
- Tender el tubo del freno izquierdo a lo largo del chasis (véase el esquema). - Fijar el tubo del freno al depósito de compensación del mando izquierdo (15 Nm). NOTA: Prestar atención a que el tubo del freno no se doble ni entre en contacto con componentes calientes.


