Tabla de contenido
Publicidad
Idiomas disponibles
Idiomas disponibles
Enlaces rápidos
2500 165th Street • Hammond, Indiana 46320
1-800-937-6664 • www.omnifilter.com
INSTALLATION
NOTICE: Install this RO system on the cold water line only.
Completely read these instructions before starting installation.
Carefully read and follow all safety instructions in this manual
or on system.
This is the safety alert symbol. When you see this symbol on
your RO system or in this manual, look for one of the follow-
ing signal words and be alert to the potential for personal injury!
DANGER warns about hazards that will cause seri-
ous personal injury, death or major property damage if ignored.
WARNING warns about hazards that can cause seri-
ous personal injury, death or major property damage if ignored.
CAUTION warns about hazards that will or can
cause minor personal injury or property damage if ignored.
The word NOTICE indicates special instructions which are important
but not related to hazards.
The preservatives on the RO membrane can cause
severe digestive disturbance and diarrhea if ingested into the human
body. Flush the membrane housing twice and flush the membrane
itself twice before first using the RO water. See "Flushing the
System", Page 4.
Tools Needed:
Drill
3/8" bit
1-1/8" bit (optional for hole for faucet)
Wrench
Phillips screwdriver
Pliers
Shallow pan
Bucket (for sanitizing the membrane housing)
9-Volt battery (not included). Purchase separately for
Model RO2000-TDS
©2001, Omnifilter
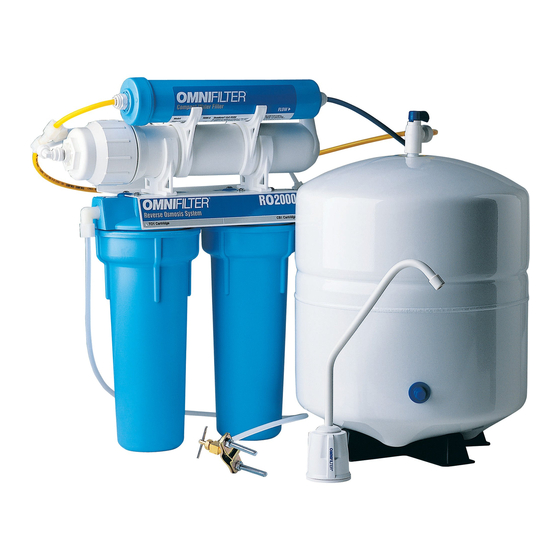
Reverse Osmosis System
®
Models RO2000 and RO2000-TDS
Faucet Installation. See Figure 1.
1. Turn off the cold water supply valve.
2. If necessary, drill (or punch) a 1-1/8" hole in the sink top.
3. Remove the nut and spacer from the RO faucet and feed the two
lengths of black tubing (attached to the faucet stem) down
through the hole in the sink top until the faucet is seated on the
sink top. The vertical ridge on the faucet handle should be facing
toward the user.
4. Reach below the sink top and slide the channel washer up the
faucet stem. Install the spacer tube (if needed) and tighten the
stem nut (cone shaped side up) on the channel washer. Tighten
the stem nut just enough to keep the faucet securely in place; do
not overtighten.
NOTICE: Be sure that the channel in the channel washer faces up
and that it completely bridges the hole in the sink top (that is, it
should be tightening against both sides of the hole).
NOTICE: For Model RO2000-TDS, make sure that the grey cable
coming from the faucet base is lying inside the channel washer,
and that the edges of the channel washer don't pinch the cable.
3639 0100 ASB
Figure 1
Waste Drain Saddle Installation
1. Install the Waste Drain Saddle on the sink drain, above the trap
and below the bottom of the RO faucet.
Figure 2:Waste Drain Saddle Installation
Printed in U.S.A.
INSTALLATION INSTRUCTIONS
Vertical ridge of
faucet handle.
Cold Water Line
Cold Water Shut-off Valve
Waste
Saddle
1" Minimum
Threaded Stem
of Faucet
Existing Sink
Faucet Sprayer Hole
Channel Washer
Stem Nut
OM539 (Rev. 7/20/01)
Publicidad
Tabla de contenido

Manuales relacionados para Omnifilter RO2000


Resumen de contenidos para Omnifilter RO2000
- Página 1 (that is, it should be tightening against both sides of the hole). NOTICE: For Model RO2000-TDS, make sure that the grey cable coming from the faucet base is lying inside the channel washer, and that the edges of the channel washer don’t pinch the cable.
- Página 2 Do not force it and do not overtighten. Figure 5:Tubing Layout w/o TDS Monitor For Model RO2000, Skip to Step 5. Secure the Saddle For Model RO2000-TDS, go to Step 4, below. Turn handle Valve by clockwise to tightening the 4.
- Página 3 10. Open the RO membrane housing and drain the water out of the TDS MONITOR WITH housing. MODEL RO2000-TDS INSTALLATION 11. Install the RO membrane per the instructions in the following section. NOTICE: Your RO unit will probably remove about 75% of your water supply’s TDS.
-
Página 4: Flushing The System
2. Peel back the bag from the cut end and use it as a holder to PRE-FILTER CARTRIDGE CHANGE insert the RO Membrane, O-Rings first, into the Membrane (TO1 AND CB1) Housing (see Figure 9). NOTICE: Do not disconnect any tubing for this operation! 1. - Página 5 1 - 2 YEAR RO MEMBRANE CHANGE/ 2. Unscrew the compression nut holding the black tube onto the membrane housing. CARTRIDGE CHANGE/SYSTEM DISINFECTION 3. Gently remove the tube from the membrane housing port; NOTICE: The quality of the supply water feeding the RO system will keep the nut on the tube.
-
Página 6: Exploded View
Fluoride, Cysts, Lead, TDS, Nitrate and Nitrite. The Chlorine claim was tested off of the R200 post filter. For further operating, installation, or maintenance assistance: Call Omnifilter Customer Service ® 3639 0100 at 800-937-6664 REPAIR PARTS LIST Key No. -
Página 7: Outils Requis
(autrement dit, les côtés du profilé doivent être serrés de chaque côté du trou). NOTA : Dans le cas du modèle RO2000-TDS, s’assurer que le câble gris branché à la base du robinet passe dans le profilé et que les côtés du profilé... - Página 8 Dans le cas du modèle RO2000, passer à l’opération 5. Turn handle Valve by poignée à robinet à étrier Dans le cas du modèle RO2000-TDS, passer à l’opération 4. qui suit. clockwise to droite pour en serrant les tightening the...
- Página 9 INSTALLATION DU MODULE DE CONTRÔLE DES Fermer le robinet d’eau traitée de l’évier dès que l’eau cesse de couler, MATIÈRES TOTALES DISSOUTES - MODÈLE RO2000-TDS puis ouvrir le robinet du réservoir de stockage d’eau traitée. 10. Ouvrir la cuve de la membrane d’osmose inverse, puis en vider l’eau.
- Página 10 Relever le sac là où il a été coupé, et l’utiliser pour tenir et introduire la REMPLACEMENT DES CARTOUCHES membrane d’osmose inverse dans sa cuve, ses joints toriques en premier PRÉFILTRANTES (TO1 ET CB1) (se reporter à la Figure 9). NOTA : Aucun tube ne doit être débranché...
- Página 11 REMPLACEMENT TOUS LES ANS OU TOUS 2. Dévisser l’écrou à compression de retenue du tube noir sur la cuve de la membrane d’osmose inverse. LES 2 ANS DE LA MEMBRANE D’OSMOSE 3. Sortir prudemment le tube de l’orifice de la cuve de la membrane ; INVERSE/REMPLACEMENT DES CAR- laisser l’écrou sur le tube.
-
Página 12: Vue Éclatée
La réduction de chlore a été testée avec une cartouche postfiltrante R200. Pour tout autre renseignement concernant le fonctionnement, l’installation ou l’entretien : Appeler le service à la clientèle Omnifilter 3639 0100 en composant le (800) 937-6664 LISTE DES PIÈCES DE RECHANGE Réf. -
Página 13: Instalación
(es decir, debe quedar firme contra ambos lados del orificio). AVISO: Para el Modelo RO2000-TDS, asegúrese de que el cable gris que viene desde la base del grifo, quede en la parte interior de la arandela acanalada y que los bordes de la arandela acanalado no "pellizquen" el cable. -
Página 14: Ensamblaje E Instalación Del Sistema De Osmosis Inversa (Oi)
Silla apretando clockwise to de las agujas tightening the las tuercas y los Para el Modelo RO2000-TDS vaya al paso 4 a continuación. del reloj para pierce the nuts and bolts. pernos. Enrosque el conmutador de flujo blanco al extremo del grifo (ver Figura 6). -
Página 15: Instalación Del Monitor Tds Con El Modelo Ro2000-Tds
INSTALACIÓN DEL MONITOR TDS CON 10. Abra la envoltura de la membrana de OI y drene el agua fuera de la EL MODELO RO2000-TDS misma. AVISO: Su sistema de OI probablemente elimine un 75% del total de sólidos 11. -
Página 16: Operación Del Monitor Tds
Abra la bolsa desde el extremo cortado y úsela como sujeción para intro- CAMBIO DEL CARTUCHO DE ducir la Membrana de OI, con los aros tóricos primero, en la Envoltura de PREFILTRACIÓN (TO1 Y CB1) la Membrana (ver Figura 9). AVISO: ¡No desconecte ningún tubo para esta operación! Cierre el suministro de agua en la Llave de Silla para el Agua Fría o en la ¡NO TOQUE LA MEMBRANA... - Página 17 CAMBIO DE LA MEMBRANA DE OI AL AÑO 2. Destornille la tuerca de compresión que sostiene el tubo negro a la envoltura de la membrana. O A LOS 2 AÑOS/ CAMBIO DEL 3. Delicadamente retire el tubo de la abertura de la envoltura de la CARTUCHO/DESINFECCIÓN DEL SISTEMA membrana, manteniendo la tuerca en el tubo.
-
Página 18: Diagrama Despiezado
La reivindicación sobre el cloro no fue incluida en la prueba del postfiltro R200. Para mayor asistencia sobre el funcionamiento, instalación o mantenimiento: Llame al departamento de servicio al cliente de Omnifilter, al 800-937-6664 3639 0100 LISTA DE PIEZAS DE REPARACIÓN Clave No. Cant.