Publicidad
Idiomas disponibles
Idiomas disponibles
Enlaces rápidos
Publicidad

Manuales relacionados para Bissell POWERFORCE HELIX TURBO REWIND PET 2692 Serie


Resumen de contenidos para Bissell POWERFORCE HELIX TURBO REWIND PET 2692 Serie
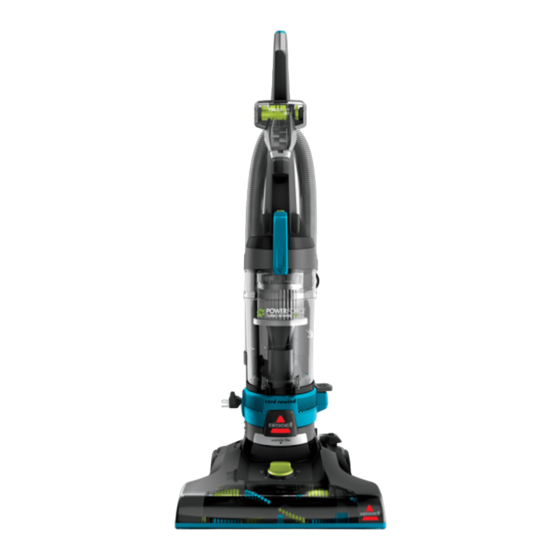
- Página 1 POWERFORCE ® HELIX TURBO REWIND PET Vacuum ___________ USER GUIDE 2692 SERIES...
-
Página 2: Important Safety Instructions
This plug will fit in a polarized outlet only one way. If the plug does not fit fully in the outlet, reverse the plug. If it still does not fit, contact a qualified electrician to install a proper outlet. Do not change the plug in any way. www.BISSELL.com... -
Página 3: Tabla De Contenido
BISSELL.com and at various retailers. Style 1214. Febreze and related trademarks are owned by The Procter & Gamble Company, Cincinnati, Ohio and used under license by BISSELL Homecare, Inc. Safety Instructions... 2 Troubleshooting . -
Página 4: Product View
19 Handle Recline Pedal 8 Washable Post-Motor Filter 20 Foot Hose 9 Automatic Cord Rewind Button 21 Product Rating Label & Serial Number 10 Cord Hook 22 Pet Hair Corner Tool (does not store on unit) 11 Hose Clip www.BISSELL.com... -
Página 5: Assembly
Febreze® and related trademarks are owned by The Procter & Gamble Company, Cincinnati, Ohio and used under license by BISSELL Homecare, Inc. www.BISSELL.com... - Página 6 Never place your fingers under the vacuum when it is running. Never place the foot of the vacuum on furniture or uneven surfaces. Do not place vacuum cleaner close enough to objects to pull them into rotating brush. www.BISSELL.com...
- Página 7 Place until slot appears, Wheel. Inspect Brush Roll with belt back in. Faceplate then separate for damages and will not close properly if all parts are faceplate. replace if necessary. not aligned correctly. www.BISSELL.com...
-
Página 8: Emptying The Dirt Tank
WARNING Do not operate the vacuum with damp or wet filters, without filters in place or with the Dirt Tank missing. Allow components to dry before reassembling the Dirt Tank. www.BISSELL.com... - Página 9 Brush Roll. Line up the end caps and pull the brush forward into place. This will stretch the belt. Once the Brush Roll is installed, place the bottom cover back on End Cap and replace the screws. www.BISSELL.com...
-
Página 10: Troubleshooting
Brush Roll bristles are worn. Replace Brush Roll. Brush Roll is jammed. Remove Brush Roll and clean debris from brush and ends. Check drive belt for any damage. Cord won’t Power Cord is knotted or twisted. Follow instructions on page 6. retract www.BISSELL.com... -
Página 11: Warranty
Care by E-mail or telephone as described it was sold. below. BISSELL is not liable for incidental or It may be necessary to obtain some of your consequential damages of any nature personal information, such as a mailing associated with the use of this product. -
Página 12: Parts & Supplies
NOTE: Please keep your original sales receipt. It provides proof of purchase date in the event of a warranty claim. See Warranty page for details. Parts & Supplies For Parts and Supplies, go to www.BISSELL.com and enter your model number in the search field. We can’t wait to hear from you! -
Página 13: Aspiradora
Aspiradora POWERFORCE ® HELIX TURBO REWIND PET ___________ GUÍA DEL USUARIO SERIE 2692... -
Página 14: Instrucciones Importantes De Seguridad
Este enchufe entra en un tomacorriente polarizado en una sola posición. Si el enchufe no entra bien en el tomacorriente, inviértalo. Si aun así no entra, comuníquese con un electricista calificado para que instale un tomacorriente apropiado. No modifique el enchufe de manera alguna. www.BISSELL.com... -
Página 15: Qué Hay En La Caja
Rewind están disponibles para su compra en BISSELL.com y en varios minoristas. Estilo 1214. Febreze y las marcas registradas relacionadas son propiedad de The Procter & Gamble Company, Cincinnati, Ohio y BISSELL Homecare, Inc. la usa bajo licencia. Instrucciones de seguridad. . . 2 Identificación de fallas . -
Página 16: Diagrama Del Producto
20 Manguera de la base 9 Botón de rebobinado automático 21 Rótulo de calificación del producto y del cordón número de serie 10 Gancho del cordón 22 Herramienta Pet Hair para esquinas 11 Clip de manguera (no se almacena en la unidad www.BISSELL.com... -
Página 17: Ensamblaje
NOTA: La herramienta para espacios pequeños se encuentra dentro del tubo de extensión. La puede quitar para usarla y volver a guardarla ordenadamente fuera del camino cuando termine. Febreze® y las marcas registradas relacionadas son propiedad de The Procter & Gamble Company, Cincinnati, Ohio y BISSELL Homecare, Inc. la usa bajo licencia. www.BISSELL.com... -
Página 18: Uso Del Rebobinado Automático Del Cordón
Siempre coloque la aspiradora sobre el piso con el mango en la posición vertical al usar herramientas. Nunca coloque los dedos abajo de la aspiradora cuando está funcionando. Nunca coloque el cabezal motorizado de la aspiradora sobre muebles ni superficies irregulares. No coloque la aspiradora suficientemente cerca de objetos como para tirar de ellos adentro del cepillo giratorio. www.BISSELL.com... -
Página 19: Uso Del Ajuste De La Altura
Inspeccione para ver si con la correa. La placa frontal no se cerrará ranura, luego, separe hay daños y reemplace correctamente si todas las piezas no están la placa frontal. si es necesario. alineadas correctamente. www.BISSELL.com... -
Página 20: Vaciado Del Tanque De Suciedad
ADVERTENCIA No opere la aspiradora con filtros húmedos o mojados, sin tener los filtros en su sitio, o sin el tanque de suciedad. Permita que se sequen los componentes antes de volver a armar el tanque de suciedad. www.BISSELL.com... -
Página 21: Limpieza Del Separador
Una vez que el cepillo giratorio está sitio. Esto estirará la correa. instalado, coloque nuevamente la cubierta inferior en su sitio y vuelva a Tapa de extremo instalar los tornillos. www.BISSELL.com... -
Página 22: Eliminación De Una Obstrucción
Saque el cepillo giratorio y limpie la suciedad del cepillo y El cordón de alimentación está anudado o retorcido. cordón. de los extremos. Inspeccione la correa de accionamiento para ver que no esté dañada. Siga las instrucciones de la página 6 www.BISSELL.com... -
Página 23: Garantía
La responsabilidad de con los términos de esta garantía. Todos los datos BISSELL no será mayor que el precio de compra del personales se gestionarán de conformidad con la producto. -
Página 24: Piezas Y Suministros
¡Visite www.BISSELL.com/registration! O visite el sitio Web de BISSELL: www.bissell.com Al comunicarse con BISSELL, tenga disponible el número de modelo de la aspiradora Anote el número de modelo: ___________________ Anote la fecha de compra: ___________________ NOTA: Guarde el recibo original de compra.