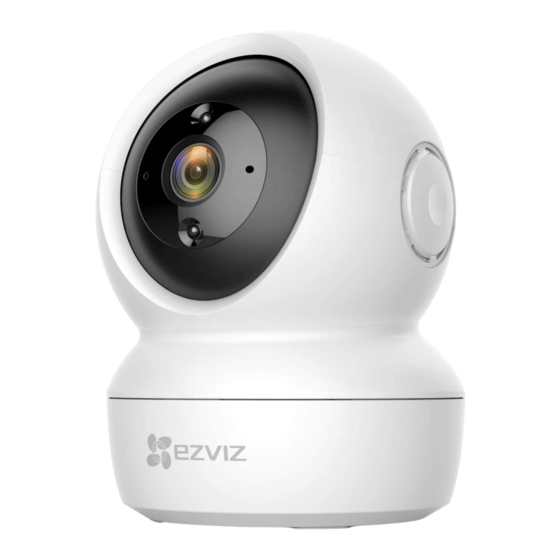
Publicidad
COPYRIGHT © Hangzhou EZVIZ Software Co., Ltd.. ALL RIGHTS RESERVED.
Any and all information, including, among others, wordings, pictures, graphs are the
properties of Hangzhou EZVIZ Software Co., Ltd. (hereinafter referred to as "EZVIZ").
This user manual (hereinafter referred to as "the Manual") cannot be reproduced,
changed, translated, or distributed, partially or wholly, by any means, without the
prior written permission of EZVIZ. Unless otherwise stipulated, EZVIZ does not make
any warranties, guarantees or representations, express or implied, regarding to the
Manual.
About this Manual
The Manual includes instructions for using and managing the product. Pictures,
charts, images and all other information hereinafter are for description and
explanation only. The information contained in the Manual is subject to change,
without notice, due to firmware updates or other reasons. Please find the latest
version in the
™ website (http://www.ezvizlife.com).
Revision Record
New release – January, 2019
Trademarks Acknowledgement
™,
™, and other EZVIZ's trademarks and logos are the properties of
EZVIZ in various jurisdictions. Other trademarks and logos mentioned below are the
properties of their respective owners.
Legal Disclaimer
TO THE MAXIMUM EXTENT PERMITTED BY APPLICABLE LAW, THE PRODUCT
DESCRIBED, WITH ITS HARDWARE, SOFTWARE AND FIRMWARE, IS PROVIDED
"AS IS", WITH ALL FAULTS AND ERRORS, AND EZVIZ MAKES NO WARRANTIES,
EXPRESS OR IMPLIED, INCLUDING WITHOUT LIMITATION, MERCHANTABILITY,
SATISFACTORY QUALITY, FITNESS FOR A PARTICULAR PURPOSE, AND NON-
INFRINGEMENT OF THIRD PARTY. IN NO EVENT WILL EZVIZ, ITS DIRECTORS,
OFFICERS, EMPLOYEES, OR AGENTS BE LIABLE TO YOU FOR ANY SPECIAL,
CONSEQUENTIAL, INCIDENTAL, OR INDIRECT DAMAGES, INCLUDING, AMONG
OTHERS, DAMAGES FOR LOSS OF BUSINESS PROFITS, BUSINESS INTERRUPTION,
OR LOSS OF DATA OR DOCUMENTATION, IN CONNECTION WITH THE USE OF THIS
PRODUCT, EVEN IF EZVIZ HAS BEEN ADVISED OF THE POSSIBILITY OF SUCH
DAMAGES.
TO THE MAXIMUM EXTENT PERMITTED BY APPLICABLE LAW, IN NO EVENT SHALL
EZVIZ'S TOTAL LIABILITY FOR ALL DAMAGES EXCEED THE ORIGINAL PURCHASE
Publicidad
Tabla de contenido

Resumen de contenidos para Ezviz C6N
- Página 1 COPYRIGHT © Hangzhou EZVIZ Software Co., Ltd.. ALL RIGHTS RESERVED. Any and all information, including, among others, wordings, pictures, graphs are the properties of Hangzhou EZVIZ Software Co., Ltd. (hereinafter referred to as “EZVIZ”). This user manual (hereinafter referred to as “the Manual”) cannot be reproduced, changed, translated, or distributed, partially or wholly, by any means, without the prior written permission of EZVIZ.
- Página 2 LIMITATION, USING ANY THIRD PARTY’S PRODUCTS, SOFTWARE, APPLICATIONS, AND AMONG OTHERS. REGARDING TO THE PRODUCT WITH INTERNET ACCESS, THE USE OF PRODUCT SHALL BE WHOLLY AT YOUR OWN RISKS. EZVIZ SHALL NOT TAKE ANY RESPONSIBILITES FOR ABNORMAL OPERATION, PRIVACY LEAKAGE OR OTHER DAMAGES RESULTING FROM CYBER ATTACK, HACKER ATTACK, VIRUS INSPECTION, OR OTHER INTERNET SECURITY RISKS;...
-
Página 3: Contenido Del Paquete
Contenido del paquete Cámara Base Juego de tornillos Plantilla de perforación Cable de alimentación Adaptador de corriente Información normativa Guía de inicio rápido... -
Página 4: Información Básica
• Azul parpadeando rápidamente: la cámara está preparada para conectarse a la red wifi. • Azul parpadeando lentamente: la cámara está funcionando correctamente. Tarjeta microSD Inicialice la tarjeta en la aplicación EZVIZ antes de usarla. (vendida por separado) Botón Reiniciar Manténgalo pulsado durante 5 segundos para reiniciar y restaurar todos los parámetros a los valores... -
Página 5: Instalación
Altavoz Puerto Ethernet Puerto de alimentación Instalación Encendido Conecte el cable de alimentación a la cámara y, después, enchufe el adaptador de corriente a una toma de corriente como se muestra en la siguiente figura. Toma de corriente Cable de alimentación El led parpadeando rápidamente en azul indica que la cámara está... -
Página 6: Añada Una Cámara A Ezviz
(TM) Descargue e instale la aplicación EZVIZ. Ejecute la aplicación. Cree y registre una cuenta de usuario EZVIZ siguiendo las instrucciones del asistente de inicio. 2. Añada una cámara a EZVIZ Inicie sesión en su cuenta con la aplicación EZVIZ. -
Página 7: Instalación (Opcional)
Inserte la tarjeta microSD (vendida por separado) en la ranura para tarjetas como se muestra en la figura siguiente. Este lado hacia arriba Una vez insertada la tarjeta microSD, inicialícela en la aplicación EZVIZ antes de usarla. aplicación EZVIZ, pulse «Storage... -
Página 8: Instalación De La Base
Instalación de la base Es posible colocar la cámara horizontalmente o instalarla en el techo. Aquí, nos referimos a la instalación en el techo como ejemplo. • Asegúrese de que el techo sea lo suficientemente resistente para soportar un peso tres veces mayor que el de la cámara. •... -
Página 9: Instalación De La Cámara
Instalación de la cámara Monte la cámara en la base y gírela en sentido horario hasta que quede asegurada. Una vez instalada la cámara, acceda a la aplicación EZVIZ para voltear la imagen de la cámara. Para obtener información detallada, visite www.ezviz.eu.


