Publicidad
Idiomas disponibles
Idiomas disponibles
Enlaces rápidos
Publicidad

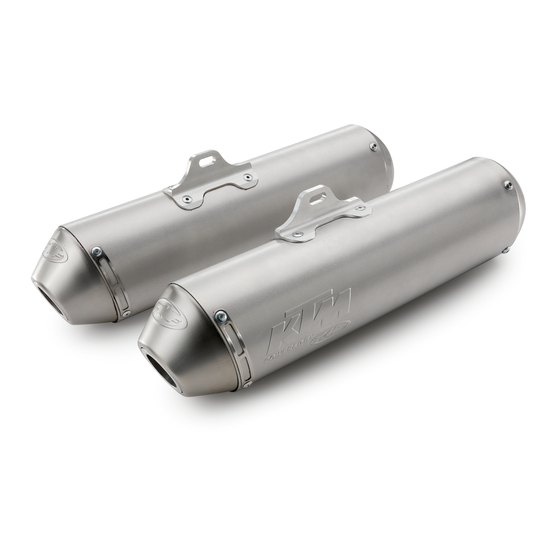
Resumen de contenidos para KTM Power Parts 60005099300
- Página 1 Information Power Parts 60005099300 01. 2010 3.211.592 *3211592* www.ktm.com...
- Página 2 Todos nuestros productos han sido desarrollados y producidos según los estándares más altos utilizando los mejores materiales disponibles. Las KTM Power Parts están probadas en competencia y garantizan un óptimo rendimiento. NO SE PUEDE HACER RESPONSABLE A LA KTM POR UN MONTAJE O UN USO INCORRECTO DE ESTE PRODUCTO.
- Página 3 Lieferumfang: 2x Enddämpfer 2x Flanschmutter M8 49030028000 2x Schraube M8x35 0025080356 4x Buchse 58405050065 2x Dichtung 60005005002 Die Auspuffanlage kann extrem heiß werden! Lassen Sie das Motorrad abküh- len, bevor Sie mit der Montage beginnen! Wir raten Ihnen, die Montage einem qualifizierten Servicetechniker zu über- lassen.
- Página 4 - Neue Dichtung (Lieferumfang) in den Enddämpfer (Lieferumfang) einset- zen. - Buchsen (1) (Lieferumfang) beidseitig der Lasche einsetzen. - Enddämpfer vorsichtig auf den Krümmer aufschieben. - Enddämpfer mit der Schraube M8x35 (2) und Flachmutter M8 (3) mon- tieren. HINWEIS: Schrauben noch nicht anziehen. - Original Schrauben (4) mit Kupferpaste fetten und montieren.
- Página 5 Scope of delivery: 2x main silencers 2x flange nuts M8 49030028000 2x screws M8x35 0025080356 4x bushings 58405050065 2x gaskets 60005005002 The exhaust system can get extremely hot. Allow the motorcycle to cool down before you start work. We advise you to leave the installation to a qualified service technician. Incorrect installation can result in a shorter service life of the exhaust system and/or damage to the motorcycle.
- Página 6 - Insert the new gasket (included) into the main silencer (included). - Insert the bushings (1) (included) on both sides of the tab. Carefully push the main silencer onto the manifold. - Mount the main silencer using the M8x35 screw (2) and M8 thin nut (3). NOTE: Do not tighten the screws yet.
- Página 7 Volume della fornitura: N. 2 silenziatori N. 2 dadi a flangia M8 49030028000 N. 2 viti M8x35 0025080356 N. 4 boccole 58405050065 N. 2 guarnizioni 60005005002 L'impianto di scarico può raggiungere temperature estremamente alte! Far raffreddare la motocicletta prima di iniziare il montaggio! Consigliamo di far eseguire il montaggio da un tecnico per l'assistenza qua- lificato.
- Página 8 - Inserire la nuova guarnizione (in dotazione) nel silenziatore (in dotazione). - Inserire le boccole (1) (in dotazione) su entrambi i lati della linguetta. - Spingere delicatamente il silenziatore sul collettore. - Montare il silenziatore utilizzando la vite M8x35 (2) e il dado piatto M8 (3).
- Página 9 Contenu de la livraison : 2x silencieux arrière 2x Écrous à embase M8 49030028000 2x Vis M8x35 0025080356 4x Bague 58405050065 2x Joint 60005005002 L'échappement risque d'être très chaud ! Laisser refroidir la moto avant d'en- treprendre le montage ! Nous recommandons de faire exécuter le montage par un mécanicien qua- lifié.
- Página 10 - Mettre un nouveau joint (contenu de la livraison) dans le silencieux arrière (contenu de la livraison). - Mettre en place les bagues (1) (contenu de la livraison) des deux côtés de l'attache. - Emmancher avec précaution le silencieux arrière sur le collecteur. - Monter le silencieux arrière avec la vis M8x35 (2) et l'écrou plat M8 (3).
- Página 11 Volumen de suministro: 2x silenciadores 2x tuercas de brida M8 49030028000 2x tornillos M8x35 0025080356 4x casquillos 58405050065 2x juntas 60005005002 El equipo de escape puede alcanzar temperaturas muy elevadas. Por lo tanto, hay que esperar a que la motocicleta se haya enfriado antes de comenzar con las tareas de montaje.
- Página 12 - Colocar una junta nueva (volumen de suministro) en el silenciador (volu- men de suministro). - Colocar los casquillos (1) (volumen de suministro) a ambos lados de la len- güeta. - Colocar el silenciador con cuidado en el colector. - Montar el silenciador con el tornillo M8x35 (2) y la tuerca plana M8 (3). NOTA: No apretar los tornillos todavía.


