Brizo 64070LF Instrucciones De Instalación
Ocultar thumbs
Ver también para 64070LF:
- Manual de instrucciones (17 páginas) ,
- Guía de instalación y garantía (16 páginas) ,
- Manual del usuario (16 páginas)
Tabla de contenido
Publicidad
Enlaces rápidos
U P
C
ASME A112.18.1 / CSA B125.1
ICC/ANSI A117.1
Model/Modelo/Modèle
64070LF & 64970LF
Series/Series/Seria
Write purchased model number here.
Escriba aquí el número del modelo comprado.
Inscrivez le numéro de modèle ici.
WARNING: THIS FAUCET IS NOT TO BE USED WITH
PORTABLE DISHWASHERS! / ADVERTENCIA: ¡SESTA
LLAVE NO SE DEBE UTILIZAR CON MAQUINAS
LAVAPLATOS PORTATILES! / AVERTISSEMENT: ON NE
DOIT PAS BRANCHER UN LAVE-VAISSELE PORTATIF
SUR CE ROBINET!
For easy installation of your
Brizo
faucet you will need:
®
• To READ ALL the instructions completely
before beginning.
• To READ ALL warnings, care, and
maintenance information.
Para instalación fácil de su llave
Brizo
usted necesitará:
®
• LEER TODAS las instrucciones completamente
antes de empezar.
• LEER TODOS los avisos, cuidados, e
información de mantenimiento.
Pour installer votre robinet
Brizo
facilement, vous devez:
®
• LIRE TOUTES les instructions avant de débuter;
• LIRE TOUS les avertissements ainsi que toutes
les instructions de nettoyage et d'entretien;
®
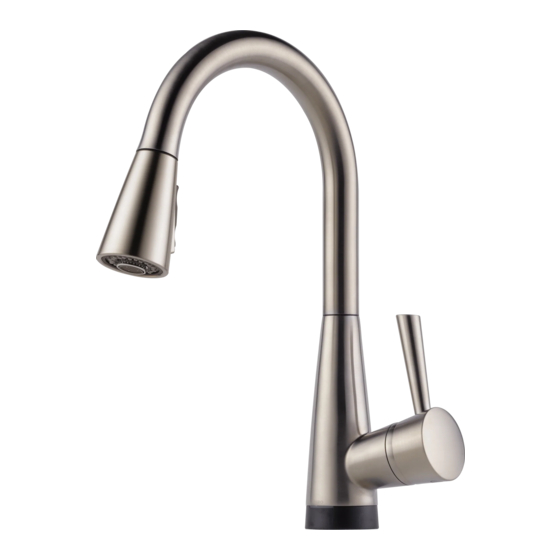
HIGH-RISE PULL-DOWN KITCHEN
63844
AND BAR / PREP FAUCETS
LLAVES DE AGUA ELEVADAS,
DESLIZABLES HACIA ABAJO,
PARA COCINAS Y BARES / PREP
ROBINET À COL DE CYGNE ET
BEC-DOUCHETTE POUR ÉVIER
DE BAR OU D'ÎLOT DE CUISINE
Usted puede necesitar
Articles dont vous pouvez avoir besoin:
63844
1
You may need
T E FLO N
3/16/10
Rev. A
Publicidad
Tabla de contenido

Manuales relacionados para Brizo 64070LF


Resumen de contenidos para Brizo 64070LF
- Página 1 ASME A112.18.1 / CSA B125.1 BEC-DOUCHETTE POUR ÉVIER ICC/ANSI A117.1 DE BAR OU D’ÎLOT DE CUISINE Model/Modelo/Modèle 64070LF & 64970LF Series/Series/Seria Write purchased model number here. Escriba aquí el número del modelo comprado. Inscrivez le numéro de modèle ici. You may need...
-
Página 2: Cleaning And Care
1-877-345-BRIZO (2749) (in the U.S. and Canada) or by writing to: this warranty applying except the duration of the warranty. This warranty is applicable to Brizo faucets manufactured after January 1, 1995. -
Página 3: Accessory Order Only Orden De Accesorio Solamente Livrable Séparément Seulement
Accessory Order Only Orden de Accesorio Solamente RP60111▲ Livrable séparément seulement Spout Assembly Ensamble del Tubo de Salida RP53222 Friction Ring & RP60112▲ Isolator Sleeve Sprayer Assembly Arandela de Fricción (includes aerator) Rondelle de frottement Ensamble de rociador RP60547 (incluye el aireador) Contact Plate Pulvérisateur RP44001... -
Página 4: Sistema De Protección Contra El Contraflujo
3/8”-24 UNEF a 1/2”-20 UN & Sistema de protección contra el contraflujo 3/8”-24 UNEF a 1/2”-14 NPSM Adapteurs Su llave de agua tipo deslizable Brizo tiene un sistema de protección ® 3/8 po-24 UNEF à 1/2 po-20 UN et para el contraflujo, incorpora, que ha sido probado para cumplir con 3/8 po-24 UNEF à... - Página 5 Top Mount Sinks / Instalación por Encima / Bâti supérieur 1 1/4" Min. From Center Line To Sink Bowl. 1 1/4" Mínimo. De la línea de centro para hundir el tazón de fuente. 1 1/4" ; Minimal. De la ligne centrale pour descendre la cuvette.
-
Página 6: Instalación Del Surtidor En Fregaderos Instalados Por Debajo O El Interior De La Encimera O Superficie
Under Mount Sinks / Instalación por Debajo / Sous le bâti 1 1/4" Min. From Center Line To Sink Bowl. 1 1/4" Mínimo. De la línea de centro para hundir el tazón de fuente. 1 1/4" ; Minimal. De la ligne centrale pour descendre la cuvette. -
Página 7: Instalación Del Solenoide
Solenoid Installation Next, slide solenoid assembly (1) onto adapter (2). Make sure that the From underneath the sink, slide adapter (1) onto hose (2). Make assembly is fully engaged; then, slide the metal retaining clip (3) through the sure that the assembly is fully engaged; then, rotate adapter arm (3) thin slots (4) on top of the solenoid inlet. -
Página 8: Hose Installation
Insert hose through spout tip only. Hose Installation Remove hose guide and slide hose weight (1) over end of hose (2). Screw the spray head (1) onto the threaded fitting of hose (2) to prevent the hose from being pulled into the spout until you are ready to flush the lines. Push hose end (1) onto solenoid assembly outlet (2). -
Página 9: Wire Connections
Wire Connections Wire extension (3), extending from faucet base, is shipped with a protective Briefly touch the cold stop or other ground to dissipate any static charge. plastic cap (4). Remove this by grasping the plug and pulling off the cap. Attach wire (1), from the solenoid assembly, onto the groove on the spout Discard cap. - Página 10 Peel the plastic backing from one side of the Velcro strips (7) and stick to the back of Load 4 “C” batteries (9) into the battery box (8). Important: DO the battery box (8). Peel the remaining plastic backing from the Velcro strips on the NOT load batteries before making all electrical connections.
- Página 11 Water Line Connections Custom Fit Connections WARNING: Do not use pipe dope or other sealants Important: To ensure proper operation of your If you determine the PEX supply tubing for this on water line connections. plumbing it is essential to install these check faucet is too long and must be shorter to create an valve assemblies onto your supply stops.
-
Página 12: Correct Method Método Correcto Bonne Méthode
Incorrect Installation Correct method Instalación Incorrecta Método Correcto Installation Incorrecte Bonne méthode Do not install sleeve Ensure cut is straight. upside down. No instale la manga Asegúrese que el corte Custom Fit Connections - Plastic Sleeve Installation Instructions boca abajo. esté... -
Página 13: Instalación Del Dispensador Del Jabón - Orden De Accesorio Solamente
Interchangeable Intercambiable Interchangeable Turn on hot and cold water supplies (1). Pull the hose assembly (2) out of the spout and Soap Dispenser Installation - Accessory Order Only remove the spray head (3). Be sure to hold the end of the hose down into the sink and turn faucet handle (4) to the mixed position. -
Página 14: Mantenimiento
Cleaning the Screen / Filtro de Limpieza: / Nettoyage du filtre Note: If red light (9) is blinking 2 seconds on then 2 seconds off, call Delta Customer Service at 1-800-345-DELTA. Nota: Si la luz roja (9) está destellando durante 2 segundos cuando está... -
Página 15: Solución De Averías Del Solenoide
Solenoid Troubleshooting 1. If your spout flashes a red light on then off and then keeps repeating this, 3. If your LED base indicator is not displaying any lights, replace the batteries. a. Check to make sure the spout connector, RP53233 is attached to the spout If the spout still flashes a red light, please replace RP53230, solenoid and and the wire from the solenoid / electronics kit. -
Página 16: Desviador Manual De Las Opciones Electrónicas
Manual Bypass of Electronic Features Remove the battery pack (1)from the Momentarily connect the “+” terminal Pilar battery cable (2). of the battery (1) to the “-” terminal of the solenoid (2) and the “-” terminal Disconnect the two spade contacts (1) of the battery to the “+”...