Publicidad
Idiomas disponibles
Idiomas disponibles
Enlaces rápidos
28008908044
28108908044
28508908044
HUSQVARNA MOTORCYCLES ACCESSORIES
INFORMATION
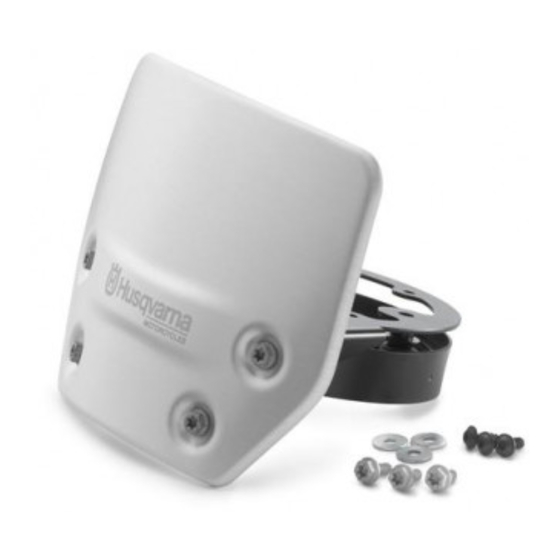
FLYSCREEN
12.2019
3.402.307
*3402307*
Husqvarna Motorcycles GmbH
Stallhofnerstraße 3
5230 Mattighofen, Austria
T: + 43 / 7742 / 60 00-0
W: www.husqvarna-motorcycles.com
Publicidad

Resumen de contenidos para Husqvarna 28008908044
- Página 1 28008908044 28108908044 28508908044 HUSQVARNA MOTORCYCLES ACCESSORIES INFORMATION FLYSCREEN 12.2019 3.402.307 *3402307* Husqvarna Motorcycles GmbH Stallhofnerstraße 3 T: + 43 / 7742 / 60 00-0 5230 Mattighofen, Austria W: www.husqvarna-motorcycles.com...
- Página 2 3 DEUTSCH Wir freuen uns, dass Sie sich für dieses Produkt entschieden haben. Unser hochwertiges Qualitätsprodukt ist rennerprobt und wurde speziell für sportliche Herausforderungen entwickelt. Eine korrekte Montage des Produktes ist unerlässlich, um ein Maximum an Sicherheit und Funktionalität gewährleisten zu können. Bitte befolgen Sie daher die Montageanleitung oder wenden Sie sich an Ihren autorisierten Fachhändler.
- Página 3 Lieferumfang 1x Flyscreen 1x Halteblech für Kombiinstrument 1x Kombiinstrumententräger 3x Schraube 3x Scheibe 3x Bundschraube M5x12 3x Bundschraube M6x15 4x Blindsteckmutter M5 4x Schraube M5x17 Montage - Schrauben entfernen. - Kombiinstrument abnehmen und vorsichtig zur Seite legen. HINWEIS Bauteile durch Abdecken vor Beschädigungen schützen.
- Página 4 - Gummitüllen am Halteblech (Lieferumfang) montieren. - Halteblech wie dargestellt auf dem Kombiinstrument positionie- ren. - Schrauben mit Scheiben (alles Lieferumfang) montieren und mit 2 Nm festziehen. - Kombiinstrumententräger (Lieferumfang) wie dargestellt positi- onieren. - Schrauben ...
- Página 5 Scope of supply 1x fl yscreen 1x retaining bracket for combination instrument 1x combination instrument support 3x screw 3x washer 3x collar screw M5x12 3x collar screw M6x15 4x well nuts M5 4x screw M5x17 ...
- Página 6 - Mount rubber grommets on retaining bracket (included). - Position retaining bracket on the combination instrument as shown. - Mount screws with washers (all included) and tighten to 2 Nm. - Position combination instrument support ...
- Página 7 Materiale fornito 1 fl yscreen 1 piastrina per quadro strumenti 1 supporto per quadro strumenti 3 viti 3 rondelle 3 viti fl angiate M5x12 3 viti fl angiate M6x15 4 daci ciechi M5 ...
- Página 8 - Montare i passacavi in gomma sulla piastrina (in dotazione). - Posizionare la piastrina come raffi gurato sul quadro strumenti. - Montare le viti con le rondelle (tutto in dotazione) e serrare a 2 Nm. - Posizionare il supporto per quadro strumenti ...
- Página 9 Contenu de la livraison 1x écran Flyscreen 1x plaque de fi xation pour tableau de bord 1x support de tableau de bord 3x vis 3x rondelles 3x vis à épaulement M5x12 3x vis à épaulement M6x15 ...
- Página 10 - Monter les gaines en caoutchouc sur la plaque de fi xation (contenu de la livraison). - Positionner la plaque de fi xation sur le tableau de bord comme illustré. - Mettre en place les vis avec les rondelles ...
-
Página 11: Montaje
Volumen de suministro 1x fl yscreen 1x retenedor del cuadro de instrumentos 1x fi jación del cuadro de instrumentos 3x tornillos 3x arandelas 3x tornillos de collarín M5x12 3x tornillos de collarín M6x15 4x tuercas ciega M5 ... - Página 12 - Montar los pasahilos de caucho en el retenedor (volumen de suministro). - Colocar el retenedor en el cuadro de instrumentos tal como se muestra en la ilustración. - Montar y apretar a 2 Nm los tornillos ...


