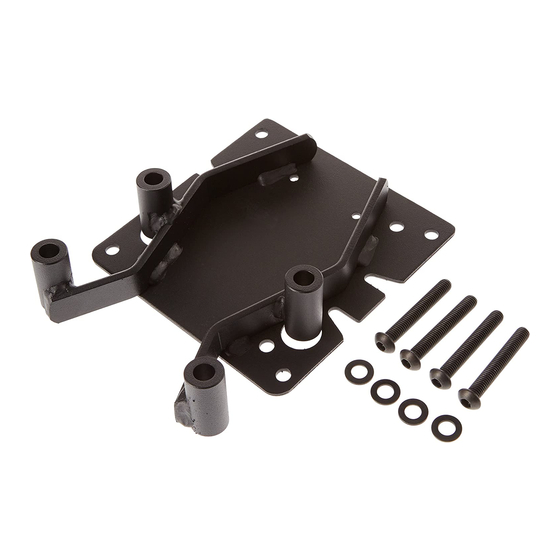
Publicidad
Enlaces rápidos
Consejo para un correcto montaje del kit: No apretar los tornillos del todo hasta asegurarse que el KIT esté correctamente
colocado y alineado.
Advice for correct fitting of the kit: Do not fully tighten the screws until it is ensured that the KIT is correctly attached
and aligned.
Conseil pour un montage correct du kit: Ne pas serrer les vis avant d'être sûr que le Kit est correctement monté et ajusté.
Hinweis für einen korrekten Einbau des Bausatzes: Ziehen Sie die Schrauben nicht ganz fest, bevor Sie sich nicht vergewissert haben,
daß der Bausatz korrekt eingestellt und ausgerichtet ist.
Consiglio per un montaggio corretto del kit: Non stringere del tutto le viti finché non si è controllato che il Kit è situato e
allineato correttamente.
1.
PCX 125i '14
C
1.
PCX 125i '10-13
A
B
Ø 22
A
B
Ø22
Abrir el asiento (A). Desmontar la tapeta embellecedora (B) del
trasportín trasero original de la moto, recortar la plantilla (C)
adjunta en el kit, posicionarla según nos muestra el dibujo, y
realizar los 4 agujeros que vienen marcados a un Ø22 (nota:
recomendamos no realizar el agujero de Ø22 de una sola vez,
sino ir realizando de Ø inferiores hasta llegar al Ø22.
Open the seat (A). Dismantle the hubcap (B) of the
motorcycle's original luggage carrier, cut out the pattern (C)
included in the kit, placed it as shown in the picture and make
4 Ø22 mm holes in the marks. (Note: It is recommended not
to make a Ø22 mm hole at once but rather starting to make a
smaller hole until reaching a Ø22 mm.
Ouvrir le siège (A). Démonter l'enjoliveur (B) du bac banane
original de la moto, recouper le gabarit (C) adjoint au kit, le
positionner selon ce que nous montre le dessin et faire 4 trous
de Ø22 sur les marques (Note: nous vous conseillons de ne
pas faire un trou de Ø22 d'un seul coup mais plutôt d'y aller
progressivement en commençant par faire un trou très petit
jusqu'à obtenir un trou de Ø22 mm).
Den Sitz öffnen (A). Die Zierkappe (B) der hinteren
Transportbox des Motorrades demontieren, Die im Kit
mitgelieferte Schablone (C) zuschneiden, wie in der Zeichnung
anlegen und den Mittelpunkt markieren und 4 Löcher in die
Markierungen in Ø22 bohren (Notiz: Wir empfehlen, das Loch
von Ø22 nicht nur in einem Mal zu bohren, sondern in Ø
Schritten bis man zu Ø22 kommt.
Aprire il sedile (A). Smontare la calotta (B) del portapacchi
originale della moto, ritagliare la sagoma (C) allegata al kit,
sistemarla secondo il disegno, e fare 4 fori Ø22 mm nei
marchi (Nota: Si raccomanda di fare un buco Ø22 mm in una
sola volta, ma puittoso di iniziare a fare un buco più piccolo
fino a raggiungere Ø22 mm.
Abrir el asiento (A). Desmontar la tapeta embellecedora
(B) del transportin trasero original de la moto, y realizar
los 4 agujeros que vienen marcados a un Ø22 (nota:
recomendamos no realizar el agujero de Ø22 de una sola
vez, sino ir realizando de Ø inferiores hasta llegar al Ø22.
Open the seat (A). Dismantle the hubcap (B) of the
motorcycle's original luggage carrier and make 4 Ø22 mm
holes in the marks. (Note: It is recommended not to make
a Ø22 mm hole at once but rather starting to make a
smaller hole until reaching a Ø22 mm.
Ouvrir le siège (A). Démonter l'enjoliveur (B) du bac
banane original de la moto, et faire 4 trous de Ø22 sur les
marques (Note: nous vous conseillons de ne pas faire un
trou de Ø22 d'un seul coup mais plutôt d'y aller
progressivement en commençant par faire un trou très
petit jusqu'à obtenir un trou de Ø22 mm).
Den Sitz öffnen (A). Die Zierkappe (B) der hinteren
Transportbox des Motorrades demontieren, und 4 Löcher
in die Markierungen in Ø22 bohren (Notiz: Wir empfehlen,
das Loch von Ø22 nicht nur in einem Mal zu bohren,
sondern in Ø Schritten bis man zu Ø22 kommt.
Aprire il sedile (A). Smontare la calotta (B) del
portapacchi originale della moto e fare 4 fori Ø22 mm nei
marchi (Nota: Si raccomanda di fare un buco Ø22 mm in
una sola volta, ma puittoso di iniziare a fare un buco più
piccolo fino a raggiungere Ø22 mm.
Publicidad

Resumen de contenidos para Shad H0PC10ST
- Página 1 Consejo para un correcto montaje del kit: No apretar los tornillos del todo hasta asegurarse que el KIT esté correctamente colocado y alineado. Advice for correct fitting of the kit: Do not fully tighten the screws until it is ensured that the KIT is correctly attached and aligned.
- Página 2 Cerrar el asiento (A). Montar la tapeta embellecedora (B) del transportin trasero original de la moto. Montar el soporte KIT TOP (1) mediante las arandelas (2) y los tornillos (3). Close the seat (A). Assemble the hubcap (B) of the motorcycle’s original luggage carrier.


