Tabla de contenido
Publicidad
Idiomas disponibles
Idiomas disponibles
Enlaces rápidos
Publicidad
Tabla de contenido

Manuales relacionados para Steren AMP-210SD


Resumen de contenidos para Steren AMP-210SD
-
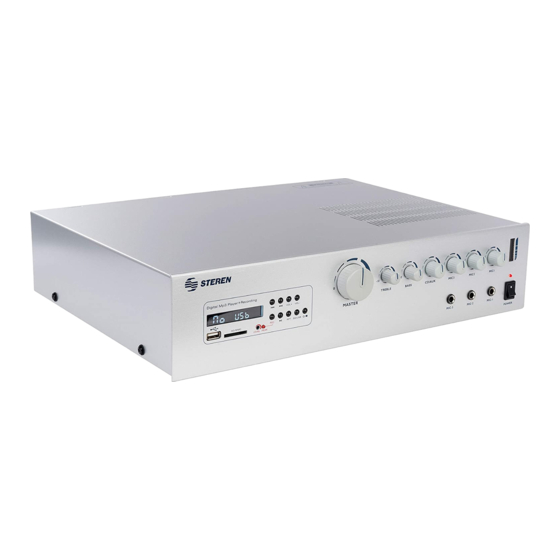
Página 2: Amplificador De 210W Con Lector Sd
Amplificador de 210W con lector SD. Por favor revise el manual completamente para estar seguro de instalar y poder operar apropiadamente este producto. Para apoyo, compras y todo lo nuevo que tiene Steren, visite nuestro sitio Web en: www.steren.com... - Página 3 IMPORTANTE Antes de utilizar su nuevo Amplificador de audio, por favor lea las siguientes recomendaciones: • Verifique la línea de voltaje antes de utilizar el equipo. • Si tiene alguna pregunta acerca de los requerimientos de voltaje, o acerca del voltaje que se utiliza en su área, contacte a un distribuidor cercano antes de conectar el equipo al tomacorriente.
-
Página 4: Instalación
1. INSTALACIÓN -Para asegurar la correcta operación y evitar posibles daños al equipo, coloque la unidad en una superficie firme y plana. Cuando coloque la unidad en un estante, asegúrese de que el estante y cualquier equipo para montar puede soportar el peso del amplificador. -
Página 5: Limpieza
2. LIMPIEZA Cuando la unidad se encuentra sucia, límpiela con un paño suave y seco. Si es necesario, limpie primero la superficie con un paño ligeramente humedecido en agua jabonosa, seguido por un paño seco. Nunca utilice benceno, thinner, alcohol u otro agente de limpieza volátil. No utilice limpiadores abrasivos, pueden dañar el acabo de las partes metálicas. - Página 6 5. CONTROLES PANEL FRONTAL PANEL TRASERO...
-
Página 7: Panel Frontal
5.1 Panel frontal 1. Pantalla LCD 2. Ranura SD: Permite insertar una memoria SD con archivos de música en formato MP3. 3. PLAY / PAUSE: Permite reproducir o pausar una pista de audio. 4. FR: Regresa a una pista previa. 5. - Página 8 14. CD/AUX Permite ajustar el nivel de volumen del equipo conectado a la entrada Auxiliar y del reproductor de SD. 15. MIC 3 Control de volumen del micrófono 3 16. MIC 2 Control de volumen del micrófono 2 17. MIC 1 Control de volumen del micrófono 1 18.
-
Página 9: Panel Trasero
5.2 Panel trasero 1. Interruptor de Corriente Alterna 115V~/230V~ 2. Tierra Permite aterrizar el equipo al chasis o bastidor donde puede estar instalado el amplificador. 3. Entrada de energía eléctrica. 4. Compartimiento de Fusible T5V 250V 5. LINE OUT Salida de línea; permite conectar un equipo de audio externo. 6. - Página 10 3. Para conectar los altavoces puede conectarlos de diferentes formas por ejemplo: - Dos Altavoces de 8ohms conectados en paralelo para tener una impedancia de 4ohms. - Dos altavoces de 8 ohms conectados en serie para obtener una impedancia de 16ohms. - Cuatro altavoces de 8ohms en serie/ paralelo para obtener una impedancia de 8ohms.
- Página 11 Cuando requerimos conectar más de cuatro bocinas o combinaciones de ellas, y debido a la dificultad de conseguir por medio de conexiones serie paralelo una impedancia estándar, se utiliza la línea de 25, 70 ó 100 volts del amplificador. Para usar la línea de 25, 70 ó 100 volts, es necesario el empleo de un transformador de línea, que acopla la impedancia de las bocinas a la línea de 25, 70 ó...
-
Página 12: Operación
7. OPERACIÓN 1. Ajuste el volumen del equipo que desee utilizar al mínimo. 2. Presione el interruptor de encendido. 3. Encienda el equipo que desee utilizar (CD, micrófonos o un equipo de audio externo). 4. Ajuste el volumen gradualmente a un nivel óptimo. 5. -
Página 13: Especificaciones
8. ESPECIFICACIONES Alimentación: 120V~ 60 Hz 380W Frecuencia de respuesta: 50 – 15 000Hz Impedancia: 4, 8 y 16 ohms Potencia de salida: 150Wrms / 210Wmax Consumo nominal: 273,6 kWh/mes Consumo en espera: no aplica El diseño del producto y las especificaciones pueden cambiar sin previo aviso. - Página 14 1.- Para hacer efectiva la garantía, presente ésta póliza y el producto, en donde fue adquirido o en Electrónica Steren S.A. de C.V. 2.- Electrónica Steren S.A de C.V. se compromete a reparar el producto en caso de estar defectuoso sin ningún cargo al consumidor. Los gastos de transportación serán cubiertos por el proveedor.
- Página 16 210W P.A. amplifier with SD card reader. Please review this manual thoroughly to ensure proper installation and operation of this product. For support, shopping, and everything new at Steren, visit our website: www.steren.com...
- Página 17 IMPORTANT Before using your new Audio amplifier, please read the following recommendations. • Verify line voltage before use. • Connecting the amplifier to a line voltage other than that for which it is intended can create a safety and fire hazard, and may damage the amplifier. •...
-
Página 18: Installation Location
1. INSTALLATION LOCATION - To ensure proper operation and to avoid the potential for safety hazards, place the unit on a firm and level surface. When placing the unit on a shelf, be certain that the shelf and any mounting hardware can support the amplifier’s weight. - Make certain that the proper space is provided both above and below the unit for ventilation. - Página 19 2. CLEANING When the unit gets dirty, wipe it with a clean, soft and dry cloth. If necessary, first wipe the surface with a soft cloth slightly dampened with mild soapy water, followed by a fresh cloth with clean water. Wipe immediately with a dry cloth. Never use benzene, thinner, alcohol or any other volatile cleaning agent.
- Página 20 5. CONTROLS FRONT PANEL REAR PANEL...
-
Página 21: Front Panel
5.1 Front panel 1. LCD screen 2. SD slot: Allow to connect a SD Memory Card with MP3 audio files. 3. PLAY/PAUSE: Plays or pauses SD tracks. 4. FR: Returns to previous tracks. 5. FF: Advances to next track. 6. VOL DOWN: Decreases the volume level from the SD player. 7. - Página 22 14. CD/AUX: Set the volume level of the auxiliary equipment connected to the amplifier. 15. MIC 3: Microphone 3 volume control. 16. MIC 2: Microphone 2 volume control. 17. MIC 1: Microphone 1 volume control. 18. MIC-3: Microphone 3 input. 19.
-
Página 23: Rear Panel
5.2 Rear panel 1. CA (115V~/230V~) switch 2. Ground If the main contact doesn’t counts with a ground lead, this screw offers you the possibility to ground the amplifier’s metallic parts. 3. AC Input. 4. Fuse (T5V 250V) compartment 5. LINE OUT Allow one to connect an external audio system. - Página 24 3. For connect the speakers there are different ways for example: - Two 8ohms speakers in parallel to get an impedance of 4ohms - Two 8ohms speakers in serial to get an impedance of 16ohms - Four 8ohms speakers in serial/ parallel to get an impedance of 8ohms...
- Página 25 When you want connect more of four speakers you can use 25, 70 or 100volts output from amplifier. You’ll need a line transformer. Never touch stripped wires from amplifier’s output, when they’re in use, may cause serious damages or electrical shock. Replace the protector cover once you have finished the connection process.
-
Página 26: How To Use
7. HOW TO USE 1. Set the volume level to minimum. 2. Press On/Off button. 3. Power on the device that you want to use (CD player, microphones or an external audio system). 4. Gradually, raise the volume level to an optimum level. 5. - Página 27 8. SPECIFICATIONS Input: 120V~ 60 Hz 380W Frequency response: 50 – 15 000Hz Impedance: 4, 8 and 16 ohms Power output: 150Wrms / 210Wmax Nominal consumption: 273.6 kWh/month Stand-by power consumption: not applicable Product design and specifications are subject to change, without notice.
- Página 28 Product: 210W P.A. amplifier with SD card reader Part number: AMP-210SD Brand: Steren WARRANTY This Steren product is warranted under normal usage against defects in workmanship and materials to the original purchaser for one year from the date of purchase. CONDITIONS 1.- This warranty card with all the required information, invoice, product...
- Página 30 Este instructivo puede mejorar con tu ayuda, llámanos a: Help us to improve this instruction manual, call us at: 01800 500 9000 Centro de Servicio a Clientes Customer Service Center...