Ingeteam NEO Pro Manual De Instalacion Y Uso
Ocultar thumbs
Ver también para NEO Pro:
- Manual de instalación (104 páginas) ,
- Manual de usuario (64 páginas)

Manuales relacionados para Ingeteam NEO Pro


Resumen de contenidos para Ingeteam NEO Pro
- Página 1 NEO Pro Installation and Operation Manual Manual de instalación y uso Manuel d'installation et usage Manuale d'installazione e uso...
- Página 2 Ingeteam Power Technology, S.A. - Energy ABV2012IQM01_ 06/2021 Avda. Ciudad de la Innovación, 13 31621 SARRIGUREN (Navarra) - Spain Tel.: +34 948 28 80 00 Fax.: +34 948 28 80 01 e-mail: electricmobility.energy@ingeteam.com Service Call Center: +34 948 698 715...
- Página 3 Ingeteam English Español Français Italiano ABV2012IQM01_...
- Página 4 Ingeteam The copy, distribution or use of this document or of its content requires written authorisation. Any breach thereof will be reported for damages. All rights reserved including those of patent rights or design registration. The conformity of the document content with the hardware described has been checked. However, discrepancies may exist. Liability will not be assumed for total concordance.
-
Página 5: Tabla De Contenido
2.2. Elements included in the packaging ....................7 2.3. Required tools ..........................8 3. Installation ............................10 3.1. Installation of the NEO Pro charger ....................10 3.1.1. Check the power supply cut ....................10 3.1.2. Check the connections ......................10 3.1.3. -
Página 6: Welcome
INGETEAM guarantees this product and its accessories against any defects in materials and in the manufacturing process for a period of 2 years from the date of purchase. During this period, INGETEAM will repair or replace any defective product. In the event of repair or replacement, the warranty period for new items will be the remainder of the original components, or 6 months, whichever is longer. -
Página 7: Before Starting
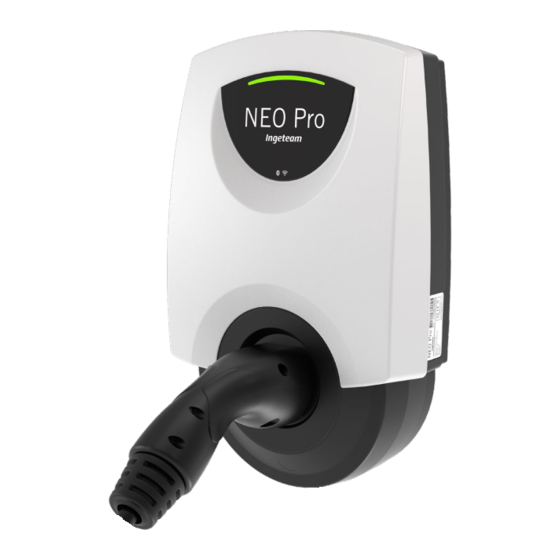
Ingeteam 2. Before starting 2.1. Identification of the charger The charger model is visible on its panel (NEO Pro) The charger also has a label on the side that shows which model it is. 2.2. Elements included in the packaging... -
Página 8: Required Tools
Ingeteam Before starting Element Quantity CURVEx3 CURVEx3 Iskra IE38Mx Smart gateway Iskra SG-E1 2.3. Required tools NEO Pro Drill 8 mm drill bit Phillips PH2 screwdriver Hammer Pencil or marker STAND Wrench 4 mm Allen or hex key CURVE 3.2 mm flathead screwdriver... - Página 9 Before starting Ingeteam CURVEx3 Phillips PH2 screwdriver ABV2012IQM01_ - Installation and Operation Manual...
-
Página 10: Installation
Ingeteam Installation 3. Installation 3.1. Installation of the NEO Pro charger 3.1.1. Check the power supply cut Make sure the power supply is interrupted at the point of installation of the charger. 3.1.2. Check the connections Check that the required electrical wiring for powering the charger is available at the point of installation. -
Página 11: Prepare The Connections
Installation Ingeteam Connector height 1.2 m Ground 3.1.5. Prepare the connections Following the template’s indications, carry out the following steps: Place the tube for the power supply wiring at the indicated height. Cut and strip the cables to the recommended length. -
Página 12: Prepare The Installation Of The Charger
Ingeteam Installation NEO Pro (single-phase) NEO Pro (three-phase) 25 cm 25 cm Connection tube Connection tube 20 mm hollow 20 mm hollow crimp ferrule crimp ferrule 5.5 cm 5.5 cm 3.1.6. Prepare the installation of the charger Mark the holes to be made. -
Página 13: Connect The Charger To The Power
Connect the electrical terminals of the power cable to the corresponding points on the charger. CAUTION Make sure that all screws are suitably tightened for effective contact of the active elements of the conductor. NEO Pro (single-phase) NEO Pro (three-phase) Neutral... -
Página 14: Hang The Charger From The Bushing
3.1.11. Supply power to the charger Close the cut-off element of the electrical circuit that powers the charger. 3.2. Installation of the CURVE device CAUTION The CURVE device is designed to be used with the NEO Pro charger (single-phase). ABV2012IQM01_ - Installation and Operation Manual... - Página 15 Installation Ingeteam Select the circuit on which you wish to install the CURVE device. At the meter output Bypassing the home PANEL PANEL CURVE Home power Home power CURVE METER METER Contracted Contracted power power Electric Electric vehicle vehicle PANEL...
- Página 16 Ingeteam Installation Strip the cable 8 mm on each wire and connect it to the terminals of the CURVE device. Strip the cable 8 mm on each wire and connect the CURVE device to the charger on pins 1 and 4.
-
Página 17: Installation Of The Curvex3
Installation Ingeteam 3.3. Installation of the CURVEx3 Select the circuit on which you wish to install the CURVEx3. At the meter output In the home circuit ENERGY PANEL PANEL METER Home power Home power ENERGY METER METER METER Contracted Contracted... - Página 18 Ingeteam Installation Prepare the wiring between the three-phase energy meter and the Smart Gateway (stripping the cables 6 mm at the ends that go to the latter), put the contacts of the power and neutral cables in the Smart Gateway and tighten the screws.
-
Página 19: Connection Of The Charger To Another Charger Or A Communications Element
NEO Pro (three-phase) 3.4. Connection of the charger to another charger or a communications element NEO Pro models have two local network sockets that, as well as allowing the connection of a three-phase energy meter (see “Installation of the CURVEx3”), also allow the following connections: •... -
Página 20: Installation Of The Stand Element (Optional)
Ingeteam Installation • Connect several chargers to each other, forming a “chain”. Each charger must be connected to the chargers closest to it. Ethernet bridges 3.5. Installation of the STAND element (optional) Prepare the ground anchors for the STAND element according to the figure, always using M12 components. - Página 21 Installation Ingeteam Remove the top part of the STAND element in order to access the hollow interior. Put the STAND element next to the cable output on the ground, and pass the power supply cables and the auxiliary wiring (to connect other devices) through the hollow interior from the bottom until they can be pulled out via the corresponding grommet.
- Página 22 Ingeteam Installation Fix the STAND element to the ground. Install the charger on the STAND element. Follow points 7 to 11 of the charger assembly instructions. CAUTION The fasteners to be used in this case must be those provided with the STAND element and not those provided with the charger.
- Página 23 Installation Ingeteam Reinstall the top part of the STAND element. ABV2012IQM01_ - Installation and Operation Manual...
-
Página 24: Technical Specifications
Proximity Manual Static power control Individually for each charger, and for a group of interconnected chargers Individual charger, with Ingeteam CURVE device. And Individual charger or group of interconnected Dynamic power control group of interconnected chargers, with CURVEx3. chargers, with CURVEx3 Charging scheduling No. -
Página 25: Dimensions
Technical specifications Ingeteam 4.2. Dimensions 4.3. Accessories 4.3.1. STAND Single STAND 1400 ABV2012IQM01_ - Installation and Operation Manual... -
Página 26: Curve
Ingeteam Technical specifications Double STAND 1400 Technical specifications Functional Number of chargers single STAND Number of chargers double STAND Mechanical Material Lacquered steel Single STAND dimensions (mm) 1400 x 283 x 240 Double STAND dimensions (mm) 1400 x 310 x 350... -
Página 27: Curvex3
Technical specifications Ingeteam Technical specifications Mechanical Dimensions (mm) 48 x 57 x 27 Material PC/ABS V0 4.3.3. CURVEx3 IE38Mx SG-E1 *Images taken from the corresponding Iskra manuals. IE38Mx technical specifications Mechanical Dimensions (mm) 52.5 x 96.4 x 68.2 Assembly DIN rail... - Página 28 Ingeteam Technical specifications SG-E1 technical specifications Mechanical Dimensions (mm) 17.5 x 95.4 x 68.2 Assembly DIN rail to the right of the IE38MD Electrical Power supply Single-phase (P+N) Voltage 85-265 V AC Cable gage 0.5-3 mm Communications Connector RJ45 ABV2012IQM01_ - Installation and Operation Manual...
-
Página 29: Contenidos
2.2. Elementos incluidos en el embalaje ....................31 2.3. Herramientas necesarias ....................... 32 3. Instalación ............................34 3.1. Instalación del cargador NEO Pro ....................34 3.1.1. Verificar corte alimentación eléctrica ..................34 3.1.2. Comprobar conexiones ......................34 3.1.3. Opcional: instalar el elemento stand ..................34 3.1.4. -
Página 30: Bienvenida
INGETEAM garantiza este producto y sus accesorios contra cualquier defecto en materiales y en el proceso de fabricación durante un periodo de 2 años a partir de la fecha de compra. Durante ese periodo, INGETEAM reparará o sustituirá cualquier producto defectuoso. En caso de reparación o sustitución, el plazo de garantía de los nuevos elementos será... -
Página 31: Antes De Empezar
2. Antes de empezar 2.1. Identificación del cargador El modelo de cargador es visible en su carátula (NEO Pro). Además, el cargador cuenta con una etiqueta en el lateral en la que se puede ver el modelo del mismo. 2.2. Elementos incluidos en el embalaje... -
Página 32: Herramientas Necesarias
Ingeteam Antes de empezar Elemento Cantidad CURVEx3 CURVEx3 Iskra IE38Mx Smart gateway Iskra SG-E1 2.3. Herramientas necesarias NEO Pro Taladro Broca de 8 mm Destornillador Phillips PH2 Martillo Lápiz o rotulador STAND Llave Llave Allen o hexagonal de 4 mm... - Página 33 Antes de empezar Ingeteam CURVEx3 Destornillador Phillips PH2 ABV2012IQM01_ - Manual de instalación y uso...
-
Página 34: Instalación
Ingeteam Instalación 3. Instalación 3.1. Instalación del cargador NEO Pro 3.1.1. Verificar corte alimentación eléctrica Asegurarse de que la alimentación eléctrica se encuentra interrumpida en el punto de instalación del cargador. 3.1.2. Comprobar conexiones Comprobar que dispone del cableado eléctrico necesario para la alimentación del cargador en el punto de instalación. -
Página 35: Preparar Conexiones
Instalación Ingeteam Altura conector 1,2 m Suelo 3.1.5. Preparar conexiones Siguiendo las indicaciones de la plantilla realizar las siguientes acciones: Colocar el tubo para el cableado de alimentación eléctrica a la altura indicada. Cortar y pelar cables a la longitud recomendada. -
Página 36: Preparar La Instalación Del Cargador
Ingeteam Instalación NEO Pro (monofásico) NEO Pro (trifásico) 25 cm 25 cm Tubo acometida Tubo acometida Puntera hueca Puntera hueca de crimpado de crimpado 5,5 cm 5,5 cm de 20 mm de 20 mm 3.1.6. Preparar la instalación del cargador Marcar los agujeros a realizar. -
Página 37: Conectar El Cargador A La Alimentación
Conectar los terminales eléctricos del cable de alimentación en los puntos correspondientes del cargador. ATENCIÓN Asegurar el apriete de todos los tornillos de las bornas para un contacto eficaz de los elementos activos del conductor. NEO Pro (monofásico) NEO Pro (trifásico) Neutro Neutro... -
Página 38: Colgar Cargador Del Casquillo
3.1.11. Suministrar alimentación eléctrica al cargador Cerrar el elemento de corte del circuito eléctrico que alimenta el cargador. 3.2. Instalación del dispositivo CURVE ATENCIÓN El dispositivo CURVE está diseñado para ser utilizado con el cargador NEO Pro (monofásico). ABV2012IQM01_ - Manual de instalación y uso... - Página 39 Instalación Ingeteam Seleccionar el circuito sobre el que se quiere instalar el dispositivo CURVE. A la salida del contador En derivación de la vivienda CUADRO CUADRO CURVE Potencia Potencia casa casa CURVE CONTADOR CONTADOR Potencia Potencia contratada contratada Potencia Potencia vehículo...
- Página 40 Ingeteam Instalación Pelar el cable 8 mm en cada hilo y conectarlo a las bornas del dispositivo CURVE. Pelar el cable 8 mm en cada hilo y conectar el dispositivo CURVE al cargador en los pines 1 y 4. ABV2012IQM01_ - Manual de instalación y uso...
-
Página 41: Instalación Curvex3
Instalación Ingeteam 3.3. Instalación CURVEx3 Seleccionar el circuito sobre el que se quiere instalar el CURVEx3. A la salida del contador En derivación de la vivienda MEDIDOR CUADRO CUADRO DE ENERGÍA Potencia Potencia casa casa MEDIDOR DE ENERGÍA CONTADOR CONTADOR... - Página 42 Ingeteam Instalación Preparar el cableado entre el medidor trifásico de energía y el Smart Gateway (pelando 6 mm los cables en las puntas que van a este último), colocar los contactos de los cables de potencia y de neutro en el Smart Gateway y ajustar los tornillos.
-
Página 43: Conexión Del Cargador A Otro Cargador, O A Un Elemento De Comunicaciones
NEO Pro (trifásico) 3.4. Conexión del cargador a otro cargador, o a un elemento de comunicaciones Los modelos NEO Pro disponen de dos tomas de red local que permiten, además de la conexión a un medidor trifásico de energía (ver “Instalación CURVEx3”), lo siguiente:... -
Página 44: Instalación Del Elemento Stand (Opcional)
Ingeteam Instalación • Conectar varios cargadores entre sí, formando una “cadena”. Cada cargador debe conectarse a los cargadores que tenga más próximos. Puentes Ethernet 3.5. Instalación del elemento STAND (opcional) Preparar los anclajes a suelo para el elemento STAND de acuerdo con la figura, utilizando siempre componentes de métrica 12. - Página 45 Instalación Ingeteam Desmontar la pieza superior del elemento STAND para poder acceder al interior hueco. Colocar el elemento STAND próximo a la salida de cables en el suelo, y pasar los cables de alimentación eléctrica y los cableados auxiliares (para conectar otros dispositivos) a través del espacio interior desde la parte inferior hasta sacarlos por los pasacables correspondientes.
- Página 46 Ingeteam Instalación Fijar el elemento STAND al suelo. Montar el cargador sobre el elemento STAND. Seguir los puntos del 7 al 11 de las instrucciones de montaje del cargador. ATENCIÓN La tornillería a utilizar en este caso debe ser la proporcionada con el elemento STAND, y no lo suministrada con el cargador.
- Página 47 Instalación Ingeteam Volver a montar la pieza superior del elemento STAND. ABV2012IQM01_ - Manual de instalación y uso...
-
Página 48: Características Técnicas
Manual Control estático de potencia Para cada cargador de manera individual, y para un grupo de cargadores interconectados Cargador individual, con dispositivo Ingeteam Cargador individual o grupo de cargadores Control dinámico de potencia CURVE. Y grupo de cargadores interconectados, con interconectados, con CURVEx3 CURVEx3. -
Página 49: Dimensiones
Características técnicas Ingeteam 4.2. Dimensiones 4.3. Accesorios 4.3.1. STAND STAND simple 1400 ABV2012IQM01_ - Manual de instalación y uso... -
Página 50: Curve
Ingeteam Características técnicas STAND doble 1400 Características técnicas Funcionales Número de cargadores STAND simple Número de cargadores STAND doble Mecánicas Material Acero lacado Dimensiones STAND simple (mm) 1400 x 283 x 240 Dimensiones STAND doble (mm) 1400 x 310 x 350... -
Página 51: Curvex3
Características técnicas Ingeteam Características técnicas Mecánicas Dimensiones (mm) 48 x 57 x 27 Material PC/ABS V0 4.3.3. CURVEx3 IE38Mx SG-E1 *Imágenes tomadas de los correspondientes manuales de Iskra. Características técnicas IE38Mx Mecánicas Dimensiones (mm) 52,5 x 96,4 x 68,2 Montaje Carril DIN Eléctricas... - Página 52 Ingeteam Características técnicas Características técnicas SG-E1 Mecánicas Dimensiones (mm) 17,5 x 95,4 x 68,2 Montaje Carril DIN a la derecha del IE38MD Eléctricas Alimentación Monofásica (F+N) Tensión 85-265 V AC Sección de los cables 0,5-3 mm Comunicaciones Conector RJ45 ABV2012IQM01_ - Manual de instalación y uso...
-
Página 53: Table Des Matières
2.2. Éléments inclus dans l’emballage ....................56 2.3. Outils nécessaires ........................57 3. Installation ............................59 3.1. Installation du chargeur NEO Pro ....................59 3.1.1. Vérifier la coupure de l’alimentation électrique ............... 59 3.1.2. Vérifier les connexions ......................59 3.1.3. En option : installer l’élément stand ..................59 3.1.4. -
Página 54: Bienvenue
INGETEAM garantit ce produit et ses accessoires contre tout défaut matériel ou au cours du processus de fabrication pendant une période de 2 ans à partir de la date d’achat. Au cours de cette période, INGETEAM réparera et remplacera tout produit défectueux. En cas de réparation ou de remplacement, le délai de garantie des nouveaux éléments correspondra à... - Página 55 Bienvenue Ingeteam maximal égal à la sortie maximale du chargeur (32 A). Cet équipement nécessite une protection différentielle externe. ABV2012IQM01_ - Manuel d’installation et usage...
-
Página 56: Avant De Commencer
Avant de commencer 2. Avant de commencer 2.1. Identification du chargeur Le modèle de chargeur est visible sur son boîtier (NEO Pro). En outre, le chargeur dispose d’une étiquette sur le côté indiquant son modèle. 2.2. Éléments inclus dans l’emballage Élément... -
Página 57: Outils Nécessaires
Avant de commencer Ingeteam Élément Quantité CURVEx3 CURVEx3 Iskra IE38Mx Smart gateway Iskra SG-E1 2.3. Outils nécessaires NEO Pro Perceuse Mèche de 8 mm Tournevis Phillips PH2 Marteau Crayon ou marqueur STAND Clé Clé Allen ou hexagonale de 4 mm CURVE Tournevis plat de 3,2 mm... - Página 58 Ingeteam Avant de commencer CURVEx3 Tournevis Phillips PH2 ABV2012IQM01_ - Manuel d’installation et usage...
-
Página 59: Installation
Installation Ingeteam 3. Installation 3.1. Installation du chargeur NEO Pro 3.1.1. Vérifier la coupure de l’alimentation électrique S’assurer que l’alimentation électrique est coupée sur le point d’installation du chargeur. 3.1.2. Vérifier les connexions Vérifier que le câblage électrique nécessaire pour l’alimentation du chargeur sur le point d’installation est disponible. -
Página 60: Préparer Les Connexions
Ingeteam Installation Hauteur du connecteur 1,2 m Au sol 3.1.5. Préparer les connexions En suivant les indications du modèle, réaliser les actions suivantes : Placer le tuyau pour le câblage d’alimentation électrique à la hauteur indiquée. Couper et dénuder les câbles à la longueur recommandée. -
Página 61: Préparer L'iNstallation Du Chargeur
Installation Ingeteam NEO Pro (monophasé) NEO Pro (triphasé) 25 cm 25 cm Tuyau Tuyau d’alimentation d’alimentation Pointe creuse Pointe creuse de sertissage de sertissage de 20 mm2 5,5 cm 5,5 cm de 20 mm2 3.1.6. Préparer l’installation du chargeur Marquer les trous à réaliser. Percer les trous. -
Página 62: Connecter Le Chargeur À L'aLimentation
Connecter les cosses électriques du câble d’alimentation sur les points correspondants du chargeur. ATTENTION Assurer le serrage de toutes les vis des bornes pour un contact efficace des éléments actifs du conducteur. NEO Pro (monophasé) NEO Pro (triphasé) Neutre Neutre... -
Página 63: Accrocher Le Chargeur À La Douille
3.1.11. Fournir une alimentation électrique au chargeur Fermer l’élément de coupure du circuit électrique alimentant le chargeur. 3.2. Installation du dispositif CURVE ATTENTION Le dispositif CURVE est conçu pour être utilisé avec le chargeur NEO Pro (monophasé). ABV2012IQM01_ - Manuel d’installation et usage... - Página 64 Ingeteam Installation Sélectionner le circuit sur lequel sera installé le dispositif CURVE. En dérivation du logement À la sortie du contacteur TABLEAU TABLEAU CURVE Puissance du Puissance du logement logement CURVE COMPTEUR COMPTEUR Puissance Puissance souscrite souscrite Puissance Puissance du véhicule du véhicule...
- Página 65 Installation Ingeteam Dénuder 8 mm du câble sur chaque fil et le connecter aux bornes du dispositif CURVE. Dénuder 8 mm du câble sur chaque fil et connecter le dispositif CURVE aux cosses 1 et 4 du chargeur. ABV2012IQM01_ - Manuel d’installation et usage...
-
Página 66: Installation Curvex3
Ingeteam Installation 3.3. Installation CURVEx3 Sélectionner le circuit sur lequel sera installé le CURVEx3. À la sortie du contacteur En dérivation du logement WATTMÈTRE TABLEAU TABLEAU Puissance du Puissance du logement logement WATTMÈTRE COMPTEUR COMPTEUR Puissance Puissance souscrite souscrite Puissance Puissance du véhicule... - Página 67 Installation Ingeteam Préparer le câblage entre le wattmètre d’énergie triphasé et le Smart Gateway (en dénudant 6 mm des câbles sur les pointes allant jusqu’à lui), placer les contacts des câbles de puissance et de neutre dans le Smart Gateway et ajuster les vis.
-
Página 68: Connexion Du Chargeur À Un Autre Chargeur, Ou À Un Élément De Communications
NEO Pro (triphasé) 3.4. Connexion du chargeur à un autre chargeur, ou à un élément de communications Les modèles NEO Pro disposent de deux prises de réseau local permettant, outre la connexion à un wattmètre d’énergie triphasé (voir « Installation CURVEx3 »), ce qui suit : •... -
Página 69: Installation De L'éLément Stand (En Option)
Installation Ingeteam • Connecter plusieurs chargeurs entre eux en formant une « chaîne ». Chaque chargeur doit être connecté aux chargeurs les plus proches. Ponts Ethernet 3.5. Installation de l’élément STAND (en option) Préparer les ancrages au sol pour l’élément STAND conformément à la figure, en utilisant toujours des composants de métrique 12. - Página 70 Ingeteam Installation Démonter la pièce supérieure de l’élément STAND pour pouvoir accéder à l’intérieur creux. Placer l’élément STAND à proximité de la sortie de câbles au sol, et faire passer les câbles d’alimentation électrique et les câblages auxiliaires (pour connecter d’autres dispositifs) à travers l’espace intérieur depuis la partie inférieure, jusqu’à...
- Página 71 Installation Ingeteam Fixer l’élément STAND au sol. Monter le chargeur sur l’élément STAND. Suivre les points 7 à 11 des instructions de montage du chargeur. ATTENTION La visserie à utiliser dans ce cas doit être celle fournie avec l’élément STAND, et non celle fournie avec le chargeur.
- Página 72 Ingeteam Installation Remonter la pièce supérieure de l’élément STAND. ABV2012IQM01_ - Manuel d’installation et usage...
-
Página 73: Caractéristiques Techniques
Proximité Manuel Contrôle statique de puissance Pour chaque chargeur individuellement, et pour un groupe de chargeurs interconnectés Chargeur individuel, avec dispositif Ingeteam Chargeur individuel ou groupe de chargeurs Contrôle dynamique de puissance CURVE. Et groupe de chargeurs interconnectés, avec interconnectés, avec CURVEx3. -
Página 74: Dimensions
Ingeteam Caractéristiques techniques 4.2. Dimensions 4.3. Accessoires 4.3.1. STAND STAND simple 1400 ABV2012IQM01_ - Manuel d’installation et usage... -
Página 75: Curve
Caractéristiques techniques Ingeteam STAND double 1400 Caractéristiques techniques Fonctionnelles Nombre de chargeurs STAND simple Nombre de chargeurs STAND double Mécaniques Matériau Acier laqué Dimensions STAND simple (mm) 1 400 x 283 x 240 Dimensions STAND double (mm) 1400 x 310 x 350 Poids 20 kg 4.3.2. CURVE Caractéristiques techniques Électriques... -
Página 76: Curvex3
Ingeteam Caractéristiques techniques Caractéristiques techniques Mécaniques Dimensions (mm) 48 x 57 x 27 Matériau PC/ABS V0 4.3.3. CURVEx3 IE38Mx SG-E1 *Images issues des manuels d’Iskra correspondants. Caractéristiques techniques IE38Mx Mécaniques Dimensions (mm) 52,5 x 96,4 x 68,2 Montage Rail DIN Électriques Alimentation Triphasée (3F+N) Courant maximal 80 A Tension 3 x 400 Vac... - Página 77 Caractéristiques techniques Ingeteam Caractéristiques techniques SG-E1 Mécaniques Dimensions (mm) 17,5 x 95,4 x 68,2 Montage Rail DIN à droite de l’unité IE38MD Électriques Alimentation Monophasée (F+N) Tension 85-265 Vac Section des câbles 0,5-3 mm Communications Connecteur RJ45 ABV2012IQM01_ - Manuel d’installation et usage...
- Página 78 Notes - Notas - Remarques - Note...
-
Página 79: Contenuti
2.2. Elementi inclusi nell’imballaggio ....................81 2.3. Strumenti necessari ........................82 3. Installazione ............................84 3.1. Installazione del caricatore NEO Pro ....................84 3.1.1. Controllare che l’alimentazione elettrica sia staccata ............... 84 3.1.2. Controllare i collegamenti ..................... 84 3.1.3. Opzionale: installare l'elemento stand ..................84 3.1.4. -
Página 80: Benvenuto
1.2. Garanzia INGETEAM garantisce questo prodotto e i suoi accessori contro difetti di materiali e di lavorazione per un periodo di 2 anni dalla data di acquisto. Durante questo periodo, INGETEAM riparerà o sostituirà qualsiasi prodotto difettoso. -
Página 81: Prima Di Iniziare
Prima di iniziare Ingeteam 2. Prima di iniziare 2.1. Identificazione del caricatore Il modello del caricatore è visibile sul coperchio (NEO Pro). Inoltre, il caricatore ha un'etichetta sul lato dove è indicato il modello. 2.2. Elementi inclusi nell’imballaggio Elemento Quantità... -
Página 82: Strumenti Necessari
Ingeteam Prima di iniziare Elemento Quantità CURVEx3 CURVEx3 Iskra IE38Mx Smart gateway Iskra SG-E1 2.3. Strumenti necessari NEO Pro Trapano Punta da 8 mm Cacciavite Phillips PH2 Martello Matita o pennarello STAND Chiave Chiave Allen o esagonale da 4 mm... - Página 83 Prima di iniziare Ingeteam CURVEx3 Cacciavite Phillips PH2 ABV2012IQM01_ - Manuale d’installazione e uso...
-
Página 84: Installazione
Ingeteam Installazione 3. Installazione 3.1. Installazione del caricatore NEO Pro 3.1.1. Controllare che l’alimentazione elettrica sia staccata Assicurarsi che l'alimentazione sia interrotta nel punto di installazione del caricatore. 3.1.2. Controllare i collegamenti Controllare di avere il cablaggio elettrico necessario per alimentare il caricatore nel punto di installazione. -
Página 85: Preparare I Collegamenti
Installazione Ingeteam Altezza connettore 1,2 m Pavimento 3.1.5. Preparare i collegamenti Seguendo le indicazioni sulla dima, eseguite le seguenti azioni: Posizionare il tubo per il cablaggio dell'alimentazione all'altezza specificata. Tagliare e spellare i fili alla lunghezza raccomandata. Posizionare le punte... -
Página 86: Preparare L'iNstallazione Del Caricatore
Ingeteam Installazione NEO Pro (monofase) NEO Pro (trifase) 25 cm 25 cm Tubo di Tubo di allacciamento allacciamento Punta cava a Punta cava a crimpare da crimpare da 20 5,5 cm 5,5 cm 20 mm 3.1.6. Preparare l'installazione del caricatore Segnare i fori da eseguire. -
Página 87: Collegare Il Caricatore Alla Rete Di Alimentazione
Collegare i terminali elettrici del cavo di alimentazione ai punti corrispondenti del caricatore. ATTENZIONE Assicurarsi che tutte le viti dei morsetti siano strette per garantire un contatto efficace degli elementi attivi del conduttore. NEO Pro (monofase) NEO Pro (trifase) Neutro Neutro... -
Página 88: Appendere Il Caricatore Alla Boccola
3.1.11. Fornire alimentazione elettrica al caricatore Chiudere l'interruttore del circuito elettrico che alimenta il caricatore. 3.2. Installazione del dispositivo CURVE ATTENZIONE Il dispositivo CURVE è progettato per essere utilizzato con il caricatore NEO Pro (monofase). ABV2012IQM01_ - Manuale d’installazione e uso... - Página 89 Installazione Ingeteam Selezionare il circuito su cui deve essere installato il dispositivo CURVE. All'uscita del contatore Come derivazione dell’abitazione QUADRO QUADRO CURVE Potenza casa Potenza casa CURVE CONTATORE CONTATORE Potenza Potenza contrattata contrattata Potenza Potenza veicolo veicolo QUADRO QUADRO elettrico...
- Página 90 Ingeteam Installazione Spellare il cavo da 8 mm su ogni filo e collegarlo ai terminali del dispositivo CURVE. Spellare il cavo da 8 mm su ogni filo e collegare il dispositivo CURVE al caricatore sui pin 1 e 4. ABV2012IQM01_ - Manuale d’installazione e uso...
-
Página 91: Installazione Curvex3
Installazione Ingeteam 3.3. Installazione CURVEx3 Selezionare il circuito su cui deve essere installato il CURVEx3. All'uscita del contatore Come derivazione dell’abitazione MISURATORI QUADRO QUADRO DI CORRENTE Potenza casa Potenza casa MISURATORI DI CORRENTE CONTATORE CONTATORE Potenza Potenza contrattata contrattata Potenza... - Página 92 Ingeteam Installazione Preparare il cablaggio tra il contatore di energia trifase e lo Smart Gateway (spellando i fili alle estremità che vanno allo Smart Gateway di 6 mm), mettere i contatti dei cavi di alimentazione e neutro nello Smart Gateway e stringere le viti.
-
Página 93: Collegare Il Caricatore Ad Un Altro Caricatore O Ad Un Elemento Di Comunicazione
NEO Pro (trifase) 3.4. Collegare il caricatore ad un altro caricatore o ad un elemento di comunicazione I modelli NEO Pro hanno due prese di rete locali che permettono, oltre al collegamento a un contatore di energia trifase (vedi “Installazione CURVEx3”), quanto segue:... -
Página 94: Installazione Dell'eLemento Stand (Opzionale)
Ingeteam Installazione • Collegare diversi caricatori insieme, formando una "catena". Ogni caricatore deve essere collegato ai caricatori più vicini. Ponti Ethernet 3.5. Installazione dell'elemento STAND (opzionale) Preparare gli ancoraggi a terra per l'elemento STAND secondo la figura, utilizzando sempre componenti di misura 12. - Página 95 Installazione Ingeteam Rimuovere la parte superiore dell'elemento STAND per accedere all'interno cavo. Posizionare l'elemento STAND accanto all'uscita dei cavi sul pavimento e far passare i cavi di alimentazione e il cablaggio ausiliario (per il collegamento di altri dispositivi) attraverso lo spazio interno dal basso e fuori attraverso i pressacavi corrispondenti.
- Página 96 Ingeteam Installazione Fissare l'elemento STAND al pavimento. Montare il caricatore sull'elemento STAND. Seguire i punti da 7 a 11 delle istruzioni di installazione del caricatore. ATTENZIONE Le viti da utilizzare in questo caso devono essere quelle fornite con l'elemento STAND e non quelle fornite con il caricatore.
- Página 97 Installazione Ingeteam Rimontare la parte superiore dell'elemento STAND. ABV2012IQM01_ - Manuale d’installazione e uso...
-
Página 98: Caratteristiche Tecniche
Prossimità Manuale Controllo della potenza statica Per ogni caricatore individualmente e per un gruppo di caricatori interconnessi Caricatore individuale, con dispositivo Ingeteam Caricatore individuale o gruppo di caricatori Controllo della potenza dinamica CURVE. E gruppo di caricatori interconnessi, con interconnessi, con CURVEx3 CURVEx3. -
Página 99: Dimensioni
Caratteristiche tecniche Ingeteam 4.2. Dimensioni 4.3. Accessori 4.3.1. STAND STAND singolo 1400 ABV2012IQM01_ - Manuale d’installazione e uso... -
Página 100: Curve
Ingeteam Caratteristiche tecniche STAND doppio 1400 Caratteristiche tecniche Funzionali Numero di caricatori STAND singolo Numero di caricatori STAND doppio Meccaniche Materiale Acciaio laccato Dimensioni STAND singolo (mm) 1400 x 283 x 240 Dimensioni STAND doppio (mm) 1400 x 310 x 350... -
Página 101: Curvex3
Caratteristiche tecniche Ingeteam Caratteristiche tecniche Meccaniche Dimensioni (mm) 48 x 57 x 27 Materiale PC/ABS V0 4.3.3. CURVEx3 IE38Mx SG-E1 *Immagini tratte dai corrispondenti manuali Iskra. Caratteristiche tecniche IE38Mx Meccaniche Dimensioni (mm) 52,5 x 96,4 x 68,2 Montaggio Guida DIN... - Página 102 Ingeteam Caratteristiche tecniche Caratteristiche tecniche SG-E1 Meccaniche Dimensioni (mm) 17,5 x 95,4 x 68,2 Montaggio Guida DIN sul lato destro dell'IE38MD Elettriche Alimentazione Monofase (F+N) Tensione 85-265 V AC Sezione del cavo 0,5-3 mm Comunicazioni Connettore RJ45 ABV2012IQM01_ - Manuale d’installazione e uso...
- Página 103 31676 Toulouse Labège cedex - France Colonia Jardín Español - MONTERREY Tel: +33 (0)5 61 25 00 00 Ingeteam Power Technology India Pvt. Ltd. 64820 - NUEVO LEÓN - México Fax: +33 (0)5 61 25 00 11 2nd floor, 431 Tel: +52 81 8311 4858 email: france@ingeteam.com...
- Página 104 ABV2012IQM01_ 06/2021 Ingeteam Power Technology, S.A. www.ingeteam.com...