Publicidad
Idiomas disponibles
Idiomas disponibles
Enlaces rápidos
Before using your new Electronic insect killer, please read
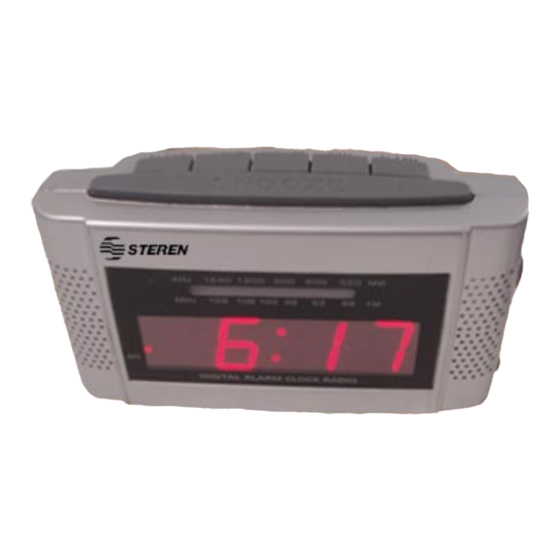
Before using your new Digital alarm clock radio, read the
this instruction manual to prevent any damage. Put it away
following recommendations.
IMPORTANT
•
Do not expose the device to extreme temperatures.
•
Do not use the device near wet places, may cause
malfunctions.
•
Clean with a soft and dry cloth.
•
Warranty is void if you try to open the device.
•
If power cord is broken, it must be replaced by the
manufacturer or service agent or by qualified personnel, to
avoid any risk.
•
Check the battery each 3 months, change it if needed.
FEATURES
•
AM/FM radio.
•
Snooze function.
•
With a 9V battery (not included) the device can store the
alarm time in case of electric outage.
•
Easy to use.
CONTROLS
1.- Sleep.
Press to set the radio sleep
function.
2.- Hour.
Set the hour.
3.- Minute.
Set the minutes.
4.- Time.
Set the digital clock.
5.- Alarm.
Press to display and set the alarm.
6.- Snooze.
Turn the alarm tone for 9 minutes.
7.- AM / FM switch.
Use to switch between AM or FM band.
8.- Tunning.
Use it to select a radio station.
9.- Volume.
Set the volume level.
3
4
2
1
5
10
8
7
9
10.- On / Off / Auto / Alarm
Use this switch to turn the
radio on / off and activate
the alarm.
11.- Battery compartment.
Use it to place a 9V backup
battery.
12.- Speaker.
1.- Before using the alarm clock, make sure to install a 9V battery.
It will help you in case of an electric outage, it will keep the alarm
time.
2.- Plug the power cord to an outlet.
SETTING THE HOUR
1.- Press and hold TIME, then press HOUR several times to set
the hour.
2.- Press and hold TIME, then press MINUTE several times to set
the minutes.
SETTING THE ALARM
1.- Press and hold ALARM, then press HOUR several times to set
the hour.
2.- Press and hold ALARM, then press MINUTE several times to
set the minutes.
3.- Move the ON / OFF button to ALARM / AUTO.
4.- Press Snooze to turn the alarm off for 9 minutes, after this
time, the alarm will activate once again.
5.- Switch ON / OFF button to OFF, to turn the alarm off,
completely, or press ALARM button.
Before using your new Electronic insect killer, please read
If you move the ON / OFF button to OFF, the alarm will be
this instruction manual to prevent any damage. Put it away
disabled for next day.
in a safe place for future references.
If you press AL.ARM button, the alarm will be disabled for the
current day but not for next day.
RADIO
1.- Set the volume level to the minimum.
2.- Turn the radio on.
3.- Select the band.
4.- Set the volume level gradually, according your needs.
6
5.- Use Tunning button to tune a radio station.
6.-Move to OFF to turn the radio off.
SLEEP
Use this function to turn the radio off after a period of time. Press
Sleep to set the desired time, you can set from 1 minutes to 1:59
minutes.
1. While listening the radio, press and hold Sleep, then use Minute
/Hour button to set the sleep time.
Input: 110V~ 60Hz 4W
Back up battery: 9V - - - (battery not included)
Before using your new Electronic insect killer, please read
Product design and specifications are subject to change
this instruction manual to prevent any damage. Put it away
without previous notice.
INSTALLATION
INSTRUCTIONS
SPECIFICATIONS
11
12
Publicidad

Resumen de contenidos para Steren CLK-210
- Página 1 10.- On / Off / Auto / Alarm Use this switch to turn the radio on / off and activate the alarm. 11.- Battery compartment. Use it to place a 9V backup battery. 12.- Speaker. INSTALLATION 1.- Before using the alarm clock, make sure to install a 9V battery. It will help you in case of an electric outage, it will keep the alarm time.
- Página 2 Product: Digital alarm clock radio Part number: CLK-210 Brand: Steren WARRANTY This Steren product is warranted under normal usage against defects in workmanship and materials to the original purchaser for one year from the date of purchase. CONDITIONS 1.- This warranty card with all the required information, invoice or purchase ticket, product box or package, and product, must be presented when warranty service is required.
- Página 3 Electrónica Steren S.A. de C.V. asegúrese de instalar una batería de 9V. En caso de no contar 2.- Electrónica Steren S.A de C.V. se compromete a reparar el producto con energía eléctrica. La batería le servirá para guardar en en caso de estar defectuoso sin ningún cargo al consumidor.


