Publicidad
Idiomas disponibles
Idiomas disponibles
Enlaces rápidos
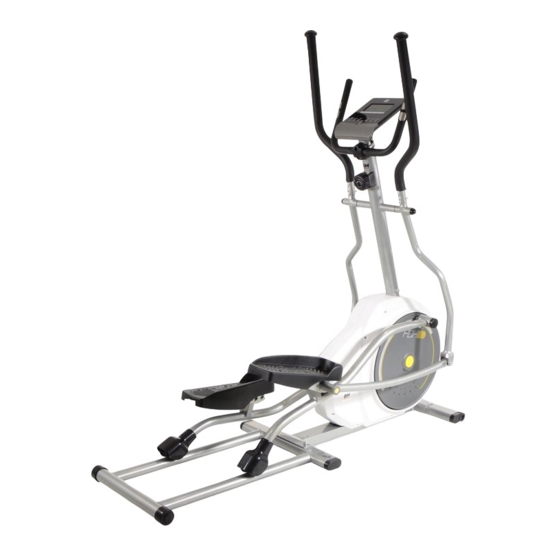
G840-G842N
Instrucciones de montaje y utilización
Instructions for assembly and use
Instructions de montage et utilisation
Montage und gebrauchsanleitung
Instruções de montagem e utilização
Istruzioni di montaggio e uso
Montage-en gebruiksinstrukties
Publicidad

Manuales relacionados para BH FITNESS G840


Resumen de contenidos para BH FITNESS G840
- Página 1 G840-G842N Instrucciones de montaje y utilización Instructions for assembly and use Instructions de montage et utilisation Montage und gebrauchsanleitung Instruções de montagem e utilização Istruzioni di montaggio e uso Montage-en gebruiksinstrukties...
- Página 2 Fig.1...
- Página 3 Fig.2 Fig.3...
- Página 4 Fig.4 Fig.5a...
- Página 5 Fig.5b Fig.6...
- Página 6 Fig.7 Fig.8 Fig.9...
- Página 7 Fig.10a Fig.10b Fig.11 Fig.12 Fig.13...
-
Página 8: Trabaje En El Nivel De Ejercicio
No utilice prendas sueltas. No utilice calzado con suela de cuero o tacones altos. Este aparato ha sido probado y cumple con la norma EN957 bajo la clase H.B. G842N (H.C. G840). El frenado es independiente de la velocidad. IMPORTANTE.- Realice cada... -
Página 9: Los Padres Y Otras Personas
Es muy importante mantener un ritmo de calentamiento y relajación de constante. El ritmo de ejercicio será lo costumbre, pero cuando esté llegando bastante alto para aumentar al final de la fase de ejercicio, pulsaciones hasta la zona objetivo aumente la resistencia para someter muestra gráfico sus piernas a un mayor esfuerzo. - Página 10 6 Utilice prendas de vestir y calzado (87) Arandela D7,5. adecuado. Átese cordones (88) Arandela D7,5. correctamente. (89) Arandela D7. (90) Arandela D7. 1. INSTRUCCIONES DE (91) Tornillo de M-7x30. MONTAJE.- (93) Tornillo de M-8x40. (94) Arandela D8. Saque la unidad de la caja (95) Tornillo de M-8x50.
- Página 11 (55), Fig.5. con el soporte pedal (30) y la arandela G842N: Conexione los terminales (56 plana (31) y atornille. con el 10) Fig.5a. G840: Conexione los terminales (56 Realice el mismo montaje con el reposapiés derecho (28) marcado con comprobando funciona la letra (R) en el tirante de pie (34) correctamente el mando de tensión...
- Página 12 - Retire el tornillo de montaje de los NIVELACIÓN.- bastones. Una vez colocada la unidad en su lugar - Añada una o más de las arandelas. definitivo, para realización - Reapriete el tornillo de los bastones. ejercicio, compruebe asentamiento suelo 8.
- Página 13 If you feel pain, high heels. STOP. This appliance has been tested and it complies with standard EN957 under class H.B. G842N (H.C. G840). Braking is independent of speed. IMPORTANT.- Read the instructions carefully before proceeding to assemble the equipment.
- Página 14 Weight loss In this case the important factor is the effort made. The more intense and the longer the session, the greater the number of calories burned. Even though you are dong the same work as you do to improve fitness, the objective has changed.
- Página 15 1. ASSEMBLY INSTRUCTIONS.- (94) Washer D8. (95) Screw M-8x50. 1. Take the unit out of its box and make (96) Screw D16x16,5. sure that all of the pieces are there: (97) Washer D8. (98) Nut M8. ATTENTION: The assistance of a (99) Screw M-5x14.
- Página 16 G842N: Connect the terminals (56) and ATTENTION: advisable (10), Fig.5a. retighten these screws after one G840: Connect the terminals (56) and month of using the machine. (10), and the terminals (14) and (73). Verify the tension knob works properly. 7. FITTING THE FOOT STRAP.- Fig.5b.
- Página 17 9. FITTING THE HANDLEBAR.- MOVEMENT & STORAGE.- Bring the handlebar (3) up to the The unit is equipped with wheels (15), handlebar stem (9), Fig.9, insert the as shown in Fig.12, which make it hand-grip cable (7) in through the slot easier to move.
- Página 18 à semelle en cuir ni à talons hauts. Cet appareil a été testé et répond à la norme EN957 classe H.B. G842N (H.C. G840). Le freinage est indépendant de la vitesse. REMARQUES IMPORTANTES.- Chaque étirement doit durer environ 30 Secondes.
- Página 19 rythme l’exercice sera habituels et à la fin de phase de suffisamment élevé pour augmenter l’exercice, augmentez la résistance afin les pulsations jusqu’à la zone-objectif de soumettre vos jambes à un effort indiquée sur le schéma suivant. plus important. Vous devrez réduire la vitesse pour maintenir la fréquence cardiaque dans la zone-objectif.
- Página 20 1. MONTAGE.- (87) Rondelles D7,5. (88) Rondelles D7,5. Déballez l’appareil et vérifiez qu’il ne (89) Rondelles D7. manque aucune pièce. (90) Rondelles D7. 1. Sortez l’unité de la boîte d’emballage (91) Vis M-7x30. et vérifiez qu’il ne manque aucune (93) Vis M-8x40. pièce.
- Página 21 G842N : connecter les connecteurs (56 la machine. au 10) Fig.5a. G840 : connecter les connecteurs (56 7. MONTAGE DU TIRANT DES au 10) et (14 au 73) Fig.5b. PIEDS .- Introduire le tube rameur (9) dans le tube qui dépasse du corps central (55)
- Página 22 Faire le même montage avec le bras DÉPLACEMENT ET droit (101) (signalé par la lettre R) que celui réalisé avec le bras supérieur RANGEMENT.- gauche. Comme indiqué dans la Fig.12, cet appareil dispose de roulettes (15) qui 9. MISE EN PLACE DU permettent un déplacement facile.
- Página 23 Anforderungen der Norm EN957 in werden. Führen jeder dieser Klasse H.B. G842N (H.C. G840). Die Streckübungen ca. 30 Sekunden lang Bremswirkung ist unabhängig von der durch, ohne jedoch die Muskeln zu Geschwindigkeit. überlasten. Wenn Schmerzen WICHTIG.
- Página 24 2. Trainingsphase Möglicherweise müssen sie dabei die dieser Phase wird erfolgt Dauer des Trainings reduzieren. Wenn hauptsächliche physische Anstren- Sie darüber hinaus Ihre allgemeine gung. Nach dem regelmäßigen Training physische Form verbessern wollen, wird dei Flexibilität der Beinmuskulatur müssen Sie Ihr Trainingsprogramm gesteigert.
- Página 25 4 Der Eigentümer hat die Aufgabe Fig.2 Schrauben sicherzustellen, dass alle Benutzer des (79) Inbusschraube M-6x6. Geräts über alle notwendigen (80) Inbusschraube M-8x55. Sicherheitsmaßnahmen informiert sind (81) Unterlegscheiben D8. und sich entsprechend verhalten. (82) Muttern 5 Das Gerät darf nicht von mehrere (83) Kappe Personen gleichzeitig benutzt werden.
- Página 26 G842N: verbinden Sie die Klemmen Setzen Sie die Achse der linken, mit (56 und 10) miteinander Fig.5a. Buchstaben markierten G840: verbinden Sie die Klemmen (56 Fußschale (27) auf auf die Pedalstange und 10) (14 und 73) miteinander (33) Fig.7. Fig.5b.
- Página 27 7. MONTAGE DER 9. ANBRINGEN DES SPANNVORRICHTUNG.- LENKERS.- Nehmen Sie die Spannvorrichtung des Setzen Sie den Lenker (3) in die Fußteils (27) und positionieren Sie sie Lenkstange (9), Fig.9; führen Sie das gegenüber dem unteren Arm (102) wie Kabel des Hand-Grip (7) durch die Nut in Fig.7 dargestellt.
- Página 28 Bewahren Sie das Gerät an einem Sollten über Zustand einer trockenen Ort mit möglichst geringen Komponente Zweifel bestehen, setzen Temperaturschwankungen auf. sich bitte (TKD) Technischen Kundendienst NETZANSCHLUSS.- G842N Verbindung, indem Servicetelefon anrufen (siehe letzte Stecken Sie den Stecker (m) des Seite des Handbuchs).
- Página 29 Se sentir dor, PARE. altos. Este aparelho foi testado e cumpre com a norma EN957 na clase H.B. G842N (H.C. G840). A travagem é independente da velocidade. IMPORTANTE. Leia atentamente as instruções antes de começar a montagem.
- Página 30 O ritmo do exercício deverá ser o exercício, aumente a resistência para suficientemente alto forma submeter as suas pernas a um maior aumentar as pulsações até à zona esforço. Deverá reduzir a velocidade objectivo que se mostra no seguinte para manter o ritmo cardíaco na zona gráfico.
- Página 31 INSTRUÇÕES DE MONTAGEM.- (90) Arandela D7. (91) Parafusos M-7x30. 1 Retire a unidade da caixa e (93) Parafusos M-8x40. comprove se estão todas as peças. (94) Arandela D8. (95) Parafusos M-8x50. ATENÇÃO: Recomenda-se a ajuda (96) Parafusos D16x16,5. de uma segunda pessoa para a (97) Arandela D8.
- Página 32 G842N: ligue os terminais (56 com o 10) Fig.5a. ATENÇÃO: É aconselhável reapertar G840: ligue os terminais (56 com o 10) os parafusos que se acabam de e (14 com o 73) Fig.5b. montar ao fim de um mês de uso da Introduza o tubo de remo (9) no tubo máquina .
- Página 33 Realize a mesma montagem com o braço direito (101), marcado com a MOVIMENTO E letra R, que realizou com o braço ARMAZENAGEM.- superior esquerdo. A unidade está equipada com rodas (15) como mostra a Fig.12, o que torna 9. COLOCAÇÃO DO GUIADOR.- mais simples o seu movimento.
- Página 34 Non utilizzi capi grandi e sciolti. Non utilizzi scarpe con suola di cuoio o tacchi alti. Quest’apparecchio è stato testato ed è a norma con il EN957 nella classe H.B. G842N (H.C. G840). È consigliabile realizzare alcuni IMPORTANTE.
- Página 35 È molto importante mantenere un peró quando sia vicina alla fine della ritmo constante. ritmo dell’ fase d’ allenamento, aumenti allenamento sarà alto a sufficienza per resistenza per sottomettere le sue fare in modo che aumentino le gambe ad uno sforzo maggiore. Dovrà pulsazioni fino alla zona obiettivo che ridurre la velocità...
-
Página 36: Istruzioni Di Montaggio
ISTRUZIONI DI MONTAGGIO (90) Rondella D7. (91) Vite M-7x30. 1. Estragga l’ apparecchio dalla scatola (93) Vite M-8x40. e verifi chi di avere a disposizione tutti i (94) Rondella D8. pezzi. (95) Vite M-8x50. (96) Vite D16x16,5. ATTENZIONE: raccomanda (97) Rondella D8. l’ausilio di una seconda persona, per la realizzazione del montaggio (98) Dado M8. - Página 37 G842N: collegare i terminali (56 con il Fig.7. 10) Fig.5a. ATTENZIONE: consiglia G840: collegare i terminali (56 con il 10) stringere di nuovo le viti che sono e (14 con il 73) Fig.5b. state appena montate trascorso Inserire il tubo remo (9) nel tubo almeno un mese dall’uso della...
- Página 38 Inserire le viti (93) con le rondelle (94) SPOSTAMENTO ED ei dadi (82) Fig.8 e stringere con forza. Realizzare con il braccio destro (101) IMMAGAZZINAGGIO.- (indicato con la lettera R), lo stesso L’ apparecchio è munito di ruote (15) montaggio effettuato con il braccio che rendono più...
- Página 39 Draag geen schoenen met een lederen zool of met hoge hakken. Dit toestel is getest en het voldoet aan de EN957-norm onder klasse H.B. G842N (H.C. G840). Er kan geremd worden onafhankelijk van snelheid. raadzaam eerst stretchen. elke strechting...
- Página 40 Het ritme van de oefening dient gewoonlijk, maar wanneer u aan het voldoende hoog te liggen om de einde van de oefening komt, vermeerdert polsslag in de zone te krijgen die in de u de weerstand om zo een grotere onderstaande grafiek is aangegeven.
- Página 41 MONTAGE-INSTRUCTIES.- (94) Ring D8. (95) Inbusschroef M-8x50. 1 Haal het apparaat uit de verpakking (96) Inbusschroef D16x16,5. controleer alle onderdelen (97) Ring D8. aanwezig zijn. (98) Moer M8. N.B.: De hulp van een tweede persoon (99) Inbusschroef M-5x14. wordt aanbevolen bij het monteren van Inbussleutel n4,n5,n6, dit toestel Ringsleutel tweezijdig 13/17.
- Página 42 (28) gemarkeerd met hoofdframe (55), de letter (R), in het voetriempje (34), G842N: verbind uiteinden (56 en 10), Fig.7. Fig.5a. N.B.: Het is aanbevelenswaardig G840: verbind uiteinden (56 en 10), en deze schroeven één maand (14en73) Fig.5b. toestelgebruik...
- Página 43 Installeer de schroeven (93), met getoond in Fig.11. ringen (94) en moeren (82) Fig 8 en draai. VERPLAATSING & OPSLAG.- Voer dezelfde procedure uit voor de Het toestel is uitgerust met wieltjes onderste rechterfocusstang (101) (15), zoals weergegeven in Fig.12, om (gemarkeerd met de letter “R”).
- Página 44 G842N...
- Página 45 Para pedido de repuesto: Indicar el código de la pieza y la cantidad To order replacement parts: State the part code and Quantity Pour toute commande pièces détachées: Indiquer le code de la pièce et la quantité Bestellung von Ersatzteilen: Bitte angeben Teil-code und Menge Para encomenda de peça de recambio: Indicar o código da peça ea quantidade Per ordinare pezzi di ricambio: Indicare il codice del pezzo e la quantità...
- Página 46 G840...
- Página 47 Para pedido de repuesto: Indicar el código de la pieza y la cantidad To order replacement parts: State the part code and Quantity Pour toute commande pièces détachées: Indiquer le code de la pièce et la quantité Bestellung von Ersatzteilen: Bitte angeben Teil-code und Menge Para encomenda de peça de recambio: Indicar o código da peça ea quantidade Per ordinare pezzi di ricambio: Indicare il codice del pezzo e la quantità...
- Página 48 Español Por medio de la presente Exercycle S.L. declara que este producto cumple con los requisitos esenciales y cualesquiera otras disposiciones aplicables o exigibles de las Directivas 2009/125/CE, 2011/65/CE, 2004/108/CE y 2006/95/CE. Hereby, Exercycle S.L, declares that this product is in compliance with the English essential requirements and other relevant provisions of Directives 2005/32/EC, 2011/65/EC, 2004/108/EC and 2006/95/EC.
- Página 49 Tel.: +351 234 729 510 902 170 258 Fax: +351 234 729 519 Fax: +34 945 56 05 27 e-mail: info@bhfitness.pt e-mail: sat@bhfitness.com BH FITNESS NORTH AMERICA BH FITNESS MEXICO BH FITNESS UK 20155 Ellipse BH Exercycle de México S.A. de Tel: 02037347554...