Publicidad
Idiomas disponibles
Idiomas disponibles
Installation Instructions
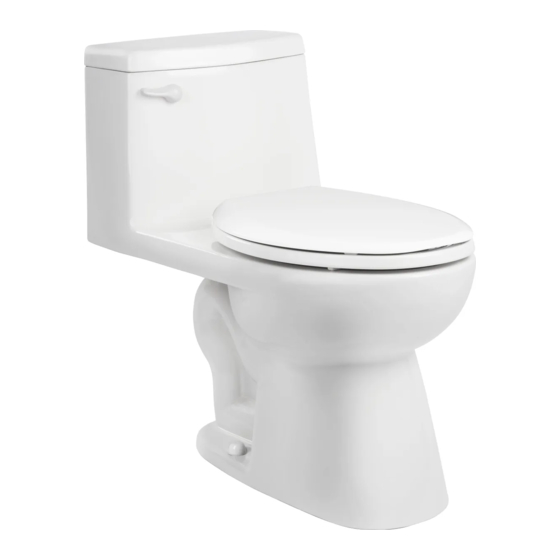
HET ONE PIECE TOILET
Tools Needed
A. Screwdriver
F. Flange
B. Wrench
G. Wax Seal
C. Tape Measure
H. Marker
D. Level
I. Flexible
E. Drill
Supply Line
Remove Old Toilet
a. Close toilet supply valve and flush tank
completely. Towel or sponge remaining water
from tank and bowl.
b. Disconnect and remove supply line
NOTE: If replacing valve, first shut off main
water supply!
c. Remove old mounting hardware, remove toilet
and plug floor waste opening to prevent escaping
sewer gases.
Installation Procedures
1. Install Closet Flange Bolts
Install closet flange bolts in to the flange channel
turning the head of the bolt 90°
and slide in to place, they will be spaced 6"
(152mm) apart and parallel to the wall.
Distributed exclusively by Wolseley North American Division: Ferguson, Stock Building Supply and Wolseley Canada.
© 2019 Ferguson Enterprises, Inc. All Rights Reserved.
2. Install Wax Ring Seal
Lay toilet on to its side (use cardboard to cushion
the ceramic and prevent damage). Install the wax
ring evenly around the waste flange horn. Place a
bead of sealant on bottom of toilet foot.
3. Position Toilet on the Flange
Unplug floor waste opening and install the toilet
on to the closet flange aligning the flange bolts
"A" through both mounting holes on the toilet foot.
Loosely install the bolt cap retainer washer, brass
washer and nut on to the flange bolts "A".
4. Install Toilet
Position the toilet so the tank will align evenly with
the wall, use a rocking motion and press down
firmly on the center of the bowl pressing it to the
floor. Alternately tighten the flange nuts until the
bowl is seated to the floor. Cut flange bolt above
the nut and install the bolt caps. Remove and
smooth excess sealant around foot.
!
5. Water Supply Connection
Connect the flexible supply line from the stop
valve to the toilet fill valve. DO NOT USE SEALANTS
ON SUPPLY FITTINGS! Hand tighten supply line,
then open stop valve and CHECK CLOSELY FOR
WATER LEAKS!
Rub
Pla
W
16159 0613
Publicidad
Tabla de contenido

Resumen de contenidos para PROFLO PF9541WH
- Página 1 Installation Instructions HET ONE PIECE TOILET Tools Needed A. Screwdriver F. Flange B. Wrench G. Wax Seal C. Tape Measure H. Marker D. Level I. Flexible E. Drill Supply Line Remove Old Toilet 2. Install Wax Ring Seal 4. Install Toilet Lay toilet on to its side (use cardboard to cushion Position the toilet so the tank will align evenly with a.
-
Página 2: Installation Instructions
Buyer must provide proof of purchase - ngular washer may cause and property damage . save sales receipt. Buyer must make claim 2. Void PROFLO Fixtures Limited Warranty. PRODUCT PARTS WARRANTY PERIOD for fill valve Fill valve nut within the Warranty Period outlined above. -
Página 3: Outils Requis
Instructions pour l’installation TOILETTE MONOBLOC À HAUTE EFFICACITÉ Outils requis A. Tournevis F. Couronne de toilette B. Clef G. Anneau de cire C. Ruban à mesurer H. Marqueur D. Niveau I. Tuyau d’alimentation E. Perceuse flexible des boulons. Enlevez et égalisez l’excès du produit Dépose de l’ancienne toilette d’étanchéité... -
Página 4: Soins Et Entretien
CONTACTER LE SERVICE À LA CLIENTÈLE DE garantie, expresse ou implicite. Le défaut du PROFLO AU 800 221-3379 OU ENVOYER UN Vendeur à faire des recommandations ou à donner © 2018 Ferguson 03/18 COURRIEL AU SERVICE DE SOUTIEN À LA des conseils à... -
Página 5: Instrucciones Para La Instalación
Instrucciones para la instalación INODORO HET DE UNA PIEZA Herramientas requeridas A. Destornillador F. Brida B. Llave inglesa G. Cera selladora C. Cinta métrica H. Marcador D. Nivelador I. Línea de suministro E. Taladro flexible Quitar el antiguo inodoro a. Cerrar por completo la válvula del inodoro y el TAPA DE PERNO tanque cisterna. -
Página 6: El Problema Que Resuelve
El incumplimiento del COMUNÍQUESE CON EL SERVICIO AL no afecta esos derechos establecidos por ley. Vendedor a dar recomendaciones o sugerencias CLIENTE DE PROFLO AL 800-221-3379, al Comprador no deberá imponer ninguna O ESCRIBA A SUPPORT@PROFLO.COM © 2018 Ferguson 18/03 responsabilidad al Vendedor.


