Publicidad
Enlaces rápidos
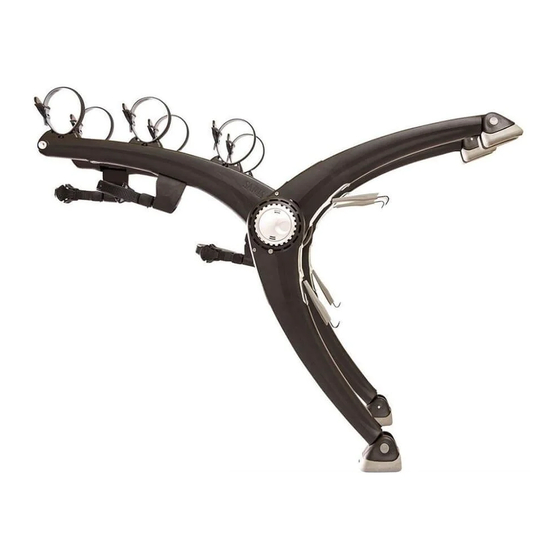
SUPERBones
Assembly Instructions
En
Instrucciones de montaje
Es
Instructions d'assemblage
Fr
Optional Accessories
#
3040
Bike Beam
Bike Beam is required if bicycle wheels are not parallel to the ground when carrying a bicycle with a sloped
top tube, or a full suspension bicycle. Bike Beam is also required if bicycle wheels are 12" or less from the
ground when installed on the rack.
Se requiere Bike Beam si las ruedas de la bicicleta no están paralelas al suelo cuando se transporta una
bicicleta con un tubo superior inclinado o una bicicleta de suspensión total. También se requiere Bike Beam si
las ruedas de la bicicleta están a 12 "o menos del suelo cuando se instalan en el soporte.
Bike Beam est nécessaire si les roues du vélo ne sont pas parallèles au sol lors du transport d'un vélo avec
un tube supérieur incliné ou d'un vélo à suspension intégrale. Bike Beam est également requis si les roues de
vélo sont à 12 po ou moins du sol lorsqu'elles sont installées sur le porte-vélos.
#3033
Wheel Straps
3 bikes
3 bicicletas
3 vélos
#802
1.800.783.7257
http://www.saris.com/en/vehicle-racks.html
Max=
35 lbs/16kg
Max=
105lbs/48kg
For relevant patents, see www.saris.com/patents
Für relevent Patente siehe www.saris.com/patents
View our installation video at
Video
http://www.saris.com/en/instructional-videos-1.html
Fit
Guide
Publicidad

Resumen de contenidos para Saris SUPERBones
- Página 1 También se requiere Bike Beam si For relevant patents, see www.saris.com/patents las ruedas de la bicicleta están a 12 ”o menos del suelo cuando se instalan en el soporte.
-
Página 2: Preparing For Installation
Preparing for installation Step 1: Reference fi t guide, www.saris.com, to determine strap placement and lower foot position. *Rack can not be mounted without fi rst confi rming compatibility. If strap/ hook placement needs adjustment, see instruction in Appendix A. - Página 3 Figure 1 - General Placement on Car Step 4: Adjust the Arms. 4a Lift “lock” lever to release arms 4b Rotate arm into general position 4c close lever 4d repeat with 2nd arm Note: Arms must be slightly above Horizontal. Install Rack on Vehicle Step 5: Place rack onto vehicle.
- Página 4 Step 6: Re-adjust upper legs so rack spline is directly above vehicle bumper. Step 7: Attach top hooks. 7a push and hold “free” lever to extend straps. 7b Secure hooks in hinge line of vehicle. 7c Push and hold “free” lever to take out strap slack. **See fi t guide for hatch hugger compatibility.
- Página 5 Step 9: Tighten all straps by opening and closing “free” lever to activate ratchet mechanism. Tighten upper straps fi rst and fi nish with lower straps. Load Bikes Step 1: Fold up anti-sways. Step 2: Place bikes on rack with heaviest/biggest bike closest to vehicle.
- Página 6 Step 3: Tighten hold down straps over bike’s top tube. Step 4: If bike spacing adjustment is needed rotate anti-sway strap. 4a tighten anti-sway strap onto seat post tube. Step 5: Once bikes are loaded recheck strap tension and tighten upper, and lower straps as necessary.
- Página 7 Step 6: Lock rack to vehicle. 6a To lock upper and lower legs, Insert key and turn to locked position. Step 7: Lock bike to rack. 7a To lock bike to rack, wrap locking cable over bike’s top tube and insert into lock slot. 7b Insert key and turn to locked position.
- Página 8 Step 2: Remove upper and lower hooks. 2a Push and hold “free” lever on upper leg to release strap tension. 2b Repeat on lower leg. Step 3: Retract strap. Guide strap into leg. Step 4: Fold fl at for storage.
- Página 9 Appendix A: Strap/Hook Placement Step 1: Pull back sleeve covering hook attachment. Step 2: Pinch strap and slide through opening on hook to remove hook. Step 3: Remove sleeve.
- Página 10 Step 4: Feed strap through leg to desired position. Step 5: Pull sleeve over hook attachment strap and re-attach hook.
- Página 11 (3) there was no failure to follow instructions or warn- ings in Owner’s Manual; (4) no alterations or modifications were made; and (5) the product or part is delivered, freight prepaid, to Saris Cycling Group or an authorized service center.
- Página 12 Términos de garantía oficial: Portabicicletas Saris Saris Cycling Group, Inc (SCG), empresa matriz de Saris Racks, garantiza al comprador original que nuestros productos no presentan defectos de material ni de mano de obra. Su compra incluye la garantía siguiente que sustituye a todas las demás garantías expresas. Esta garantía se otorga únicamente al comprador original. Esta garantía le ofrece derechos legales específicos.
- Página 13 à l’origine ; (3) il n’y a pas eu non-respect des consignes et des avertissements indiqués dans le manuel du propriétaire ; (4) le produit n’a subi aucune modification ; et (5) le produit ou ses pièces sont envoyés, en port payé, à Saris Cycling Group inc. ou à un centre de service autorisé. Veuillez appeler le 1-800-783-7257 pour obtenir une autorisation de retour avant de procéder à...


