Tabla de contenido
Publicidad
Idiomas disponibles
Idiomas disponibles
Enlaces rápidos
GE is a trademark of the General Electric Company. Manufactured under trademark license.
USING THE DRYER
Getting Started . . . . . . . . . . . . . . . . . . . . . . 5
Loading . . . . . . . . . . . . . . . . . . . . . . . . . . . . . .8
. . . . . . . . . . . . . . . . . . . . . . . . . .9
Reversing The Door Swing . . . . . . . . . . . . 10
Stacking . . . . . . . . . . . . . . . . . . . . . . . . . . . . . 13
CONSUMER SUPPORT
Warranty . . . . . . . . . . . . . . . . . . . . . . . . . . . 19
Consumer Support . . . . . . . . . . . . . . . . . . . 20
Write the model and serial
numbers here:
Model # _________________
Serial # _________________
They are on the label on the front
of the dryer behind the door.
. . . . . . . . .3
OWNER'S MANUAL
ENGLISH/ESPAÑOL
. . . . . . . . . . .8
. . . . . . 16
234D2113P002
GFD40
GFV40
49-90584 10-17 GEA
Publicidad
Capítulos
Tabla de contenido

Manuales relacionados para GE GFD40


Resumen de contenidos para GE GFD40
-
Página 1: Tabla De Contenido
Write the model and serial numbers here: Model # _________________ Serial # _________________ They are on the label on the front of the dryer behind the door. 234D2113P002 GE is a trademark of the General Electric Company. Manufactured under trademark license. 49-90584 10-17 GEA... - Página 2 THANK YOU FOR MAKING GE APPLIANCES A PART OF YOUR HOME. Whether you grew up with GE Appliances, or this is your first, we’re happy to have you in the family. We take pride in the craftsmanship, innovation and design that goes into every GE Appliances product, and we think you will too.
-
Página 3: Safety Information
IMPORTANT SAFETY INFORMATION READ ALL INSTRUCTIONS BEFORE USING THE APPLIANCE To reduce the risk of fire, explosion, electric shock, or injury to persons when using your appliance, WARNING follow basic precautions, including the following: Read all instructions before using the appliance. DO NOT dry articles that have been previously cleaned in, washed in, soaked in, or spotted with gasoline, dry-cleaning solvents, or other flammable or explosive substances, as they give off vapors that could ignite or explode. - Página 4 IMPORTANT SAFETY INFORMATION READ ALL INSTRUCTIONS BEFORE USING THE APPLIANCE ADDITIONAL GAS DRYER WARNINGS WARNING - Fire or Explosion Hazard Failure to follow safety warnings exactly could result in serious injury, death, or property damage. - DO NOT store or use gasoline or other flammable vapors and liquids in the vicinity of this or any other appliance.
-
Página 5: Getting Started
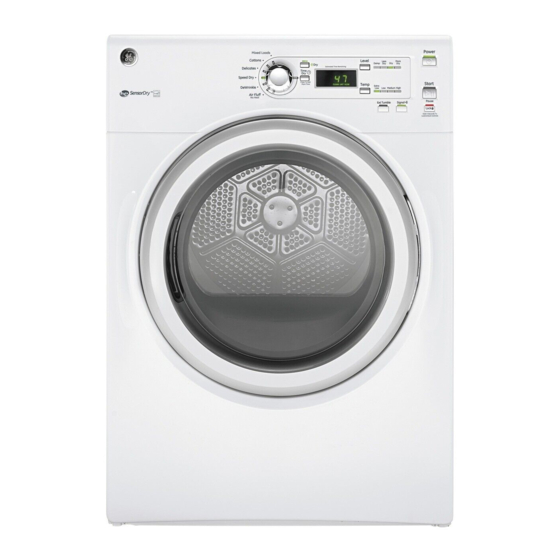
Getting started To reduce the risk of fire, electric shock, or injury to persons, read the IMPORTANT SAFETY WARNING INFORMATION before operating this appliance. WARNING - Fire Hazard • Keep flammable materials and vapors, such as • Items containing foam, rubber, or plastic must be dried gasoline, away from dryer. - Página 6 Getting started Power Press to “wake up” the display. If the display is active, press to turn the dryer off. NOTE: Pressing Power does not disconnect the appliance from the power supply. Dry Cycles The dry cycle controls the length and tumble speed of the drying process. The chart below will help you match the dry setting with the loads.
- Página 7 Getting started Start/Pause Press to start a dry cycle. If the dryer is running, press it once and it will pause the dryer. Press it again to resume the dry cycle. Ext Tumble Minimizes wrinkles by adding approximately 1 hour of no-heat tumbling after clothes are dry.
-
Página 8: Loading
A partially clogged exhaust drum provides the highest reliability available can lengthen the drying time. in a GE Appliances dryer. If the dryer drum The Exhaust Hood: Check with a mirror that should be scratched or dented during normal the inside flaps of the hood move freely when use, the drum will not rust or corrode. -
Página 9: Venting
Venting Venting the Dryer For the best drying performance, the dryer needs to be properly vented. The dryer will use more energy and run longer if it is not vented to the specifications below. Carefully follow the details on Exhausting in the Installation Instructions. Correct Incorrect Venting... -
Página 10: Optional Instructions
Optional Instructions REVERSING THE DOOR SWING (if desired) IMPORTANT NOTES • Read the instructions all the way through IMPORTANT: Once you begin, do not move the before starting. cabinet until door-swing reversal is completed. • Handle parts carefully to avoid scratching paint. These instructions are for changing the hinges •... - Página 11 Optional Instructions REVERSING THE DOOR SWING (if desired) REMOVE HINGE AND COVER REMOVE DOOR ASSEMBLY IMPORTANT: Note the location of the hinge (left A. Open the door to approximately 130 degrees. or right) before removing. • With the screws removed, turn the door over and separate the outer door assembly and hinge cover of the door from the door frame and set aside.
- Página 12 Optional Instructions REVERSING THE DOOR SWING (if desired) REASSEMBLE DOOR ASSEMBLY REINSTALL HINGE COVER A. Insert the hinge cover. Align the hinge cover IMPORTANT: Make sure there is no dirt or any holes with the holes in the door. other foreign material in between the window panes. A.
-
Página 13: Stacking
• Closet doors must be louvered or otherwise ventilated and doors must contain a minimum of 120 square inches of open area. GE APPLIANCES STACK KIT NOTE: WHEN THE EXHAUST DUCT IS LOCATED AT Order on-line at GEApplianceParts.com, 24 hours THE REAR OF THE DRYER, THE CONFIGURATION a day or by phone at 877.959.8688 during normal... - Página 14 Optional Instructions INSTALLING THE STACK BRACKET KIT REMOVE THE DRYER INSTALL BRACKET TO DRYER LEVELING LEGS A. Align the holes in the left bracket with the holes in the bottom left corner of the dryer. Use a Phillips A. Carefully lay the dryer on its side. Use the packing material so you don’t scratch the finish on the dryer.
- Página 15 Optional Instructions INSTALLING THE STACK BRACKET KIT INSTALL DRYER AND FINALIZE THE INSTALLATION BRACKET ON WASHER Do not push on the dryer once CAUTION installed to top of the washer. Disconnect power before installing. WARNING Pushing on the dryer may result in pinched fingers. Failure to do so could result in serious injury or death.
-
Página 16: Troubleshooting Tips
Troubleshooting Tips... Before you call for service Problem Possible Cause What To Do Dryer shakes or Some shaking/noise is normal. Move dryer to an even floor space, or adjust leveling legs as makes noise Dryer may be sitting unevenly. necessary until even. Clothes take Improper or obstructed Check the Installation Instructions to make sure the dryer... - Página 17 Troubleshooting Tips... Before you call for service Problem Possible Causes What To Do Dryer doesn’t Fuse is blown/circuit breaker Check the building’s fuse/circuit breaker box and replace both heat is tripped; the dryer may fuses or reset both breakers. Your dryer may tumble if only one tumble but not heat fuse is blown or one breaker tripped.
- Página 18 Try a fabric softener. Bounce Fabric Conditioner Dryer Sheets have been approved for ® use in all GE Appliances dryers when used in accordance with the manufacturer’s instructions. Overdrying Try a fabric softener. Adjust setting to Less Dry or Damp.
-
Página 19: Warranty
This warranty is extended to the original purchaser and any succeeding owner for products purchased for home use within the USA. If the product is located in an area where service by a GE Appliances Authorized Servicer is not available, you may be responsible for a trip charge or you may be required to bring the product to an Authorized GE Appliances Service location for service. -
Página 20: Consumer Support
Have a question or need assistance with your appliance? Try the GE Appliances Website 24 hours a day, any day of the year! You can also shop for more great GE Appliances products and take advantage of all our on-line support services designed for your convenience. - Página 21 Modelo # ________________ Serie # __________________ Se encuentran en una etiqueta en el frente de la secadora detrás de la puerta. 234D2113P002 GE es una marca registrada de General Electric Company. Fabricado bajo licencia de marca. 49-90584 10-17 GEA...
- Página 22 GRACIAS POR HACER QUE GE APPLIANCES SEA PARTE DE SU HOGAR. Ya sea que haya crecido usando GE Appliances, o que ésta es su primera vez, nos complace tenerlo en la familia. Sentimos orgullo por el nivel de arte, innovación y diseño de cada uno de los electrodomésticos de GE Appliances, y creemos que usted también.
-
Página 23: Información De Seguridad
INFORMACIÓN IMPORTANTE DE SEGURIDAD LEA TODAS LAS INSTRUCCIONES ANTES DE USAR Para reducir el riesgo de incendio, explosión, descargas eléctricas o lesiones sobre las ADVERTENCIA personas al usar su electrodoméstico, siga las precauciones básicas, incluyendo lo siguiente: Lea todas las instrucciones antes de usar este electrodoméstico. NO seque prendas que en forma previa hayan sido secadas, lavadas, penetradas, o manchadas con gasolina, solventes de limpieza en seco, u otras sustancias inflamables o explosivas, ya que despiden vapores que se podrían encender o explotar. - Página 24 INFORMACIÓN IMPORTANTE DE SEGURIDAD LEA TODAS LAS INSTRUCCIONES ANTES DE USAR ADVERTENCIAS ADICIONALES SOBRE LA SECADORA A ADVERTENCIA - Riesgo de incendio o de explosión El incumplimiento estricto de las advertencias de seguridad podría resultar en lesiones graves, la muerte o daños a la propiedad. - NO guarde ni use gasolina u otros vapores y líquidos inflamables cerca de éste ni de otros electrodomésticos.
-
Página 25: Puesta En Marcha
Puesta en Marcha Para reducir el riesgo de incendios, descargas eléctricas o heridas, lea las INFORMACIÓN ADVERTENCIA IMPORTANTE DE SEGURIDAD antes de utilizar este electrodoméstico. ADVERTENCIA - Riesgo de incendio • Las prendas con gomaespuma, goma, o plástico • Mantenga cualquier material y vapores inflamables, deberán ser secadas en un tendedero. - Página 26 Puesta en Marcha Power (Encendido/apagado) Pulse este botón para “activar” la pantalla. Si la pantalla está activa, presione para apagar la secadora. NOTA: Al pulsar el botón de Power (encendido/apagado) no se desconecta la lavadora de la corriente. Ciclos de secado El ciclo de secado controla el tiempo y velocidad de giro del proceso de secado.
- Página 27 Puesta en Marcha Start/Pause (Inicio/Pausa) Presione para comenzar un ciclo de secado. Si la secadora está funcionando, presiónelo una vez y la secadora se detendrá. Presiónelo de nuevo para volver al ciclo de secado. Ext Tumble (Secado prolongado) Minimiza las arrugas agregando aproximadamente 1 hora de giro sin calor una vez que esté seca la ropa.
-
Página 28: Carga
El acero inoxidable utilizado para fabricar prolongar el plazo de secado. el tambor de la secadora ofrece la mayor confiabilidad de una secadora GE Appliances. La salida de escape: Verifique, utilizando un Si el tambor de la secadora se raya o abolla espejo, que las aletas interiores de la salida durante un uso normal, éste no se oxidará... -
Página 29: Ventilación
Ventilación Ventilación de la Secadora Para un mejor funcionamiento del secado, es necesario que la secadora sea ventilada de forma apropiada. La secadora usará más energía y funcionará durante más tiempo si no está ventilada de acuerdo con las especificaciones siguientes. -
Página 30: Instrucciones Opcionales
Instrucciones Opcionales CÓMO INVERTIR LA APERTURA DE LA PUERTA (si así se desea) NOTAS IMPORTANTES • Lea todas las instrucciones antes de comenzar. IMPORTANTE: Una vez que haya comenzado, no mueva el gabinete hasta haber finalizado la • Manipule las piezas con cuidado para no rayar inversión de la apertura de la puerta. - Página 31 Instrucciones Opcionales CÓMO INVERTIR LA APERTURA DE LA PUERTA (si así se desea) QUITE LA BISAGRA Y LA TAPA RETIRE EL CONJUNTO DE LA PUERTA IMPORTANTE: Observe la ubicación de la bisagra (izquierda o derecha) antes de quitar. A. Abra la puerta 130 grados aproximadamente. •...
- Página 32 Instrucciones Opcionales CÓMO INVERTIR LA APERTURA DE LA PUERTA (si así se desea) REENSAMBLE CONJUNTO PUERTA REINSTALE TAPA DE LA BISAGRA A. Introduzca la tapa de la bisagra. Alinee los IMPORTANTE: Asegúrese que no haya suciedad agujeros de la cubierta de bisagra con los ni otro material extraño entre los paneles de vidrio.
- Página 33 60 pulgadas cuadradas de espacio abierto. Si el armario incluye una lavadora y una secadora, las puertas deben contener un KIT DE APILADO GE APPLIANCES: mínimo de 120 pulgadas cuadradas de espacio abierto. Ordene hoy a través de Internet en GEAppliancesparts.
-
Página 34: Apilado
Instrucciones Opcionales CÓMO INSTALAR EL KIT DE SOPORTE DE APILADO CÓMO QUITAR LAS PATAS CÓMO INSTALAR EL SOPORTE NIVELADORAS DE LA SECADORA EN LA SECADORA A. Con cuidado coloque la secadora sobre su lado. A. Alinee los orificios del soporte izquierdo con Utilice el material de empaque para no rayar el los orificios del extremo inferior izquierdo de la acabado de la secadora. - Página 35 Instrucciones Opcionales CÓMO INSTALAR EL KIT DE SOPORTE DE APILADO INSTALAR LA SECADORA Y EL FINALICE LA INSTALACIÓN SOPORTE EN LA LAVADORA No empuje la secadora una PRECAUCIÓN vez que se haya instalado Desconecte la energía ADVERTENCIA sobre la lavadora. Si empuja la secadora puede antes de instalar.
-
Página 36: Consejos Para Solución De Problemas
Consejos para la solución de problemas Problema Causas posibles Solución La secadora se El movimiento/ruido es normal. Desplace la secadora a un lugar nivelado, o ajuste las patas niveladoras mueve o hace ruido La secadora puede estar según sea necesario. colocada en un lugar desnivelado Las prendas Conducto inadecuado u obstruido Controle las Instrucciones de instalación para verificar que la... - Página 37 Consejos para la solución de problemas Problema Causas posibles Solución Mensaje “Clean Se activó el botón Power Presione Start/Pause (Inicio/Pausa) para iniciar un ciclo de secado y Filter” (Limpie filtro (Encendido/Apagado) desaparecerá el mensaje. de pelusa) La secadora no Fusible quemado/disyuntor Revise la caja de fusibles/disyuntores y reemplace ambos fusibles y calienta desconectado;...
- Página 38 Intente utilizar un suavizador de telas. suavizador de telas Bounce® Fabric Conditioner Dryer Sheets ha sido aprobado para ser usado con todas las Secadoras GE Appliances y cuando se usen de acuerdo con las instrucciones del fabricante. Sobresecado Intente utilizar un suavizador de telas.
- Página 39 GE Appliances la información sobre su electrodoméstico. Si no desea que los datos de su electrodoméstico sean enviados a GE Appliances, solicitamos que le indique a su técnico NO entregar los datos a GE Appliances en el momento del servicio.
- Página 40 En EE.UU.: GEAppliances.com/register Servicio Programado El servicio de reparación de expertos de GE Appliances está a sólo un paso de su puerta. Conéctese a través de Internet y programe su servicio a su conveniencia cualquier día del año.