Tabla de contenido
Publicidad
Idiomas disponibles
Idiomas disponibles
Enlaces rápidos
Publicidad
Tabla de contenido
Solución de problemas

Manuales relacionados para EUFY RoboVac G20


Resumen de contenidos para EUFY RoboVac G20
- Página 1 RoboVac G20 Owner’s Manual T2257 51005003140 V01...
-
Página 2: Tabla De Contenido
Table of Contents Important Safety Instructions About Your RoboVac What's in the Box RoboVac Anatomy LED Indication Using Your RoboVac Important Tips Before Use Preparation Charge Your RoboVac Use Your RoboVac with the EufyHome App Start / Stop Cleaning Select a Cleaning Mode English Select a Suction Power Level Select BoostIQ™... -
Página 3: Important Safety Instructions
Important Safety Instructions connector. • The used battery should be placed in a sealed plastic bag and disposed of safely according to local environmental To reduce the risk of injury or damage, keep these instructions regulations. at hand when setting up, using, and maintaining this device. •... -
Página 4: Fcc Statement
Notice this device. Use only on hard floor surfaces or low-pile carpets, and not on carpets with tasseled edges or loose threads. This symbol on the device or its packaging • This device has been designed to be used on floors indicates: without scratching them. -
Página 5: Declaration Of Conformity
Equipment Regulations 2012. The full text of the GB experienced radio / TV technician for help. declaration of conformity is available at the following internet address: https://www.eufy.com. ISED Compliance Statement The following importer is the responsible party (contract for This device contains license-exempt transmitter(s)/... -
Página 6: Consignes De Sécurité Importantes
Consignes de sécurité importantes GSCU0600S019V12E ; R-U :GSCB0600S019V12E ; AUS : GSCV0600S019V12E ; UE : GSCS0600S019V12E) fourni avec cet appareil. Pour réduire le risque de blessure ou de dommage, gardez • La batterie doit être retirée de cet appareil avant de le ces consignes de sécurité... - Página 7 cordon d'alimentation et le traîne avec lui, un objet peut ou modifié. Les batteries endommagées ou modifiées tomber d'une table ou d'une étagère. peuvent présenter un fonctionnement imprévisible risquant d'entraîner un incendie, une explosion ou des • Si la pièce à nettoyer possède un balcon, une barrière blessures.
-
Página 8: Déclaration Fcc
Avis raisonnable contre des interférences nuisibles dans une installation résidentielle. Ce symbole sur le produit ou son emballage Cet appareil génère, utilise et peut émettre des fréquences indique : radio qui peuvent causer des interférences nuisibles aux Ne jetez pas les appareils électriques de la même radiocommunications si l’appareil n’est pas installé... -
Página 9: About Your Robovac
About Your RoboVac d'interférences radio de la Communauté européenne. Par les présentes, Anker Innovations Limited déclare que l'équipement radio de type T2257 est conforme à la What's in the Box directive 2014/53/UE. Le texte complet de la déclaration de conformité à la réglementation européenne est disponible à l'adresse Internet suivante : https://www.eufylife.com/ Puissance de sortie maximale : 18 dBm (pour l'UE) Bande de fréquence : Bande 2,4 G (2,4000 GHz -... -
Página 10: Robovac Anatomy
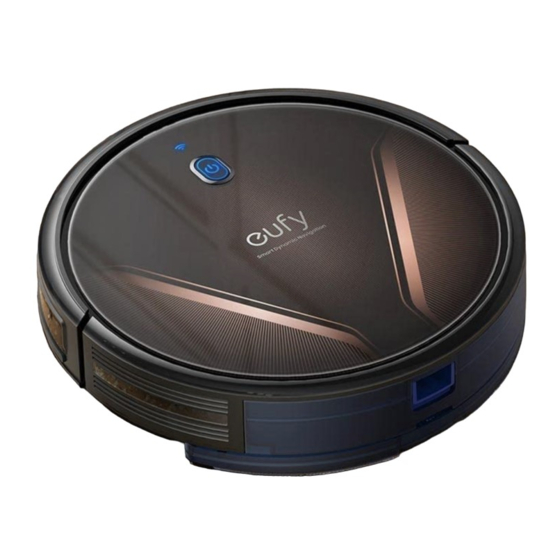
RoboVac Anatomy C. Dust Collector Filter Filter A. Top & Side Auto cleaning control button Auto cleaning control button Wi-Fi status light Wi-Fi status light Bumper Bumper D. Suction Inlet Dust collector Dust collector Dust collector Dust collector release button Dust collector Dust collector release button B. -
Página 11: Led Indication
Using Your RoboVac LED Indication You can see the status of RoboVac from the LED indicators. Important Tips Before Use (Power Status Light) Status Pulsing orange Charging Solid blue Standby / Cleaning / Fully charged Solid orange Low power and returning to Charging Base •... -
Página 12: Preparation
Charging Base. If you cannot remove the objects, move RoboVac to a new place and check whether RoboVac can return to the Charging Base normally; if not, contact eufy customer service for help. Turn on the main power switch on the bottom of RoboVac. -
Página 13: Charge Your Robovac
(Android devices). 2. Open the app and create a user account. 3. Tap the “+” icon to add “RoboVac G20” to your EufyHome account. 4. Follow the instructions in the app to set up the Wi-Fi connection. - After connecting successfully, you can control RoboVac via the app. -
Página 14: Schedule Cleaning
Schedule Cleaning Select a Cleaning Mode With the EufyHome app, you can schedule RoboVac to start cleaning at a particular Auto Cleaning Mode time. After startup, RoboVac moves from the Charging Base and automatically determines • You can set the time and customize the cleaning schedules from Sunday its cleaning route, following a bow-shaped cleaning method. -
Página 15: Spot Cleaning Mode
Select BoostIQ™ feature • During cleaning, RoboVac will return to the Charging Base automatically if the battery level becomes low. Once recharged, RoboVac will resume In the EufyHome app, select the BoostIQ™ feature according to your needs. RoboVac to finish the remaining cleaning. will automatically increase the suction power if it detects that stronger power is •... -
Página 16: Cleaning And Maintenance
Cleaning and Maintenance Open and empty the dust collector. Before cleaning and maintaining, turn off the device and unplug the adapter. For optimal performance, follow the instructions below to clean and maintain RoboVac regularly. The cleaning / replacement frequency will depend on your RoboVac usage habits. -
Página 17: Clean The Rolling Brush
Clean the Rolling Brush Rinse the dust collector and filter thoroughly with water. Pull on the release tabs to unlock the brush guard as shown. Lift the rolling brush to remove. Clean the rolling brush with the cleaning tool. Reinstall the rolling brush by inserting the fixed protruding end first and then clicking into place. -
Página 18: Clean The Side Brush
Clean the Side Brush Replace the Side Brush Foreign substances, such as hair, can easily get tangled in the side brush, and dirt may The side brush may become damaged after being used for a period of time. Follow the adhere to it. -
Página 19: Clean The Swivel Wheel
• Check if the indicator on the Charging Base lights up. If not, reconnect the adapter with the Charging Base and try a new power outlet. If the problem persists, contact the eufy service center to repair or replace the Charging RoboVac cannot be Base. -
Página 20: Voice Alert
• If your cleaning time is much less than the time If not, move the device to a new position and try again. mentioned above, contact eufy customer service for help. Wheel may be stuck or trapped. Clear any obstacles •... -
Página 21: Specifications
Specifications Voice Prompt Cause and Solution Wheels may be suspended in air. Move the device to Error 7: Wheel Stuck a flat surface and a new position close to the original Battery Voltage 14.4 V Hanging position then try again. Power Consumption 55 W Error 8: Low Battery,... -
Página 22: Customer Service
Customer Service For tutorial videos, FAQs, manuals, and more information, please visit: support.eufylife.com. Contact Us support@eufylife.com www.eufylife.com (US) +1 (800) 988 7973 Mon-Fri 6:15 - 17:00 (PT); Sat-Sun 6:30-16:30 (PT) (UK) +44 (0) 1604 936200 Mon-Fri 6:00 - 17:00; Sat-Sun 6:00-14:00 (DE) +49 (0) 69 9579 7960 Mo-Fr 8:00 - 16:00 (日本) 03 4455 7823 月-金... - Página 23 Español Índice 44 Instrucciones de seguridad importantes Acerca del RoboVac QUÉ HAY EN LA CAJA Anatomía del RoboVac Indicación LED Uso del RoboVac Consejos importantes antes del uso Preparación Carga del RoboVac Uso del RoboVac con la aplicación EufyHome Inicio/detención de la limpieza Selección de un modo de limpieza Selección de un nivel de potencia de aspiración Selección de la función BoostIQ™...
-
Página 24: Instrucciones De Seguridad Importantes
Español Español Instrucciones de seguridad importantes tornillos en la parte inferior y luego retire la tapa trasera. Para quitar la batería, desconecte el conector rápido. • La batería usada se debe colocar en una bolsa de A fin de reducir el riesgo de lesiones o daños, conserve las plástico sellada y se debe desechar de forma segura y de instrucciones a mano durante la configuración, el uso y el conformidad con las normativas ambientales locales. -
Página 25: Declaración De La Fcc
Español Español Aviso • No exponga el sistema electrónico del dispositivo, su batería ni la base de carga integrada. No hay partes dentro que el usuario pueda reparar. Este símbolo en el dispositivo o en su embalaje • No utilice el dispositivo sobre suelos en bruto, sin sellar, indica lo siguiente: encerados o ásperos. -
Página 26: Declaración De Conformidad Con La Exposición A Radiofrecuencia
Internet: https:// 1. Este dispositivo no puede causar interferencias. www.eufy.com. 2. Este dispositivo debe aceptar cualquier interferencia La siguiente empresa importadora es la parte responsable recibida, incluida la interferencia que pueda causar un (persona de contacto para la UE y el Reino Unido) funcionamiento no deseado del dispositivo. -
Página 27: Acerca Del Robovac
Español Español Acerca del RoboVac ANKER TECHNOLOGY (UK) LTD Suite B, Fairgate House, 205 Kings Road, Tyseley, QUÉ HAY EN LA CAJA Birmingham, B11 2AA, Reino Unido Anker Innovations Deutschland GmbH Georg-Muche-Strasse 3, 80807 Múnich, Alemania Aviso de marcas registradas •... -
Página 28: Anatomía Del Robovac
Español Español Anatomía del RoboVac C. Depósito de polvo Filtro Filter A. Parte superior y lateral Botón de control de limpieza automática Auto cleaning control button Luz de estado de Wi-Fi Wi-Fi status light Paragolpes Bumper D. Entrada de succión Recolector de polvo Dust collector Dust collector... -
Página 29: Indicación Led
Español Español Uso del RoboVac Indicación LED Puede ver el estado del RoboVac en los indicadores LED. Consejos importantes antes del uso (Luz de estado de Estado energía) Naranja intermitente Cargando Azul fijo En espera/Limpieza/Completamente cargado Naranja fijo Baja potencia y regreso a la base de carga •... -
Página 30: Preparación
Si no puede quitar los objetos, cambie el RoboVac de sitio y verifique si RoboVac puede regresar sin ayuda a la base de carga con normalidad; si no es así, comuníquese con el servicio de atención al cliente de eufy para obtener ayuda. -
Página 31: Carga Del Robovac
Play (dispositivos Android). 2. Abra la aplicación y cree una cuenta de usuario. 3. Pulse el icono "+" para agregar "RoboVac G20" a su cuenta de EufyHome. 4. Siga las instrucciones de la aplicación para configurar la conexión Wi-Fi. - Una vez conectado correctamente, podrá controlar el RoboVac a través de la aplicación. -
Página 32: Programación De La Limpieza
Español Español Restablecer la conexión Wi-Fi Selección de un modo de limpieza Para restablecer la conexión Wi-Fi, mantenga pulsado durante 10 segundos Modo de limpieza automática hasta que escuche un mensaje de voz. Al mismo tiempo, RoboVac restaurará la configuración predeterminada de fábrica. Después del inicio, el RoboVac abandona la base de carga y determina - La luz de estado de Wi-Fi parpadeará... -
Página 33: Modo De Limpieza Localizada
Español Español Selección de la función BoostIQ™ • Durante la limpieza, el RoboVac volverá a la base de carga automáticamente si el nivel de la batería es bajo. Una vez recargado, el En la aplicación EufyHome, seleccione la función BoostIQ™ según sus necesidades. RoboVac se reanudará... -
Página 34: Limpieza Y Mantenimiento
Español Español Limpieza y mantenimiento Limpieza de los filtros y el recolector de polvo Presione el botón de liberación del depósito de polvo para sacar el depósito de Antes de proceder a la limpieza y el mantenimiento, apague el dispositivo y polvo. -
Página 35: Limpieza Del Cepillo Giratorio
Español Español Limpie el depósito de polvo y el filtro con el cepillo de limpieza. Vuelva a colocar el filtro en el depósito de polvo. Devuelva el depósito de polvo a su lugar presionándolo sobre la unidad principal. Enjuague el depósito de polvo y el filtro a fondo con agua. Limpieza del cepillo giratorio Tire de las lengüetas de liberación para desbloquear la protección del cepillo como se muestra. -
Página 36: Limpieza Del Cepillo Lateral
Español Español Desenrolle y retire con cuidado cualquier cabello o cuerda que esté enrollada entre la unidad principal y el cepillo lateral. Utilice un paño humedecido con agua tibia para quitar el polvo del cepillo o para darle una nueva forma. Utilice el cepillo lateral solo cuando esté... -
Página 37: Limpieza De Los Sensores Y Los Contactos De Carga
Español Español Limpieza de los sensores y los contactos de carga Limpie cualquier suciedad o pelo enrollado alrededor de la rueda o enredado dentro de la cavidad de la rueda. Vuelva a instalar la rueda y empújela hasta que encaje en su lugar. Para mantener un rendimiento óptimo, limpie los sensores de desnivel y los contactos de carga con frecuencia. - Página 38 Si no es así, póngase en la banda de 5 GHz). contacto con el centro de servicio de eufy para reparar o sustituir la base de carga. • Retire los objetos que se encuentren a una distancia de...
-
Página 39: Alerta De Voz
Español Español Problemas Soluciones Mensaje de voz Causa y solución • Compruebe si existe algún problema de conexión a Puede que la rueda esté atascada o atrapada. Elimine cualquier obstáculo en el área circundante y revise Internet. Error 2: Rueda atascada la rueda en busca de polvo atrapado. -
Página 40: Especificaciones
Español Español Servicio de atención al cliente Mensaje de voz Causa y solución - Compruebe si el cepillo lateral está atascado en un Para ver vídeos tutoriales, preguntas frecuentes, manuales y más información, objeto desconocido antes de reiniciar el dispositivo. Error S3: Error de cepillo lateral visite: soporte.