Publicidad
Publicidad
Tabla de contenido

Manuales relacionados para Hansgrohe AXOR 250 2jet 35298 Serie


Resumen de contenidos para Hansgrohe AXOR 250 2jet 35298 Serie
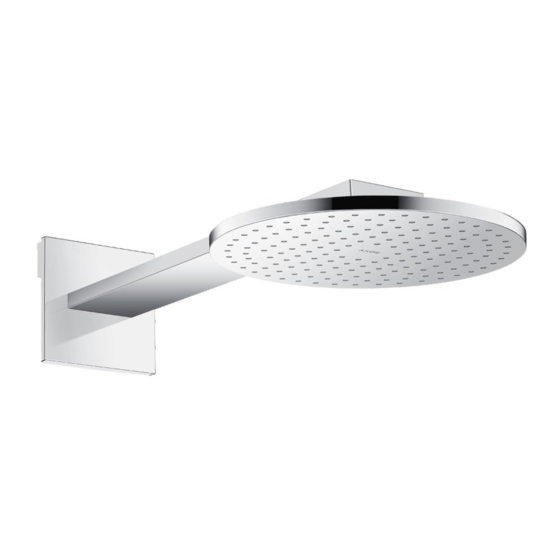
- Página 1 AXOR 250 2jet 35298xx1 AXOR 250 2jet 35366xx1 AXOR 250⁄250 2jet EN Installation / User Instructions / Warranty 35313xx1 FR Instructions de montage / Mode d'emploi / Garantie AXOR 250⁄250 2jet ES Instrucciones de montaje / Manejo / Garantía 35315xx1 I N S T A L L A T I O N I N S T A L L A T I O N...
-
Página 2: Technical Information
T EC HN I C A L I N FO RMATIO N Max. flow rate 35298xx1, 35313xx1 2.5 GPM (9.5 L/min) 35366xx1, 35315xx1 1.75 GPM (6.6 L/min) I NSTALL ATI ON CO N SIDE R ATION S ⁄ For best results, Hansgrohe recommends that this unit ⁄ #35366xx11, 35315xx1 only: This showerhead is be installed by a licensed, professional plumber. for use with automatic compensating valves rated at 1.3 GPM (4.9 L/min) or less. ⁄ Please read over these instructions thoroughly before beginning installation. Make sure that you ⁄ To prevent scald injury, the maximum output tem-... - Página 3 D ON N É E S T EC HN I Q UES Capacité nominale 35298xx1, 35313xx1 2.5 GPM (9.5 L/min) 35366xx1, 35315xx1 1.75 GPM (6.6 L/min) À P RE N D R E E N CO NSIDÉ R ATION P OU R L’ IN STA LL ATION ⁄ Pour de meilleurs résultats, Hansgrohe recommande ⁄ 35366xx1, 35315xx1 seulement: Cette pomme de que ce produit soit installé par un plombier profes- douche doit être utilisée avec une soupape qui com- pense automatiquement, et est évalué à 1.3 GPM sionnel licencié. (4.9 L/min) ou moins.
-
Página 4: Datos Tecnicos
E S P A Ñ O L DATOS TEC N ICO S Caudal máximo 35298xx1, 35313xx1 2.5 GPM (9.5 L/min) 35366xx1, 35315xx1 1.75 GPM (6.6 L/min) CO NSI D E R AC IO N E S PAR A L A IN STAL ACI ÓN ⁄ Para obtener mejores resultados, la instalación ⁄ 35366xx1, 35315xx1 solamente: Esta ducha ca- debe estar a cargo de un plomero profesional bezal debe ser utilizada con una válvula que com- pensa automáticamente, y es valorado en 1.3 GPM matriculado. - Página 5 2⅛" (53 mm) 2⅞" (72 mm) AXOR 250 2jet 35298xx1 5¾"/5¾" 2⅞" 2⅛" 35366xx1 (145/145 mm) (72 mm) (53 mm) 1¾" (45 mm) 1¾" (45 mm) 1⅛" (28 mm) Ø 9⅞" (250 mm) G½ G½ 4" ⅞" (22 mm) (103 mm) 4⅞" (125 mm) 9⅜"(238 mm) AXOR 250⁄250 2jet...
- Página 6 I N S T A L L A T I O N / I N S T A L L A T I O N / I N S T A L A C I Ó N 13 mm E N G L I S H F R A N ...
- Página 7 E N G L I S H F R A N A I S E S P A Ñ O L Remove the plugs from the hoses Retirez les bouchons des tuyaux Quite los tapones de las in the rough. dans la pièce intérieure. mangueras en la pieza interior. Turn the water on and allow the Ouvrez l’eau et rincez les Abra el paso de agua y permita lines to flush. conduites. que las líneas se enjuaguen.
- Página 8 3 mm 3 mm E N G L I S H F R A N A I S E S P A Ñ O L Push the hoses back into place in Remettez les tuyaux en place Coloque las mangueras nueva- the dummy. dans le patron de montage. mente en su lugar en la plantilla. Remove the showerhead function Retirez du compartiment le bloc Quite el bloque de función del block from the housing. de fonction de la pomme de cabezal de ducha de la carcasa douche.
- Página 9 E N G L I S H F R A N A I S E S P A Ñ O L Score the center seal on the Incisez le joint central du Marque el sello central en la housing. compartiment. carcasa. Remove the dummy from the Retirez le patron de montage du Quite la plantilla del cielo raso. ceiling. plafond.
- Página 10 E N G L I S H F R A N A I S E S P A Ñ O L Insert the housing in the Insérez le compartiment dans le Inserte la carcasa en el cielo ceiling,pulling the supply hoses plafond, en passant les tuyaux raso, tirando de las mangueras and the grounding wire through d’alimentation et le fil de terre au de suministro y el cable de tierra the seals. travers des joints. a través de los sellos.
- Página 11 13 mm E N G L I S H F R A N A I S E S P A Ñ O L Secure the housing using the Fixez le compartiment à l’aide Fije la carcasa usando las aran- washers and nuts. des rondelles et écrous. delas y tuercas. Seal the ceiling around the edges Scellez le plafond autour des Selle el cielo raso alrededor de of the housing using waterproof rebords du compartiment à l’aide los bordes de la carcasa, usando sealant. d’un agent d’étanchéité. un sellador impermeable.
- Página 12 24 mm 10 mm Ø 4 mm² E N G L I S H F R A N A I S E S P A Ñ O L Connect the grounding wire. Connectez le fil de terre. Conecte el cable de tierra. Lightly lubricate the o-rings on the Lubrifiez légèrement les Lubrique ligeramente los retenes supply hoses. joints toriques sur les tuyaux anulares de las mangueras de d’alimentation. suministro. Connect the supply hoses to the function block. Connectez les tuyaux Conecte las mangueras de sumin- d’alimentation au bloc de istro al bloque de función.
- Página 13 3 mm 3 mm E N G L I S H F R A N A I S E S P A Ñ O L Connect the function block to the Connectez le bloc de fonction au Conecte el bloque de función a housing. compartiment. la carcasa. Lightly lubricate the o-rings on the Lubrifiez légèrement les joints to- Lubrique ligeramente los retenes showerhead. riques sur la pomme de douche. anulares del cabezal de ducha.
- Página 14 CLICK E N G L I S H F R A N A I S E S P A Ñ O L Push the showerhead over the Poussez la pomme de douche sur Empuje el cabezal de ducha housing so that the nipple on the le compartiment de manière à ce sobre la carcasa, de manera tal top of the showerhead goes into que le raccord sur le dessus de la que el niple de la parte superior the port on the function block. pomme de douche s’insère dans del cabezal de ducha entre en el le port sur le bloc de fonction. puerto del bloque de función. Rotate the showerhead until it Tournez la pomme de douche Rote el cabezal de ducha hasta clicks.
- Página 15 N O ! E N G L I S H F R A N A I S E S P A Ñ O L Do not seal the ceiling Ne scellez pas le No selle el cielo raso around the showerhead. plafond autour de la alrededor del cabezal pomme de douche. de ducha.
- Página 16 R E P L A C E M E N T P A R T S / P I È C E S D É T A C H É E S / R E P U E S T O S AXOR 250 2jet AXOR 250⁄250 2jet 35298xx1...
- Página 17 C L E A N I N G / N E T T O Y A G E / L I M P I E Z A...
- Página 18 scale remover détartrant commercial desincrustante comercial CLICK...
- Página 20 TROU B LES H OOT IN G P RO B L E M P OS SI BL E C AU SE S O LUTI O N Shower drips continuously Not a problem with the shower head - shut- Service the shutoff valve according to the manufacturer’s off valve (not included) dirty or worn instructions Water drips from showerhead for a few Normal clearing of showerhead - not a minutes after the shutoff unit is closed problem Spray channels not functioning correctly Filters are dirty Clean the filters - see page 17 Spray channels clogged with scale Clean / descale the showerhead - see page 17 Low flow from showerhead Filters are dirty Clean the filters - see page 17 Water pressure too low...
- Página 21 C L E A N I N G RECOMME NDAT ION FO R HANS GROHE P RODUCTS Modern bathroom faucets, kitchen faucets and shower products are made from different materials to comply with the needs of the market with regard to design and functionality. To avoid damage to the product, it is necessary to take proper care of it. FOR BEST RESULTS: ⁄ Prevent the buildup of mineral scale and /or soap residue by cleaning your Hansgrohe product(s) when needed. ⁄ Select a cleaning agent specifically intended for the type of product. ⁄ DO NOT use these types of cleaners as they will cause damage to your Hansgrohe product: • Any cleaning agent containing hydrochloric acid, formic acid, lye, or acetic acid. • Abrasive cleaning powders, pads, or brushes. • Steam cleaners. • “No rinse” cleaning agents. ⁄ ALWAYS follow the instructions provided by the manufacturer of the cleaning agent. ⁄ DO NOT mix cleaning agents, unless directed by the manufacturer. ⁄ DO NOT spray cleaners directly onto the product as drops could enter openings and gaps and cause damage. When using spray cleaners, spray the cleaner onto a soft cloth or sponge. ⁄...
-
Página 22: Para Obtener Mejores Resultados
IMPORTANT ⁄ Les residus de produits pour le corps comme les savons liquides, shampooings, gels de douche, teintures pour cheveux, parfums, apres-rasage et vernis a ongles peuvent causer des deteriorations. Rincez le produit avec de l’eau propre après chaque utilisation. ⁄ Le résidu provenant des nettoyants pour cuvette/baignoire/carrelage peut endommager les robinets et les raccords de tuyauterie. Rincez immédiatement toute surpulvérisation sur le produit Hansgrohe. ⁄ De meme, il est interdit de stocker des detergents ou des produits chimiques sous les produits, par ex. dans un meuble sous lavabo, car les vapeurs qui s’en degagent risquent d’abimer les produits. ⁄ LES DOMMAGES AU PRODUIT CAUSÉS PAR UN MAUVAIS ENTRETIEN OU PAR L’UTILISATION DE PRODUITS DE NETTOYAGE INADÉQUATS NE SONT PAS COUVERTS PAR LA GARANTIE. ⁄ SI UN COMPOSANT DU PRODUIT EST ENDOMMAGÉ, REMPLACEZ-LE, CAR IL EXISTE UN RISQUE DE BLESSURE. R ECOME NDAC IÓ N D E L IM PIE ZA PAR A LOS PROD UCTOS DE H AN SGROHE Hoy en día, las griferías de baño y de cocina así como duchas modernas se componen de materiales muy distintos para satisfacer las exigencias del mercado respecto al diseño y la funcionalidad. Para evitar daños y reclamaciones hay que tener en cuenta ciertos aspectos tanto en el uso como en su limpieza. PARA OBTENER MEJORES RESULTADOS: ⁄... -
Página 24: What Is Not Covered By The Warranty
(iii) hansgrohe or AXOR products purchased from unauthorized originally installed. For commercial purchasers, the warranty period sellers. is (a) one (1) year for hansgrohe products and (b) five (5) years WHAT YOU MUST DO TO OBTAIN WARRANTY SERVICE for AXOR products, in each case from the date of purchase. The OR INFORMATION... - Página 25 LABOR CHARGES TO REPAIR, REPLACE, INSTALL OR REMOVE THIS PRODUCT), WHETHER ARISING OUT OF BREACH OF ANY EXPRESS OR IMPLIED WARRANTY, BREACH OF CONTRACT, TORT, OR OTHERWISE. HANSGROHE, INC. SHALL NOT BE LIABLE FOR ANY DAMAGE TO THE PRODUCT RESULTING FROM REASONABLE WEAR AND TEAR, OUTDOOR USE, MISUSE (INCLUDING USE OF THE PRODUCT FOR AN UNINTENDED...
- Página 28 AXOR ⁄ Hansgrohe, Inc. 1490 Bluegrass Lakes Parkway Alpharetta, GA 30004 Tel. 800-334-0455 Fax 770-889-1783 axor-design.com...