Electrolux EWX127410W Manual De Instrucciones
Ocultar thumbs
Ver también para EWX127410W:
- Manual de instrucciones (80 páginas) ,
- Manual de instrucciones (64 páginas)

Manuales relacionados para Electrolux EWX127410W


Resumen de contenidos para Electrolux EWX127410W
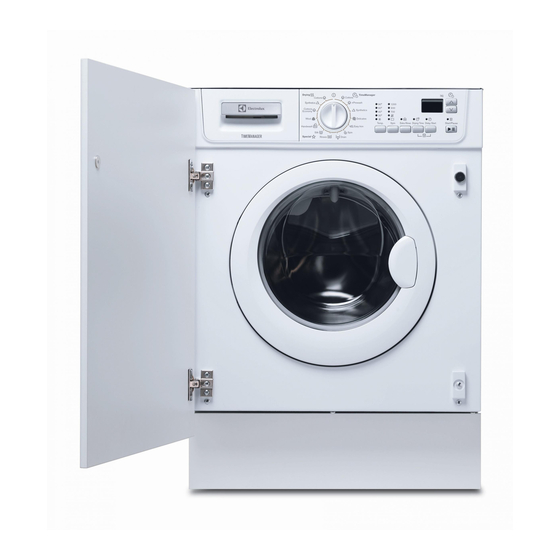
- Página 1 EWX127410W Washer dryer User Manual Lavadora-secadora Manual de instrucciones...
-
Página 2: Tabla De Contenido
2 electrolux Electrolux. Thinking of you. Share more of our thinking at www.electrolux.com CONTENTS Safety information Washing programmes Safety instructions Drying Programmes Product description Care and cleaning Control panel What to do if… First use Technical data Personalisation Consumption values... -
Página 3: General Safety
3 GENERAL SAFETY • Before maintenance, deactivate the appliance and discon- nect the mains plug from the mains socket. • Do not change the specification of this appliance. • Obey the maximum load volume of 7 kg (refer to the “Pro- gramme chart”... - Página 4 4 electrolux • Do not pull the mains cable to disconnect • Before drying items that have been in the appliance. Always pull the mains contact with substances such as cooking plug. oil, acetone, alcohol , petrol, kerosene, • Do not touch the mains cable or the spot removers, turpentine, waxes and mains plug with wet hands.
-
Página 5: Product Description
5 PRODUCT DESCRIPTION Your new appliance meets all modern requirements for effective treatment of laundry with low water, energy and detergent consumption. Its new washing system allows total use of detergent and reduces water consumption so saving energy. Detergent dispenser drawer... -
Página 6: Detergent Dispenser Drawer
6 electrolux DETERGENT DISPENSER DRAWER Compartment for detergent used for prewash and soak phase or for stain re- mover used during the stain action phase (if available). The prewash and soak detergent is added at the beginning of the wash pro- gramme. - Página 7 7 PROGRAMME SELECTOR DIAL time you want appears on the display ac- cording to the fabrics (cottons or synthetics) It allows you to switch the appliance on/off you have to dry. For Cottons you can select and/or to select a programme.
- Página 8 8 electrolux DISPLAY The display shows the following informa- integrated red light of button 8 start flash- tion: ing. 7.1: • End of programme • Duration of the selected programme When the programme has finished three After selecting a programme, the duration...
-
Página 9: First Use
9 7.4: Child safety lock (see «Child Safe- ty Lock» paragraph). TABLE OF SYMBOLS = Cold Wash = Door locked = No Spin = Child Lock └ ┘ = Rinse Hold FIRST USE • Ensure that the electrical and water... - Página 10 10 electrolux Caution! If you turn the programme ment or in the appropriate compartment selector dial to another programme if the selected programme/option it requires when the machine is working, the red (see more details in «Detergent dispenser pilot light of button 8 will blink 3 times drawer»).
-
Página 11: Altering An Option Or A Running Programme
11 peatedly, to select the desired delay. The SELECT THE TIME MANAGER OPTION relevant pilot light goes on. BY PRESSING BUTTONS 10 The selected delay time value (up to 20 By pressing these buttons repeatedly, the hours) will appear on the display a few sec-... -
Página 12: Use - Drying
12 electrolux INTERRUPTING A PROGRAMME AT THE END OF THE PROGRAMME Press the button 8 to interrupt a pro- The machine stops automatically. Three gramme which is running, the correspond- blinking 0.00 appear on the display and the ing green pilot light starts blinking. -
Página 13: Use - Washing & Drying
13 4. Set the timed drying: press the button 7. Turn the selector dial to the O position 5 until the time you want appears on to switch the machine off. the display (see the «Drying Pro- 8. Remove the laundry from the drum. -
Página 14: Helpful Hints And Tips
14 electrolux 5. Start the programme by pressing but- 6. At the end of the programme turn the ton 8. The time remaining is updated selector dial to the O position to switch every minute on the display. the machine off and remove the laun- dry. -
Página 15: Detergents And Additives
15 DETERGENTS AND ADDITIVES Follow the product manufacturer’s recom- mendations on quantities to use and do Good washing results also depend on the not exceed the «MAX» mark in the de- choice of detergent and use of the correct tergent dispenser drawer. -
Página 16: Washing Programmes
16 electrolux The detergent and any additives must be • speed of the final spin placed in the appropriate compartments of • dryness degree required (iron dry, store the dispenser drawer before starting the dry) wash programme. • type of laundry If using liquid detergents, a programme •... - Página 17 17 Programme - Maximum and Minimum Tempera- Detergent Com- ture - Cycle Description - Maximum Spin Speed - Options partment Maximum Fabrics Load - Type of Laundry Delicados NO SPIN 40° - 30° RINSE HOLD Main wash - Rinses...
-
Página 18: Drying Programmes
18 electrolux Programme - Maximum and Minimum Tempera- Detergent Com- ture - Cycle Description - Maximum Spin Speed - Options partment Maximum Fabrics Load - Type of Laundry Lana CENTRIFUGADO 40° - 30° NO SPIN Main wash - Rinses RINSE HOLD Maximum spin speed at 900 rpm Max. -
Página 19: Care And Cleaning
19 Suggested Degree of Drying Type of Fabric Max Load Spin Speed drying time in Mins 90 - 100 Suitable for items to put Synthetics and 2 kg 55 - 65 away without ironing mixed fabrics 1 kg 140 - 150... -
Página 20: Drain Pump
20 electrolux DRAIN PUMP The pump should be inspected regularly and particularly if: • the appliance does not empty and/or spin; • the appliance makes an unusual noise during draining due to objects such as safety pins, coins etc. blocking the pump;... - Página 21 21 5. When no more water comes out, un- 8. Replace the filter into the pump by in- screw the pump cover (A) by turning it serting it correctly into the special anti-clockwise and remove the filter. guides. Screw the pump cover firmly by Use pliers, if necessary.
-
Página 22: Emergency Emptying Out
22 electrolux 6. Clean the filter in the valve with a stiff 5. When you intend to start the machine brush or with the piece of cloth. up again, make sure that the room temperature is above 0°C. EMERGENCY EMPTYING OUT... - Página 23 23 Problem Possible cause/Solution The door has not been closed. E40 • Close the door firmly. The plug is not properly inserted in the power socket. • Insert the plug into the power socket. There is no power at the socket.
- Página 24 24 electrolux Problem Possible cause/Solution Too little detergent or unsuitable detergent has been used. • Increase the detergent quantity or use another one. Stubborn stains have not been treated prior to washing. Unsatisfactory washing re- • Use commercial products to treat the stubborn stains.
-
Página 25: Technical Data
25 Problem Possible cause/Solution The fabrics washed in the previous cycle released fluff of a differ- ent color (refer to “Fluff in the garments” in chapter “Use - Washing & Drying”). • The drying phase helps to eliminate some fluff. -
Página 26: Consumption Values
26 electrolux CONSUMPTION VALUES Programme Energy consumption Water consumption Programme duration (KWh) (litres) (Minutes) Cottons 60° 1.35 For the duration of the programmes, Cotton Energy Saving 1.05 please refer to the Programme 60° display on the con- trol panel. Cottons 40°... -
Página 27: Water Inlet
27 4. Slide out the relevant plastic spacers. Accurate levelling prevents vibration, noise and displacement of the machine during operation. 5. Fill the smaller upper hole and the two large ones with the corresponding plas- Caution! Never place cardboard,... -
Página 28: Water Drainage
28 electrolux 2. Connect the hose with the angled con- the window «A». Should this occur, turn the nection to the machine. Do not place water tap off and refer to your Service Cen- the inlet hose downwards. Angle the tre to replace the hose. -
Página 29: Building In
29 The drain hose may be extended to a maximum of 4 metres. An additional drain hose and joining piece is available from your local Service Centre. BUILDING IN OVERVIEW - width 595-598 mm - thickness 16-22 mm This appliance has been designed to be The height X depends on the height of the built into the kitchen furniture. -
Página 30: Environment Concerns
30 electrolux A (steel disk + rubber ring) into the inner Fig. 4 side of the door. Its position must corre- spond to the magnet B on the appliance (Fig. 6). Warning! Do not remove the screw C. Fig. 6... -
Página 31: Ecological Hints
31 This means that they can be recycled by • The machine works more economically if disposing of them properly in appropriate it is fully loaded. collection containers. • With adequate pre-treatment, stains and limited soiling can be removed; the laun-... -
Página 32: Índice De Materias
32 electrolux Electrolux. Thinking of you. Conozca mejor nuestros conceptos en www.electrolux.com ÍNDICE DE MATERIAS Información sobre seguridad Programas de lavado Instrucciones de seguridad Programas de secado Descripción del producto Mantenimiento y limpieza Panel de mandos Qué hacer si… Primer uso Datos técnicos... -
Página 33: Seguridad General
33 • Si el aparato dispone de dispositivo de seguridad para ni- ños, se recomienda activarlo. SEGURIDAD GENERAL • Antes de proceder con el mantenimiento, apague el aparato y desconecte el enchufe de la red. • No cambie las especificaciones de este aparato. -
Página 34: Uso Del Aparato
34 electrolux • Asegúrese de no provocar daños en el Si detiene el aparato antes de que termi- enchufe ni en el cable de red. Póngase ne el ciclo de secado, retire inmediata- en contacto con un electricista o con el mente y distribuya todas las prendas, de servicio técnico para cambiar un cable de... -
Página 35: Descripción Del Producto
35 MANTENIMIENTO Y LIMPIEZA DESECHO Advertencia Podría sufrir lesiones o Advertencia Existe riesgo de lesiones dañar el aparato. o asfixia. • No utilice pulverizadores ni vapor de • Desconecte el aparato de la red. agua para limpiar el aparato. -
Página 36: Depósito Dosificador De Detergente
36 electrolux DEPÓSITO DOSIFICADOR DE DETERGENTE Compartimento del detergente para la fase de prelavado y remojo o del quitaman- chas utilizado durante la fase antimanchas (si está disponible). El detergente de prela- vado y remojo se deposita al principio del programa de lavado. -
Página 37: Piloto Indicador Puerta Cerrada
37 Piloto indicador de puerta bloquea- TIEMPO DE SECADO Para utilizar un programa de secado tem- TIME MANAGER teclas porizado, presione esta tecla hasta que en el indicador aparezca el tiempo de secado SELECTOR DE PROGRAMAS que quiera aplicar en función del tejido (al- godón o sintético). - Página 38 38 electrolux PANTALLA En la pantalla se muestra la siguiente infor- mensaje Err durante unos segundos y el mación: piloto de la tecla 8 empieza a parpadear. 7.1: • Fin de programa • Duración del programa seleccionado Cuando el programa finaliza, aparecen...
-
Página 39: Primer Uso
39 7.4: Bloqueo de seguridad para niños (consulte «Bloqueo de seguridad para niños»). TABLA DE SÍMBOLOS = Lavado en frío = Puerta bloqueada = Sin centrifugado = Seguridad para niños └ ┘ = Agua en la cuba PRIMER USO •... -
Página 40: Botones De Selección De Programas
40 electrolux Tire del depósito dosificador hasta el tope. Al final del programa, el selector debe Mida la cantidad de detergente necesaria y situarse en la posición para apagar viértala en el compartimento de lavado prin- la lavadora. cipal o en el compartimento adecuado si Precaución Si gira el selector hasta... -
Página 41: Seleccione El Inicio Diferido Con La Tecla
41 Consulte la compatibilidad de los pro- Para interrumpir un programa en marcha, gramas de lavado con las opciones en pulse la tecla 8: el piloto verde comienza a el capítulo "Programas de lavado". parpadear. Para reiniciar el programa a partir del punto SELECCIONE EL INICIO DIFERIDO de interrupción, pulse de nuevo la tecla 8. -
Página 42: Uso - Secado
42 electrolux sea cambiar la opción Time Manager, de- unos minutos podrá abrir la puerta (preste berá cancelar el programa en curso y repe- atención al nivel del agua y a la tempe- tir la selección). ratura). El cambio de un programa en marcha sólo Una vez cerrada la puerta, deberá... -
Página 43: Uso - Lavado Y Secado
43 la o conectarse a la tubería de desa- 7. Gire el selector de programas hasta O güe. para apagar la máquina. 1. Cargue la ropa. 8. Saque las prendas del tambor. 2. Para obtener los mejores resultados, Nota:... -
Página 44: Consejos Útiles
44 electrolux 3. Seleccione las opciones necesarias 4. Seleccione el tiempo de secado con la con las teclas apropiadas. tecla 5. La pantalla muestra la duración Siempre que sea posible, no selec- total del programa de lavado y el ciclo cione una velocidad de centrifuga- de secado seleccionado. -
Página 45: Detergentes Y Aditivos
45 perficie suave y quite la mancha con la ye- • detergente en polvo para todo tipo de ma de los dedos y un trapo de algodón. prendas Óxido: utilice ácido oxálico disuelto en • detergente en polvo para prendas delica- agua caliente o un quitamanchas para óxi-... -
Página 46: Consejos De Secado
46 electrolux CONSEJOS DE SECADO PREPARACIÓN DEL CICLO DE Si se utiliza detergente líquido, debe selec- SECADO cionar un programa sin prelavado. La lavadora incorpora un sistema de recir- Como secadora, la máquina funciona se- culación que garantiza un aprovechamiento gún el principio de condensación. -
Página 47: Programas De Lavado
47 PROGRAMAS DE LAVADO Programa - Temperaturas máxima y mínima - Compartimiento Descripción del ciclo - Velocidad de centrifuga- disponibles del detergente do máxima - Carga máxima - Tipo de colada Algodón CENTRIFUGADO 90° - 30° SIN CENTRIFUGADO Lavado principal - Aclarado AGUA EN LA CUBA Velocidad máxima de centrifugado a velocidad máxi-... - Página 48 48 electrolux Programa - Temperaturas máxima y mínima - Compartimiento Descripción del ciclo - Velocidad de centrifuga- disponibles del detergente do máxima - Carga máxima - Tipo de colada Descarga Descarga del agua de lavado Carga máxima 7 kg Para vaciar el agua del último aclarado en programas que se detienen con la opción seleccionada con agua...
-
Página 49: Programas De Secado
49 Programa - Temperaturas máxima y mínima - Compartimiento Descripción del ciclo - Velocidad de centrifuga- disponibles del detergente do máxima - Carga máxima - Tipo de colada O = APAGADO Permite cancelar el programa en marcha o apagar el aparato. -
Página 50: Desincrustación
50 electrolux DESINCRUSTACIÓN El agua corriente que utilizamos suele con- tener cal. Se recomienda utilizar periódica- mente en la lavadora un producto en polvo descalcificador del agua. Realice esta tarea con independencia de cualquier ciclo de la- vado y de acuerdo con las instrucciones del fabricante del producto descalcificador. -
Página 51: Junta De Estanqueidad De La Puerta
51 1. Retire los depósitos de óxido del tam- 2. Si es necesario, espere hasta que el bor con un agente de limpieza para agua se enfríe. acero inoxidable. 2. Ponga en marcha un ciclo de lavado sin introducir ropa para limpiar los resi- duos del agente de limpieza. -
Página 52: Limpieza De Los Filtros De Entrada De Agua
52 electrolux 6. Retire los cuerpos extraños y limpie las Nunca extraiga la tapa de la bomba duran- pelusas del filtro y del rotor de la bom- te un ciclo de lavado; espere siempre a que el aparato haya terminado el ciclo y esté va- Asegúrese de que el rotor de la bomba... -
Página 53: Descarga De Emergencia
53 jo de 0 °C, tome las siguientes precaucio- 1. desenchufe el aparato; nes: 2. cierre la toma de agua; 1. Cierre la toma de agua. 3. si es necesario, espere a que el agua 2. Desconecte el tubo de entrada de se enfríe;... - Página 54 54 electrolux Problema Causa y soluciones posibles La puerta no está cerrada. E40 • Cierre bien la puerta. El enchufe no está correctamente insertado en la toma de corrien- • Inserte el enchufe en la toma. No hay tensión en la toma de corriente.
- Página 55 55 Problema Causa y soluciones posibles Se ha utilizado poco detergente o un detergente inadecuado. • Aumente la cantidad de detergente o utilice otro. No se han tratado las manchas difíciles antes de lavar la ropa. Los resultados del lavado •...
-
Página 56: Datos Técnicos
56 electrolux Problema Causa y soluciones posibles No se ha seleccionado la duración o el grado de secado • Seleccione la duración o el grado de secado La toma de agua está cerrada E10. • Abra el grifo. El filtro de descarga está obstruido. E20. -
Página 57: Valores De Consumo
57 VALORES DE CONSUMO Fases del Consumo energético Consumo de agua Duración del progra- (KWh) (litros) ma (minutos) Algodón 60° 1.35 Compruebe la dura- ción de los progra- Programa Algodón 1.05 mas en la pantalla ECO 60° del panel de control. -
Página 58: Colocación
58 electrolux 4. Deslice los separadores de plástico pa- ra quitarlos. Un nivelado correcto evita las vibraciones, el ruido y el desplazamiento de la lavadora durante el funcionamiento. 5. Tape el orificio superior más pequeño y Precaución No coloque cartón, los dos más grandes con los tapones... -
Página 59: Dispositivo Antifuga
59 2. Conecte el tubo a la lavadora mediante ocurre, cierre la toma de agua y pida a su la conexión en ángulo. No coloque el Centro de servicio técnico local que sustitu- tubo de entrada hacia abajo. Sitúelo a ya el tubo. -
Página 60: Empotrado
60 electrolux La manguera de descarga debe extenderse hasta un máximo de 4 metros. En el Centro de servicio técnico local encontrará disponibles una manguera de descarga y una pieza de unión adicionales. EMPOTRADO DESCRIPCIÓN GENERAL La puerta debe tener las siguientes medi- das: Este aparato está... -
Página 61: Aspectos Medioambientales
61 (disco de acero con anillo de goma) por el Fig. 4 lado interno de la puerta. Su posición debe coincidir con el imán B del aparato (fig. 6). Advertencia No quite el tornillo C. Fig. 6 c) Montaje de la puerta Fije las bisagras al aparato con los tornillos M5x15. -
Página 62: Consejos Ecológicos
62 electrolux SÓLO LAVADO • La ropa que no esté demasiado sucia se puede lavar con un programa que no in- Los materiales marcados con el símbolo cluya prelavado a fin de ahorrar deter- son reciclables. gente, agua y tiempo (y proteger el me- >PE<=polietileno... - Página 63 63...
- Página 64 www.electrolux.com/shop...