Publicidad
Idiomas disponibles
Idiomas disponibles
Enlaces rápidos
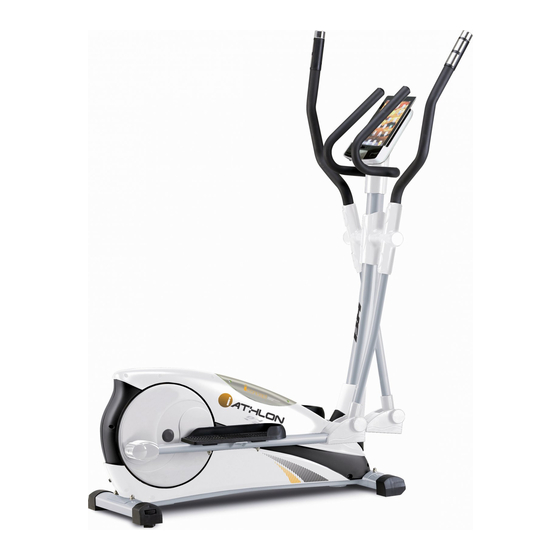
G2337
Instrucciones de montaje y utilización
Instructions for assembly and use
Instructions de montage et utilisation
Montage und gebrauchsanleitung
Instruções de montagem e utilização
Istruzioni di montaggio e uso
Montage-en gebruiksinstrukties
Publicidad

Manuales relacionados para BH FITNESS G2337


Resumen de contenidos para BH FITNESS G2337
- Página 1 G2337 Instrucciones de montaje y utilización Instructions for assembly and use Instructions de montage et utilisation Montage und gebrauchsanleitung Instruções de montagem e utilização Istruzioni di montaggio e uso Montage-en gebruiksinstrukties...
- Página 2 Fig.1 Fig.2...
- Página 3 Fig.3 Fig.4 Fig.5 Fig.6...
- Página 4 Fig.7 Fig.8 Fig.9 Fig.10...
- Página 5 Fig.11 Fig.12 Fig.13 Fig.14...
- Página 6 Fig.15 Fig.16 Fig.17 Fig.18...
- Página 7 Fig.19...
- Página 8 Español INSTRUCCIONES DE adecuado sólo para uso doméstico. El frenado independiente SEGURIDAD.- velocidad. Antes comenzar cualquier programa de ejercicio, consulte a su IMPORTANTE.- médico. Se recomienda la realización Lea las instrucciones detenidamente de un examen físico completo. antes de proceder con el montaje. Trabaje nivel ejercicio...
-
Página 9: Los Padres Y Otras Personas
Tonificación muscular. Para tonificar los músculos durante el ejercicio deberá seleccionar resistencia alta. Esto implicará una mayor tensión sobre la musculatura de las piernas y quizás deba reducir el tiempo del ejercicio. Si también desea mejorar su forma física general, deberá 2. - Página 10 Esta unidad no ha de utilizarse en (36) Tapa trasera embellecedora de ningún caso como juguete. pie derecho. 4 Es responsabilidad del propietario (76) Tapa embellecedora inferior de asegurarse que todos los usuarios de remo. máquina estén adecuados (86) Tapa embellecedora delantera informados sobre todas...
- Página 11 4. MONTAJE TUBO REMO.- tornillo (12) y atornille fuertemente. Coloque tapa trasera Una vez se ha colocado en el tubo de embellecedora de pie derecho (36), remo la tapa embellecedora. Suelte Fig.8 y coloque el tornillo (35). de la parte inferior del tubo remo (80) tornillos (78), junto...
- Página 12 Introduzca el brazo en el saliente del sobre el pie derecho (31L), coloque brazo inferior izquierdo (16L) haciendo las tuercas (30) las arandelas (29) y coincidir las letras (L) Fig.11, coloque tornillos (26), soltados los tornillos (78) las tuercas ciegas anteriormente y apriete fuertemente.
- Página 13 ATENCIÓN: ligeramente por la parte delantera y Es muy importante el reapretar todos empujando, como muestra la Fig.18. los tornillos que han intervenido en el Guarde su máquina en un lugar seco montaje de la maquina, a la semana con las menores variaciones aproximadamente...
- Página 14 English SAFETY INSTRUCTIONS.- IMPORTANT.- Read the instructions carefully before Consult your doctor before starting any proceeding to assemble the equipment. exercise program. It is advisable to Remove all the parts from the cardboard undergo complete physical packaging and check them against the examination.
- Página 15 2. Exercise phase you should change your training This phase requires the greatest program. warm-up physical exertion. After regular cooldown exercises as normal but exercise the leg muscles will become when you are reaching the end of the more flexible. It is important to keep exercise phase, increase the exertion the rhythm constant.
- Página 16 1. ASSEMBLY INSTRUCTIONS.- 2. FITTING THE STABILISER Take the unit out of its box and make BARS.- sure that all of the pieces are there: Bring the front stabiliser bar with wheels The assistance of a second person (73) to the main body (48) positioning is recommended when assembling the wheels at the front of the unit, Fig.3, this unit Fig.1.
- Página 17 Fit the spacer washers (3) as shown in (35-20) to screw them together. Then Fig.7. Insert the left focus bar (16L) do the same with the other covers (17) (marked with the letter “L”) onto the & (21L-21R) on the left-hand side. focus bar spindle (81), Fig.7, then fit 9.
- Página 18 Next, position the left footrest (27L ATTENTION: important marked with the letter “L”) on top of retighten all of the screws involved in the left foot (31L), refit the nuts (30), assembling machine after the washers (29) and the screws (26) approximately a week of use as this removed previously...
- Página 19 Français CONSIGNES DE SÉCURITÉ.- monté complètement la machine. L’appareil doit toujours être utilisé selon Avant de commencer tout exercice, les instructions. demandez l’avis de votre médecin. Il Si au cours du montage ou de la est conseillé de passer un examen vérification de l’appareil, vous constatez médical complet.
- Página 20 2. Phase de l’exercice résistance élevée. Cela se traduira par Il s’agit de la phase dans laquelle est une tension plus élevée également sur réalisé l’exercice le plus important. la musculature des jambes et il faudra Après l’exercice réalisé régulièrement, peut être aussi réduire la durée de les muscles des jambes deviennent l’exercice.
- Página 21 4 Il incombe au propriétaire de (86) Cache avant rameur. l’appareil de s’assurer que tous les (94) Cache arrière rameur. utilisateurs de la machine peuvent (92) Transformateur. l’utiliser et qu’ils ont été dûment Fig.2 informés à propos des précautions à (12) Vis de M-8x20.
- Página 22 Unissez connecteur (77) Prendre la rondelle (37) et l’écrou (12) dépasse du tube rameur (80) au et vissez très fort. connecteur (74) qui dépasse du tube Placez le cache embellisseur du pied du corps central (48), Fig.6. gauche (36), Fig.8 et placez la vis Introduisez le tube rameur (80) dans (35).
- Página 23 10. MONTAGE DES CACHES guidon sur la plaque de la partie supérieure tube rameur (80) LATÉRAUX DE L’AXE DE Fig.14. Vissez avec les vis (12) ROTATION DES BRAS.- dévissées précédemment. Prendre les caches (15R) portant à l’intérieur la lettre (R), placez-les à 14.
- Página 24 NIVELLEMENT.- BRANCHEMENT AU RÉSEAU.- Après avoir installé l’unité à Introduire la fiche de branchement (m) l’emplacement qui lui a été réservé du transformateur (92) dans le point pour réaliser les exercices, vérifiez si de connexion (k) du corps central (48), l’assise au sol et le nivellement sont (partie arrière inférieur) et connectez corrects.
- Página 25 Deutsch SICHERHEITSHINWEISE.- Dieses Gerät wurde getestet und erfüllt die Norm EN957, für den häuslichen Bevor einem Gebrauch geeignet. Die Bremswirkung Trainingsprogramme beginnen, unabhängig konsultieren Sie bitte Ihren Arzt. Wir Geschwindigkeit. empfehlen dabei eine komplette Untersuchung. Arbeiten Sie mit dem WICHTIG. empfohlenen Trainingsniveau, trainieren Lesen Sie die Anleitung vor der Sie niemals bis zur Erschöpfung.
- Página 26 Es ist ratsam, einige Streckübungen Systems Muskulatur.Es vorzunehmen, weiter unten handelt sich z.B. um die Wiederholung erläutert werden. Führen Sie jeder der Übungen aus der Aufwärmphase, dieser Streckübungen reduziertem Rhythmus Sekunden lang durch, ohne jedoch die während ungefähr Minuten. Muskeln zu überlasten. Wenn Sie Wiederholen Sie die Streckübungen Schmerzen spüren,...
- Página 27 ALLGEMEINE HINWEISE.- mit Regelschrauben. (27L) Linke Fußstütze. Lesen Sie dies Anleitungen dieses (27R) Rechte Fußstütze. Handbuchs aufmerksam. Hier finden (31L) Linkes Pedal. Sie wichtige Anleitungen zur Montage (31R) Rechtes Pedal. und Hinweise zur Sicherheit und zur (6L) Oberer linker Arm. Handhabung des Geräts.
- Página 28 Setzen Sie die Schrauben (52), die Sockel Hauptrahmens (48) Federscheiben (13) hinunter Fig.6. geschwungenen Unterlegscheiben (79) 5. MONTAGE DER Selbstblock (49) ein und ziehen Sie sie mit dem 5mm Inbusschlüssel gut fest. GRIFFSTANGEN.- Nehmen dann hintere Schieben Sie die Drehachse der Ständerrohr (53) die Federscheiben (13) Griffstangen (81) durch die Hülsen mit den Regelschrauben Fig.4.
- Página 29 Setzen Sie die hintere Blende des gleichen Vorgang mit dem oberen linken Fußes (36) auf Fig.8 und rechten Arm (6R). bringen Sie die Schraube (35) an. 10. MONTAGE DER 7. MONTAGE DER SEITLICHEN ABDECKUNGEN TRITTFLÄCHENTRÄGER.- DER DREHACHSE DER Nehmen Sie das Rechte Fuβteil (31R) GRIFFSTANGEN.- und positionieren Sie es in das “U”...
- Página 30 Positionieren dann linke Positionieren hintere Fußstütze (27L, mit L markiert) auf Abdeckung (94) und die vordere dem linke Fußteil (31L), bringen Sie Abdeckung (83) am Ruderrohr (80) die nuss (30), Unterlegscheiben (29) Fig.16. Ziehen Sie sie anschlieβend und Schrauben (26), die Sie zuvor mit den Schrauben (87) fest.
- Página 31 Sollten über Zustand einer BH BEHÄLT SICH DAS RECHT ZU Komponente Zweifel bestehen, setzen sich bitte (TKD) ÄNDERUNGEN SEINER PRODUKT- Technischen Kundendienst SPEZIFIZIERUNGEN OHNE Verbindung, indem VORHERIGE ANKÜNDIGUNG VOR. Servicetelefon anrufen (siehe letzte Seite des Handbuchs).
- Página 32 Português INSTRUÇÕES DE SEGURANÇA.- adequado para uso doméstico. A travagem é independente Antes de começar qualquer programa velocidade. de exercício, consulte o seu médico. Recomendamos a realização de um IMPORTANTE. exame físico completo. Leia atentamente as instruções antes Trabalhe nível exercício de começar a montagem.
- Página 33 Tonificação muscular Para tonificar os músculos durante o exercício deverá seleccionar resistência elevada. Isto implicará uma maior tensão sobre a muscula-tura das pernas e talvez seja necessário reduzir o tempo do ejercício. Se também deseja melhorar a sua forma física geral, 2.
- Página 34 Esta unidade nunca deverá utilizarse (36) Tampa traseira decorativa do pé como um brinquedo. direito. 4 É da responsabilidade do proprie- (76) Tampa embelezadora inferior de tário comprovar se todos os usuários remo. da máquina estão adequadamente (86) Tampa embelezadora dianteira informados sobre todas...
- Página 35 4. MONTAGEM TUBO REMO.- Depois pegue no anel (37) e no parafuso (12) e aparafuse com força. Uma vez colocado no tubo de remo a Coloque a tampa traseira decorativa tampa embelezadora, solte da parte do pé direito (36), Fig.8 e coloque o inferior tubo remo...
- Página 36 Introduza o braço no saliente do braço os porcas (30) as arandelas (29) e os inferior esquerdo (16L) fazendo parafusos (26), soltos anteriormente, coincidir as letras (L) Fig.11, coloque e aperte com força. os parafusos (78), as porcas cegas 13. COLOCAÇÃO DO (79) e aperte.
- Página 37 ATENÇÃO: levantando, ligeiramente a parte da É muito importante reapertar todos os frente e empurrando, como mostra a parafusos usados na montagem da Fig.18. Deverá guardar a sua máquina máquina, após semana num lugar seco, com as menores aproximadamente de uso da máquina, variações de temperatura possíveis.
- Página 38 Italiano ISTRUZIONI DI SICUREZZA.- e controllato e segue la norma EN957 adatto solo per il suo uso domestico. Prima cominciare qualsiasi frenata agisce maniera programma d’ allenamento, chieda indipendente alla velocità. consulenza medica. Si consiglia di realizzare un controllo fisico completo. IMPORTANTE.
- Página 39 Con il passare dei giorni, avrà bisogno di un allenamento più prolungato e di maggior intensità. È consigliabile allenarsi un minimo di tre giorni a set- timana, in giorni alterni. Tonificazione muscolare Per tonificare i muscoli durante l’ Realizzi ogni stiramento più o meno allenamento dovrà...
- Página 40 3 I genitori ed altre persone responsabili piede sinistro. dei bambini devono tenere conto della (36) Coperchio posteriore abbellente natura curiosa di questi che li può piede destro. portare a situazioni e condotte che (76) Coperchio decorativo inferiore possono risultare pericolose. Questo del remo.
- Página 41 4. MONTAGGIO DEL TUBO introduca nell’ asse (43) della parte sinistra della macchina. REMO.- A continuazione prenda la rondella Una volta che si è inserito nel tubo (37) e la vite (12) ed avviti con forza. remo il coperchio decorativo. Allentare Collochi coperchio posteriore...
- Página 42 9. MONTAGGIO DEI BRACCI (26), svitati precedentemente stringere fortemente. SUPERIORI.- Successivamente regolare il poggia- Prendere il braccio superiore sinistro piede sinistro (27L segnato con la (6L) (segnato con la lettera L). lettera L) sul piede sinistro (31L), Introdurre il braccio nella linguetta del inserire le dado (30) le rondelle (29) braccio inferiore sinistro (16L) facendo ed le viti (26), allentati precedente-...
- Página 43 Prendere il coperchio posteriore (94) apparecchio, faciliteranno coperchio anteriore (83), manovra collocare posizionarli nel tubo remo (80) Fig.16 apparecchio nel luogo scelto, alzando ed in seguito avvitarli con le viti (87). leggeramente dalla parte anteriore e spingendo, come mostra la Fig.18. ATTENZIONE: Conservi il suo apparecchio in un È...
- Página 44 Nederlands VEILIGHEIDSAANWIJZINGEN gebruik thuis. werkt onafhankelijk van de snelheid. Raadpleeg uw geneesheer alvorens u oefe ningenprogramma BELANGRIJK begint. Het wordt aangeraden om een Lees deze gebruiksaanwijzing volledig onderzoek te laten doen. aandachtig voor Voer de oefening op het aanbevolen monteren begint. niveau uit, vermijd elke vorm van Neem alle...
- Página 45 per week te oefenen, telkens met een dag ertussen. Het versterken van de spieren Om de spieren tijdens de oefeningen steviger en sterker te maken dient u een hoge weerstand te kiezen. Dit geeft een hogere spanning op het 2. De oefening spierstelsel soms Tijdens...
- Página 46 3 Ouders en andere personen met verbindingen op de focusbalken. kinderen onder hun hoede dienen er (36) Sierstuk achterkant linker rekening mee te houden dat kinderen voetstang. van nature uit nieuwsgierig zijn en dat (36) Sierstuk achterkant rechter ze daardoor zichzelf in gevaar kunnen voetstang.
- Página 47 4. DE HOOFDSTEUN Neem de linker pedaal (31L) Fig.8 (gemarkeerd door de letter L) en BEVESTIGEN.- plaats die op de as (43) aan de Zodra de steunkap voor de onderkant linkerzijde van het apparaat. gemonteerd verwijdert Neem vervolgens de ring (37) en de schroeven (78) en sluitringen (13) en schroef (12) en draai stevig vast.
-
Página 48: De Feedback-Kabel Aansluiten
monteer schroeven (78), verwijderde en maak alles goed vast. dopmoeren (79) en maak alles goed Plaats daarna de linkervoetsteun (27L vast. Doe nu hetzelfde voor de gemarkeerd met de letter “L”) bovenop bovenste rechterfocusstang (6R). de linkerpoot (31L), monteer opnieuw de noot (30), de sluitringen (29) en de 10. - Página 49 Neem de bedekkingen van voorkant uitgekozen plaats te plaatsen door de (83) en achterkant (94) en plaats ze voorkant iets te laten overhellen en te hoofdsteun (80), Fig.16. duwen, zoals wordt getoond in Fig.18. Gebruik vervolgens de schroeven Berg het apparaat op een droge plaats (87) om ze vast te maken aan de waar mogelijk...
- Página 50 G2337...
- Página 51 Para pedido de repuesto: Indicar el código de la pieza y la cantidad To order replacement parts: State the part code and Quantity Pour toute commande pièces détachées: Indiquer le code de la pièce et la quantité Bestellung von Ersatzteilen: Bitte angeben Teil-code und Menge Para encomenda de peça de recambio: Indicar o código da peça ea quantidade Per ordinare pezzi di ricambio: Indicare il codice del pezzo e la quantità...
- Página 52 G2336018 G2336048 G2336082 G2336019 G2336049 G2337083 G2336020 G2336050 G2336084 21R G2337021R G2336051 G2336085 21L G2337021L G2336052 G2337086 G2336022 G2336053 G2336087 G2336023 G2336054 G2336088 G2336024 G2336055 G2336089 G2336025 G2336056 G2336090 G2336026 G2336057 G2336091 G2336027 G2336058 0190153 27L G2336027L G2336059 G03 G2336G03 27R G2336027R G2336060 G04 G2337G04...
- Página 53 Español Por medio de la presente Exercycle S.L. declara que este producto cumple con los requisitos esenciales y cualesquiera otras disposiciones aplicables o exigibles de las Directivas 2004/108/CE y 2006/95/CE. English Hereby, Exercycle S.L, declares that this product is in compliance with the essential requirements and other relevant provisions of Directives 2004/108/EC and 2006/95/EC.
- Página 54 Fax: +33 0810 00 290 Fax: +34 945 56 05 27 e-mail: info@bhfitness.pt e-mail: e-mail: sat@bhfitness.es savfrance@bhfitness.com BH FITNESS NORTH AMERICA BH FITNESS MEXICO BH FITNESS UK 20155 Ellipse BH Exercycle de México S.A. de Halliards, Terrington Drive Foothill Ranch...