
Manuales relacionados para Cameo ZENIT B200


Resumen de contenidos para Cameo ZENIT B200
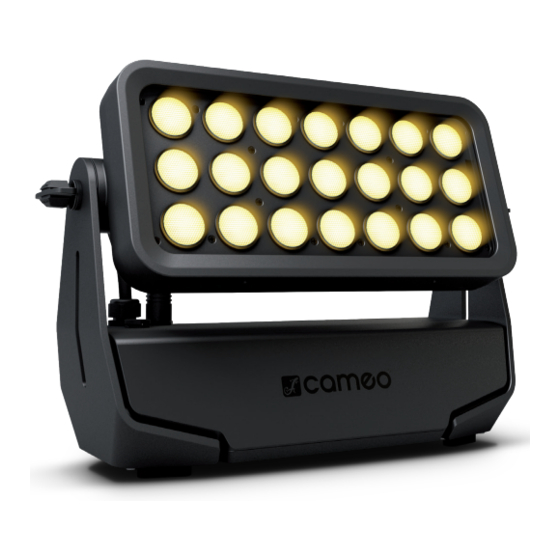
- Página 1 USER´S MANUAL BEDIENUNGSANLEITUNG MANUEL D`UTILISATION MANUAL DE USUARIO INSTRUKCJA OBSŁUGI MANUALE D‘ USO ZENIT B200 ® LED BATTERY OUTDOOR WASHLIGHT CLZB200...
-
Página 2: Tabla De Contenido
CONTENTS / INHALTSVERZEICHNIS / CONTENU / CONTENIDO / TREŚĆ / CONTENUTO ENGLISH ESPAÑOL PREVENTIVE MEASURES MEDIDAS DE SEGURIDAD INTRODUCTION INTRODUCCIÓN CONNECTIONS, OPERATING AND DISPLAY ELEMENTS CONEXIONES, ELEMENTOS DE MANEJO Y ELEMENTOS OPERATION DE VISUALIZACIÓN IR REMOTE CONTROL FUNCIONAMIENTO INSTALLATION MANDO A DISTANCIA POR INFRARROJOS OPTIONAL ACCESSORIES INSTALACIÓN Y MONTAJE DMX TECHNOLOGY... -
Página 3: English
We have designed this product to operate reliably over many years. Please read this User‘s Manual carefully, so that you can begin making optimum use of your Cameo Light product quickly. Learn more about Cameo Light on our website WWW.CAMEOLIGHT.COM. - Página 4 CAUTION: To reduce the risk of electric shock, do not remove cover (or back). There are no user serviceable parts inside. Maintenance and repairs should be exclusively carried out by qualified service personnel. The warning triangle with lightning symbol indicates dangerous uninsulated voltage inside the unit, which may cause an electrical shock.
-
Página 5: Introduction
BATTERY SAFETY 1. Keep the battery poles away from conductive objects such as keys, jewellery and the like. This can lead to the battery being short-circuited, which can cause injuries and burns. 2. Never alter the polarity of the battery contacts. 3. -
Página 6: Connections, Operating And Display Elements
POWER OUT IP65 power output socket with rubber sealing cap. Facilitates power supply to other CAMEO lights. Ensure that the total current consumption of all connected devices does not exceed the value specified on the device in amperes (A) (when not in use, always close with the rubber sealing cap). -
Página 7: Operation
• If the Zenit B200 spotlight is operated on the mains, ensure that the ambient temperature is not below 0°C and not above 40°C. • If the Zenit B200 spotlight is operated on its internal battery, ensure that the ambient temperature is not below -15°C and not above 40°C. -
Página 8: Main Display
MAIN DISPLAY After the power-up process, the lamp is ready for operation and starts in the previously activated mode. The main display appears with the following information: current mode (e.g. DMX mode), W-DMX™ status, battery charge status and mains operation. W-DMX™... -
Página 9: W-Dmx™ Status
W-DMX™ STATUS W-DMX™ W-DMX™ W-DMX™ W-DMX W-DMX™ W-DMX™ W-DMX™ as receiver as receiver activated and as reveicer and transmissi- and transmissi- deactivated activated, activated and coupled device, activated and on mode G3 on mode G4S not coupled device coupled, no DMX signal coupled device, Arrow up = send Arrow up = send... - Página 10 SETTING STANDALONE MODE Press MODE to access the selection menu. Use UP and DOWN to select the menu item “Stand Alone” (observe arrow) and confirm with EN- TER. In the sub-menu you can now select from the standalone modes “Auto”, “Colour Macro”, “Static”, “Tunable White” and “User Colour” as well as the timer function “Timer”...
- Página 11 COLOUR TEMPERATURE (Tunable White) The colour temperature mode enables you to configure the colour temperature from cold white to warm white (CTC) and the brightness (Dim) of the light directly on the device. Select the colour temperature mode as per the procedure previously described in SETTING STAND ALONE MODE and confirm with ENTER.
- Página 12 SLAVE MODE CONFIGURATION Press MODE to access the selection menu. Using the UP and DOWN controls, select the menu item “Slave” (observe arrow) and confirm with ENTER. Connect the slave and the master units (same model) with a DMX cable and enable one of the standalone modes on the master unit (Auto, Colour Macro, Static, Tunable White, User Colour).
- Página 13 DMX Fail Operating status with DMX Hold Last command is retained signal fault Blackout Activates blackout Full On All the LEDs have 100% output Stand Alone Spotlight switches to the last selected stand- alone mode AC Failure Operating status in the event No Action Last command is retained of a power failure...
-
Página 14: Dimmer Curves
BATTERY RUN TIME (Runtime) Battery life can be increased to up to 24 hours by reducing brightness accordingly (see table Settings). Battery life is calculated with spotlight on full and 100% battery charge status. Battery life is extended considerably if not all of the colours red, green, blue and white are activated (Full On), instead only red, for example. -
Página 15: Ir Remote Control
IR REMOTE CONTROL Aim the infrared remote control directly at the infrared sensor on the front of the lamp. The maximum range is approximately 8 metres. In DMX and Slave modes, the remote control is deactivated. Battery for IR remote control = CR2025. The blackout button is used to switch off all LEDs, regard- less of operating mode enabled via the remote control. -
Página 16: Installation
INSTALLATION Thanks to its integrated plastic feet, the lamp can be positioned in a suitable location on a level surface. Installation on a traverse is carried out with an Omega bracket, mounted in the centre of the base of the device (A). A Omega bracket is included. Suit- able beam clamps are available as an option. -
Página 17: Dmx Technology
CLZW300B200SMLSD6010 60° x 10° diffuser Tool-free installation via SNAPMAG technology ® DMX TECHNOLOGY DMX-512 DMX (Digital Multiplex) is the designation for a universal transmission protocol for communications between corresponding devices and controllers. A DMX controller sends DMX data to the connected DMX device(s). The DMX data is always transmitted as a serial data stream that is forwarded from one connected device to the next via the "DMX IN"... -
Página 18: Technical Data
Pin Assignment DMX cable with 3-pin XLR connectors: DMX cable with 5-pin XLR connectors (pin 4 and 5 are not used): Shield Shield DMX TERMINATORS (TERMINATING RESISTORS) To prevent system errors, the last device in a DMX chain needs to be equipped with a terminating resistor (120 ohm, 1/4 Watt). 3-pin XLR connector with a terminating resistor: K3DMXT3 5-pin XLR connector with a terminating resistor: K3DMXT5 Pin Assignment... -
Página 19: Manufacturer'S Declarations
Operating controls: Mode, Enter, Up, Down, ON/OFF switch Display elements: OLED display Operating voltage: 100–240 V AC/50–60 Hz Power consumption: 180W Battery type: LG F1L Battery voltage: 44.4 V Battery capacity: 6.71 Ah Battery power: 298 Wh Battery charge time: Battery protection: Protection against overloading and deep discharge 300 charging cycles 0% ->... -
Página 20: Fcc Statement
FCC STATEMENT This device complies with Part 15 of the FCC Rules. Operation is subject to the following two conditions: (1) This device may not cause harmful interference, and (2) This device must accept any interference received, including interference that may cause undesired operation CE Compliance Adam Hall GmbH states that this product meets the following guidelines (where applicable): R&TTE (1999/5/EC) or RED (2014/53/EU) from June 2017... -
Página 21: Deutsch
Dieses Gerät wurde unter hohen Qualitätsanforderungen entwickelt und gefertigt, um viele Jahre einen reibungslosen Betrieb zu gewähr- leisten. Bitte lesen Sie diese Bedienungsanleitung sorgfältig, damit Sie Ihr neues Produkt von Cameo Light schnell und optimal einsetzen können. Weitere Informationen über Cameo Light erhalten Sie auf unserer Website WWW.CAMEOLIGHT.COM. - Página 22 Lebensdauer. Lagern Sie den Scheinwerfer nur mit vollständig geladenem Akku. Wenn der Scheinwerfer über einen längeren Zeitraum nicht verwendet wird, laden Sie den Akku alle 6 Monate vollständig auf. Laden Sie den Akku des Zenit B200 Scheinwerfers nicht bei Umgebungstemperaturen von unter 0°C und über 40°C.
-
Página 23: Einführung
VORSICHT! WICHTIGE HINWEISE IN BEZUG AUF LICHT-PRODUKTE! 1. Das Produkt ist für den professionellen Einsatz im Bereich der Veranstaltungstechnik entwickelt worden und ist nicht für die Raumbeleuchtung in Haushalten geeignet. 2. Blicken Sie niemals, auch nicht kurzzeitig, direkt in den Lichtstrahl. 3. -
Página 24: Anschlüsse, Bedien- Und Anzeigeelemente
Scheinwerfer nun betriebsbereit, indem Sie den Schalter in die heruntergedrückte Position bringen. Während des Startvorgangs werden nacheinander „Welcome to Cameo“, die Modellbezeichnung und die Software Version im Display angezeigt. In der nicht heruntergedrückten Position des Schalters befindet sich der Scheinwerfer im Standby-Modus. Während beider Betriebszustände wird stets der Akku geladen, sobald der Scheinwerfer korrekt am Stromnetz angeschlossen ist. -
Página 25: Bedienung
• Laden Sie den Akku des Zenit B200 Scheinwerfers nicht bei Umgebungstemperaturen von unter 0°C und über 40°C. • Bei Betrieb des Zenit B200 Scheinwerfers mit Netzspannung darf die Umgebungstemperatur 0°C nicht unter- und +40°C nicht überschreiten. • Bei Betrieb mit internem Akku darf die Umgebungstemperatur -15°C nicht unter- und +40°C nicht überschreiten. -
Página 26: Dmx Address
DISPLAY HAUPTANZEIGE Nach dem Anschaltvorgang ist der Scheinwerfer betriebsbereit und startet in der Betriebsart, die zuvor aktiviert war. Die Hauptanzeige erscheint mit folgenden Informationen: Aktuelle Betriebsart (im Beispiel DMX-Betriebsart), W-DMX™ Status, Akku-Ladestatus und Betrieb am Stromnetz. W-DMX™ Status Akku-Ladestatus Betrieb am Stromnetz DMX Address Aktuelle Betriebsart AKKU-LADESTATUS IM STANDBY-MODUS... -
Página 27: System Info
W-DMX™ STATUS W-DMX™ W-DMX™ W-DMX™ als W-DMX W-DMX™ als W-DMX™ W-DMX™ deaktiviert als receiver receiver aktiviert aktiviert und reveicer aktiviert und Übertra- und Übertra- aktiviert, und Gerät Gerät gekoppelt, und Gerät gungs-Modus gungs-Modus nicht gekoppelt gekoppelt, kein DMX-Signal gekoppelt, G3 aktiviert G4S aktiviert Transmitter DMX-Signal... - Página 28 STAND-ALONE-BETRIEBSART EINSTELLEN Durch Drücken auf MODE gelangen Sie in das Auswahl-Menu. Mit Hilfe der Bedienfelder UP und DOWN wählen Sie nun den Menu-Punkt „Stand Alone“ aus (Pfeil beachten) und bestätigen mit ENTER. Im Untermenü können Sie nun unter den Stand-Alone-Betriebsarten „Auto“, „Color Macro“, „Static“, „Tunable White“, und „User Color“...
- Página 29 STATISCHER MODUS (Static) Der Statische Modus ermöglicht es, ähnlich wie mit einem DMX-Steuergerät, Dimmer, Stroboskop (Strobe), R, G, B und W direkt am Gerät mit Werten von 000 bis 255 einzustellen. Somit kann eine individuelle Szene erstellt werden, ohne einen zusätzlichen DMX-Controller zu be- nötigen.
- Página 30 TIMER-FUNKTION (Timer) Die Timer-Funktion ermöglicht die zeitgesteuerte Kontrolle der Stand-Alone-Betriebsarten „Color Macro“, „Static“, „Tunable White“, und „User Color“ in der Art, dass die Einblendzeit (Fade In) von 0 bis 60 Minuten, die Haltezeit (Dwell Time) von 1 bis 24 Stunden und die Aus- blendzeit (Fade Out) von 0 bis 60 Minuten eingestellt werden kann.
- Página 31 Wireless Setting W-DMX Einstellungen W-DMX On/ On = W-DMX aktiviert (Wireless-DMX) Off = W-DMX deaktiviert Operating Receive = W-DMX-Modul als Empfänger Mode Transmit = W-DMX-Modul als Sender Transmitting G3 = G3 Sendestandard Mode G4S = G4S Sendestandard Link Link = mit W-DMX-Geräten koppeln. W-DMX muss bei allen Geräten aktiviert und die Kopplung mit einem Transmitter aufgehoben sein (Receive Reset).
-
Página 32: Dmx Mode
Autolock Automatische Sperrung der Automatische Sperrung der Bedienelemente nach ca. 1 Bedienelemente Minute Inaktivität. Anzeige im Display nach Bedienversuch: „Locked!“ Entsperren: Gleichzeitiges Drücken von UP und DOWN für ca. 5 Sekunden Automatische Sperrung der Bedienelemente deaktiviert LED Frequency LED PWM Frequenz 800Hz / Einstellen der LED PWM Frequenz 1200Hz /... -
Página 33: Ir Fernbedienung
MANUELLE SPERR-FUNKTION Neben der Möglichkeit, den Scheinwerfer automatisch vor versehentlicher und unbefugter Bedienung zu schützen (siehe "Settings" - "Autolock"), kann die Sperrung der Bedienelemente auch manuell erfolgen. Halten Sie für ca. 5 Sekunden die Bedienfelder UP und DOWN gleichzeitig gedrückt. Bei dem Versuch, Einstellungsänderungen vorzunehmen, wird nun "Locked!" im Display angezeigt und eine Änderung der Einstellungen des Scheinwerfers über die Bedienfelder ist nicht mehr möglich. -
Página 34: Aufstellung Und Montage
AUFSTELLUNG UND MONTAGE Dank der integrierten Kunststofffüße kann der Scheinwerfer an einer geeigneten Stelle auf eine ebene Fläche gestellt werden. Die Montage an einer Traverse erfolgt mit Hilfe eines Omega-Bügels, der in der Mitte der Gerätebasis befestigt wird (A). Ein Omega-Bügel ist im Lieferumfang enthalten, geeignete Traversenklemmen sind optional erhältlich. -
Página 35: Dmx Technik
CLZW300B200SMLSD6010 60° x 10° Streuscheibe Werkzeuglose Montage durch SNAPMAG Technologie ® DMX TECHNIK DMX-512 DMX (Digital Multiplex) ist die Bezeichnung für ein universelles Übertragungsprotokoll für die Kommunikation zwischen entsprechenden Geräten und Controllern. Ein DMX-Controller sendet DMX-Daten an das/die angeschlossene(n) DMX-Gerät(e). Die DMX-Datenübertragung erfolgt stets als serieller Datenstrom, der über die an jedem DMX-fähigen Gerät vorhandenen DMX IN- und DMX OUT-Anschlüsse (XLR-Steckverbinder) von einem angeschlossenen Gerät an das nächste weitergeleitet wird, wobei die maximale Anzahl der Geräte 32 nicht... -
Página 36: Technische Daten
Steckerbelegung: DMX-Kabel mit 3-Pol XLR-Steckern: DMX-Kabel mit 5-Pol XLR-Steckern (Pin 4 und 5 sind nicht belegt.): Shield Shield DMX-ABSCHLUSSSTECKER (TERMINATOR): Um Systemfehler zu vermeiden, ist das letzte Gerät einer DMX-Kette mit einem Abschlusswiderstand zu bestücken (120 Ohm, 1/4 Watt). 3-Pol XLR-Stecker mit Abschlusswiderstand: K3DMXT3 5-Pol XLR-Stecker mit Abschlusswiderstand: K3DMXT5 Steckerbelegung: 3-Pol XLR-Stecker:... -
Página 37: Herstellererklärungen
Steuerung: DMX512, W-DMX™, IR Fernbedienung, RDM enabled Bedienelemente: Mode, Enter, Up, Down, ON/OFF switch Anzeigeelemente: OLED-Display Betriebsspannung: 100 - 240V AC / 50 - 60Hz Leistungsaufnahme: 180W Akku Typ: LG F1L Akku Spannung: 44,4V Akku Kapazität: 6,71 Ah Akku Energie: 298 Wh Akku Ladezeit: Akku Schutzeinrichtung:... -
Página 38: Ce-Konformität
CE-Konformität Hiermit erklärt die Adam Hall GmbH, dass dieses Produkt folgenden Richtlinien entspricht (soweit zutreffend): R&TTE (1999/5/EG) bzw. RED (2014/53/EU) ab Juni 2017 Niederspannungsrichtlinie (2014/35/EU) EMV-Richtlinie (2014/30/EU) RoHS (2011/65/EU) Die vollständige Konformitätserklärung finden Sie unter www.adamhall.com. Des Weiteren können Sie diese auch unter info@adamhall.com anfragen. -
Página 39: Francais
Cet appareil a été développé et fabriqué en appliquant des exigences de qualité très élevées: il garantit des années de fonctionnement sans problème.Veuillez lire attentivement ce Manuel Utilisateur : vous apprendrez rapidement à utiliser votre appareil Cameo Light de façon optimale. - Página 40 33. Poussière et autres dépôts à l‘intérieur de l‘appareil sont susceptibles de l‘endommager. Si les conditions environnementales sont diffi- ciles (présence de poussière, de nicotine, de gouttelettes d‘eau...), il est recommandé de le confier à un personnel spécialisé pour entretien et nettoyage (non pris en charge par la garantie), afin d‘éviter toute surchauffe et défaillance.
-
Página 41: Introduction
ATTENTION ! CONSEILS IMPORTANTS POUR LES PRODUITS D‘ÉCLAIRAGE 1. Ce produit est conçu pour une utilisation professionnelle dans le domaine du spectacle vivant : il n‘est pas prévu pour une utilisation en éclairage domestique. 2. Ne regardez jamais directement le faisceau lumineux, même brièvement. 3. -
Página 42: Raccordements, Éléments De Commande Et D'AFfichage
Assurer un niveau de charge suffisant de la batterie ou brancher le projecteur sur le réseau d’alimentation. Pousser l’interrupteur vers le bas pour que le projecteur soit opérationnel. Pendant la phase de démarrage, un message de bienvenue (« Welcome to Cameo »), la référence du modèle et la version du logiciel s’affichent successivement à... -
Página 43: Dispositif De Compensation De Pression
• À condition que le projecteur soit correctement branché sur le secteur et que l’interrupteur Standby soit poussé vers le bas, pendant la phase de démarrage, un message de bienvenue (« Welcome to Cameo »), la référence du modèle et la version du logiciel s’affichent succes- sivement à... - Página 44 AFFICHAGE PRINCIPAL DE L’ÉCRAN À l’issue de la phase d’amorçage, le projecteur est opérationnel et passe dans le mode précédemment activé. L’écran principal s’affiche. Il contient les informations suivantes : Mode de fonctionnement actuel (ici : mode DMX), l’état W-DMX™, le niveau de charge de la batterie et le fonctionnement sur secteur.
-
Página 45: System Info
ÉTAT W-DMX™ W-DMX™ W-DMX ™ com- W-DMX ™ com- W-DMX ™ W-DMX ™ en W-DMX ™ et W-DMX™ me récepteur me récepteur dispositif activé tant qu‘appareil mode de trans- et mode de désactivé activé, activé et dispo- et couplé, activé et couplé mission G3 transmission pas couplé... - Página 46 RÉGLAGE DU MODE DE FONCTIONNEMENT STANDALONE Appuyer sur MODE pour accéder au menu de sélection. Utiliser ensuite les touches UP et DOWN pour sélectionner l’option de menu « Stand Alone » (voir flèche), puis confirmer en appuyant sur ENTER. Ce sous-menu permet de sélectionner les modes de fonctionnement Standalone « Auto », «...
- Página 47 MODE STATIQUE (Static) De façon similaire à un dispositif de commande DMX, le mode statique permet de régler les fonctions Dimmer, stroboscope (Strobe) et les valeurs R, G, B, W directement sur l’appareil, avec des valeurs comprises entre 000 et 255. Il est ainsi possible de créer une scène person- nalisée sans avoir à...
- Página 48 FONCTION TIMER (Temporisation) La fonction de temporisation permet le contrôle temporisé des modes de fonctionnement Standalone (autonomes) « Color Macro », « Static », « Tunable White », et « User Color » de sorte que le temps d’affichage en fondu (Fade In) soit réglable de 0 à 60 minutes, la durée de temporisation (Dwell Time) de 1 à...
- Página 49 Wireless Setting Paramètres W-DMX W-DMX On/Off On = W-DMX activé (Wireless-DMX) Off = W-DMX désactivé Operating Mode Receive = Module W-DMX en tant que récepteur Transmit = Module W-DMX en tant qu'émetteur Transmitting Mode G3 = Norme d'envoi G3 G4S = Norme d'envoi G4S Link Link = Connecter aux appareils W-DMX.
-
Página 50: Courbes De Dimmer
Color Calibration Calibrage des couleurs R, G, B, W avec une valeur maximale de 225 (Si l’un des modes de fonctionne- ment DMX est activé avec le ca- User Calibration Calibrage spécifique des couleurs. Réglage de la librage d’usine, un autre calibrage luminosité... -
Página 51: Fonction De Verrouillage Manuelle
FONCTION DE VERROUILLAGE MANUELLE En plus de la fonction de verrouillage automatique, qui permet de protéger le projecteur contre une utilisation par une personne non autorisée (cf. « Settings » - « Autolock »), l’appareil offre également la possibilité de verrouiller manuellement les éléments de commande. Pour cela, appuyer simultanément sur les touches de fonction UP et DOWN pendant env. -
Página 52: Installation Et Montage
INSTALLATION ET MONTAGE Grâce aux pieds en plastique intégrés, le projecteur peut être placé à un endroit approprié sur une surface plane. Le montage sur traverse s’effectue à l’aide d’un oméga de fixation fixé au milieu de la base de l’appareil (A). Un oméga de fixation est inclus dans la li- vraison, des pinces de serrage sur traverse adaptées sont disponibles en option. -
Página 53: Technique Dmx
CLZW300B200SMLSD6010 Diffuseur 60° x 10° Montage sans outil grâce à la technologie SNAPMAG ® TECHNIQUE DMX DMX-512 Le terme DMX (Digital Multiplex) désigne un protocole de transport universel permettant la communication entre des appareils et des contrôleurs à ce format. Un contrôleur DMX envoie des données DMX aux appareils DMX qui lui sont connectés. -
Página 54: Caractéristiques Techniques
Assignation des contacts Câble DMX avec connecteurs XLR 3 points : Câble DMX avec connecteurs XLR 5 points (les points 4 et 5 ne sont pas câblés): Shield Shield Pour éviter tout dysfonctionnement, le dernier appareil d'une chaîne DMX doit être équipé d'une résistance de terminaison (120 Ohms, 1/4 Watt). - Página 55 Paramètres du système : Paramètres W-DMX, rotation à 180° de l’affichage, autonomie de la batterie (Runtime), éclairage de l’écran, DMX Fail, AC Failure, courbes de dimmer, comportement du dimmer, calibrage des couleurs, fonction de verrouillage de l’écran, fréquence du signal PWM des LED, télécommande infrarouge, Factory Reset Pilotage : DMX512, W-DMX™, pilotage par télécommande infrarouge, RDM enabled...
-
Página 56: Garantie Fabricant & Limitation De Responsabilité
DECLARATIONS GARANTIE FABRICANT & LIMITATION DE RESPONSABILITÉ Nos conditions actuelles de garantie et de limitation de responsabilité sont disponibles à l‘adresse suivante : https://cdn-shop.adamhall.com/ media/pdf/Manufacturers-Declarations-CAMEO_DE_EN_ES_FR.pdf. Pour les réparations, veuillez contacter Adam Hall GmbH, Adam-Hall-Str. 1, 61267 Neu Anspach / E-Mail Info@adamhall.com / +49 (0)6081 / 9419-0. TRI ET MISE AUX DÉCHETS CORRECTE DE CE PRODUIT (Valid in the European Union and other European countries with waste separation) (Applicable dans l‘Union Européenne et les autres pays européens pratiquant le tri des déchets) La présence de ce symbole sur le... -
Página 57: Español
Este equipo está diseñado y fabricado con los estándares de calidad más exigentes, para garantizar un correcto funcionamiento durante muchos años.Lea atentamente este manual de usuario para poder aprovechar rápidamente toda la funcionalidad de su nuevo producto de Cameo Light. Más información sobre Cameo Light en la web WWW.CAMEOLIGHT.COM. MEDIDAS DE SEGURIDAD 1. - Página 58 (polvo, nicotina, niebla, etc.), deberá realizarse periódicamente el mantenimiento o la limpieza del equipo por personal especializado, para evitar cualquier sobrecalentamiento o fallo de funcionamiento (mantenimiento y limpieza no cubiertos por la garantía). 34. Asimismo, deberá dejarse una distancia mínima de 0,5 metros con cualquier material inflamable. 35.
-
Página 59: Introducción
¡ATENCIÓN: INFORMACIÓN IMPORTANTE SOBRE LOS PRODUCTOS DE ILUMINACIÓN! 1. Este producto ha sido desarrollado para uso profesional en el sector de eventos y no está diseñado para la iluminación doméstica. 2. No mire directamente el haz de luz, ni siquiera momentáneamente. 3. -
Página 60: Conexiones, Elementos De Manejo Y Elementos De Visualización
POWER OUT Toma de salida de alimentación IP65 con tapa de sellado de goma. Sirve para suministrar corriente eléctrica a otros focos Cameo. Asegúrese de que el consumo de corriente total de todos los dispositivos conectados no supere el valor indicado en amperios (A) sobre el dispositivo (mientras no se vaya a usar, guardarlo siempre cerrado con la tapa de sellado de goma). -
Página 61: Elemento Compensador De Presión
• La batería del foco Zenit B200 no deberá cargarse a temperaturas ambiente inferiores a 0 °C ni superiores a 40 °C. Si el foco Zenit B200 funciona con tensión de red, la temperatura ambiente no deberá ser inferior a 0° C ni superior a +40° C. -
Página 62: Pantalla Principal
PANTALLA PRINCIPAL Tras el procedimiento de encendido, el foco estará listo para funcionar y se activará en el último modo operativo empleado. Se mostrará la pantalla principal con la siguiente información: Modo operativo actual (en el ejemplo, modo operativo DMX), estado W-DMX™, estado de carga de la batería y funcionamiento con conexión a la red eléctrica. -
Página 63: Estado W-Dmx
ESTADO W-DMX™ W-DMX™ W-DMX ™ W-DMX ™ W-DMX ™ W-DMX ™ W-DMX ™ y W-DMX ™ y desactivado, como receptor como receptor dispositivo como un dispo- modo de trans- modo de trans- activado, activado y activado y sitivo revelador misión G3 misión G4S no acoplado acoplado al... - Página 64 CONFIGURAR EL MODO OPERATIVO AUTÓNOMO Pulsando MODE accederá al menú de selección. Ahora, utilice los botones UP y DOWN para seleccionar la opción de menú «Stand Alone» (indicada por la flecha) y confirme la selección con ENTER. A continuación, en el submenú seleccione con los botones UP y DOWN el modo operativo autónomo: «Auto», «Color Macro», «Static», «Tunable White»...
- Página 65 MODO ESTÁTICO (Static) De forma similar a la configuración con un equipo de control DMX, ajuste en el modo Estático las funciones Dimmer, Estrobo (Strobe), R, G, B y W directamente en el dispositivo, seleccionando valores entre 000 y 255. De esa forma, se podrá crear un escenario personalizado sin necesidad de un equipo de control DMX adicional.
-
Página 66: Configurar El Modo Operativo Esclavo
FUNCIÓN DE TEMPORIZADOR (Timer) La función de temporizador permite el control por tiempo de los modos operativos autónomos «Color Macro», «Static», «Tunable White» y «User Color» ajustando el tiempo de aparición (Fade In) de 0 a 60 minutos, el tiempo de permanencia (Dwell Time) de 1 a 24 horas y el tiempo de desapa- rición (Fade Out) de 0 a 60 minutos. - Página 67 Wireless Setting Configuración de W-DMX W-DMX On/Off On = W-DMX activado (Wireless-DMX) Off = W-DMX desactivado Operating Mode Receive = Módulo W-DMX como receptor Transmit = Módulo W-DMX como transmisor Transmitting Mode G3 = Estándar de emisión G3 G4S = Estándar de emisión G4S Link Link = Acoplar con equipos W-DMX.
-
Página 68: Curvas De Atenuación
Color Calibration Calibración de colores R, G, B, W con valor máximo 225 (Si uno de los modos User calibration Calibración individual de colores. Configuración operativos DMX está activado del brillo común a los modos operativos de los 4 con calibración de fábrica grupos de LED RGBW con valores de 000 - 255 [Factory], no es posible seleccionar otra calibración... -
Página 69: Función De Bloqueo Manual
System Info Firmware Visualización de la Main CPU Vx.xx versión del firmware del LED Driver Vx.xx equipo Temperature Visualización de la xx °C / xx °F temperatura de la Unit °C (= visualización en grados Celsius) unidad LED °F (= visualización en grados Fahrenheit) Operation Hours Visualización del tiempo xx:xx h... -
Página 70: Instalación Y Montaje
INSTALACIÓN Y MONTAJE Gracias a las patas de plástico integradas, el foco puede instalarse en un lugar adecuado sobre una superficie nivelada. El montaje en travesaño se realiza fijando una percha de montaje Omega en el centro de la base del equipo (A). El volumen de suministro incluye una percha de montaje Omega;... -
Página 71: Tecnología Dmx
CLZW300B200SMLSD6010 Difusor de 60° x 10° Montaje sin herramientas mediante la tecnología SNAPMAG ® TECNOLOGÍA DMX DMX512 DMX (Digital Multiplex) es el nombre de un protocolo universal utilizado como medio de comunicación entre dispositivos y controladores. El controlador DMX envía datos DMX a los equipos DMX conectados. -
Página 72: Terminación Dmx (Terminador)
Asignación de pines: Cable DMX con XLR de 3 pines: Cable DMX con XLR de 5 pines (los pines 4 y 5 no se utilizan): Shield Shield TERMINACIÓN DMX (TERMINADOR): Para evitar errores de sistema, debe conectarse una resistencia de terminación (120 ohmios, 1/4 W) en el último equipo de la cadena DMX. XLR aéreo de 3 pines con resistencia de terminación: K3DMXT3 XLR aéreo de 5 pines con resistencia de terminación: K3DMXT5 Asignación de pines:... - Página 73 Configuración del sistema: Configuración de W-DMX, giro de 180° de la imagen en pantalla, Runtime, iluminación de la pantalla, DMX Fail, AC Failure, curvas de atenuación, respuesta de atenuación, calibración del color, función de bloqueo de la pantalla, frecuencia de la modulación por ancho de pulsos (PWM) de los LED, mando a distancia por infrarrojos, restablecimiento de la configuración de fábrica Control: DMX-512, W-DMX™, mando a distancia por infrarrojos, habilitado para RDM...
-
Página 74: Declaraciones Del Fabricante
DECLARACIÓN DEL FABRICANTE GARANTÍA DEL FABRICANTE Y LIMITACIÓN DE RESPONSABILIDAD Consulte nuestras condiciones de garantía y limitaciones de responsabilidad en: https://cdn-shop.adamhall.com/media/pdf/Manufactu- rers-Declarations-CAMEO_DE_EN_ES_FR.pdf. En caso de necesitar servicio técnico, póngase en contacto con Adam Hall GmbH, Adam-Hall- Str. 1, 61267 Neu Anspach (Alemania); correo electrónico Info@adamhall.com; +49 (0)6081 / 9419-0. ELIMINACIÓN CORRECTA DE ESTE PRODUCTO (Aplicable en la Unión Europea y en los países europeos que dispongan de un sistema de recogida selectiva) El símbolo que aparece sobre el producto o en la documentación adjunta indica que al final de la vida útil del equipo, no deberá... -
Página 75: Polski
To urządzenie zostało zaprojektowane i wyprodukowane przy zastosowaniu najwyższych kryteriów jakościowych w celu zapewnienia wieloletniej bezawaryjnej eksploatacji. Proszę starannie przeczytać niniejszą instrukcję obsługi, aby móc jak najszybciej zacząć użytkować ten produkt marki Cameo Light. Więcej informacji na temat Cameo Light znajdą Państwo na naszej stronie internetowej pod adresem WWW.CAMEOLIGHT.COM. - Página 76 32. Instalacja urządzenia powinna odbywać się, gdy urządzenie nie jest podłączone do źródła zasilania (należy wyjąć wtyczkę z gniazda). 33. Kurz i inne osady wewnątrz urządzenia mogą je uszkodzić. W zależności od warunków otoczenia (kurz, nikotyna, opary itp.) urządzenie powinno być konserwowane lub czyszczone przez wykwalifikowanego specjalistę (usługa nieobjęta gwarancją), aby zapobiec przegrzaniu i nieprawidłowemu działaniu.
-
Página 77: Wprowadzenie
OSTROŻNIE! WAŻNE WSKAZÓWKI DOTYCZĄCE PRODUKTÓW OŚWIETLENIOWYCH! 1. Produkt przeznaczony jest do zastosowań profesjonalnych podczas organizacji imprez i nie nadaje się do oświetlania pomieszczeń w gospodarstwie domowym. 2. Nigdy nie spoglądać bezpośrednio w stronę promienia świetlnego, nawet przez krótką chwilę. 3. Nigdy nie spoglądać w stronę promienia świetlnego przy pomocy urządzeń optycznych, takich jak np. szkło powiększające. 4. -
Página 78: Gniazda, Elementy Obsługi I Wskaźniki
Upewnij się, że akumulator jest dostatecznie naładowany lub prawidłowo podłącz reflektor do sieci. Teraz przełącz reflektor w tryb pracy, wciskając włącznik. Podczas uruchamiania urządzenia na wyświetlaczu pojawi się napis „Welcome to Cameo”, a następnie nazwa modelu i wersja oprogramowania. Jeśli włącznik nie jest wciśnięty, reflektor znajduje się w trybie standby. W obu trybach prawidłowe podłączenie reflektora do zasilania powoduje ładowanie się... -
Página 79: Obsługa
• Nie należy ładować akumulatora reflektora Zenit B200 w temperaturze otoczenia poniżej 0°C i powyżej 40°C. • Podczas pracy reflektora Zenit B200 przy zasilaniu sieciowym temperatura otoczenia nie może być niższa od 0°C i wyższa od +40°C. • Podczas pracy przy zasilaniu akumulatorowym temperatura otoczenia nie może być niższa od -15°C i wyższa od +40°C. - Página 80 WIDOK GŁÓWNY WYŚWIETLACZA Po włączeniu reflektor jest gotowy do pracy i przełącza się na ostatnio wybrany tryb. W widoku głównym wyświetlą się następujące informacje: aktualny tryb pracy (w przykładzie tryb DMX), status W-DMX™, poziom naładowania akumulatora i informacja o podłączeniu do zasilania. StatusW-DMX™...
-
Página 81: Status W-Dmx
STATUS W-DMX™ W-DMX™ W-DMX ™ W-DMX ™ W DMX W-DMX ™ W-DMX ™ i tryb W-DMX ™ i tryb nieaktywne włączony jako jako odbiornik włączone i jako rewelacy- transmisji G3 transmisji G4S odbiornik, aktywowany sprzężone jne urządzenie Strzałka w górę Strzałka w górę... -
Página 82: Auto Program
TRYB PRACY AUTOMATYCZNEJ (program 1 – program 6) 6 różnych programów automatycznych zawiera zaprogramowane sekwencje zmian kolorów, jasności oraz prędkości ruchu. Te programy można ustawiać oddzielnie. Najpierw wybierz tryb pracy automatycznej i potwierdź przyciskiem ENTER zgodnie z opisem w punkcie USTAWIANIE TRYBU PRACY STANDALONE. - Página 83 TEMPERATURA BARWOWA (Tunable White) Tryb temperatury barwowej umożliwia ustawienie światła z temperaturą barwową od zimnej bieli do ciepłej bieli (CTC), a także jasności (Dim) bezpośrednio na urządzeniu. Najpierw wybierz tryb temperatury barwowej i potwierdź przyciskiem ENTER, zgodnie z opisem w punkcie UST- AWIANIE TRYBU PRACY STANDALONE.
- Página 84 USTAWIANIE TRYBU SLAVE Naciśnij przycisk MODE, by przejść do menu wyboru. Przyciskami UP i DOWN wybierz opcję „Slave” (zgodnie ze strzałką) i potwierdź wybór przyciskiem ENTER. Połącz urządzenia slave i master (ten sam model) kablem DMX i włącz w urządzeniu master jeden z trybów pracy Stand-Alone (Auto, Colour Macro, Static, Tunable White, User Color).
- Página 85 DMX Fail Tryb pracy w przypadku Hold Ostatnie polecenie zostanie wykonane przerwania sygnału DMX Blackout Natychmiastowe wygaszenie reflektora Full On Wszystkie diody LED świecą z maksymalną mocą Stand Alone Reflektor przełącza się do ostatnio wybranego trybu pracy stand alone AC Failure Tryb pracy w sytuacji prze- No Action Ostatnie polecenie zostanie wykonane...
-
Página 86: Krzywe Ściemniania
CZAS PRACY AKUMULATORA (runtime) Odpowiednia redukcja jasności może wydłużyć czas pracy akumulatora do 24 godzin (zob. tabela pt. Ustawienia). Czas pracy został obliczo- ny dla trybu Full On, gdy akumulator jest naładowany na 100%. Czas pracy akumulatora można znacząco wydłużyć, rezygnując z trybu Full On (wszystkie kolory: czerwony, zielony, niebieski i biały), np. -
Página 87: Pilot Na Podczerwień
PILOT NA PODCZERWIEŃ Skieruj pilota na podczerwień bezpośrednio na czujnik podczerwieni wbudowany z przodu reflektora. Maksymalny zasięg wynosi ok. 8 metrów. W trybie pracy DMX oraz slave sterowanie pilotem jest nieaktywne. Bateria do pilota na podczerwień = CR2025. Przycisk Blackout służy do wyłączenia wszystkich diod LED, niezależnie od włączonego trybu pracy urządzenia Blackout kontrolowanego pilotem. -
Página 88: Ustawianie I Montaż
USTAWIANIE I MONTAŻ Do ustawienia reflektora w odpowiednim miejscu na płaskiej powierzchni służą zamontowane na stałe nóżki z tworzywa sztucznego. Do montażu reflektora na trawersie służy dostarczony w komplecie uchwyt Omega, który należy przymocować na środku podstawy urządzenia (A). Uchwyt Omega jest zawarty w zestawie, a odpowiednie zaciski do trawersu są dostępne jako opcja. Upewnij się, że urządzenie jest so- lidnie przymocowane. -
Página 89: Technika Dmx
CLZW300B200SMLSD6010 Dyfuzor 60° x 10° Montaż bez użycia narzędzi za pomocą technologii SNAPMAG ® TECHNIKA DMX DMX-512 DMX (Digital Multiplex) to nazwa uniwersalnego protokołu transmisji do komunikacji między odpowiednimi urządzeniami a kontrolerami. Kontroler DMX wysyła dane DMX do podłączonych urządzeń DMX. Transmisja danych DMX następuje zawsze w formie szeregowego strumienia danych, który jest przekazywany z jednego urządzenia do następnego przez znajdujące się... -
Página 90: Dane Techniczne
Przyporządkowanie wtyczek: Kabel DMX z 3-stykowymi wtyczkami XLR: Kabel DMX z 5-stykowymi wtyczkami XLR (pin 4 i 5 są niepodłączone): Shield Shield TERMINATOR DMX: Aby zapobiec awariom systemu, należy wyposażyć ostatnie urządzenie w łańcuchu DMX w terminator (120 Ω, 1/4 W). 3-stykowa wtyczka XLR z terminatorem: K3DMXT3 5-stykowa wtyczka XLR z terminatorem: K3DMXT5 Przyporządkowanie wtyczek:... - Página 91 Ustawienia systemu: ustawienia W-DMX, obracanie widoku wyświetlacza o 180°, runtime, oświetlenie wyświetlacza, DMX Fail, AC Failure, krzywe ściemniania, regulacja ściemniania, kalibracja kolorów, blokada wyświetlacza, częstotliwość modulacji PWM lampy LED, pilot na podczerwień, Factory Reset Sterowanie: DMX512, W-DMX™, pilot na podczerwień, możliwość pracy w standardzie RDM Elementy obsługi: Mode, Enter, Up, Down, przycisk ON/OFF Wyświetlacz:...
-
Página 92: Deklaracje Producenta
DEKLARACJE PRODUCENTA GWARANCJA PRODUCENTA I OGRANICZENIE ODPOWIEDZIALNOŚCI Nasze aktualne warunki gwarancji i informacje dotyczące ograniczenia odpowiedzialności znajdą Państwo na stronie: https://cdn-shop. adamhall.com/media/pdf/Manufacturers-Declarations-CAMEO_DE_EN_ES_FR.pdf. W razie konieczności skorzystania z serwisu proszę skontaktować się z firmą Adam Hall GmbH, Adam-Hall-Str. 1, 61267 Neu Anspach / e-mail Info@adamhall.com / +49 (0)6081 / 9419-0. PRAWIDŁOWA UTYLIZACJA NINIEJSZEGO PRODUKTU (Obowiązuje w Unii Europejskiej i innych krajach europejskich stosujących system sortowania odpadów) Niniejszy symbol na produk- cie lub związanych z nim dokumentach wskazuje, iż... -
Página 93: Italiano
Questo dispositivo è stato sviluppato e prodotto in conformità con elevati standard qualitativi che ne garantiscono il regolare funzionamento per molti anni. Leggete attentamente questo manuale d‘uso per utilizzare al meglio il vostro nuovo prodotto Cameo Light. Per maggiori informazioni su Cameo Light consultare la nostra pagina Web WWW.CAMEOLIGHT.COM. - Página 94 (senza garanzia, interventi a carico del proprietario) per evitare surriscaldamento e malfunzionamenti. 34. La distanza dai materiali infiammabili deve essere di almeno 0,5 m 35. I cavi di rete utilizzati per l’alimentazione elettrica di più dispositivi devono avere una sezione di almeno 1,5 mm². I cavi impiegati nell’Unione Europea devono essere di tipo H05VV-F o simile.
-
Página 95: Introduzione
ATTENZIONE! INDICAZIONI IMPORTANTI RELATIVE AI PRODOTTI DI ILLUMINAZIONE! 1. Il prodotto è stato sviluppato per un uso professionale nel settore della tecnologia applicata a spettacoli e non è idoneo all‘impiego nell‘illuminazione domestica. 2. Non fissare mai direttamente il fascio di luce, nemmeno per brevi istanti. 3. -
Página 96: Connettori, Elementi Di Comando E Di Visualizzazione
POWER OUT Presa di uscita IP65 con tappo ermetico in gomma. Serve per l’alimentazione di altri proiettori Cameo. Tenere presente che la corrente assorbita complessiva di tutti i dispositivi collegati non deve superare il valore riportato in ampere (A) sul dispositivo (in caso di mancato utilizzo, chiudere sempre con tappo ermetico in gomma). -
Página 97: Utilizzo
• Non caricare la batteria del proiettore Zenit B200 a temperature ambiente inferiori a 0°C e superiori a 40°C. • Durante il funzionamento del proiettore Zenit B200 con tensione di rete, la temperatura ambiente non deve essere inferiore a 0°C e superiore a +40°C. -
Página 98: Schermata Principale Del Display
SCHERMATA PRINCIPALE DEL DISPLAY Dopo il processo di accensione, il proiettore è pronto per l’uso e si avvia nella modalità di funzionamento precedentemente attivata. Compa- re quindi la schermata principale con le seguenti informazioni: modalità di funzionamento attuale (nell’esempio, modalità di funzionamento DMX), stato W-DMX™, livello di carica della batteria e funzionamento con collegamento alla rete elettrica. -
Página 99: System Info
STATO W-DMX™ W-DMX™ W-DMX ™ W-DMX ™ e disattivato come ricevitore W-DMX ™ W-DMX W-DMX ™ la modalità di W-DMX ™ e attivato, come ricevi- dispositivo atti- come disposi- trasmissione G3 modalità di tras- non accoppiato tore attivato vo e accoppiato, tivo abilitato e Freccia verso missione G4S... - Página 100 IMPOSTAZIONE DELLA MODALITÀ DI FUNZIONAMENTO STAND-ALONE Premendo MODE si accede al menu di selezione. Con i tasti UP e DOWN, selezionare la voce di menu “Stand-Alone” (prestare attenzione alla freccia) e confermare con ENTER. Nel sottomenu, selezionare una delle modalità di funzionamento stand-alone “Auto”, “Color Macro”, “Static”, “Tunable White”...
- Página 101 MODALITÀ STATICA (Static) Analogamente a quanto avviene in un dispositivo di comando DMX, la modalità statica consente di impostare direttamente sul dispositivo le funzioni dimmer, stroboscopio, R, G, B e W con valori da 000 a 255. È quindi possibile creare una scena personalizzata, senza necessità di utilizzare un controller DMX aggiuntivo.
- Página 102 PRESET UTENTE (User Color) La modalità di funzionamento “Preset utente” consente di salvare la luminosità generale, lo stroboscopio e il mix cromatico di R, G, B e W diret- tamente nel dispositivo in cinque preset cromatici individuali. Selezionare la voce di menu “User Color” seguendo la procedura descritta prima in “IMPOSTAZIONE DELLA MODALITÀ...
- Página 103 Wireless Setting Impostazioni W-DMX W-DMX On/Off On = W-DMX attivato (Wireless-DMX) Off = W-DMX disattivato Operating Mode Receive = modulo W-DMX come ricevitore Transmit = Modulo W-DMX come trasmettitore Transmitting Mode G3 = standard di trasmissione G3 G4S = standard di trasmissione G4S Link Link = accoppiamento con dispositivi W-DMX.
-
Página 104: Curve Dimmer
Color Calibration Calibrazione colori calibrazione del colore individuale. Regolazione (Se è attivata la modalità della luminosità di 4 gruppi di LED RGBW per DMX con calibrazione di tutte le modalità nell’intervallo 000-255 fabbrica non sarà possibile User calibration Calibrazione singola dei colori. Impostazione selezionare alcun’altra della luminosità... -
Página 105: Telecomando A Infrarossi
System Info Firmware Visualizzazione del Main CPU Vx.xx firmware del dispositivo LED Driver Vx.xx Temperature Visualizzazione della xx°C / xx°F temperatura dell'unità Unit °C (= visualizzazione in gradi Celsius) °F (= visualizzazione in gradi Fahrenheit) Operation Hours Visualizzazione del tem- xx:xxh Visualizzazione del tempo di funzionamento complessivo in po di funzionamento... -
Página 106: Installazione E Montaggio
INSTALLAZIONE E MONTAGGIO Grazie ai piedini in plastica integrati, il proiettore può essere collocato in un punto adatto su una superficie piana. Il montaggio a una traversa viene effettuato tramite una staffa a Omega, fissata al centro della base dell'apparecchio (A). Una staffa a Omega è inclusa nella dotazione;... -
Página 107: Tecnologia Dmx
CLZW300B200SMLSD6010 Diffusore 60° x 10° Montaggio senza utensili grazie alla tecnologia SNAPMAG ® TECNOLOGIA DMX DMX512 DMX (Digital Multiplex) è la sigla di un protocollo di trasmissione universale per la comunicazione tra dispositivi e controller. Un controller DMX invia dati DMX ai dispositivi DMX collegati. -
Página 108: Dati Tecnici
Configurazione dei connettori: Cavo DMX con connettori XLR a 3 poli: Cavo DMX con connettori XLR a 5 poli (pin 4 e 5 non assegnati): Shield Shield CONNETTORE TERMINALE DMX (TERMINATORE): Per evitare errori di sistema, l'ultimo dispositivo di una catena DMX deve essere dotato di una resistenza di terminazione (120 ohm, 1/4 W). Connettore XLR a 3 poli con resistenza di terminazione: K3DMXT3 Connettore XLR a 5 poli con resistenza di terminazione: K3DMXT5 Configurazione dei connettori:... - Página 109 Elementi di comando: Mode, Enter, Up, Down, interruttore ON/OFF Elementi di visualizzazione: Display OLED Tensione di esercizio: 100 - 240 V CA, 50 - 60 Hz Potenza assorbita: 180W Tipo di batteria: LG F1L Tensione batteria: 44,4 V Capacità batteria: 6,71 Ah Energia batteria: 298 Wh...
-
Página 110: Dichiarazioni Del Produttore
DICHIARAZIONI DEL PRODUTTORE MANUFACTURER’S WARRANTY & LIMITATION OF LIABILITY Le nostre attuali condizioni di garanzia e la limitazione di responsabilità sono consultabili alla pagina: https://cdn-shop.adamhall.com/media/ pdf/Manufacturers-Declarations-CAMEO_DE_EN_ES_FR.pdf. In caso di assistenza, rivolgersi a Adam Hall GmbH, Adam-Hall-Str. 1, 61267 Neu Anspach / E-mail Info@adamhall.com / +49 (0)6081 / 9419-0. CORRETTO SMALTIMENTO DEL PRODOTTO (In vigore nell‘Unione Europea e in altri Paesi europei in cui si attui la raccolta differenziata) Questo simbolo apposto sul prodotto o sui relativi documenti indica che, per evitare danni all‘ambiente e alle persone causati da uno smaltimento incontrollato dei rifiuti,... -
Página 111: Dmx Control
DMX CONTROL / DMX STEUERUNG / PILOTAGE DMX / CONTROL DMX / STEROWANIE DMX / CONTROLLO DMX 15 CH Mode Function Values Sub-Group Dimmer 0% to 100% Dimmer Dimmer fine 0% to 100% Strobe open Strobe closed Pulse random slow -> fast Ramp up random slow ->... - Página 112 No function Linear dimmer curve Set dimmer curve Exponential dimmer curve Set dimmer curve Logarithmic dimmer curve S-Curve dimmer curve No function Dimmer response LED (hold 1,5 s) Dimmer response halogen (hold 1,5s) No function Silent fan (hold 3s) Auto fan (hold 3s) No function PWM 1 (800 Hz) (hold 3s) PWM 2 (1200 Hz) (hold 3s)
- Página 113 Color off Amber Yellow warm Yellow Green Turquoise Cyan Blue Lavender Color Macros Color Macros Mauve (override RGBW) Magenta Pink Warm White White Cold White Color Jumping stop Color Jumping speed slow -> fast / color 1 -> 12 Color Fading speed slow -> fast / color 1 ->...
- Página 114 Set runtime 20h (hold 3S) Raw mode (hold 3s) Device settings Factory calibrated mode (hold 3s) Control (please read remark 1*) User calibrated mode (hold 3s) No function 8 CH 8 Bit Function Values Sub-Group Dimmer 0% to 100% Dimmer Strobe open Strobe closed Pulse random, slow ->...
- Página 115 no function Dimmer response LED (hold 1,5 s) Dimmer response halogen (hold 1,5s) No function Silent fan (hold 3s) Auto fan (hold 3s) No function PWM 1 (800 Hz) (hold 3s) PWM 2 (1200 Hz) (hold 3s) PWM 3 (2000 Hz) (hold 3s) Device Settings PWM 4 (3600 Hz) (hold 3s) Control...
- Página 116 3 CH Factory-Calibrated 8 Bit Function Values Sub-Group 0% to 100% Green 0% to 100% Green Blue 0% to 100% Blue 3 CH Color Macros Function Values Sub-Group Dimmer 0% to 100% Dimmer Strobe open Strobe closed Pulse random slow -> fast Ramp up random slow ->...
- Página 120 CAMEOLIGHT.COM Adam Hall GmbH | Adam-Hall-Str. 1 | 61267 Neu-Anspach | Germany Phone: +49 6081 9419-0 | adamhall.com REV: 05...