Trixie TX9 Smart Manual De Instrucciones
Ocultar thumbs
Ver también para TX9 Smart:
- Instrucciones de uso (43 páginas) ,
- Manual de instrucciones (21 páginas) ,
- Instrucciones de uso (29 páginas)
Tabla de contenido

Manuales relacionados para Trixie TX9 Smart


Resumen de contenidos para Trixie TX9 Smart
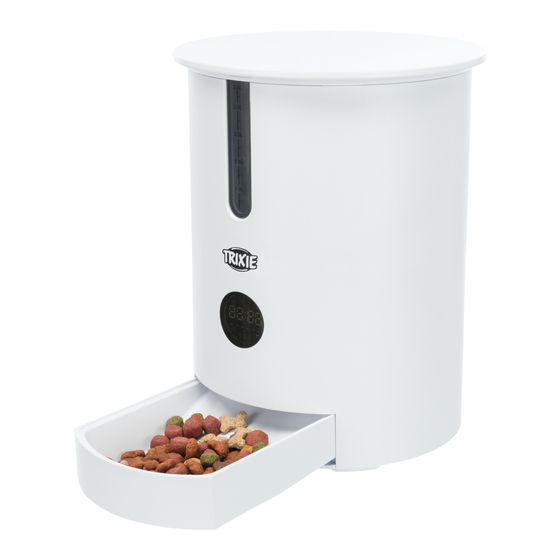
- Página 1 Bedienungsanleitung TX9 Smart E Instructions d Betjeningsvejledning F Instructions e Instrucciones I Istruzioni per l’uso P Instruções N Gebruiksaanwijzing p Instrukcja S Instruktioner C Instrukce R Инструкция по эксплуатации #24341...
- Página 2 • Zur Kopplung des Gerätes stehen zwei verschiedene Optionen D Bedienungsanleitung zur Verfügung: Der EZ-Modus und der AP Modus. Einige Dual-Band Router nutzen eine gemeinsame SSID (Name des Netzwerkes) für beide Frequenzen. Die Kopplung im EZ-Modus • Lesen Sie vor der Nutzung die Bedienungsanleitung. funktioniert in diesem Fall nur, wenn Sie zunächst in den •...
- Página 3 2. In der Übersicht der Fütterungen können Sie einfach einzelne cken, sollten Sie zu Beginn regelmäßig einige Leckerlis in den Fütterungen aktivieren oder deaktivieren. Napf legen. Manuelle Fütterung Reinigung 1. Drücken Sie auf FÜTTERN und wählen Sie die Anzahl der Porti- Schalten Sie den Futterautomaten aus und trennen Sie ihn vom onen, die sofort ausgegeben werden sollen.
-
Página 4: Other Settings
• The automatic feed dispenser is only suitable for indoor use. acoustic signal and after a few seconds, the green control light • Do not allow your pet to gnaw on the device or the cable. Use a will start to flash slowly. cable guard if necessary. - Página 5 2. You can change the name of the device, share it or use the echo your router, you should deactivate it to stop your IoT devices function. Here you can also disconnect the device. from communicating unchecked on the internet. 3.
-
Página 6: Autres Paramètres
bi-bandes sans séparation préalable des deux fréquences. Appu- Coupler l'appareil yez sur le bouton SET de l'appareil 10 fois de suite pour activer le mode AP. Choisissez ensuite AP MODE dans l'application A l'étape suivante, le distributeur automatique est connecté et suivez les instructions pour vous connecter au hotspot de à... -
Página 7: Collegamento Del Dispositivo
s'approche de l'appareil. Vous pouvez également voir ces notifi- L'appareil fonctionne avec l'application "Tuya Smart", de Tuya cations dans votre profil sous MESSAGES. Inc. L'application est disponible gratuitement. Veuillez lire les conditions d'utilisation et informations sur les protections data communiqués lors du téléchargement de l'application. Familiarisez votre animal avec l'appareil Certains animaux ont besoin d'un peu de temps pour s'habituer I Istruzioni per l’uso... -
Página 8: Altre Impostazioni
• Notare che l’accoppiamento del distributore automatico di 2. Nella panoramica dei tempi dei pasti, è possibile attivare o cibo funziona solo alla frequenza di 2,4 GHz. Se si dispone di un disattivare i singoli pasti. router WLAN che invia 2 GHz e 5 GHz, assicurarsi di scegliere la banda di frequenza corretta. - Página 9 Per risvegliare la curiosità dell’animale domestico, all'inizio, vindt u aan het einde van deze gebruiksaanwijzing. mettere alcune gustose leccornie nella ciotola del distributore. Voor het gebruik van de voederautomaat: Pulizia 1. Sluit u de voederautomaat aan op een stroombron door middel Spegnere il distributore automatico di cibo e staccare la spina.
- Página 10 Er klinkt een geluidssignaal en na een paar seconden dient het activeren om een melding te ontvangen wanneer uw dier de groene controlelampje langzaam beginnen te knipperen. voederautomaat nadert. 2. Kies in de app GERÄT HINZUFÜGEN. Zoek onder VIDEOÜBER- WACHUNG het veld SICHERHEITSKAMERA. Andere instellingen 3.
-
Página 11: Ansluta Enheten
• Activeer de firewall van uw router. Hur du registrerar dig • Stel een aparte WLAN in voor IoT-apparaten. De IoT-apparaten worden dan bediend in een apart netwerk, dat geen verbinding Öppna appen och klicka på REGISTER för att skapa ett konto. heeft met gevoelige gegevens of apparaten als uw computer. -
Página 12: Övriga Inställningar
frekvenserna. Tryck på SET-knappen på enheten 10 gånger i rad Vänj ditt djur vid enheten: för att aktivera AP-läget. Välj sedan "AP-läge" i appen och följ instruktionerna för att ansluta till enhetens hotspot. Vissa djur behöver lite tid på sig för att vänja sig vid den nya 2. -
Página 13: Tilkobling Af Apparatet
ændrer indstillingerne. AP-modus længere nede, byder på en d Betjeningsvejledning anden løsning af dette problem. Denne koblingsmodus fungerer også med routere som har dual band uden at adskille frekven- serne. • Læs betjeningsvejledningen inden brug. • Foderdispenseren er udelukkende egnet for tørfoder (diameter 5 –... -
Página 14: Øvrige Indstillinger
Videooverførsel og lydoptagelser Tips for anvendelsen af flere IoT-apparater 1. Hvis du ønsker at optage et screenshot, af det billede der bliver • Opdater apparaternes software, hvis der står sikkerhedsopdate- vist på skærmen, klik på BILLEDE. ringer til rådighed. 2. Hvis du ønsker et kommunikere med dyret, kan du klikke på •... -
Página 15: Conectar El Dispositivo
3. Para el control y la programación del comedero automático, de- está configurada en la frecuencia correcta (sólo 2,4 GHz). Elija scargue la aplicación "Tuya Smart" en su smartphone o tablet. la red correcta, introduzca su contraseña y confirme su entrada. Escanear el código QR te lleva directamente a la descarga. -
Página 16: Notificaciones
función de visión nocturna por infrarrojos. Igualmente, puede • Asegúrese de que el acceso externo a sus dispositivos sea impo- configurar el modo de audio en una o dos direcciones. sible o extremadamente difícil y que no se pueda realizar ningún cambio en su hardware desde el exterior. -
Página 17: Emparelhamento Do Dispositivo
instruções para se ligar ao hotspot do dispositivo. Emparelhamento do dispositivo 2. Pressionar o botão SET, 5 vezes seguidas para voltar do Modo AP para o modo EZ. No seguinte passo, o alimentador automático é ligado à inter- net e emparelhado ao seu smartphone. Por favor seguir atenta- mente as seguintes instruções para assegurar uma ligação sem Programar a refeição problemas:... -
Página 18: Rejestracja Produktu
de dados, fornecidos pela App. Habituar o seu animal ao alimentador: Alguns animais precisam de um pouco de tempo para se habitu- arem ao novo alimentador automático. Por isso recomendamos p Instrukcja o seguinte : • Przeczytaj instrukcję przed użyciem urządzenia. •... -
Página 19: Inne Ustawienia
że wybierasz właściwe pasmo częstotliwości. dozować od razu. • Istnieją dwie opcje łączenia urządzenia: tryb EZ i tryb AP. Nie- 2. Naciskając MÓW, możesz nagrać 10-sekundową wiadomość które routery dwuzakresowe używają wspólnego SSID (nazwy audio. Będzie to odtwarzane podczas karmienia, aby zwrócić sieci) dla obu częstotliwości. - Página 20 Czyszczenie Před použitím automatického podavače Wyłącz automatyczny podajnik karmyi odłącz go od zasilania. 1. Zapojte automatický dávkovač do elektrické zásuvky pomocí Zdejmij miskę do karmienia (podnieś i wyciągnij), pokrywkę síťové zástrčky. Zapněte hlavní vypínač vespod. i pojemnik na karmę (po prostu wyciągnij do góry) ze stacji 2.
- Página 21 Toto nastavení lze snadno přehlédnout. aktivovat zobrazení stavu a zkontrolovat stav zařízení. S FLIP 4. Ještě jednou se ujistěte, že zelená kontrolka na automatickém SCREEN můžete převrátit displej na obrazovce nebo aktivovat podavači bliká. funkci infračerveného nočního vidění. Stejně tak můžete nasta- 5.
- Página 22 lované komunikaci vašich zařízení IoT na internetu. Соединение • Ujistěte se, že externí přístup k zařízením není možný nebo extrémně obtížný a zvenčí nelze provádět žádné změny hardwaru. На следующем этапе автоматическая кормушка • Porty USB nebo LAN by neměly být volně přístupné, protože подключается...
- Página 23 можете перевернуть дисплей на экране или активировать AP-режим функцию инфракрасного ночного видения. Кроме того, Вы можете установить аудиорежим на односторонний или 1. Если подсоединить устройство не удается, хотя Вы двусторонний формат. выполнили все инструкции и частота сети установлена на 2,4 Гц, Вы можете попробовать альтернативный режим сопряжения...
- Página 24 использования и информацию о защите данных, • Порты USB или LAN не должны быть свободно доступны, приведенную в мобильном приложении. т. к. они могут служить шлюзом в Вашу сеть и к Вашим TRIXIE Heimtierbedarf · Industriestr. 32 · 24963 Tarp · GERMANY · www.trixie.de...