Tabla de contenido
Publicidad
Idiomas disponibles
Idiomas disponibles
Enlaces rápidos
Step 2: Installing Eyewash Unit
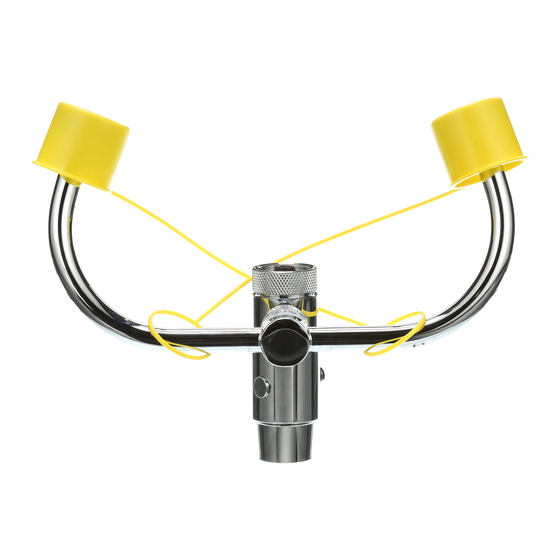
1. Remove the Allen screw from the Eyewash Yoke
Assembly using the enclosed small Allen wrench (see
Figure 3).
Figure 3
2. Attach the yoke assembly to the connection on the
Eyewash adapter (see Figure 4). Be sure that the
sprayheads are facing toward the user's eyes.
3 Re-install the Allen screw using the Allen wrench.
Tighten the Allen screw until the yoke assembly is
firmly attached to the adapter.
Note: When adjusting the Eyewash Yoke Assembly
on the adapter, always remember to loosen the Allen
screw first, make the adjustment and then tighten.
4. Activate cold or tempered water supply and pull the
diverter pin to ensure the eyewash is working properly.
Yellow spray head dust caps will pop off with the
pressure of the water. Make sure the dust caps are on
the sprayheads when the Eyewash is not in use.
5. Place the Emergency Eyewash Sign and Inspection Tag
in plain view by the eyewash.
Figure 4
Step 3: Using Eyewash Unit
IMPORTANT
• C
old or tempered water supply to the eyewash
from the faucet must be "ON" at all times.
To activate the eyewash, pull the diverter pin
•
toward you.To activate the faucet only, push the
shutoff pin until water flows from the faucet.
1. To activate the eyewash, pull the diverter pin toward
you.
2. Use the forefinger and thumb to hold your eyes open
during rinse.
3. Rotate eyes back and forth while continuing to rinse
eyes for a minimum of 15 minutes.
4. Seek medical attention immediately.
IMPORTANT
It is the responsibility of the employer to provide the
following information to its employees:
• Circumstances that would render the use of an
eyewash station.
• Location of each eyewash station in your facility.
• Proper use of the eyewash station, including the
exclusive use of the cold water supply if tempered
water cannot be provided (please refer to the
Warning stated in the Pre-installation Information.
For further information on the proper installation and use of
Emergency Eyewash and Shower equipment, please refer
to ANSI Z358.1-2004.
WARNING
To prevent scalding of the eyes when the
Eyewash is in use, it is recommended that the
hot water supply be disconnected OR that
tempered water be provided. A comfortable
eyewash water temperature range is 15° C - 35°
C (60° F - 95° F). In circumstances where
chemical reaction is accelerated by water
temperature, a facilities safety/health advisor
should be consulted regarding the optimum
temperature for each application*.
*ANSI Z358.1-2004
Faucet-Mount
Eyewash
Model S19-200B
Installation
Instructions
P.O. Box 309, Menomonee Falls, WI 53052-0309
TEL 1-800-BRADLEY
FAX 262-251-5817
http://www.bradleycorp.com
215-1333 Rev. F; EN 06-531
© 2006
Certified
Model
Z358.1-2004
Made in Taiwan
page 1 of 6
8/21/06
Publicidad
Tabla de contenido

Resumen de contenidos para Bradley S19-200B
- Página 1 IMPORTANT Assembly using the enclosed small Allen wrench (see • C old or tempered water supply to the eyewash Model S19-200B Figure 3). from the faucet must be “ON” at all times. To activate the eyewash, pull the diverter pin •...
-
Página 2: Pre-Installation Information
Make sure all parts are accounted for before discarding any packaging material. If any parts are missing, do not attempt to install your Bradley Faucet- Mount Eyewash Unit until you obtain the missing parts. Supplies Required •... - Página 3 IMPORTANT utilisant la clé Allen fournie (voir Figure 3). • L'approvisionnement en eau froide ou tempérée Modèle S19-200B à la douche oculaire à partir du robinet doit être sur « ON/MARCHE » à tout moment. • Pour activer la douche oculaire, tirer le goujon du partiteur vers soi.
-
Página 4: Information Avant Installation
Figure 1 relative au filetage. Note : Bradley fournit deux adaptateurs qui convertissent les 2. Dévisser le générateur de jets du montage du partiteur de filetages femelles standard 55/64"x 27 sur l'appareil : la douche oculaire (voir Figure 2a). -
Página 5: Paso 2: Instalación Del Lavador De Ojos
IMPORTANTE usando la llave Allen que se incluye (vea Figura 3). • El suministro de agua fría o templada al lavaojos Modelo S19-200B desde el grifo debe estar en la posición "ON" en todo momento. • Para activar el lavaojos, jale hacia usted la perilla del desviador de flujo. -
Página 6: Información Previa A La Instalación
Asegúrese de contar todas las piezas antes de desechar el empaque. En caso de faltar alguna pieza, no intente instalar el lavador de ojos para montar en grifo de Bradley hasta cuando obtenga las piezas faltantes. Materiales requeridos •...


