Tabla de contenido
Publicidad
Enlaces rápidos
Publicidad
Tabla de contenido

Manuales relacionados para Baby Lock Zest BL15B


Resumen de contenidos para Baby Lock Zest BL15B
-
Página 2: Important Safety Instructions
IMPORTANT SAFETY INSTRUCTIONS When using an electrical appliance, basic safety precautions should always be followed, including the following: This sewing machine is designed and manufactured for household use only. Read all instructions before using this sewing machine. DANGER — To reduce the risk of electric shock: 1. -
Página 3: Instrucciones Importantes De Seguridad
INSTRUCCIONES IMPORTANTES DE SEGURIDAD Siempre que utilice esta máquina, tome ciertas precauciones mínimas de seguridad: La máquina de coser fue diseñada y fabricada únicamente para uso doméstico. Lea todas las instrucciones antes de utilizar esta máquina. PELIGRO: Para reducir el riesgo de descarga eléctrica: 1. -
Página 4: Consignes Importantes De Securite
CONSIGNES IMPORTANTES DE SECURITE Pour utiliser un appareil électrique, il faut toujours respecter les consignes de sécurité fondamentales, notamment les consignes suivantes: Cette machine à coudre a été conçue et fabriquée pour l'usage domestique uniquement. Avant d’utiliser cet appareil, lisez toutes ces instructions. DANGER: Pour éviter tout risque de décharge électrique: 1. -
Página 5: Tabla De Contenido
TABLE OF CONTENTS ESSENTIAL PARTS Names of Parts ............................8 Extension Table ............................10 Free-arm Sewing ............................10 Accessory Storage Box ..........................10 Standard Accessories ..........................10 GETTING READY TO SEW Connecting the Power Supply ........................12 Operating Instructions: ...........................12 Controlling Sewing Speed ........................12 Presser Foot Lifter ..........................14 Changing Presser Foot ..........................14 To Attach and Remove the Foot Holder ....................14 Changing the Needle..........................16... - Página 6 INDICE PIEZAS ESENCIALES Nombre de las Piezas ..........................9 Mesa extensión ............................11 Costura con brazo libre .......................... 11 Caja de accesorios ..........................11 Accesorios Estándar ..........................11 PREPARACIÓN PARA COSER Conexión de la máquina a la fuente de alimentación eléctrica .............. 13 Instrucciones de operación (sólo para EE.UU.
- Página 7 TABLE DES MATIÈS PIECES MAITRESSES Identification des pièces ........................... 9 Table d’extension ............................ 11 Couture avec le bras libre ........................11 Rangement des accessoires ........................11 Accessoires standard ..........................11 PRÉPAREZ-VOUS À COUDRE Branchez la machine ..........................13 Conseils d'utilisation (pour les E.U. et le Canada uniquement).............. 13 Contrôlez la vitesse de couture ......................
-
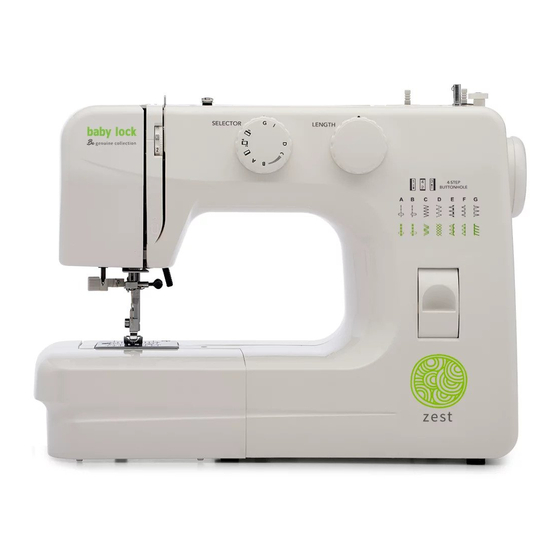
Página 8: Essential Parts Names Of Parts
ESSENTIAL PARTS Names of Parts Reverse stitch lever Pattern selector dial Stitch length dial Bobbin winder stopper Bobbin winder spindle Spool pin Bobbin winding tension disk Upper thread guide Thread take-up lever Thread tension dial Face cover Presser foot Extension table (Accessory storage) Foot holder Needle clamp screw Needle... -
Página 9: Piezas Esenciales Nombre De Las Piezas
PIEZAS ESENCIALES PIECES MAITRESSES Nombre de las Piezas Identification des pièces Tecla de cosido hacia atrás Bouton de marche arrière Selector de puntada Cadran de sélection du point Selector de longitud de puntada Cadran de réglage de la longeur du point Freno del devanador de canillas Arrêt du dévidoir Eje del devanador de canillas... -
Página 10: Extension Table
Extension Table The extension table provides an extended sewing area and can be easily removed for free-arm sewing. Detaching the table Pull the table away from the machine. Free-arm Sewing Free-arm is useful for sewing tubular garments and for darning knee or elbow areas. Accessory Storage Box Sewing accessories are conveniently located in the extension table. -
Página 11: Mesa Extensión
Mesa extensión Table d’extension La mesa extensión proporciona una superficie de La table d’extension ajoute de la surface pour costura adicional fácilmente extraíble para coser coudre et peut être facilement enlevée. con brazo libre. Desmontaje de la mesa extensión: Pour remettre la table: Poussez la table d’extension jusqu’à... -
Página 12: Getting Ready To Sew Connecting The Power Supply
GETTING READY TO SEW Connecting the Power Supply z Turn “OFF” the power switch. x Insert the machine plug into the machine socket. c Insert the power supply plug into the wall outlet. v Turn “ON” the power switch to turn “ON” the power and sewing light. -
Página 13: Preparación Para Coser
PREPARACIÓN PARA COSER PRÉPAREZ-VOUS À COUDRE Conexión de la máquina a la fuente de Branchez la machine alimentación eléctrica z Éteignez la machine. x Branchez la fiche de raccord électrique sur la z Apague el interruptor. prise de la machine. x Introduzca la clavija de la máquina en el c Connectez la prise électrique q à... -
Página 14: Presser Foot Lifter
Presser Foot Lifter The presser foot lifter raises and lowers your presser foot. You can raise it about 0.6 cm (1/4˝) higher than the normal up position for easy removal of the presser foot or to help you to place heavy fabric under the foot. -
Página 15: Palanca De Elevación Del Prensatelas
Palanca de elevación del prensatelas Relève-pied presseur La palanca de elevación del pie prensatelas sube Le relève pied presseur remonte et abaisse le y baja el pie prensatelas. pied presseur. Puede elevarlo unos 0,6 cm. (1/4˝) por encima de la Vous pouvez le remonter d’environ 0,6 cm (1/4˝) posición elevada normal para extraer fácilmente plus haut que la position normale pour retirer plus... -
Página 16: Changing The Needle
Changing the Needle CAUTION: Turn OFF the power switch before changing the needle. Raise the needle to its highest position by turning the handwheel counterclockwise. A loose needle or a loose screw may cause machine malfunction or needle to break. Loosen the needle clamp screw by turning it counterclockwise. -
Página 17: Cambio De La Aguja
Cambio de la aguja Changer l’aiguille PPRECAUCIÓN: ATTENTION: Apague el interruptor de alimentación antes de Éteignez l’interrupteur avant de changer cambiar la aguja. l’aiguille. Suba la aguja hasta su posición más alta Relevez l’aiguille jusqu’à sa plus haute position girando el volante hacia la izquierda y baje el en tournant le volant manuellement dans le pie prensatelas. -
Página 18: Fabric, Thread And Needle Chart
Fabric, Thread and Needle Chart • For general sewing, use needle size 11/75 or 14/90. • A fine thread and needle should be used for sewing lightweight fabrics, so the fabric will not be marred. • Heavy fabrics require a needle large enough to pierce the fabric without fraying the needle thread. -
Página 19: Tabla De Telas Y Agujas
Tabla de telas y agujas Tableau des tissus, fils et aiguilles • En general, utilice una aguja 11/75 o 14/90. • Pour la couture en général, utilisez des aiguilles • Utilice una aguja e hilo finos para coser telas de tailles 11/75 ou 14/90. ligeras: así... -
Página 20: Setting Spool Pins
Setting Spool Pins The spool pins are used for holding the spool of thread in order to feed thread to the machine. To use, pull up the spool pin. Push down for storage. Removing or Inserting the Bobbin Case Open the hook cover. Hook cover Raise the needle by turning the handwheel toward you. -
Página 21: Preparación De Los Pasadores Portacarretes
Preparación de los pasadores Pose de la broche à bobine portacarretes Les broches à bobines servent à retenir les Los pasadores portacarretes se utilizan para bobines de fil en vue de procéder à l’enfilage du fil sujetar el carrete de hilo con objeto de alimentar supérieur. -
Página 22: Winding The Bobbin
Winding the Bobbin z Pull the handwheel out. x Draw the thread from the spool. Guide the thread around the bobbin winder thread guide. c Insert the thread through the hole in the bobbin from the inside to the outside. Put the bobbin on the bobbin winder spindle. -
Página 23: Devanado De La Canilla
Devanado de la Canilla Bobinage d’une canette de fil z Saque el volante hacia fuera. z Tourneg le volant vers la droite pour empêcher l’aiguille de se déplacer lorseque vous bobinez x Suelte hilo del carrete. Guíe el hilo alrededor del guiahilos del la canette. -
Página 24: Threading The Machine
Threading the Machine Raise the thread take-up lever to its highest position by turning the handwheel toward you. Raise the presser foot. Place a spool on the spool pin as shown, with thread coming from back of the spool. z Draw the thread into thread guide using both hands. -
Página 25: Enhebrado De La Máquina
Enhebrado de la máquina Enfilage de la machine Sitúe el tirahilos en su posición más elevada Faites monter le levier releveur tendeur de fil le girando el volante hacia usted. plus haut possible en tournant le volant à main en Levante el prensatelas. -
Página 26: Drawing Up The Bobbin Thread
Drawing up the Bobbin Thread z Raise the presser foot. Hold the needle thread lightly with your left hand. x Turn the handwheel slowly toward you with your right hand until the needle goes down and continue turning the handwheel until the take- up lever is at its highest position. -
Página 27: Extracción Del Hilo De La Canilla
Extracción del hilo de la canilla Comment faire monter le fil de la canette z Levante el pie prensatelas y sujete el hilo de la z Faites monter le pied presseur. Tenez le fil de l’aiguille souplement de la main gauche. aguja ligeramente con la mano izquierda. -
Página 28: Stitch Selector Dial
Stitch Selector Dial Turn the stitch selector dial to set the setting mark with the symbol corresponding to the desired pattern. q Setting mark CAUTION: To avoid needle or fabric damage, make sure the needle is up and out of the fabric while selecting a stitch. -
Página 29: Selector De Puntada
Selector de puntada Cadran de sélection du point Gire el selector de puntada para ajustar el Tourner le cadran de sélection du point et placer símbolo correspondiente al modelo deseado en la le repère en face du symbole correspondant au marca de ajuste. -
Página 30: Reverse Stitch Button
Reverse Stitch Button As long as you keep the reverse stitch button depressed, the machine will sew in reverse. Darning Plate Position the darning plate with 3 pins on the bottom. Fit the darning plate pins into the needle plate holes. The feed dogs will show through the darning plate holes. -
Página 31: Tecla De Cosido Hacia Atrás
Tecla de cosido hacia atrás Bouton de marche arrière Mientras mantenga pulsada la tecla de cosido La machine coud en arrière tant que vous hacia atrás, la máquina coserá hacia atrás. maintenez le bouton de marche arrière enfoncé. Placa de zurcir Plaque de reprisage Coloque la placa zurcidora con 3 clavijas en la Positionnez la plaque de reprisage avec ses 3... -
Página 32: Basic Sewing Straight Stitch Sewing
BASIC SEWING Straight Stitch Sewing q Pattern selector: A or B w Presser foot: Zigzag foot e Needle thread tension: 2 to 6 r Stitch length: 1.5 to 4 z Raise presser foot and position the fabric next to a seam guide line on the needle plate. Lower the needle to the point where you want to start. -
Página 33: Costura Básica Costura De Puntada Recta
COSTURA BÁSICA COUTURE DE BASE Costura de puntada recta Utilisation du point droit q Selector de puntada: A o B q Selecteur de point: A ou B w Prensatelas: Prensatelas para zigzag w Pied presseur: Pied zigzag e Tensión del hilo: 2–6 e Tension du fil: 2–6... -
Página 34: Using Seam Guides
Using Seam Guides The numbers on the needle plate indicate the distance from the center needle position and the guide line. The numbers in front are centimeters. The numbers in back are fraction of an inch. Number 10 15 20 3/8 4/8 5/8 6/8 Distance (cm) 1.0 1.5 2.0 1.0 1.3 1.6 1.9 q Center needle position... -
Página 35: Utilización De Las Guías De Costura De La Placa De Aguja
Utilización de las guías de costura de la Guides de couture placa de aguja Les nombres sur la plaque d’aiguille indiquent la distance entre la position centrale de l’aiguille et Las guías de costura de la placa de aguja le le guide. -
Página 36: Tricot Stitch
Tricot Stitch q Pattern selector: w Presser foot: Zigzag foot A w Thread tension dial: 1 − 4 w Stitch length: 0.5 − 4 This stitch is used to finish a raw edge of synthetics and other stretch fabrics that tend to pucker. -
Página 37: Zigzag De Tricot
Zigzag de tricot Point zig-zag multiple q Selector de puntada: D q Selecteur de point: w Prensatelas: Prensatelas para zigzag w Pied presseur: Pied zigzag e Tensión del hilo: 1–4 e Tension du fil: 1–4 r Longitud de puntada: 0,5–4 r Longueur du point: 0,5–4 Esta puntada se utiliza para terminar el margen... -
Página 38: Triple Stretch Stitch
Triple Stretch Stitch q Pattern selector: w Presser foot: Zigzag foot A e Thread tension dial: 2 to 6 r Stitch Length: S.S. This strong, durable stitch is recommended when both elasticity and strength are necessary in order to insure comfort and durability. Use it to reinforce areas such as crotch and armhole seams. -
Página 39: Puntada Recta Elástica
Puntada recta elástica Point droit extensible q Selector de puntada: A q Sélecteur de point: w Prensatelas: Prensatelas para zigzag w Pied presseur: Pied zigzag e Tensión del hilo: 2–6 e Tension du fil: 2–6 r Longitud de puntada: S.S. r Longueur du point: S.S. -
Página 40: Sewing Buttons
Sewing Buttons q Pattern selector: w Presser foot: Zigzag foot e Thread tension dial: 3 to 7 r Stitch length: t Darning plate Attach the darning plate. Match the holes of button to the horizontal slot of the presser foot. Adjust the stitch width so the needle will enter the left hole of the button. -
Página 41: Coser Botones
Coser botones Pose des boutons q Selector de puntada: C q Sélecteur de point: w Prensatelas: Prensatelas para zigzag w Pied presseur: Pied zigzag e Tensión del hilo: 3–7 e Tension du fil: 3–7 r Longitud de puntada: Cualquiera r Longueur du point: t Placa de zurcir t Plaque de reprisage Montez la plaque de reprisage. -
Página 42: Buttonhole
Buttonhole q Pattern selector: (BH) w Presser foot: Sliding buttonhole foot e Thread tension dial: 1 to 5 r Stitch length: (0.5–1) NOTE: • Make a test buttonhole on a sample duplicating the fabric, interfacing and seams of the actual garment. •... -
Página 43: Ojales
Ojales Boutonnières q Selector de puntada: (BH) q Sélecteur de point: (BH) w Prensatelas: Prensatelas para w Pied presseur: Pied de boutonnière ojales deslizante coulissant e ensión del hilo: 1–5 e Tension du fil: 1–5 r Longitud de puntada: r Longueur du point: NOTA: REMARQUE: * Faites une boutonnière d’essai avec le... -
Página 44: Zipper Application
Zipper Application q Pattern selector: w Presser foot: Zipper foot e Thread tension: 3–6 r Stitch length: 1.5-4 Pin or baste zipper tape to fabric and place it under the foot. Smooth the threads toward the back and lower the foot. To sew the left side of the zipper, guide the zipper teeth along the edge of the foot and stitch through the garment and zipper tape. -
Página 45: Aplicación De Cremalleras
Aplicación de cremalleras Installation des fermeture à glissière q Selector de puntada: A/B q Sélecteur de point: A/B w Prensatelas: Prensatelas para w Pied presseur: Pied fermeture à glissière cremalleras e Tension du fil: 2–6 e Tensión del hilo: 2–6 r Longueur du point: 1,5-4 r Longitud de puntada: 1,5-4 Prenda con alfileres o hilvane la cinta de Épingler ou faufiler le ruban de la fermeture à... -
Página 46: Decorative Stitching Shell Tuck
DECORATIVE STITCHING Shell Tuck q Pattern selector: w Presser foot: Zigzag foot e Thread tension: 6–8 r Stitch length: 2–3 Use a lightweight fabric (tricot, for example). Fold and stitch on the bias. When the needle swings to the right, allow the needle to just clear the folded edge of the fabric. -
Página 47: Costura Decorativa Puntada De Ondas
COSTURA DECORATIVA COUTURE DECORATIVE Puntada de ondas Ourlet coquille q Selector de puntada: G q Sélecteur de point: G w Prensatelas: Prensatelas para zigzag w Pied presseur: Pied zigzag e Tensión del hilo: 6–8 e Tension du fil: 6–8 r Longitud de puntada: 2–3 r Longueur du point: 2–3 Utilice una tela ligera (tricot, por ejemplo). -
Página 48: Applique
Applique q Pattern selector: w Presser foot: Zigzag foot e Thread tension: 1–4 r Stitch length: 0.5–1 Baste (or fuse with iron-on fabric joiner) applique pieces on the fabric. Stitch around the applique making sure the needle falls along the outer edge of the applique. When sewing corners, lower the needle down into the fabric. -
Página 49: Aplicaciones
Appliqué Aplicaciones q Sélecteur de point: C q Selector de puntada: C w Pied presseur: Pied zigzag w Prensatelas: Prensatelas para zigzag e Tension du fil: 1–4 e ensión del hilo: 1–4 r Longueur de point: 0,5–1 r Longitud de puntada: 0,5–1 Hilvane (o pegue con adhesivo para plancha) las Faufilez ou repassez avec un adhésif à... -
Página 50: Maintenance Of Your Machine
MAINTENANCE OF YOUR MACHINE Cleaning the Bobbin Case and the Hook WARNING: • Turn the power switch “OFF” and/or unplug the machine before dismantle or cleaning the machine. • Do not dismantle the machine other than as explained in this section. CAUTION: Do not store the machine in a high-humidity area, near a heat radiator, or in direct sunlight. -
Página 51: Cuidado De La Máquina
CUIDADO DE LA MÁQUINA ENTRETIEN DE VOTRE MACHINE Nettoyage du logement de la canette et du Desmontaje y montaje de la pista de la chemin de la navette lanzadera ATENCIÓN: AVERTISSEMENT: • Apague el interruptor y/o desenchufe la • Mettez le commutateur sur arrêt et/ou máquina. -
Página 52: Troubleshooting
Troubleshooting Condition Cause Reference The needle thread 1. The needle thread is not threaded properly. Page 24 breaks. 2. The needle thread tension is too tight. Page 26 3. The needle is bent or blunt. Page 16 4. The needle is incorrectly inserted. Page 16 5. -
Página 53: Identificación Y Resolución De Problemas
Identificación y resolución de problemas Situación Causa Probable Referencia El hilo de la 1. El hilo de la aguja no se ha enhebrado correctamente. Véase la Página 25 aguja se rompe 2. La tensión del hilo de la aguja es excesiva. Véase la Página 27 3. - Página 54 En Cas de Problème Problème Cause Reference Le fil d’aiguille se 1. Le fil d’aiguille n’est pas passé correctement. Page 25 casse. 2. La tension du fil d’aiguille est trop forte. Page 27 3. L’aiguille est tordue ou émoussée. Page 17 4.
- Página 56 305-800-471 (ESF) Printed in Thailand...