Tabla de contenido
Publicidad
Idiomas disponibles
Idiomas disponibles
Publicidad
Capítulos
Tabla de contenido

Manuales relacionados para EAS ELECTRIC EMIH600-FX


Resumen de contenidos para EAS ELECTRIC EMIH600-FX
- Página 1 Vitrocerámica Ceramic Hob MANUAL EMIH600-F V. 1...
-
Página 2: Tabla De Contenido
Indice 1. Introducción..................... 4 1.1 Advertencias de seguridad ............. 4 1.2 Instalación ..................4 1.2.1 Riesgo de descarga eléctrica..........4 1.2.2 Riesgo de corte..............4 1.2.3 Instrucciones importantes de seguridad......4 1.3 Funcionamiento y mantenimiento..........5 1.3.1 Riesgo de descarga eléctrica..........5 1.3.2 Peligro para la salud............. -
Página 3: Introducción
1. Introducción 1.1 Advertencias de seguridad. Su seguridad es importante para nosotros. Por favor lea esta información antes de comenzar a usar la vitrocerámica. 1.2 Instalación 1.2.1 Riesgo de descarga eléctrica Desconecte el aparato de la toma de corriente principal antes de realizar cualquier trabajo de mantenimiento en la vitrocerámica. -
Página 4: Funcionamiento Y Mantenimiento
1.3 Funcionamiento y mantenimiento 1.3.1 Riesgo de descarga eléctrica No cocine en una vitrocerámica rota o rajada. Si la superficie de la vitrocerámica está rota o agrietada, desconecte el aparato de la fuente de alimentación principal y contacte con personal cualificado. -
Página 5: Riesgo De Corte
1.3.4 Riesgo de corte. La falta de precaución podría causar lesiones o cortes. El borde afilado del cristal de la encimera se expone cuando se retira la cubierta de seguridad puede provocar heridas, mantenga siempre a los niños alejados. 1.3.5 Instrucciones importantes de seguridad. ... - Página 6 ADVERTENCIA : El aparato y las partes accesibles comienzan a calentarse durante su uso. Evite tocar los mandos de control si estos están calientes. Los niños menores de 8 años deberían de mantenerse alejados a menos que estén vigilados.
-
Página 7: Vista Superior
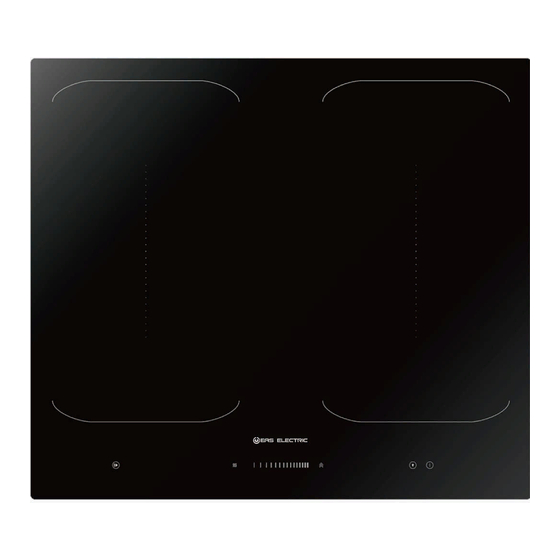
2. Información del producto 2.1 Vista superior 1. Max. 1800/3000 W zona 2. Max. 1800/3000 W zona 3. Max. 1800/3000 W zona 4. Max. 1800/3000 W zona 5. Zona de inducción libre. 3000/4000 W 6. Zona de inducción libre. 3000/4000 W 7. -
Página 8: Antes De Usar Su Nueva Vitrocerámica
Lea esta guía, prestando mucha atención en la sección "Advertencia de seguridad". Elimine cualquier película protectora que se encuentre en su placa vitrocerámica. 2.5 Especificaciones técnicas Vitrocerámica EMIH600-FX Zonas de cocción 4 Zonas Fuente de alimentación 220-240V~ 50/60Hz Potencia eléctrica instalada 7200W Tamaño de producto L×W×H(mm) -
Página 9: Elección De Adecuados Utensilios De Cocina
3.2 Elección de adecuados utensilios de cocina • Solo utilice utensilios de cocina con la base adecuada para placas de inducción. Mire el símbolo de inducción en la etiqueta de la sartén. • Puede comprobar que el utensilio es adecuado para inducción mediante un imán. Mueva un imán en el interior de la cacerola, si éste es atraído, la sartén es apta para inducción. -
Página 10: Como Usarla
3.3 Como usarla 3.3.1 Empezar a cocinar Toque el control ON / OFF. Después de encender, el timbre eléctrico emitirá un pitido una vez, el control del temporizador mostrará "00", los controles de selección de la zona de calefacción mostrarán "... -
Página 11: Uso De La Función Boost
Apague la encimera tocando el control ON/OFF. Cuidado con las superficies calientes: H aparecerá cuando la zona de cocción esté caliente para tocar. Desaparecerá cuando la superficie baje a una temperatura segura. Esto también suele usarse como una función de ahorro de energía, si quieres calentar más sartenes, use el hornillo que aún está caliente 3.4.3 Uso de la función Boost Active la función Boost... -
Página 12: Área Flexible
el indicador de zona Tocar el control de mantener caliente ”, esto significa elegir el nivel de calor para calentar muestra “ manteniendo 42 ° C con 2 litros de agua. Si vuelve a tocar el control de mantener caliente, el indicador de zona. -
Página 13: Como Zona Grande
Como zona grande Para activar el área flexible como una sola zona grande, simplemente presione las teclas dedicadas. El ajuste de potencia funciona como cualquier otra área normal. Si la olla se mueve desde la parte delantera a la parte trasera (o viceversa), el área flexible detecta automáticamente la nueva posición, manteniendo la misma potencia. -
Página 14: Programación Del Tiempo De Cocción Para Apagar Una O Más Zonas
Ajuste la hora tocando el control deslizante. (Por ejemplo, 6) Toque el control del temporizador de nuevo, el "1" parpadeará. Ajuste la hora tocando el control deslizante (p. Ej., 9), ahora el temporizador ajustado es de 96 minutos. El timbre eléctrico emitirá un pitido durante 30 segundos y el indicador del temporizador mostrará... -
Página 15: Funcionamiento Del Control De Pausa
1) Otras zonas de cocción se quedarán funcionando, si se han encendido previamente. 2) El punto rojo al lado del nivel de potencia, se iluminará indicando la zona de cocción seleccionada. Programar más de una zona Los pasos para configurar más zonas son similares a los pasos de establecer una zona; Cuando programas varias zonas de cocción simultáneamente, los puntos decimales de las zonas de cocción relevantes se encienden. -
Página 16: Tipos De Cocción
4.1 Tipos de cocción Cuando la comida llegue a ebullición, reduzca el ajuste de la temperatura. Usando una tapa se reducirá el tiempo de cocción y se ahorrará energía al retener calor. Minimice la cantidad de líquido o grasa para reducir el tiempo de cocción. ... -
Página 17: Ajustes De Calor
5. Ajuste de calor Los ajustes abajo descritos son solamente guías. El ajuste exacto dependerá de varios factores, incluyendo la cantidad de comida que se va a cocer. Experimente con la vitrocerámica para encontrar los ajustes que mejor se adapten a usted. Apropiado para Ajuste de calor •... -
Página 18: Consejos
• La placa de inducción puede sonar y apagarse ella 1. Desconecte la placa de inducción. 2. Absorba el derrame. sola, y las funciones de los mandos de control no 3. Limpie el área de los mandos de control con funcionar mientras haya liquido derramado en la Derrames en el una esponja húmeda o paño. -
Página 19: Fallo De La Pantalla E Inspección
La placa de inducción no detecta la sartén Use utensilios de cocina adecuados para la placa La sartén no se calienta y porque no es adecuada para la de inducción. Mire la sección: " Elegir el aparece en la pantalla. vitrocerámica. -
Página 20: Instalación
La temperatura ambiente puede ser demasiado alta. La entrada y salida Alta temperatura de la zona de El indicador del modo de de aire puede estar bloqueada. cocción. cocción funciona, pero no comienza a calentar. Compruebe si el ventilador Hay algún error con el funciona, si no debe ventilador. - Página 21 Mini.3mm L(mm) W(mm) H(mm) D(mm) A(mm) B(mm) X(mm) F(mm) 560+4 490+4 50 mini 3 mini Bajo cualquier circunstancia, asegúrese de que la vitrocerámica está bien ventilada y la entrada y salida de aire no está bloqueada. Asegúrese de que la placa de cocción está en buen estado de trabajo. Como aparece mas abajo: Nota:La distancia de seguridad entre la placa de cocción y el armario sobre la placa de cocción debiera ser al menos 760mm.
-
Página 22: Antes De Instalar La Vitrocerámica, Asegúrese Que
Hay agujeros de ventilación en todo el exterior de la encimera. Debe asegurarse que estos agujeros no estén bloqueados por la encimera cuando se ponga la placa en su posición. Tenga en cuenta que el pegamento que une el material de plástico o el material para la madera, puede ... -
Página 23: Antes De Fijar Los Soporte De Fijación
Si la placa se instala por encima de un espacio en los cajones o un armario , una barrera de protección térmica se instala debajo de la base de la encimera. El interruptor de aislamiento es de fácil acceso por parte del cliente . 9.4 Antes de fijar los soportes de fijación. -
Página 24: Conectar La Vitrocerámica A Las Principales Tomas De Corriente
La encimera vitrocerámica debe ser instalada de tal manera que una mejor disipación de calor pueda garantizar una mejora de fiabilidad . La pared y la zona de calentamiento inducido por encima de la superficie de trabajo deberán soportar el calor . El limpiador a vapor no se debe usar para limpiar la placa de cocción. - Página 25 Este aparato está regulado conforme a la directiva europea 2012/19 / UE sobre residuos de aparatos eléctricos y electrónicos ( RAEE ). Si asegura que este aparato se desecha correctamente, usted ayudará a evitar posibles daños al medio ambiente y para la salud humana, que de otro modo podría ser causado si se desechara en el sentido contrario.
- Página 26 Vitrocerámica Ceramic Hob MANUAL EMIH600-FX V. 1...
- Página 27 Content 1. Foreword ..................4 1.1 Safety Warnings ................. 4 1.2 Installation ................4 1.2.1 Electrical Shock Hazard ..........4 1.2.2 Cut Hazard ..............4 1.2.3 Important safety instructions .......... 4 1.3 Operation and maintenance ............5 1.3.1 Electrical Shock Hazard ..........5 1.3.2 Health Hazard ..............
- Página 28 9.2 Before installing the hob, make sure that ........23 9.3 After installing the hob, make sure that ........23 9.4 Before locating the fixing brackets ..........24 9.5 Adjusting the bracket position ............. 24 9.6 Cautions ................... 24 9.7 Connecting the hob to the mains power supply ......25 V.
-
Página 29: Foreword
1. Foreword 1.1 Safety Warnings Your safety is important to us. Please read this information before using your cooktop. 1.2 Installation 1.2.1 Electrical Shock Hazard Disconnect the appliance from the mains electricity supply before carrying out any work or maintenance on it. ... -
Página 30: Operation And Maintenance
Failure to install the appliance correctly could invalidate any warranty or liability claims. 1.3 Operation and maintenance 1.3.1 Electrical Shock Hazard Do not cook on a broken or cracked cooktop. If the cooktop surface should break or crack, switch the appliance off immediately at the mains power supply (wall switch) and contact a qualified technician. -
Página 31: Important Safety Instructions
the safety cover is retracted. Use with extreme care and always store safely and out of reach of children. Failure to use caution could result in injury or cuts. 1.3.5 Important safety instructions Never leave the appliance unattended when in use. Boilover causes smoking and greasy spillovers that may ignite. - Página 32 agents to clean your cooktop, as these can scratch the Induction glass. If the supply cord is damaged, it must be replaced by the manufacturer, its service agent or similarly qualified persons in order to avoid a hazard. This appliance is intended to be used in household and similar applications such as: -staff kitchen areas in shops, offices and other working environments;...
-
Página 33: Product Induction
Congratulations on the purchase of your new Induction Hob. We recommend that you spend some time to read this Instruction / Installation Manual in order to fully understand how to install correctly and operate it. For installation, please read the installation section. Read all the safety instructions carefully before use and keep this Instruction / Installation Manual for future reference. -
Página 34: Before Using Your New Induction Hob
Read this guide, taking special note of the ‘Safety Warnings’ section. Remove any protective film that may still be on your Induction hob. 2.5 Technical Specification Cooking Hob EMIH600-FX Cooking Zones 4 Zones Supply Voltage 220-240V~ 50/60Hz Installed Electric Power 7200W Product Size L×W×H(mm) -
Página 35: Choosing The Right Cookware
3.2 Choosing the right Cookware • Only use cookware with a base suitable for induction cooking. Look for the induction symbol on the packaging or on the bottom of the pan. • You can check whether your cookware is suitable by carrying out a magnet test. Move a magnet towards the base of the pan. -
Página 36: How To Use
3.4 How to use 3.4.1 Start cooking Touch the ON/OFF control. After power on, the buzzer beeps once, timer control show “00”,heating zone selection controls show “ ” or “ ” or “ ”, indicating that the induction hob has entered the state of standby mode. Place a suitable pan on the cooking zone that you wish to use. -
Página 37: Using The Boost Function
Turn the whole cooktop off by touching the ON/OFF control. Beware of hot surfaces H will show which cooking zone is hot to touch. It will disappear when the surface has cooled down to a safe temperature. It can also be used as an energy saving function if you want to heat further pans, use the hotplate that is still hot. -
Página 38: Flexible Area
Touching the keep warm control ,the zone indicator show this means choosing the heating level for warming up “ ”, and keeping 42° C with 2L of water again Touching the keep warm control ,the zone indicator this means choosing the heating level for show “... -
Página 39: Locking The Controls
As big zone To activate the flexible area as a single big zone, simply press the dedicated keys. The power setting works as any other normal area. If the pot is moved from the front to the rear part (or vice versa), the flexible area detects automatically the new position, keeping the same power. - Página 40 Set the time by touching the slider control. (e.g. 6) Touch timer control again, the “1” will flash. Set the time by touching the slider control (e.g.9), now the timer you set is 96 minutes. Buzzer will beep for 30 seconds and the timer indicator shows “- -”...
-
Página 41: Using The Pause Control
1) Other cooking zone will keep operating if they are turned on previously. 2)The red dot next to power level indicator will illuminate indicating that zone is selected set more zones: The steps for setting more zones are similar to the steps of setting one zone; When you set the time for several cooking zones simultaneously, decimal dots of the relevant cooking zones are on. -
Página 42: Cooking Tips
4.1 Cooking Tips When food comes to the boil, reduce the temperature setting. Using a lid will reduce cooking times and save energy by retaining the heat. Minimize the amount of liquid or fat to reduce cooking times. ... -
Página 43: Heat Settings
5. Heat Settings The settings below are guidelines only. The exact setting will depend on several factors, including your cookware and the amount you are cooking. Experiment with the induction hob to find the settings that best suit you. Heat setting Suitability •... -
Página 44: Hints And Tips
Spillovers on the 1. Switch the power to the cooktop off. • The cooktop may beep and turn touch controls 2. Soak up the spill itself off, and the touch controls 3. Wipe the touch control area with a may not function while there is clean damp sponge or cloth. -
Página 45: Failure Display And Inspection
Pans do not become hot The induction hob cannot Use cookware suitable for induction and appears in the detect the pan because it is not cooking. See section ‘Choosing the right display. suitable for induction cooking. cookware’. The induction hob cannot detect Centre the pan and make sure that its the pan because it is too small for base matches the size of the cooking... -
Página 46: Installation
board is damaged. power board. The display board is Replace the display damaged. board. Some buttons can’t work, The display board is Replace the display or the LED display is not damaged. board. normal. The Cooking Mode High temperature of the Ambient temperature Indicator comes on, but hob. - Página 47 Mini.3mm L(mm) W(mm) H(mm) D(mm) A(mm) B(mm) X(mm) F(mm) 560+4 490+4 50 mini 3 mini Under any circumstances, make sure the Induction cooker hob is well ventilated and the air inlet and outlet are not blocked. Ensure the induction cooker hob is in good work state. As shown below Note: The safety distance between the hotplate and the cupboard above the hotplate should be at least 760 mm.
-
Página 48: Before Installing The Hob, Make Sure That
There are ventilation holes around outside of the hob. YOU MUST ensure these holes are not blocked by the worktop when you put the hob into position. Be aware that the glue that join the plastic or wooden material to the furniture, ... -
Página 49: Before Locating The Fixing Brackets
The isolating switch is easily accessible by the customer. 9.4 Before locating the fixing brackets The unit should be placed on a stable, smooth surface (use the packaging). Do not apply force onto the controls protruding from the hob. 9.5 Adjusting the bracket position Fix the hob on the work surface by screw 4 brackets on the bottom of hob(see picture) after installation. -
Página 50: Connecting The Hob To The Mains Power Supply
3. The induction hotplate shall be installed such that better heat radiation can be ensured to enhance its reliability. 4. The wall and induced heating zone above the table surface shall withstand heat. 5. To avoid any damage, the sandwich layer and adhesive must be resistant to heat. 6. - Página 51 This appliance is labeled in compliance with European directive 2012/19/EU for Waste Electrical and Electronic Equipment (WEEE). By ensuring that this appliance is disposed of correctly, you will help prevent any possible damage to the environment and to human health, which might otherwise be caused if it were disposed of in the wrong way.
- Página 52 V. 1...