Tabla de contenido
Publicidad
Idiomas disponibles
Idiomas disponibles
Enlaces rápidos
Project Source® is a registered trademark
of LF, LLC. All rights reserved.
ATTACH YOUR RECEIPT HERE
Serial Number _______________ Purchase Date ______________
Questions, problems, missing parts? Before returning to the store, call our customer
service department at 1-866-389-8827, 8 a.m. - 8 p.m., EST, Monday - Friday.
ABXXXX
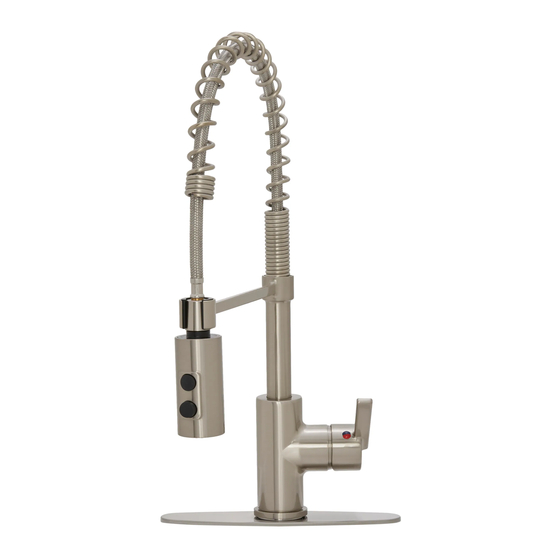
KITCHEN FAUCET
1
ITEM #1452262
COMMERCIAL
PULL-DOWN
MODEL #H90-K51D-PS-BN
Español p. 8
Publicidad
Tabla de contenido
Solución de problemas

Resumen de contenidos para Project Source H90-K51D-PS-BN
- Página 1 ITEM #1452262 COMMERCIAL PULL-DOWN KITCHEN FAUCET MODEL #H90-K51D-PS-BN Project Source® is a registered trademark of LF, LLC. All rights reserved. Español p. 8 ATTACH YOUR RECEIPT HERE Serial Number _______________ Purchase Date ______________ Questions, problems, missing parts? Before returning to the store, call our customer service department at 1-866-389-8827, 8 a.m.
-
Página 2: Package Contents
PACKAGE CONTENTS PART DESCRIPTION QUANTITY Faucet body assembly Escutcheon Gasket HARDWARE CONTENTS (not shown actual size) Lock Metal Washer Bolt Qty. 1 Qty. 1 Qty. 2... -
Página 3: Safety Information
SAFETY INFORMATION Please read and understand this entire manual before attempting to assemble, operate or install the product. CAUTION • If you solder the joints during installation of the faucet, the seats, cartridges, and washers must be removed before using a flame or the warranty will be voided on these parts. •... -
Página 4: Installation Instructions
INSTALLATION INSTRUCTIONS Turn off water at the supply valve at the main water supply, disconnect the supply lines, and remove old faucet body. Clean and dry surface area where new faucet will be mounted. Before installation, unscrew the lock nut (AA) and remove the metal washer (BB). -
Página 5: Care And Cleaning
INSTALLATION INSTRUCTIONS Optional Escutcheon Installation: NOTE: Optional eschutcheon cannot be installed with flange. Remove the flange (1) and place the escutcheon (B) with gasket (C) on the bottom of the new faucet body assembly (A). Apply a thin bead of silicone sealant to the underside of the gasket (C). -
Página 6: Troubleshooting
TROUBLESHOOTING PROBLEM POSSIBLE CAUSE SOLUTION Leaks underneath Bonnet has come loose or O-ring on 1. Move the handle to the off position. Unscrew the handle. cartridge is dirty or twisted. handle screw and remove the handle. 2. Tighten the bonnet by turning it clockwise. Move the cartridge stem to the on position. -
Página 7: Replacement Parts List
REPLACEMENT PARTS LIST For replacement parts, call our customer service department at 1-866-389-8827, 8 a.m. - 8 p.m., EST, Monday - Friday. PART DESCRIPTION PART # Set screw RP03035 Retaining ring RP03033BN Mounting hardware RP03031 Spray head assembly RP03034BN Handle assembly RP03032BN Cartridge RP03001... -
Página 8: Grifo De Cocina Desplegable Para Uso Profesional
DESPLEGABLE PARA USO PROFESIONAL MODELO #H90K-51D-PS-BN Project Source® es una marca registrada de LF, LLC. Todos los derechos reservados. ¿Preguntas, problemas, piezas faltantes? Antes de volver a la tienda, llame a nuestro Departamento de Servicio al Cliente al 1-866-389-8827, de lunes a viernes de 8 a.m. a... -
Página 9: Contenido Del Paquete
CONTENIDO DEL PAQUETE PIEZA DESCRIPCIÓN CANTIDAD Ensamblaje del cuerpo del grifo Escudo de bocallave Empaquetadura ADITAMENTOS (no es el tamaño real) Contratuerca Arandela de Perno metal hexagonal Cant. 1 Cant. 1 Cant. 2... -
Página 10: Información De Seguridad
INFORMACIÓN DE SEGURIDAD Lea y comprenda completamente este manual antes de intentar ensamblar, usar o instalar el producto. PRECAUCIÓN • Si suelda las juntas durante la instalación del grifo, se deben retirar los asientos, los cartuchos y las arandelas antes de usar la llama. De lo contrario, se anulará la garantía de dichas piezas. •... - Página 11 INSTALACIÓN INSTRUCCIONES Instale el grifo con la brida adjunta (1). Inserte el cuerpo completo del grifo (A) a través del orificio en el fregadero (2). Instale la arandela de metal (BB) en la espiga roscada (6.1). Enrosque la contratuerca (AA) en la espiga (6.1). Fije la contratuerca (AA) en su lugar apretando los pernos hexagonales (CC).
-
Página 12: Cuidado Y Mantenimiento
INSTALACIÓN INSTRUCCIONES Una vez completada la instalación, abra el suministro de agua para verificar que no haya fugas. Retire el rociador (3) desenroscándolo de la manguera (1) en sentido antiho- rario. Asegúrese de mantener el extremo de la manguera (1) hacia abajo en el fregadero y gire la palanca del grifo (2) a la posición tibia donde mezcla agua fría y caliente. -
Página 13: Garantía Limitada De Por Vida
SOLUCIÓN DE PROBLEMAS PROBLEMA CAUSA POSIBLE SOLUCIÓN El grifo tiene una fuga El aireador está sucio o las piezas peque- 1. Retire el aireador del extremo del surtidor girándolo en alrededor del aerator filtro. ñas dentro del aireador no están instalada sentido horario.


