Tabla de contenido
Publicidad
Idiomas disponibles
Idiomas disponibles
Enlaces rápidos
A SET OF MAX CLAWS ARE REQUIRED FOR INSTALLATION.
Claws purchased separately and are specific to
your vehicle make and model.
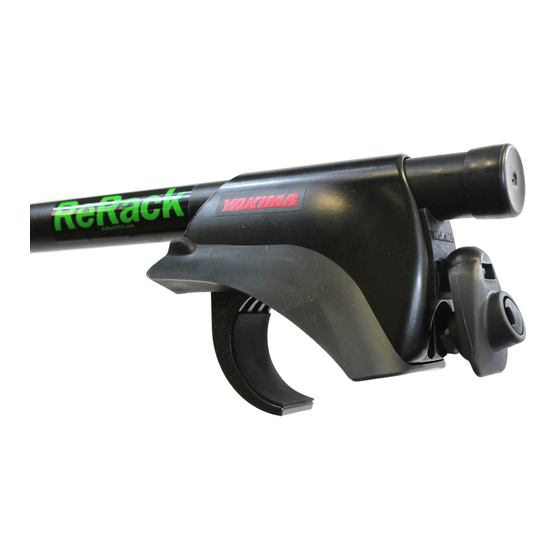
MAX TOWER
4X
END CAP
4X
BARREL NUT
4X
WEDGE
4X
1033347A-1/15
LowRider MAX
— MAX CLAW
(Claws are not
included, and may
look different.)
SKEWER BOLT
(lever)
4X
(4X)
IMPORTANT WARNING!
IT IS CRITICAL THAT ALL
YAKIMA RACKS AND
ACCESSORIES BE PROPERLY
AND SECURELY ATTACHED
TO YOUR VEHICLE.
IMPROPER ATTACHMENT
COULD RESULT IN AN
AUTOMOBILE ACCIDENT,
AND COULD CAUSE
SERIOUS BODILY INJURY OR
DEATH TO YOU OR TO
OTHERS. YOU ARE
RESPONSIBLE FOR
SECURING THE RACKS AND
ACCESSORIES TO YOUR
CAR, CHECKING THE
ATTACHMENTS PRIOR TO
USE, AND PERIODICALLY
INSPECTING THE PRODUCTS
FOR ADJUSTMENT, WEAR,
AND DAMAGE. THEREFORE,
YOU MUST READ AND
UNDERSTAND ALL OF THE
INSTRUCTIONS AND
CAUTIONS SUPPLIED WITH
YOUR YAKIMA PRODUCT
PRIOR TO INSTALLATION OR
USE. IF YOU DO NOT
UNDERSTAND ALL OF THE
INSTRUCTIONS AND
CAUTIONS, OR IF YOU HAVE
NO MECHANICAL
EXPERIENCE AND ARE NOT
THOROUGHLY FAMILIAR
WITH THE INSTALLATION
PROCEDURES, YOU SHOULD
HAVE THE PRODUCT
INSTALLED BY A
PROFESSIONAL INSTALLER
SUCH AS A QUALIFIED
GARAGE OR AUTO BODY
SHOP.
Part #1033347 Rev.A
Publicidad
Tabla de contenido

Manuales relacionados para Yakima LowRider MAX


Resumen de contenidos para Yakima LowRider MAX
- Página 1 LowRider MAX IMPORTANT WARNING! IT IS CRITICAL THAT ALL YAKIMA RACKS AND ACCESSORIES BE PROPERLY A SET OF MAX CLAWS ARE REQUIRED FOR INSTALLATION. AND SECURELY ATTACHED Claws purchased separately and are specific to TO YOUR VEHICLE. your vehicle make and model.
- Página 2 INSERT A BARREL NUT Claws are vehicle specific. INTO A CLAW. Be sure to have the correct claw for your vehicle. Refer to your YAKIMA Dealer, or go online at www.yakima.com. BEHIND THE CLAW, THREAD BOLT END INTO INSTALL TWO PLUGS INTO BARREL NUT.
-
Página 3: Rack Installation
ON A LEVEL SURFACE: RACK INSTALLATION SLIDE TWO TOWERS ONTO EACH CROSSBAR while • Make sure the wedge is keeping the wedges in place. inside the tower and flush with the face. • The claw should be as far back as possible. Be careful to keep the bars horizontal;... -
Página 4: Test The Installation
(If the pads are not seated on the tower, the claw may not seat to the rail.) CROSSBAR SPREAD: The distance between the Yakima Repeat steps to crossbars is determined by the accessories attach rear you wish to carry. The Crossbar Spread towers and bar. - Página 5 IMPORTANT LOAD LIMITS IF YOU NEED TECHNICAL MAXIMUM WEIGHT IS SPECIFIC TO YOUR CAR ASSISTANCE OR Refer to your MAX Claw instructions, your Yakima Dealer, or online at yakima.com. REPLACEMENT PARTS: Please contact your dealer or call YAKIMA at (888) 925-4621...
- Página 6 (Les mâchoires ne sont INSTRUCTIONS ET TOUS LES pas comprises et AVERTISSEMENTS peuvent avoir un ACCOMPAGNANT VOTRE aspect différent.) PRODUIT YAKIMA AVANT DE L’INSTALLER ET DE L’UTILISER. SI (4X) VOUS NE COMPRENEZ PAS BOUCHON TOUTES LES INSTRUCTIONS ET D’EXTRÉMITÉ TOUS LES AVERTISSEMENTS, OU SI VOUS N’AVEZ PAS DE...
- Página 7 Les mâchoires sont spécifiques DANS LA MÂCHOIRE. au véhicule. S’assurer d’avoir le modèle de mâchoire correspondant au véhicule. Consulter le dépositaire YAKIMA ou le site www.yakima.com. DERRIÈRE LA MÂCHOIRE, ENGAGER LE FILETAGE INSÉRER DEUX Procéder de la même manière DE LA TIGE DANS LA BOUCHONS DANS pour les autres pieds.
- Página 8 SUR UNE SURFACE PLANE: POSE DU PORTE-BAGAGES ENGAGER DEUX PIEDS SUR CHAQUE BARRE TRANSVERSALE tout en • Vérifier que le coin se gardant les coins en place. trouve dans le pied et de niveau avec la face. • La mâchoire devrait se trouver la plus Prendre soin de garder la barre à...
-
Página 9: Distance Entre Les Barres Transversales
TRANSVERSALES: Procéder de la même L’écartement à donner aux barres transversales manière pour poser Yakima dépend des accessoires que l’on compte les pieds et la barre y installer. Consulter la table d’écartement des transversale arrière. barres transversales pour connaître l’écartement nécessaire en fonction de vos accessoires. - Página 10 Le client devra assumer les frais de transport jusqu’à LONGUES de provoquer des dommages, des blessures ou Yakima et Yakima assumera les frais de retour au client. Les retours non autorisés ne seront pas même la mort. acceptés. Cette garantie limitée ne couvre pas l’usure normale ou les dommages résultant d’un usage...
- Página 11 COMPRENDER TODAS LAS (Las abrazaderas no INSTRUCCIONES Y se incluyen y pueden ADVERTENCIAS QUE VIENEN tenerz un aspecto diferente) CON LOS PRODUCTOS YAKIMA ANTES DE INSTALARLOS O USARLOS. SI NO ENTIENDE (4X) CAPUCHÓN TODAS LAS INSTRUCCIONES Y DE EXTREMO ADVERTENCIAS, O NO TIENE EXPERIENCIA EN MECÁNICA O...
-
Página 12: Prepare Las Broquetas
Las abrazaderas dependen BARRIL EN LAS del vehículo. Cerciórese de ABRAZADERAS. tener la abrazadera correcta. Consulte a su concesionario Yakima o visite el sitio www.yakima.com. ENROSQUE EL EXTREMO DEL DETRÁS DE LA ABRAZADERA, TORNILLO EN LA TUERCA BARRIL. INSTALE DOS TACOS EN Vuelva a colocar las CADASOPORTE. -
Página 13: Instalación Del Bastidor
SOBRE UNA SUPERFICIE PLANA: INSTALACIÓN DEL BASTIDOR DESLICE DOS SOPORTES SOBRE • Cerciórese de que la cuña CADA TRAVESAÑO manteniendo está dentro del soporte y a las cuñas en su lugar. nivel con la cara. • La abrazadera debe estar tan atrás como sea posible. - Página 14 En la Tabla de separación de el travesaño. travesaños figura la separación que requieren sus accesorios. Mida iguales distancias (Consulte a su concesionario Yakima o desde los soportes visite el sitio www.yakima.com) delanteros. Los cerrojos SKS Lock Cores son opcionales.
-
Página 15: El Peso M Aximo
TÉCNICA O REPUESTOS: DEPENDE DE SU VEHÍCULO comuníquese con su concesionario o llámenos al y está indicado en la Lista de compatibilidad con su concesionario Yakima, o (888) 925-4621 www.yakima.com. de lunes a viernes de 7:00 am a 5:00 pm, EVITE LA INTERFERENCIA CON EL TRAVESAÑO...