Tabla de contenido
Publicidad
Idiomas disponibles
Idiomas disponibles
Publicidad
Capítulos
Tabla de contenido
Solución de problemas

Manuales relacionados para EAS ELECTRIC E-Advanced 2 Serie


Resumen de contenidos para EAS ELECTRIC E-Advanced 2 Serie
- Página 1 AIRE ACONDICIONADO SPLIT SPLIT-TYPE AIR CONDITIONING CLIMATISEUR DE TYPE SPLIT AR CONDICIONADO TIPO SPLIT Serie E-Advanced 2 MANUAL DE INSTRUCCIONES OWNER AND INSTALLATION MANUAL MANUEL DE'INSTRUCTIONS MANUAL DE INSTRUÇÕES...
-
Página 2: Tabla De Contenido
Índice Precauciones de seguridad............. 03 Manual del usuario Especificaciones y características de la unidad ......07 Pantallas de la unidad interior ....................07 Temperatura de funcionamiento ....................08 Otras características .........................09 Ajuste del ángulo vertical del flujo de aire .................10 Funcionamiento (sin control remoto) ..................10 Cuidado y mantenimiento..............11 Solución de problemas ..............13 Función opcional solo disponible comprando dispositivo Wi-Fi por... - Página 3 Manual de instalación Accesorios ..................16 Sumario de instalación - Unidad interior ........17 Partes de la unidad ................18 Instalación de la unidad interior .............19 Paso 1: Seleccione la ubicación de instalación.................19 Paso 2: Fije la placa de montaje a la pared ................19 Paso 3: Taladre el agujero de la pared para la conexión de la tubería ........20 Paso 4: Preparar la tubería de refrigerante ................21 Paso 5: Conectar la manguera de drenaje................21...
-
Página 4: Precauciones De Seguridad
Precauciones de seguridad Lea las precauciones de seguridad antes de operar e instalar Una instalación incorrecta debido a hacer caso omiso de las instrucciones puede causar serios problemas. La gravedad de los posibles daños o lesiones se clasifica como ADVERTENCIA o PRECAUCIÓN. -
Página 5: Advertencias De Limpieza Y Mantenimiento
ADVERTENCIAS DE LIMPIEZA Y MANTENIMIENTO • Apague el dispositivo y desconecte la corriente antes de limpiarlo. Si no lo hace, puede provocar una descarga eléctrica. • No limpie el aire acondicionado con cantidades excesivas de agua.. • No limpie el aire acondicionado con agentes de limpieza inflamables. Los agentes de limpieza inflamables pueden causar incendios o deformaciones. -
Página 6: Advertencias Sobre La Instalación Del Producto
ADVERTENCIAS SOBRE LA INSTALACIÓN DEL PRODUCTO 1. La instalación debe ser realizada por un distribuidor o especialista autorizado. Una instalación defectuosa puede causar fugas de agua, descargas eléctricas o incendios. 2. La instalación debe realizarse de acuerdo con las instrucciones de instalación. Una instalación mal hecha puede causar fugas de agua, descargas eléctricas o incendios. -
Página 7: Advertencia Para El Uso De Refrigerante
ADVERTENCIA para el uso de refrigerante R32/R290 • Cuando se utilice refrigerante inflamable, la unidad deberá ser almacenada en una zona bien ventilada en la que el tamaño de la estancia se corresponda con la superficie requerida según las especificaciones de funcionamiento. -
Página 8: Especificaciones Y Características De La Unidad
Especificaciones y características de la unidad Pantalla de la unidad interior NOTA: Los diferentes modelos tienen diferentes paneles frontales y pantallas. No todos los códigos de pantalla que se describen a continuación están disponibles para el aire acondicionado que compró. Compruebe la pantalla de la unidad interior que ha comprado. Las ilustraciones de este manual tienen fines explicativos. -
Página 9: Temperatura De Funcionamiento
Temperatura de funcionamiento Cuando su aire acondicionado se usa fuera de los siguientes rangos de temperatura, ciertas características de seguridad se pueden activar y causar que la unidad se inhabilite. Split Inverter Modo PARA UNIDADES Modo FRÍO Modo CALOR Deshumidificación EXTERIORES CON Temperatura de la 17°C - 32°C... -
Página 10: Otras Características
• Operación modo Sueño La función SLEEP se utiliza para reducir el consumo de energía mientras duerme (ya que no necesita los mismos ajustes de temperatura para estar cómodo). Esta función sólo puede activarse a través del control remoto. La función SLEEP no está Otras características disponible en los modos VENTILADOR (FAN) o DESHUMIDIFICACIÓN (DRY). -
Página 11: Ajuste Del Ángulo Vertical Del Flujo De Aire
• Ajuste del ángulo del flujo de aire Ajuste del ángulo vertical del flujo de aire Mientras la unidad esté encendida, utilice el botón SWING/DIRECT del mando a distancia para ajustar la dirección (ángulo vertical) del flujo de aire. Consulte el manual del control remoto para obtener más detalles. -
Página 12: Cuidado Y Mantenimiento
Cuidado y mantenimiento escurra el exceso de agua. Limpieza de su unidad interior 7. Séquelo en un lugar fresco y seco, y evite ANTES DE LA LIMPIEZA O EL exponerlo a la luz directa del sol. 8. Cuando esté seco, vuelva a colocar el filtro MANTENIMIENTO ambientador en el filtro más grande y SIEMPRE APAGUE SU SISTEMA DE AIRE... -
Página 13: Recordatorios Sobre El Filtro De Aire (Opcional)
Mantenimiento - Largos períodos de PRECAUCIÓN inactividad • Antes de cambiar el filtro o limpiar, apague Si planea no usar su aire acondicionado por un la unidad y desconéctela de la red eléctrica. período prolongado de tiempo, haga lo siguiente: •... -
Página 14: Solución De Problemas
Solución de problemas PRECAUCIONES DE SEGURIDAD Si ocurre alguna de las siguientes situaciones, ¡apague su unidad inmediatamente! • El cable de alimentación está dañado o anormalmente caliente. • Siente un olor a quemado • La unidad emite sonidos fuertes o anormales •... - Página 15 Problema Causas posibles La unidad exterior La unidad emitirá diferentes sonidos en función de su modo de funcionamiento actual. hace ruidos La unidad interior o La unidad puede acumular polvo durante períodos prolongados de inactividad, que se emitirá exterior emite polvo cuando se encienda la unidad.
- Página 16 Problema Causas posibles Solución Espere a que se restablezca la energía Fallo de alimentación eléctrica La alimentación está desconectada Encienda el equipo La unidad no El fusible está quemado. Reemplace el fusible funciona Las baterías del control remoto Reemplace las baterías están agotadas Se ha activado la protección de 3 Espere tres minutos después de...
-
Página 17: Accesorios
Accesorios El sistema de aire acondicionado viene con los siguientes accesorios. Use todas las piezas y accesorios para instalar el aire acondicionado. Una instalación incorrecta puede provocar fugas de agua, descargas eléctricas e incendios, o hacer que el equipo falle. Los artículos no incluidos con el aire acondicionado deben ser comprados por separado. -
Página 18: Sumario De Instalación - Unidad Interior
Sumario de instalación - Unidad interior 15cm (5.9in) 12cm 12cm (4.75in) (4.75in) 2.3m (90.55in) Fije la placa de montaje Seleccione la ubicación de Determine la posición del instalación agujero en la pared Perfore un agujero en la Conecte la tubería Conecte el cableado (no aplicable pared para algunas ubicaciones en los... -
Página 19: Partes De La Unidad
Partes de la unidad NOTA: La instalación debe realizarse de acuerdo con los requisitos de las normas locales y nacionales. La instalación puede ser ligeramente diferente en diferentes áreas. Interruptor al aire (1) (2) Filtro funcional (en la parte posterior Control remoto Placa de montaje en la pared del filtro principal - algunas unidades) -
Página 20: Instalación De La Unidad Interior
Instalación de la unidad interior NOTA SOBRE EL AGUJERO EN LA Instrucciones de instalación - PARED: Unidad interior Si no se dispone de tuberías fijas de refrigerante: ANTES DE LA INSTALACIÓN Al elegir una ubicación, tenga en cuenta que debe dejar suficiente espacio para un orificio en la pared (consulte la Antes de instalar la unidad interior, consulte la etiqueta de sección (Perforar el orificio de la pared para el paso de la... -
Página 21: Paso 3: Taladre El Agujero De La Pared Para La Conexión De La Tubería
Paso 3: Taladre el agujero de la pared para la conexión de la tubería 1. Determine la ubicación del orificio de la pared basándose en la posición de la placa de montaje. Consulte las Dimensiones de la placa de montaje. Tipo A Tipo B 2. -
Página 22: Paso 4: Preparar La Tubería De Refrigerante
Paso 5: Conectar la manguera de drenaje Paso 4: Preparar la tubería de refrigerante La tubería del refrigerante se encuentra dentro de una De forma predeterminada, la manguera de desagüe manga aislante fijada a la parte posterior de la unidad. está... -
Página 23: Antes De Realizar Cualquier Trabajo Eléctrico, Lea Estas Normas
ADVERTENCIA ANTES DE REALIZAR CUALQUIER TRABAJO ELÉCTRICO, LEA ANTES DE REALIZAR CUALQUIER TRABAJO ELÉCTRICO O DE ESTAS NORMAS CABLEADO, DESCONECTE LA 1. Todo el cableado debe cumplir con los códigos y ALIMENTACIÓN PRINCIPAL DEL regulaciones eléctricas locales y nacionales y debe SISTEMA. -
Página 24: Paso 7: Envolturas Y Cables
1. Abra el panel frontal de la unidad interior. NOTA SOBRE EL CABLEADO 2. Con un destornillador, abra la tapa de la caja de cables en el lado derecho de la EL PROCESO DE CONEXIÓN DEL unidad. Esto descubrirá el bloque de CABLEADO PUEDE DIFERIR terminales. -
Página 25: Paso 8: Montaje De La Unidad Interior
NO ENVUELVA LOS EXTREMOS DE LAS TUBERÍAS Al envolver el paquete, mantenga los extremos de la tubería desenvueltos. Cuña Necesita acceder a ellos para comprobar si hay fugas al final del proceso de instalación (consulte la sección Comprobaciones eléctricas y comprobaciones de fugas de este manual). -
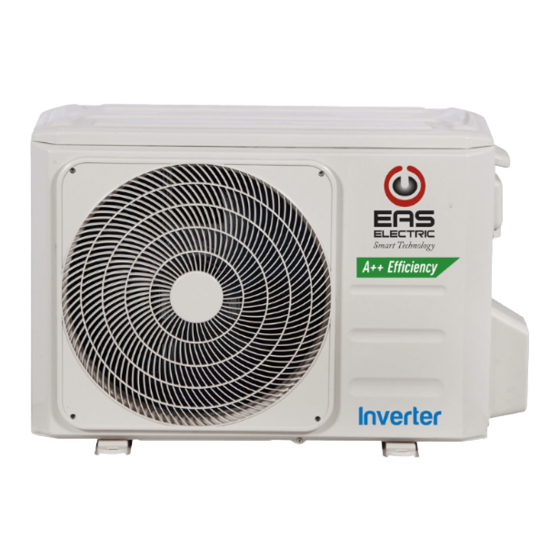
Página 26: Instalación De La Unidad Exterior
Instalación de la unidad exterior Instale la unidad siguiendo los códigos y NO instale la unidad en los siguientes lugares; regulaciones locales, puede haber pequeñas diferencias entre las diferentes Cerca de un obstáculo que bloquee las regiones. entradas y salidas de aire Cerca de una calle pública, áreas concurridas o donde el ruido de la unidad pueda molestar a otros. -
Página 27: Paso 2: Instale La Junta De Drenaje (Sólo En La Unidad Con Bomba De Calor)
Paso 3: Unidad exterior de anclaje Paso 2: Instale la junta de drenaje (sólo en la La unidad exterior se puede anclar al suelo unidad con bomba de calor) o a un soporte de pared con un perno Antes de atornillar la unidad exterior en su sitio, debe instalar la junta de drenaje en la parte inferior (M10). -
Página 28: Si Va A Instalar La Unidad En Un Soporte De Pared, Haga Lo Siguiente
Dimensiones de la unidad exterior (mm) Dimensiones de montaje W(An) x H (Al) x D (Fon) Distancia A (mm) Distancia B (mm) 681x434x285 (26.8”x17.1”x11.2”) 460 (18.1”) 292 (11.5”) 700x550x270 (27.5”x21.6”x10.6”) 450 (17.7”) 260 (10.2”) 450 (17.7”) 260 (10.2”) 700x550x275 (27.5”x21.6”x10.8”) 720x495x270 (28.3”x19.5”x10.6”) 255 (10.0”) 452 (17.7”) -
Página 29: Paso 4: Conecte Los Cables De Señal Y De Alimentación
Paso 4: Conecte los cables de señal y de 2. Desatornille la tapa del cableado eléctrico y retírela. alimentación 3. Desenrosque la abrazadera del cable debajo de la El bloque de terminales de la unidad exterior regleta y colóquelo lateralmente. está... -
Página 30: Conexión De Tubería Del Refrigerante
Conexión de tubería del refrigerante Cuando conecte tuberías de refrigerante, no permita que entren en la unidad sustancias o gases que no sean el refrigerante especificado. La presencia de otros gases o sustancias reducirá la capacidad de la unidad y puede causar una presión anormalmente alta en el ciclo de refrigeración. -
Página 31: Paso 2: Eliminar Rebabas
EXTENSIÓN DE LA TUBERÍA MÁS ALLÁ Paso 2: Eliminar rebabas Las rebabas pueden afectar el sellado hermético de DE LA FORMA DE ABOCARDADO la conexión de la tubería de refrigerante. Deben ser A (mm) Diámetro exterior eliminadas por completo. de tubería (mm) Máx. -
Página 32: No Utilice Un Par De Apriete Excesivo
2. Apriete la tuerca de ensanchamiento lo más fuerte posible con la mano. 3. Con una llave inglesa, sujete la tuerca de la manguera de la unidad. 4. Mientras sujeta firmemente la tuerca en el tubo de la unidad, utilice una llave dinamométrica para apretar la tuerca de abocardado de acuerdo con los valores de la tabla de requisitos de par de apriete que aparece a continuación. -
Página 33: Evacuación De Aire
Evacuación de aire 8. Si hay un cambio en la presión del sistema, Preparativos y precauciones consulte la sección Revisión de fugas de gas para El aire y las partículas extrañas en el circuito de obtener información sobre cómo verificar si hay refrigerante pueden causar aumentos anormales fugas. -
Página 34: Nota Sobre La Adición De Refrigerante
Nota sobre la adición de refrigerante Algunos sistemas requieren una carga adicional dependiendo de la longitud de las tuberías. La longitud estándar de la tubería varía de acuerdo a las regulaciones locales. Por ejemplo, en Norteamérica, la longitud estándar de la tubería es de 7.5 m (25'). En otras áreas, la longitud estándar de la tubería es de 5m (16'). -
Página 35: Comprobación De Fugas Eléctricas Y De Gas
Comprobación de fugas eléctricas y de gas Antes de la prueba de funcionamiento ADVERTENCIA - RIESGO DE DESCARGA ELÉCTRICA Realice únicamente la prueba de TODO EL CABLEADO DEBE CUMPLIR funcionamiento después de haber completado CON LOS CÓDIGOS ELÉCTRICOS los pasos siguientes: LOCALES Y NACIONALES, Y DEBE •... -
Página 36: Prueba De Funcionamiento
Prueba de funcionamiento DOUBLE-CHECK PIPE CONNECTIONS Prueba de funcionamiento Durante el funcionamiento, la presión del circuito La Prueba de funcionamiento debe durar por de refrigeración aumentará. Esto puede revelar lo menos 30 minutos. fugas que no estaban presentes durante la 1. -
Página 37: Condiciones De La Garantía Comercial
CONDICIONES DE LA GARANTÍA COMERCIAL Este producto tiene una garantía de reparación de dos años a partir de la fecha de venta, contra todo defecto de funcionamiento proveniente de la fabricación, incluyendo mano de obra y piezas de recambio, y cinco años de garantía en el compresor (solo componente). - Página 38 Daños en fusibles, lamas, focos, flujostato de caudal, filtros y otros elementos derivados del desgaste normal debido a la operación del equipo. Las averías que tengan su origen o sean consecuencia directa o indirecta de: contacto con líquidos, productos químicos y otras sustancias, así como de condiciones derivadas clima...
- Página 39 Table of Contents Safety Precautions ................03 Owner’s Manual Unit Specifications and Features ............07 1. Indoor unit display.........................07 2. Operating temperature........................08 3. Other features ..........................09 4. Setting angle of airflow.........................10 5. Manual operation (without Remote)....................10 Care and Maintenance ..............11 Troubleshooting .................13 Optional feature only available by purchasing WiFi device separately...
- Página 40 Installation Manual Accessories ..................16 Installation Summary - Indoor Unit ..........17 Unit Parts .....................18 Indoor Unit Installation ..............19 1. Select installation location......................19 2. Attach mounting plate to wall......................19 3. Drill wall hole for connective piping....................20 4. Prepare refrigerant piping.......................21 5. Connect drain hose........................21 6.
-
Página 41: Safety Precautions
Safety Precautions Read Safety Precautions Before Operation and Installation Incorrect installation due to ignoring instructions can cause serious damage or injury. The seriousness of potential damage or injuries is classified as either a WARNING or CAUTION. WARNING CAUTION This symbol indicates the possibility of This symbol indicates the possibility property damage or serious consequences. - Página 42 CLEANING AND MAINTENANCE WARNINGS Turn off the device and disconnect the power before cleaning. Failure to do so can cause • electrical shock. Do not clean the air conditioner with excessive amounts of water. • Do not clean the air conditioner with combustible cleaning agents. Combustible cleaning agents •...
-
Página 43: Owner's Manual
WARNINGS FOR PRODUCT INSTALLATION 1. Installation must be performed by an authorized dealer or specialist. Defective installation can cause water leakage, electrical shock, or fire. 2. Installation must be performed according to the installation instructions. Improper installation can cause water leakage, electrical shock, or fire. (In North America,installation must be performed in accordance with the requirement of NEC and CEC by authorized personnel only.) 3. -
Página 44: European Disposal Guidelines
WARNING for Using R32/R290 Refrigerant When flammable refrigerant are employed, appliance shall be stored in a well -ventilated area where the room size corresponds to the room area as specifiec for operation. For R32 frigerant models: Appliance shall be installed, operated and stored in a room with a floor area larger than 4m . Appliance shall not be installed in an unvertilated space, if that space is smaller than 4m . -
Página 45: Unit Specifications And Features
Unit Specifications and Features Indoor unit display NOTE: Different models have different front panel and display window. Not all the indicators describing below are available for the air conditioner you purchased. Please check the indoor display window of the unit you purchased. Illustrations in this manual are for explanatory purposes. -
Página 46: Operating Temperature
Operating temperature When your air conditioner is used outside of the following temperature ranges, certain safety protection features may activate and cause the unit to disable. Inverter Split Type FOR OUTDOOR UNITS COOL mode HEAT mode DRY mode WITH AUXILIARY 17°C - 32°C 0°C - 30°C 10°C - 32°C... -
Página 47: Sleep Operation
Sleep Operation • A guide on using the infrared remote is not The SLEEP function is used to decrease included in this literature package. Not all energy use while you sleep (and don’t the functions are available for the air need the same temperature settings to conditioner, please check the indoor display stay comfortable). -
Página 48: Setting Angle Of Airflow
Setting Angle of Air Flow • Setting vertical angle of air flow While the unit is on, use the SWING/DIRECT button on remote control to set the direction (vertical angle) of airflow. Please refer to the Remote Control Manual for details. NOTE ON LOUVER ANGLES When using COOL or DRY mode, do not set louver at too vertical an angle for long periods... -
Página 49: Care And Maintenance
Care and Maintenance Rinse the filter with fresh water, then shake Cleaning Your Indoor Unit off excess water. BEFORE CLEANING OR Dry it in a cool, dry place, and refrain from MAINTENANCE exposing it to direct sunlight. ALWAYS TURN OFF YOUR AIR CONDITIONER When dry, re-clip the air freshening filter to the larger filter, then slide it back into the SYSTEM AND DISCONNECT ITS POWER SUPPLY... - Página 50 Maintenance – CAUTION Long Periods of Non-Use Before changing the filter or cleaning, • If you plan not to use your air conditioner for an turn off the unit and disconnect its power extended period of time, do the following: supply.
-
Página 51: Troubleshooting
Troubleshooting SAFETY PRECAUTIONS If ANY of the following conditions occurs, turn off your unit immediately! The power cord is damaged or abnormally warm • You smell a burning odor • The unit emits loud or abnormal sounds • A power fuse blows or the circuit breaker frequently trips •... - Página 52 Issue Possible Causes The outdoor unit The unit will make different sounds based on its current operating mode. makes noises Dust is emitted from The unit may accumulate dust during extended periods of non-use, which will be either the indoor or emitted when the unit is turned on.
- Página 53 Problem Possible Causes Solution Wait for the power to be restored Power failure The power is turned off Turn on the power The unit is not The fuse is burned out Replace the fuse working Replace batteries Remote control batteries are dead The Unit’s 3-minute protection Wait three minutes after restarting has been activated...
-
Página 54: Accessories
Accessories The air conditioning system comes with the following accessories. Use all of the installation parts and accessories to install the air conditioner. Improper installation may result in water leakage, electrical shock and fire, or cause the equipment to fail. The items are not included with the air conditioner must be purchased separately. -
Página 55: Installation Summary - Indoor Unit
Installation Summary - Indoor Unit 15cm (5.9in) 12cm 12cm (4.75in) (4.75in) 2.3m (90.55in) Attach Mounting Plate Select Installation Location Determine Wall Hole Position Drill Wall Hole Connect Piping Connect Wiring (not applicable for some locations in the US ) Wrap Piping and Cable Prepare Drain Hose (not applicable for some locations in the US ) STEP... -
Página 56: Unit Parts
Unit Parts NOTE: The installation must be performed in accordance with the requirement of local and national standards. The installation may be slightly different in different areas. Air-break switch (1) (2) Functional Filter (On Back of Remote Controller Wall Mounting Plate Main Filter - Some Units) Remote controller Holder Front Panel... -
Página 57: Indoor Unit Installation
Indoor Unit Installation NOTE ABOUT WALL HOLE: Installation Instructions – Indoor unit If there is no fixed refrigerant piping: PRIOR TO INSTALLATION While choosing a location, be aware that you Before installing the indoor unit, refer to the should leave ample room for a wall hole (see label on the product box to make sure that the Drill wall hole for connective piping step) model number of the indoor unit matches the... -
Página 58: Drill Wall Hole For Connective Piping
Step 3: Drill wall hole for connective piping 1. Determine the location of the wall hole based on the position of the mounting plate. Refer to Mounting Plate Dimensions. 2. Using a 65mm (2.5in) or 90mm(3.54in) Type A (depending on models )core drill, drill a Type B hole in the wall. -
Página 59: Prepare Refrigerant Piping
Step 5: Connect drain hose Step 4: Prepare refrigerant piping By default, the drain hose is attached to the left- The refrigerant piping is inside an insulating hand side of unit (when you’re facing the back sleeve attached to the back of the unit. You of the unit). -
Página 60: Connect Signal Cable
WARNING BEFORE PERFORMING ANY ELECTRICAL WORK, READ THESE BEFORE PERFORMING ANY ELECTRICAL REGULATIONS OR WIRING WORK, TURN OFF THE MAIN POWER TO THE SYSTEM. 1. All wiring must comply with local and national electrical codes, regulations and must be Step 6: Connect signal cable installed by a licensed electrician. -
Página 61: Wrap Piping And Cables
pen front panel of the indoor unit. 1. O NOTE ABOUT WIRING Using a screwdriver, open the wire box cover THE WIRING CONNECTION PROCESS MAY on the right side of the unit. This will reveal DIFFER SLIGHTLY BETWEEN UNITS AND the terminal block. -
Página 62: Mount Indoor Unit
Step 8: Mount indoor unit Connect drain hose and refrigerant piping (refer to Refrigerant Piping Connection If you installed new connective piping to the section of this manual for instructions). outdoor unit, do the following: Keep pipe connection point exposed to If you have already passed the refrigerant perform the leak test (refer to Electrical piping through the hole in the wall, proceed... -
Página 63: Outdoor Unit Installation
Outdoor Unit Installation Install the unit by following local codes and install unit in the following locations: DO NOT regulations , there may be differ slightly between different regions. Near an obstacle that will block air inlets and outlets Near a public street, crowded areas, or where noise from the unit will disturb others Near animals or plants that will be harmed by hot air discharge... -
Página 64: Install Drain Joint
Step 2: Install drain joint(Heat pump unit only) Step 3: Anchor outdoor unit Before bolting the outdoor unit in place, you must The outdoor unit can be anchored to the install the drain joint at the bottom of the unit. ground or to a wall-mounted bracket with Note that there are two different types of drain bolt(M10). -
Página 65: Mounting Dimensions
Outdoor Unit Dimensions (mm) Mounting Dimensions Distance A (mm) Distance B (mm) W x H x D 681x434x285 (26.8”x17.1”x11.2”) 460 (18.1”) 292 (11.5”) 700x550x270 (27.5”x21.6”x10.6”) 450 (17.7”) 260 (10.2”) 450 (17.7”) 260 (10.2”) 700x550x275 (27.5”x21.6”x10.8”) 255 (10.0”) 720x495x270 (28.3”x19.5”x10.6”) 452 (17.7”) 452 (17.8”) 302(11.9”) 728x555x300 (28.7”x21.8”x11.8”) -
Página 66: Connect Signal And Power Cables
Step 4: Connect signal and power cables 2. Unscrew the electrical wiring cover and remove it. The outside unit’s terminal block is protected by 3. Unscrew the cable clamp below the terminal an electrical wiring cover on the side of the unit. block and place it to the side. -
Página 67: Refrigerant Piping Connection
Refrigerant Piping Connection When connecting refrigerant piping, do not let substances or gases other than the specified refrigerant enter the unit. The presence of other gases or substances will lower the unit’s capacity, and can cause abnormally high pressure in the refrigeration cycle. This can cause explosion and injury. -
Página 68: Remove Burrs
Step 2: Remove burrs PIPING EXTENSION BEYOND FLARE FORM Burrs can affect the air-tight seal of refrigerant Outer Diameter of A (mm) piping connection. They must be completely Max. Pipe (mm) Min. Max. removed. Ø 6.35 (Ø 0.25”) 0.7 (0.0275”) 1.3 (0.05”) Hold the pipe at a downward angle to prevent Ø... - Página 69 Tighten the flare nut as tightly as possible by hand. Using a spanner, grip the nut on the unit tubing. While firmly gripping the nut on the unit tubing, use a torque wrench to tighten the flare nut according to the torque values in the Torque Requirements table below.
-
Página 70: Air Evacuation
Air Evacuation If there is a change in system pressure, refer Preparations and Precautions to Gas Leak Check section for information Air and foreign matter in the refrigerant circuit can on how to check for leaks. If there is no cause abnormal rises in pressure, which can damage change in system pressure, unscrew the cap from the packed valve (high pressure valve). -
Página 71: Note On Adding Refrigerant
Note on Adding Refrigerant Some systems require additional charging depending on pipe lengths. The standard pipe length varies according to local regulations. For example, in North America, the standard pipe length is 7.5m (25’). In other areas, the standard pipe length is 5m (16‘). The refrigerant should be charged from the service port on the outdoor unit’s low pressure valve. -
Página 72: Electrical And Gas Leak Checks
Electrical and Gas Leak Checks Before Test Run WARNING – RISK OF ELECTRIC SHOCK Only perform test run after you have completed ALL WIRING MUST COMPLY WITH LOCAL the following steps: AND NATIONAL ELECTRICAL CODES, Electrical Safety Checks – Confirm that •... -
Página 73: Test Run
Test Run DOUBLE-CHECK PIPE CONNECTIONS Test Run Instructions During operation, the pressure of the You should perform the Test Run for at least 30 refrigerant circuit will increase. This may minutes. reveal leaks that were not present during your Connect power to the unit. initial leak check. - Página 74 COMMERCIAL GUARANTEE CONDITIONS FOR AIR CONDITIONING This product has a two-year repair guarantee from the date of sale, against all manufacturing malfunctions, including repairwork and replacement parts, and a five-year guarantee on the compressor (component only). To justify the purchase date, it will be mandatory to present the end user's invoice or purchase receipt and the installation company data.
- Página 75 15. Damage to fuses, blades, lamps, flow switch, filters and other elements derived from normal wear and tear due to the operation of the equipment. 16. Faults that have their origin or are a direct or indirect consequence of: contact with liquids, chemicals and other substances, as well as conditions derived from the climate or the environment: earthquakes, fires, floods, excessive heat or any other external force , such as insects, rodents and other animals that may have access to...
-
Página 76: Aire Acondicionado Tipo Split
AIRE ACONDICIONADO TIPO SPLIT MANUAL DE INSTRUCCIONES DEL CONTROL REMOTO www.easelectric.es El diseño y las especificaciones están sujetos a cambios sin previo aviso para mejorar el producto. Consulte con la agencia de ventas o el fabricante para más detalles. Muchas gracias por comprar nuestro aire acondicionado. Lea atentamente este manual antes de utilizar su aire acondicionado. - Página 77 Función de los botones CONTENIDOS Antes de comenzar a usar su nuevo aire acondicionado, asegúrese de familiarizarse con su control remoto. Lo siguiente es una breve introducción al control remoto en sí. Para obtener instrucciones sobre cómo usar su aire acondicionado, consulte la sección Cómo usar las funciones básicas / avanzadas de este manual.
- Página 78 MANEJO DEL CONTROL REMOTO Function Buttons CONSEJOS PARA EL USO DEL CONTROL REMOTO Before you begin using your new air conditioner, make sure to familiarize yourself with its remote ¿NO ESTÁ SEGURO DE CÓMO FUNCIONA? control. The following is a brief introduction to the remote control itself. For instructions on how to Consulte las secciones Cómo usar las funciones El control remoto debe usarse a menos operate your air conditioner, refer to the How to Use The Basic/Advance Functions section of...
- Página 79 Indicadores de la pantalla LCD del control remoto Cómo usar las funciones básicas La información se muestra cuando el control remoto está encendido. AJUTES DE TEMPERATURA El rango de temperatura de funcionamiento es ON/OFF de 17-30 ° C. Puede aumentar o disminuir la Aparece cuando la unidad temperatura establecida en incrementos de 1ºC se enciende y desaparece...
- Página 80 Cómo usar las funciones básicas Cómo usar las funciones básicas MODO HEAT (CALEFACCIÓN) MODO DRY (DESHUMIDIFICACIÓN) 1. Pulse MODE para seleccionar el modo 1. Pulse MODE para seleccionar el modo HEAT (CALEFACCIÓN). DRY (DESHUMIDIFICACIÓN). 2. Ajuste la temperatura con los botones 2.
- Página 81 Función TIMER OFF La función TIMER OFF le permite establecer un NOTA: Al configurar las funciones TIMER Ajuste del temporizador período de tiempo después del cual la unidad se ON o TIMER OFF, hasta 10 horas, el apagará automáticamente, como cuando se tiempo aumentará...
- Página 82 Activación de las funciones TIMER ON y TIMER OFF al mismo tiempo Ejemplo: Configuración de la unidad para que se encienda después de 6 horas, funcione durante 2 horas y luego se apague (vea la figura a continuación) Tenga en cuenta que los periodos de tiempo que establece para ambas funciones se refieren a horas después de la hora actual.
- Página 83 Cómo usar las funciones avanzadas Cómo usar las funciones avanzadas FUNCIÓN ECO FUNCIÓN SILENCE (SILENCIO) NOTA: Esta función solo está disponible en Mantenga presionado el botón de FAN durante 2 modo COOL.(Refrigeración). segundos para activar / cancelar el modo Se utiliza para activar al modo de ahorro silencioso.
- Página 84 AIR CONDITIONER REMOTE CONTROLLER ILLUSTRATION www.easelectric.es The design and specifications are subject to change without prior notice for product improvement. Consult with the sales agency or manufacturer for details. Thank you very much for purchasing our air conditioner. Please read this owner's manual carefully before using your air conditioner.
- Página 85 Function Buttons Before you begin using your new air conditioner, make sure to familiarize yourself with its remote CONTENTS control. The following is a brief introduction to the remote control itself. For instructions on how to operate your air conditioner, refer to the How to Use The Basic/Advance Functions section of this manual.
- Página 86 Function Buttons HANDLING THE REMOTE CONTROLLER TIPS FOR USING REMOTE CONTROL Before you begin using your new air conditioner, make sure to familiarize yourself with its remote NOT SURE WHAT A FUNCTION DOES? control. The following is a brief introduction to the remote control itself. For instructions on how to The remote control must be used within 8 Refer to the How to Use Basic Functions operate your air conditioner, refer to the How to Use The Basic/Advance Functions section of...
- Página 87 Remote LCD Screen Indicators How To Use The Basic Functions Information are displayed when the remote controller is powered up. SETTING TEMPERATURE The operating temperature range for units is ON/OFF display 17-30 C. You can increase or decrease the Appears when the unit set temperature in 1 C increments.
- Página 88 How To Use The Basic Functions How To Use The Basic Functions HEAT operation DRY operation(dehumidifying) 1. Press the MODE button to select 1. Press the MODE button to select DRY HEAT mode. mode. 2. Set your desired temperature using 2.
- Página 89 TIMER OFF function The TIMER OFF function allows you to When setting the TIMER ON or NOTE: Setting the TIMER function set a period of time after which the unit TIMER OFF functions, up to 10 hours, will automatically turn off, such as when the time will increase in 30 minute Your air conditioning unit has two you wake up.
- Página 90 Example: Setting the unit to turn on after 6 hours, operate for 2 hours, then turn off Setting both TIMER ON and TIMER OFF at the same time (see the figure below) Keep in mind that the time periods you set for both functions refer to hours after the current time.
- Página 91 How To Use The Advanced Functions How To Use The Advanced Functions ECO function Silence function NOTE: This function is only available under Hold down Fan speed button for 2 seconds COOL mode. to activate/cancel Silent mode. Due to low Used to enter the energy efficient mode.
-
Página 92: Aire Acondicionado Split
AIRE ACONDICIONADO SPLIT SPLIT-TYPE AIR CONDITIONING CLIMATISEUR DE TYPE SPLIT AR CONDICIONADO TIPO SPLIT Serie E-Advanced 2 MANUAL DE SEGURIDAD SAFETY MANUAL MANUEL DE SÉCURITÉ MANUAL DE SEGURANÇA... -
Página 93: Advertencias De Seguridad
Advertencias de seguridad Lea estas advertencias antes de la instalación y puesta en marcha Una instalación incorrecta por desobedecer las instrucciones puede causar daños y lesiones graves ADVERTENCIA Instalación (Espacio) - Donde el trabajo de la instalación de tuberías sea el mínimo posible. - Donde las tuberías estén protegidas de cualquier daño físico. -
Página 94: A Continuación Se Indican Las Alturas De Instalación De Referencia
La carga máxima en una sala debe cumplir la siguiente fórmula: (5/4) = 2,5 x (LFL) x h x (A min para instalar un aparato con carga de refrigerante o el área mínima requerida M(kg) debe cumplir con la siguiente fórmula: = (M/(2,5 x (LFL) (5/4) Donde:... -
Página 95: Carga Máxima De Refrigerante (Kg)
NOTA 1 Esta fórmula no se puede usar para refrigerantes más ligeros que 42 kg/kmol. NOTA 2 En las tablas 1-1 y 1-2 se dan algunos ejemplos de resultados de los cálculos según la formula anterior. NOTA 3 Para aparatos sellados de fábrica, la placa de características de la unidad marca la carga de refrigerante que se puede usar para calcular A NOTA 4 Para productos cargados en el momento de la instalación, se puede calcular A basándose en la carga de refrigerante instalado para no exceder la carga máxima de... -
Página 96: Información De Mantenimiento
Información de mantenimiento 1. Comprobaciones del área Antes de empezar el trabajo en sistemas que contengan refrigerantes inflamables, se deben hacer comprobaciones de seguridad para asegurar que el riesgo de ignición es mínimo. Para reparar el sistema de refrigerante, debe seguir las siguientes precauciones antes de comenzar a trabajar. -
Página 97: Comprobaciones De Los Componentes Eléctricos
8. Comprobaciones del equipo de refrigeración Si se cambia cualquier componente eléctrico, debe ser adecuado para el propósito y con las especificaciones correctas. Se deben seguir en todo momento los requisitos de mantenimiento y servicio del fabricante. Si tiene dudas, consulte al departamento técnico. Todas las instalaciones en las que se usen gases inflamables deben cumplir los siguientes puntos: la cantidad de carga está... -
Página 98: Reparación De Componentes Seguros
11. Reparación de componentes seguros No aplique ningún material inductivo o cargas de capacidad al circuito sin asegurarse de que no excede el voltaje y la corriente permitidos para el equipo en uso. Los componentes de por sí seguros son los únicos que se pueden manipular en un entorno con presencia de gas inflamable. -
Página 99: Procedimiento De Carga
La carga de refrigerante se debe recuperar en cilindros de recuperación adecuados. Para aparatos que contengan REFRIGERANTES INFLAMABLES, el sistema debe purgarse con nitrógeno para asegurar la unidad. Este proceso puede tener que hacerse varias veces. No debe usarse aire comprimido u oxígeno para purgar sistemas de refrigerante. Para aparatos que contengan REFRIGERANTES INFLAMABLES, se debe purgar la máquina rompiendo el vacío del sistema con nitrógeno, llenando hasta que se consiga la presión de trabajo, y por último devolviendo estanqueidad. -
Página 100: Etiquetado
d) Vacíe el sistema de refrigerante si es posible. e) Si no es posible hacer vacío, utilice un colector para retirar el refrigerante de varias partes del sistema. f) Compruebe que el cilindro está situado en la balanza antes de realizar la recuperación. -
Página 101: Explicación De Los Símbolos De La Unidad Interior Y Exterior
20. Transporte, etiquetado y almacenamiento de las unidades 1. Transporte de equipo que contiene refrigerantes inflamables Conformidad con la normativa de transporte 2. Etiquetado del equipo usando señales Conformidad con la normativa local 3. Disposición de equipo que contenga refrigerantes inflamables Conformidad con normativa nacional 4. - Página 102 El diseño y las especificaciones están sujetos a cambios sin previo aviso para la mejora del producto. Consulte al distribuidor o al fabricante para más detalles. Cualquier actualización del manual se subirá a la página web del servicio, por favor revísela para tener la última versión.
-
Página 103: Safety Precautions
Safety Precautions Read Safety Precautions Before Operation and Installation Incorrect installation due to ignoring instructions can cause serious damage or injury. WARNING Installation (Space) - That the installation of pipe-work shall be kept to a minimum. - That pipe-work shall be protected from physical damage. - Where refrigerant pipes shall be compliance with national gas regulations. - Página 104 The maximun charge in a room shall be in accordance with the following: (5/4) = 2,5 x (LFL) x h x (A) or the required minumum floor area to install an applicance with refrigerant charge M(kg) shall be in accordance with following: = (M/(2,5 x (LFL) x h )) (5/4)
- Página 105 NOTE 1 This formula cannot be used for refrigerants lighter than 42 kg/kmol. NOTE 2 Some examples of the results of the calculations according to the above formula are given in Tables 1-1 and 1-2. NOTE 3 For factory sealed appliances, the nameplate on the unit itself marked the refrigerant charge can be used to calculate A NOTE 4 For field charged products, calculation of A can be based on the installed refrigerant...
-
Página 106: Information Servicing
Information Servicing 1. Checks to the area Prior to beginning work on systems containing flammable refrigerants, safety checks are necessary to ensure that the risk of ignition is minimised. For repair to the refrigerating system, the following precautions shall be complied with prior to conducting work on the system. 2. - Página 107 8. Checks to the refrigeration equipment Where electrical components are being changed, they shall be fit for the purpose and to the correct specification. At all times the manufacturer s maintenance and service guidelines shall be followed. If in doubt consult the manufacturer s technical department for assistance. The following checks shall be applied to installations using flammable refrigerants: the charge size is in accordance with the room size within which the refrigerant containing ...
- Página 108 11. Repair to intrinsically safe components Do not apply any permanent inductive or capacitance loads to the circuit without ensuring that this will not exceed the permissible voltage and current permitted for the equipment in use. Intrinscially safe components are the only types that can be worked on while live in the presence of a flammable atmosphere.
- Página 109 The refrigerant charge shall be recovered into the correct recovery cylinders. For appliances containing FLAMMBLE REFRIGERNATS, the system shall be “flushed” with OFN to render the unit safe. This process may need to be repeated several times. Compressed air or oxygen shall not be used for puring refrigerant systems.
- Página 110 d) Pump down refrigerant system, if possible. e) If a vacuum is not possible, make a manifold so that refrigerant can be removed from various parts of the system. f) Make sure that cylinder is situated on the scales before recovery takes place. g) Start the recovery machine and operate in accordance with manufacturer s instructions.
- Página 111 20. Transportation, marking and storage for units 1. Transport of equipment containing flammable refrigerants Compliance with the transport regulations 2. Marking of equipment using signs Compliance with local regulations 3. Disposal of equipment using flammable refrigerants Compliance with national regulations 4.
- Página 112 The design and specifications are subject to change without prior notice for product improvement. Consult with the sales agency or manufacturer for details. Any updates to the manual will be uploaded to the service website, please check for the latest version. SAFETY MANUAL-R32(R290)-B...
-
Página 113: Avertissements De Sécurité
Avertissements de sécurité Lisez ces avertissements avant l'installation et la mise en service Une installation incorrecte en raison du non-respect des instructions peut entraîner des dommages et des blessures graves ATTENTION 1. Installation (espace) - Où le travail de l'installation des tuyaux est le minimum possible. - Où... - Página 114 La charge maximale dans une pièce doit répondre à la formule suivante: (5/4) = 2,5 x (LFL) x h x (A min pour installer un appareil avec une charge de ou la surface minimale requise réfrigérant M(kg) doit répondre à la formule suivante: = (M/(2,5 x (LFL) (5/4) Où:...
-
Página 115: Charge Maximale De Réfrigérant (Kg)
NOTE 1 Cette formule ne peut pas être utilisée pour les fluides frigorigènes inférieurs à 42 kg / kmol. NOTE 2 Les tableaux 1-1 et 1-2 donnent quelques exemples de résultats de calculs selon la formule précédente. NOTE 3 Pour les appareils scellés en usine, la plaque signalétique de l'unité indique la charge de réfrigérant qui peut être utilisée pour calculer A NOTA 4 Pour les produits chargés au moment de l'installation, A peut être calculé... -
Página 116: Informations De Maintenance
Informations de maintenance 1. Contrôles de zone Avant de commencer à travailler sur des systèmes contenant des réfrigérants inflammables, des contrôles de sécurité doivent être effectués pour s'assurer que le risque d'inflammation est minime. Pour réparer le système frigorifique, vous devez suivre les précautions suivantes avant de commencer le travail. - Página 117 8. Vérifications de l'équipement de réfrigération Si un composant électrique est changé, il doit être adapté à l'usage et aux spécifications correctes. Les exigences d'entretien et de service du fabricant doivent être respectées à tout moment. En cas de doute, consultez le service technique. Toutes les installations dans lesquelles des gaz inflammables sont utilisés doivent respecter les points suivants: la quantité...
- Página 118 11. Réparation des composants sûrs N'appliquez aucun matériau inductif ni aucune charge de capacité sur le circuit sans vous assurer qu'il ne dépasse pas la tension et le courant autorisés pour l'équipement utilisé. Seuls les composants sûrs peuvent être manipulés dans un environnement de gaz inflammable.
-
Página 119: Procédure De Chargement
La charge de réfrigérant doit être récupérée dans des bouteilles de récupération appropriées. Pour les appareils contenant des RÉFRIGÉRANTS INFLAMMABLES, le système doit être «purgé» avec de l'azote pour sécuriser l'unité. Ce processus peut devoir être effectué plusieurs fois. L'air comprimé ou l'oxygène ne doivent pas être utilisés pour purger les systèmes frigorifiques. - Página 120 d) Aspirez le système de refroidissement si possible. e) S'il n'est pas possible d'atteindre l'étancheité, utilisez un collecteur pour retirer le réfrigérant de diverses parties du système. f) Vérifiez que le cylindre est situé sur la balance avant de récupérer gaz. g) Démarrez le récupérateur et suivez les instructions du fabricant.
- Página 121 20. Transport, étiquetage et stockage des unités 1. Transport d'équipements contenant des frigorigènes inflammables Conformité aux réglementations de transport 2. Étiquetage des équipements à l'aide de panneaux Conformité aux réglementations locales 3. Élimination des équipements contenant des frigorigènes inflammables Conformité aux réglementations nationales 4.
- Página 122 La conception et les spécifications peuvent être modifiées sans préavis pour améliorer le produit. Consultez le distributeur ou le fabricant pour plus de détails. Toute mise à jour du manuel sera téléchargée sur le site Web du service, veuillez le consulter pour obtenir la dernière version.
- Página 123 Visítanos en: www.easelectric.es...