Publicidad
Enlaces rápidos
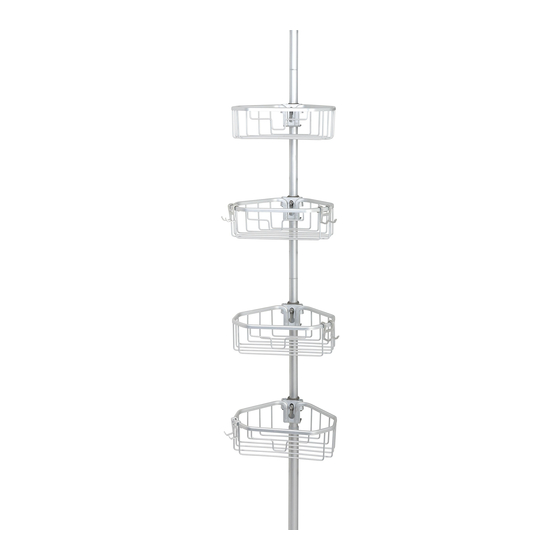
Assembly Instructions - Model 2135AL (Satin Chrome)
Instrucciones de Ensamblado - Modelo 2135AL (Satinado Cromo)
Instructions de montage - Modèle 2135AL (Chrome satiné)
PLEASE DON'T RETURN TO STORE
Our product specialist are here to help!
www.zenith-products.com/pole-caddy-installation-video
Before You Begin:
Thank you for purchasing this product. Please identify all parts and hardware pieces before you begin.
When laying out parts, place them on a soft surface to prevent scratching.
If any pieces are missing, call our Toll Free Number 1-800-892-3986 between 8:00AM-5:00PM EST Monday
through Friday.
Antes de que empiece:
Muchas gracias por comprar este producto. Identifique todas las piezas y las piezas de ferretería antes de
comenzar. Al distribuir las piezas, colóquelas sobre una superficie suave para evitar que se rayen.
Si faltaran piezas, llame a nuestro número gratuito 1-800-892-3986 entre las 8:00 a.m.- 5:00 p.m., hora
del este, de lunes a viernes.
Avant de commencer :
Merci d'avoir acheté ce produit. Veuillez identifier toutes les pièces et les accessoires de montage avant de
commencer. Lorsque vous déballez les pièces, placez-les sur une surface non rugueuse afin d'éviter les
éraflures.
S'il venait à vous manquer des pièces, appelez notre numéro sans frais 1.800.892.3986 entre 8 h et 17 h
(heure de l'Est des États-Unis), du lundi au vendredi.
Pg 1 of 10
©2016 Zenith Products Corp.
CALL US FIRST
Product Inquiries
Installation Help
(800) 892-3986
MCS 3/1/2016
www.zennahome.com IS02136-I3
Publicidad

Manuales relacionados para Zenna Home 2135AL


Resumen de contenidos para Zenna Home 2135AL
- Página 1 Assembly Instructions - Model 2135AL (Satin Chrome) Instrucciones de Ensamblado - Modelo 2135AL (Satinado Cromo) Instructions de montage - Modèle 2135AL (Chrome satiné) PLEASE DON’T RETURN TO STORE CALL US FIRST Product Inquiries Installation Help Our product specialist are here to help! (800) 892-3986 www.zenith-products.com/pole-caddy-installation-video...
- Página 2 List of Parts: Lista de Partes: Liste des pièces : (B) 1 Short tapered tube (A) 3 Long tapered tubes 1 Tubo corto con ahusamiento 3 Tubos largos con ahusamiento 1 tube conique court 3 longs tubes coniques (C) 1 Twist Tube 1 Tubo de enroscar 1 tube de torsion NOTE: The inner and outer tubes should be loose.
- Página 3 Measure the distance between the Mida la distancia entre el reborde Mesurez la distance entre le rebord tub ledge or the shower stall floor to de la bañera o el piso del cubículo de la baignoire ou le plancher de the ceiling to the nearest inch.
- Página 4 NOTE: Assembly shown for NOTA: Ensamblado mostrado REMARQUE : l’assemblage 81 in. tub ledge installation. para la instalación a 81 illustré correspond à une pulg. desde el reborde de distance au plafond de Slide two tube collars (F) down the la bañera.
- Página 5 Place the tapered end of the long Coloque el extremo ahusado del Enfilez l’extrémité conique du long tube (A) into the untapered end of tubo largo (A) en el extremo no tube (A) dans l’extrémité non the other long tube (A), as shown. ahusado del otro tubo largo (A), conique de l’autre long tube (A), como se ilustra.
- Página 6 NOTE: The inner and outer tubes NOTA: Los tubos internos y externos NOTE: The inner and outer tubes should be loose. If needed, hold the deben estar sueltos. Si fuese necesario, should be loose. If needed, hold the inner tube and twist the outer tube sostenga el tubo interno y gire el inner tube and twist the outer tube clockwise to loosen.
- Página 7 Place the small end cap (G) on the Coloque la cubierta terminal Placez le petit embout (G) sur le short tapered tube (B). pequeña (G) en el tubo corto tube conique court (B). ahusado (B). Place the tapered end of the short Enfilez l’extrémité...
-
Página 8: Instalación
Installation: Instalación: Installation: 1. Lift the entire assembly into its final 1. Levante el ensamblado completo en 1. Placez l’unité assemblée à son location, see fig.1, 2. la posición final, Ver Fig. 1, 2. emplacement définitif (fig.1, 2). 2. While holding the outer tube of the 2. - Página 9 Slide shelves (D) onto tube collar (F), Deslice las repisas (D) sobre el aro Glissez les étagères (D) sur les as shown. del tubo (F), del modo ilustrado. manchons de tube (F), comme indiqué. Attach hooks (E) in the desired Fije los ganchos (E) en los lugares locations on shelves (D).
- Página 10 NeverRust Guaranteed for Life Warranty: ® The manufacturer warrants to the original purchaser that NeverRust™ aluminum shower rods, caddies and accessories will be free from red rust during its lifetime. This warranty only covers the proper and intended use of this product. Any alteration of this product or use of this product in any manner other than its intended use shall automatically void this warranty.