Tabla de contenido
Publicidad
Idiomas disponibles
Idiomas disponibles
Enlaces rápidos
Publicidad
Tabla de contenido

Manuales relacionados para oneConcept 10030880


Resumen de contenidos para oneConcept 10030880
- Página 1 Klimaanlage 10030880...
-
Página 2: Technische Daten
Ihnen zum Erwerb Ihres Gerätes. Lesen Sie die folgenden Hinweise sorgfältig durch und befolgen Sie diese, um möglichen Schäden vorzubeugen. Für Schäden, die durch Missachtung der Hinweise und unsachgemäßen Gebrauch entstehen, übernehmen wir keine Haftung. Technische Daten Artikelnummer 10030880 Stromversorgung 220-240 V ~ 50-60 Hz Leistung 65 W... -
Página 3: Bedienfeld Und Fernbedienung
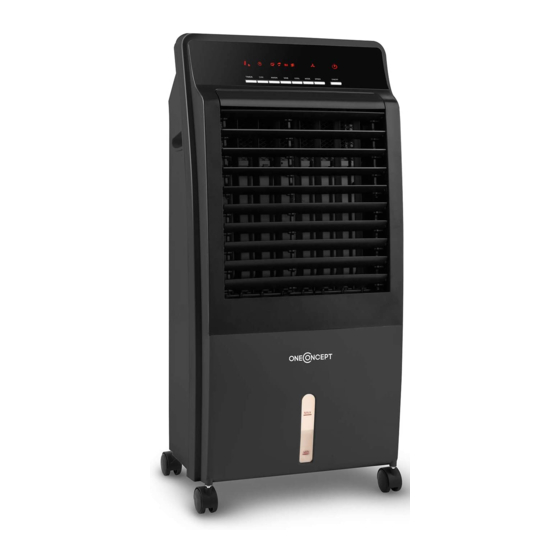
Geräteübersicht A Obere Blende G Rad M Filtergitter B Seitenverkleidung H Wasserstandsanzeige N Wassertank C Griff I Hinterer Rahmen O Wassertankabdeckung D Bedienfeld J Mechanismus-Schalter P Eiskorb E Vordere Verkleidung K Staubdichter Filter Q Eisbox F Lüfterklappen L Kabelaufwicklung R Aufhängung Bedienfeld und Fernbedienung... -
Página 4: Tasten Und Tastenfunktionen
Inbetriebnahme und Bedienung 1. Wenn Sie das Gerät benutzen, dachten Sie darauf, dass es auf einem ebenen Untergrund steht. Ein Schräger Untergrund kann zu Schäden führen. Falls Sie wünschen, dass die Luft noch kühler ist, gegen Sie zusätzlich Eiswürfel in den Korb, wie auf der unteren Abbildung dargestellt. ACHTUNG: Bewahren Sie die Eisbox außerhalb der Reichweite von Kindern auf. -
Página 5: Reinigung Und Pflege
COOL-Taste (Kühlen) HINWEIS: Falls sich kein oder zu Wenig Wasser im Tank befindet, blinkt die COOL-Kontrollleuchte, wenn Sie die COOL-Taste drücken. Bevor Sie das Gerät im Kühlmodus betreiben versichern Sie sich, dass das Auslassventil des Wasser- tanks fest zu ist. Geben Sie frisches Wasser in den Wassertank. Beobachten Sie beim Einfüllen die Wasserstandsanzeige und achten Sie darauf, dass Sie den nicht unter- oder überfüllen. -
Página 6: Konformitätserklärung
Reinigung und Pfl ege • Ziehen Sie immer den Stecker aus der Steckdose und warten Sie bis der Lüfter anhält, bevor Sie das Gerät reinigen. • Reinigen Sie die äußeren Oberfl ächen mit einem weichen, leicht feuchten Lappen. • Tauchen Sie das Gerät nicht in Wasser. •... -
Página 7: Technical Data
Any failure caused by ignoring the mentioned items and cautions mentioned in the instruction manual are not covered by our warranty and any liability. Technical Data Item number 10030880 Power supply 220-240 V ~ 50-60 Hz Rated Power... -
Página 8: Product Description
Product Description A Upper board G Castor wheel M Filter bracket B Lateral board H Water indicate window N Water tank C Handle I Rear board O Water tank cover D Control panel J Mechanism switch P Ice basket E Front board K Dust-proof filter Q Ice crystals box F Louver frame... -
Página 9: Use And Operation
Use and Operation 1. When using the appliance, make sure that it is on a flat and stable surface. Damage may occur if it is placed on an incline or decline. If you need cooler more, add ice block into upper water slot, see following image. -
Página 10: Cleaning And Care
COOL button Please noted that the COOL LAMP will flashing when you press the Cool button if there is no or lacked water in water tank. Before operating the unit in Cool mode, make sure the escape valve for the water tank is properly fixed. -
Página 11: Hints On Disposal
Cleaning and Care • Always remove the plug from the socket-outlet and allow the fan blower to stop acting before clean • Clean the external surfaces of the unit with a soft damp (not dripping wet) cloth. • WARNING: Do not immerse the unit in water. •... -
Página 12: Datos Técnicos
La empresa no se responsabiliza de los daños ocasionados por un uso indebido del producto o por haber desatendido las indicaciones de seguridad. Datos técnicos Número de artículo 10030880 Suministro eléctrico 220-240 V ~ 50-60 Hz Potencia 65 W Potencia de calefacción... -
Página 13: Descripción Del Aparato
Descripción del aparato A Pantalla superior G Rueda M Rejilla del filtro B Recubrimiento lateral H Indicador del nivel de agua N Depósito de agua C Asa I Marco trasero O Cubierta del depósito de agua D Panel de control J Interruptor de mecanismo P Cesta para el hielo E Recubrimiento delantero... -
Página 14: Puesta En Marcha Y Uso
Puesta en marcha y uso 1. Cuando utilice el aparato, asegúrese de que este se sitúe en una superficie plana. Una superficie irregular puede provocar averías. Si desea que el aire sea todavía más frío, introduzca cubitos de hielo adicionales en el cesto tal y como se muestra en la ilustración. ADVERTENCIA: Mantenga el acumulador de frío fuera del alcance de los niños. -
Página 15: Limpieza Y Cuidado
Botón COOL (enfriar) ADVERTENCIA: Si no hay agua en el depósito o su cantidad es insuficiente, el indicador luminoso COOL parpadea cuando pulse el botón COOL. Antes de activar el aparato con el modo refrigeración, asegúrese de que la válvula de salida del depósito de agua está... -
Página 16: Indicaciones Para La Retirada Del Aparato
Limpieza y cuidado • Antes de limpiar el aparato, apáguelo y desconecte el enchufe de la toma de corriente y espere hasta que el ventilador se detenga. • Limpie la superfi cie exterior con un paño húmedo y suave. • No sumerja el aparato en agua. •... -
Página 17: Fiche Technique
Nous ne saurions être tenus pour responsables des dommages dus au non-respect des consignes et à la mauvaise utilisation de l’appareil. Fiche technique Numéro d’article 10030880 Alimentation électrique 220-240 V ~ 50-60 Hz Puissance... -
Página 18: Aperçu De L'aPpareil
Aperçu de l’appareil A Cache supérieur G Roue M Grille pour filtre B Revêtement latéral H Jauge du niveau de l’eau N Réservoir à eau C Poignée I Cadre arrière O Couvercle du réservoir D Panneau de commande J Interrupteur mécanique P Panier à... -
Página 19: Mise En Marche Et Utilisation
Mise en marche et utilisation 1. Lors de l’utilisation de l’appareil, veiller à le placer sur une surface plane. Un support en pente peut provoquer des dommages. Pour que l’air soit encore plus frais, ajouter des glaçons dans le panier, comme illustré... -
Página 20: Nettoyage Et Entretien
Touche COOL (rafraîchissement) REMARQUE : s’il n’y a plus d’eau dans le réservoir ou s’il en reste trop peu, le témoin lumineux COOL se met à clignoter lorsque l’utilisateur appuie sur la touche COOL. Avant de faire fonctionner l’appareil en mode rafraîchissement, s’assurer que le bouchon d’évacuation du réservoir est bien fixé. -
Página 21: Information Sur Le Recyclage
Nettoyage et entretien • Toujours débrancher la fi che de la prise et attendre que la souffl erie s’arrête avant de nettoyer l’appareil. • Nettoyer les surfaces extérieures de l’appareil avec une éponge souple légèrement humide. • Ne pas plonger l’appareil dans l’eau. •... -
Página 22: Dati Tecnici
Non ci assumiamo alcuna responsabilità per danni scaturiti da una mancata osservazione delle avvertenze di sicurezza e da un uso improprio del dispositivo. Dati tecnici Codice articolo 10030880 Alimentazione 220-240 V ~ 50-60 Hz Potenza... -
Página 23: Descrizione Prodotto
Descrizione prodotto A Pannello superiore G Rotella M Griglia filtro B Copertura laterale H Indicatore livello acqua N Serbatoio C Presa I Telaio posteriore O Copertura serbatoio D Pannello di controllo J Interruttore meccanismo P Cestello ghiaccio E Copertura frontale K Filtro antipolvere Q Siberino F Alette di ventilazione... -
Página 24: Messa In Funzione E Utilizzo
Messa in funzione e utilizzo 1. In caso di non utilizzo, assicurarsi che il dispositivo si trovi su un fondo piano e regolare. Un fondo inclinato potrebbe causare danneggiamenti. Se desiderate che l’aria sia ancora più fredda, aggiunge- re cubetti di ghiaccio nel cestello, come indicato nell’immagine seguente. ATTENZIONE: conservare i siberini fuori dalla portata dei bambini. -
Página 25: Manutenzione E Pulizia
Tasto COOL (Raffreddare) AVVERTENZA: se nel serbatoio non c’è acqua o un livello insufficiente, la spia di controllo COOL lam- peggia, quando si preme il tasto COOL. Prima di utilizzare il dispositivo in modalità di raffreddamento, assicurarsi che la valvola di scarico del serbatoio sia chiusa. -
Página 26: Dichiarazione Di Conformità
Manutenzione e pulizia • Scollegare la spina dalla presa di corrente e attendere l’arresto della ventola prima di procedere alla pulizia. • Pulire le superfi ci esterne con un panno morbido leggermente umido. • Non immergere il dispositivo in acqua. •...