Tabla de contenido
Publicidad
Enlaces rápidos
SMF 218-B8
MANUAL DE INSTRUCCIONES
INSTRUCTION MANUAL
¡ESTAMOS AQUÍ PARA AYUDARLE!
¿Desea ver un video
para comprobar lo
fácil que es hacerlo
usted mismo?
Want to watch a
video that shows
how easy this DIY
project will be?
Visualícelo ahora en:
Watch it now at:
SANUS.com/2723
WE'RE HERE TO HELP
Acierte a la primera.
HeightFinder™ le
Recommended placement
indica el lugar donde
debe taladrar.
Get it right the first time.
HeightFinder™ shows
you where to drill.
Descúbralo en:
Check it out at:
SANUS.com/2726
Nuestros expertos
en instalación
están listos para
ayudar.
Our US-based
install experts are
standing by to help.
Llámenos al:
O contacte con
Call us at:
nosotros por chat en:
1-888-333-1376
Or, chat at:
SANUS.com/chatSS
Publicidad
Tabla de contenido

Manuales relacionados para Sanus Simplicity SMF218-B8


Resumen de contenidos para Sanus Simplicity SMF218-B8
- Página 1 Visualícelo ahora en: Descúbralo en: Llámenos al: O contacte con Watch it now at: Check it out at: Call us at: nosotros por chat en: SANUS.com/2723 SANUS.com/2726 1-888-333-1376 Or, chat at: SANUS.com/chatSS...
- Página 2 INSTRUCCIONES IMPORTANTES DE SEGURIDAD – LEA TODO ESTE MANUAL ANTES DE UTILIZAR ESTE PRODUCTO – GUARDE ESTAS INSTRUCCIONES IMPORTANT SAFETY INSTRUCTIONS – PLEASE READ MANUAL PRIOR TO USE – SAVE THESE INSTRUCTIONS PRECAUCIÓN: Evite posibles lesiones personales y daños materiales. ●...
-
Página 3: Peso Máximo
Customer Service. Si su TV (incluidos los accesorios) pesa MÁS, esta Peso máximo montura NO es compatible. (incluidos los accesorios) Visite Simplicity.sanus.com o llame al número 27.2 kg 1-888-333-1376 para encontrar una montura compatible. NO EXCEDAS (60 lbs.) If your TV (plus accessories) weighs MORE, this TV Weight Limit mount is NOT compatible. -
Página 4: Herramientas Necesarias
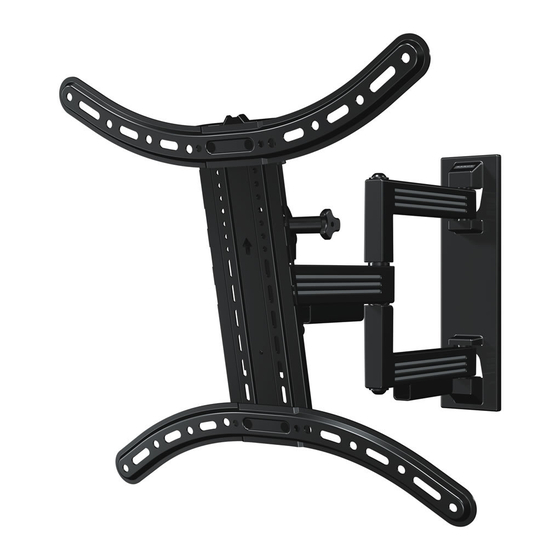
La construcción Hormigón macizo o PRECAUCIÓN: Montantes de madera de su pared bloque de hormigón CAUTION: Solid concrete or wood studs SOLAMENTE instalar en estos NO instalar concrete block tipos aceptables de la pared. en panel de yeso solo Wall Construction DO NOT install in... - Página 5 Dimensiones Dimensions INTERFAZ DE TV TV INTERFACE PLACA DE PARED WALL PLATE VISTA SUPERIOR EXTENDIDA VISTA LATERAL EXTENDIDA TOP VIEW - EXTENDED SIDE VIEW - EXTENDED 10.7 2X 8.4 4° 15° DOWN 303.9 282.5 42° - 90° 75.0 VISTA LATERAL RETRAIDO COMPLETAMENTE ENSAMBLADO VISTA SUPERIOR RETRAIDO SIDE VIEW - RETRACTED...
-
Página 6: Piezas Y Accesorios Suministrados Supplied Parts And Hardware
Piezas y accesorios suministrados Supplied Parts and Hardware ADVERTENCIA: Este producto contiene piezas pequeñas que, si fuesen tragadas, podrían producir asfixia. Antes de iniciar el ensamblaje, compruebe que todas las piezas estén incluidas y en buenas condiciones. Si faltan piezas o alguna está dañada, no devuelva el artículo al distribuidor; póngase en contacto con el servicio de atención al cliente. Nunca utilice piezas deterioradas. - Página 7 PASO 2 STEP 2 PASO 3 STEP 3 M5 x 6mm Tornillo de Bloqueo Locking Screw El Montaje del Brazo (qty. 1) Arm Assembly La Plantilla de Placa Mural (qty. 1) Drilling Template (qty. 1) Tornillos Tirafondo Lag Bolt (6mm x 70 mm) 1/4 x 2 ¾...
- Página 8 PASO 1 Fijar el soporte del televisor al televisor STEP 1 Attach TV Bracket to TV 1,1 Seleccione el diámetro de los 1,2 Seleccione la longitud de los tornillos para el televisor tornillos para el televisor 1.2 Select TV Screw Length and Spacers Solo un tamaño de tornillo es compatible con su TV.
- Página 9 1,3 Arme las placas de sujeción del televisor 1. 3 Attach TV Brackets to Your TV SIN ESPACIADOR NO SPACER CON ESPACIADOR SPACER NEEDED NOTA: Si es necesario, oriente los soportes del televisor para que los extremos no sobresalgan más allá de los bordes de su televisor. INSTALACIÓN TÍPICA ILUSTRADA.
- Página 11 PASO 2A Fijar la placa mural para montantes de madera STEP 2A Attach Arm to Wall Wood Stud Installation PRECAUCIÓN: Evite lesiones personales y daños materiales. ● El yeso que recubre la pared no debe exceder los 16 mm (5/8'') ●...
- Página 12 70 mm (2 ¾ in.) 3 mm (1/8 in.) IMPORTANTE: Asegúrese de perforar el centro del montante. IMPORTANTE: Los orificios deben realizarse con una mecha de 3 mm (1/8'') de diámetro hasta una profundidad de 70 mm (2 ¾'). IMPORTANT: Be sure to drill into the center of the stud. IMPORTANT: Pilot holes must be drilled to a depth of 2 ¾...
- Página 13 Ajuste los tornillos tirafondo solamente hasta que queden firmes contra la placa mural PRECAUCIÓN: El uso indebido podría reducir la capacidad de retención de los tornillos tirafondo. NO ajuste en exceso los tornillos tirafondo. Tighten the lag bolts only until the arm assembly is held tightly in place.
- Página 14 PASO 2B Fijar la placa mural para hormigón sólido o bloques de cemento STEP 2B Attach Arm to Wall Solid Concrete or Concrete Block Installation PRECAUCIÓN: Evite lesiones personales y daños materiales. CAUTION: Avoid potential personal injury or property damage! ●...
- Página 15 PRECAUCIÓN: Cerciórese de que los anclajes queden nivelados respecto de la superficie de hormigón. CAUTION: Be sure the anchors are seated flush with the concrete surface.
- Página 16 Ajuste los tornillos tirafondo solamente hasta que queden firmes contra la placa mural PRECAUCIÓN: El uso indebido podría reducir la capacidad de retención de los tornillos tirafondo. NO ajuste en exceso los tornillos tirafondo. Tighten the lag bolts only until the arm assembly is held tightly in place.
- Página 17 PASO 3 Fije el televisor a la placa mural STEP 3 Attach TV to Arm Assembly ¡ELEMENTO PESADO! Es posible que necesite ayuda en este paso. HEAVY! You may need assistance with this step.
- Página 18 PRECAUCIÓN: Evite posibles lesiones personales o daños materiales. Este tornillo de bloqueo debe instalarse para fijar el televisor en el montaje del brazo CAUTION: Avoid potential personal injury or property damage! Locking screw must be installed to secure the TV to the arm assembly...
-
Página 19: Organizar Los Cables Manage Cables
Organizar los cables Manage Cables Retire la cubierta de los cables Remove the two cable covers NOTA: Extienda el brazo NOTE: fully extend arms completo antes de pasar los cables. ensure enough slack in cables. Route your cables through the arms Pase los cables por el brazo shown —... -
Página 20: Ajustes Del Televisor Tv Adjustments
Ajustes del televisor TV Adjustments AJUSTE DE LA INCLINACIÓN AJUSTE DEL NIVEL TILT ADJUSTMENT LEVEL ADJUSTMENT El televisor debe acomodarse fácilmente Your TV should adjust easily when Ajuste el nivel de su televisor Turn level screw , to adjust al moverlo, y luego quedar en su lugar. moved, then stay in place. - Página 21 EXTENDER / RETRAER EXTRACCIÓN DEL TELEVISOR EXTEND / RETRACT REMOVING THE TV El televisor debe acomodarse ¡ELEMENTO PESADO! Es posible que necesite ayuda en este paso. Your TV should adjust easily when fácilmente al moverlo, y luego moved, then stay in place. quedar en su lugar.
-
Página 22: Solución De Problemas Troubleshooting
Solución de problemas Espaciador Troubleshooting Si no está seguro acerca de cuáles son las herramientas que debe utilizar, TV Supplied Spacers póngase en contacto con el Servicio de Atención al Cliente al 1-888-333-1376. ESPACIADORES SUMINISTRADOS CON EL TELEVISOR If you are uncertain about your hardware selection, contact Customer Service at 1-888-333-1376. - Página 23 Milestone AV Technologies y sus empresas asociadas y filiales (colectivamente “Milestone”) tienen la intención de que este manual sea preciso y completo. Sin embargo, Milestone no garantiza que la información que contiene incluya todos los detalles condiciones y variaciones, ni que contemple toda posible contingencia en conexión con la instalación y uso de este producto.
- Página 24 1-888-333-1376 info@sanus.com simplicity.SANUS.com Diseñado y desarrollado en EE. UU. Fabricado en China. ©2018 Milestone AV Technologies. Todos los derechos reservados. Simplicity es una marca de Milestone. Simplicity, HeightFinder y el logotipo de Simplicity son marcas comerciales de Milestone. IMPORTADO POR: IMPORTADORA PRIMEX, S.A. DE C.V. BLVD. MAGNOCENTRO NO.4, SAN FERNANDO LA HERRADURA, HUIXQUILUCAN, ESTADO DE MÉXICO, C.P.