Tabla de contenido
Publicidad
Idiomas disponibles
Idiomas disponibles
Enlaces rápidos
Publicidad
Capítulos
Tabla de contenido

Manuales relacionados para Stihl HT 73


Resumen de contenidos para Stihl HT 73
-
Página 2: Tabla De Contenido
3, before Fueling ..........18 using your pole pruner. Chain Oil ......... 19 Contact your STIHL dealer or the STIHL Filling Chain Oil Tank ...... 19 distributor for your area if you do not Checking Chain Lubrication ... 20 understand any of the instructions in this Adjusting Telescopic Shaft .... -
Página 3: Guide To Using This Manual
Engineering improvements in different ways: individual components. STIHL’s philosophy is to continually Step or procedure without direct Note or hint which is not essential improve all of its products. As a result, reference to an illustration. -
Página 4: Safety Precautions
These safety precautions and warnings strength to maintain control of the observed to reduce the risk of personal apply to the use of all STIHL pole pruner, do not use it. If you have any injury. pruners. Different models may have condition that might be aggravated by different parts and controls. - Página 5 / USA Most STIHL power tools are To reduce the risk of serious or fatal Warning! available with an anti-vibration injury, persons with pacemaker should Prolonged use of pole pruners (or other ("AV") system designed to reduce consult their physician and the...
- Página 6 STIHL or expressly approved by STIHL extremely high temperatures. Avoid glasses with adequate top for use with the specific STIHL pole touching the hot muffler – you could and side protection complying with pruner models are authorized. Although receive serious burns! ANSI Z 87.1.
- Página 7 If the risks associated with the possible pruner dust, vapor and smoke emissions are Your STIHL pole pruner uses an oil- not known, you should obtain the Take off the chain guard and inspect for gasoline mixture for fuel (see chapter relevant information from the contractor safety in operation.
- Página 8 Unit vibrations can cause on the STIHL product carefully so as to an improperly tightened allow any pressure build-up in the tank fuel cap to loosen or come to release slowly.
- Página 9 If you cannot set the correct idle speed, have your STIHL dealer check To reduce the risk of serious or fatal your pole pruner and make proper injury from breathing toxic fumes, never adjustments or repairs.
- Página 10 Operate the pole pruner under good bystanders should always wear a visibility and daylight conditions only. respirator approved by NIOSH / MSHA Don't work alone. Keep within calling for the type substance at issue. distance of others in case help is needed. HT 73...
- Página 11 It is not designed for prying or establish a path of escape and remove handle and shaft between your thumb shoveling away limbs, roots or other all obstacles. and forefinger. objects. HT 73...
- Página 12 Warning! carefully move the branch to open the pinch and release the bar. Use only STIHL replacement parts for Warning! maintenance and repair. Use of parts To reduce the risk of personal or even manufactured by others may cause fatal injury from falling objects do not cut serious or fatal injury.
- Página 13 STIHL Owner's Manual should be Warning! pruner. Do not attempt any maintenance strictly followed.
-
Página 14: Using The Machine
The shaft should always be held at an controllable pieces. angle of 60° or less! Typical applications Standard cut The most convenient working position is a tool angle of 60°, but any lesser angle may be used to suit the situation concerned. HT 73... - Página 15 (1) on the underside of the branch. To do this, apply the cutting attachment and pull it across the bottom of the branch as far as the bar nose. Perform the cross-cut (2). HT 73...
-
Página 16: Mounting The Bar And Chain
(2) butts against the 8" (20 cm) from the final cut. Then carry left end of the housing slot. out the flush-cut (4), starting with a relieving cut and finishing with a cross- cut. HT 73... -
Página 17: Tensioning The Saw Chain
Now refer to chapter chapter "Operating Instructions“. some time – check chain tension "Tensioning the Saw Chain". frequently – see chapter "Operating Instructions / During Operation“. Check chain tension. HT 73... -
Página 18: Fuel
/ USA Fuel This engine is certified to operate on Use only STIHL two-stroke engine oil or Gaso- Oil (STIHL 50:1 or unleaded gasoline and with the mix ratio equivalent branded two-stroke air- line equivalent branded TC oils) 50:1. -
Página 19: Fueling
After fueling, tighten fuel cap as securely as possible by hand. HT 73... -
Página 20: Chain Oil
Biological chain oil must be resistant Waste oil does not have the for half the unit's running time with a to aging (e.g. STIHL BioPlus) since required lubricating properties and full fuel tank. You should therefore it will otherwise quickly turn to resin. -
Página 21: Checking Chain Lubrication
Adjust shaft to required length. spring hook (2), with the unit replaced by your STIHL dealer. attached, is at about the same Tighten the screw firmly. Every new chain has to be broken in height as your right hip. -
Página 22: Starting / Stopping The Engine
This is the move slide control in direction of c (7). Reach behind the filter cover to starting-throttle position. press the fuel pump bulb (9) at least five times, even if the bulb is still filled with fuel. HT 73... - Página 23 – This will bend the tube raised support (e.g. a branch, and result in permanent damage to mound or something similar). the telescopic shaft. Check that nobody is standing within the working range of the pruner. HT 73...
- Página 24 Hold the unit firmly with your left Do not let the starter grip snap back hand around the fan housing – your – guide it slowly into the housing so thumb under the fan housing. that the starter rope can rewind properly. HT 73...
- Página 25 Refit the spark plug and tighten it speed. down to max. torque of 15 Nm Open throttle slightly – warm up (11lbf.ft) with combination wrench. engine for short period. HT 73...
-
Página 26: Operating Instructions
Check tightness of nuts and Check chain tension frequently! screws (not adjusting screws) at regular A new chain has to be tensioned more intervals and retighten as necessary. often than one that has been in use for some time. HT 73... -
Página 27: Cleaning The Air Filter
Move the choke lever to g. or, if necessary, wash in a clean, Release screw (1) and remove the non-flammable solution (e.g. warm filter cover (2). soapy water) and then dry. Clean away loose dirt from around the filter. HT 73... -
Página 28: Motor Management
The carburetor is set at the factory to provide an optimum fuel-air mixture under all operating conditions. Standard setting Check chain tension. Check air filter and install a new one if necessary. Check spark arresting screen and clean or replace as necessary. HT 73... -
Página 29: Spark Arresting Screen In Muffler
Clean spark arresting screen if deposits to form on the insulator nose necessary. If screen is damaged or which may result in trouble in operation. coked up, fit a new one. Push the spark arresting screen on to the stub. HT 73... -
Página 30: Rewind Starter
To reduce the risk of fire and burn Fit a new spark plug after approx. 100 injury, use only spark plugs operating hours authorized by STIHL. Always press or earlier if the electrodes are badly spark plug boot (2) snugly onto eroded. -
Página 31: Storing The Machine
It is best to use two chains in rotation with one sprocket. Drain and clean the fuel tank in a well ventilated area. Use only original STIHL chain sprockets. Run engine until carburetor is dry, this helps prevent the carburetor Replacing the chain soprocket diaphragms sticking together. -
Página 32: Taking Care Of Guide Bar
– this avoids kickback and resulting injury! one-sided wear, especiallly at nose and underside of the bar. Regularly clean 1 = oil inlet hole 2 = oil passage 3 = bar groove ** see “Special Accessories“ HT 73... - Página 33 The chain pitch (e.g. 3/8) is marked on the depth gauge side of each cutter. A = Filing angle As these requirements can be met only B = Side plate angle after sufficient and constant practice: Use a file holder**! see "Special Accessories" HT 73...
- Página 34 For checking angles This can be very time consuming – it is best to have this work done in a STIHL filing gauge – Part No. workshop on an electric grinder. 0000 893 4000 – A universal tool for checking the filing and side plate angles, Hold the file horizontally for all depth gauge setting and cutter length.
- Página 35 Filing gauge for depth gauge setting of 0.45 mm (0.018"): Part No. 0000 893 4000 Round off depth gauges parallel to the stamped marking. HT 73...
-
Página 36: Maintenance Chart
Replace Chain lubrication Check Inspect, also check sharpness Saw chain Check chain tension Sharpen Check (wear, damage) Clean and turn over Guide bar Deburr Replace Check Chain sprocket Replace STIHL dealer * see “Guide to Using this Manual“ HT 73... -
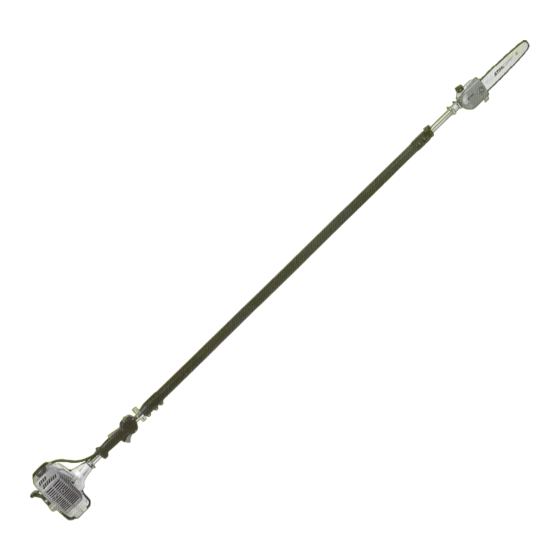
Página 37: Parts And Controls
15 Chain sprocket cover 16 Hook 17 Chain guard (scabbard) 18 Chain sprocket 19 Chain tensioner 20 Muffler (with spark arresting screen) 21 Fuel tank 22 Fuel filler cap 23 Starter grip 24 Choke lever 25 Carburetor adjusting screws HT 73... - Página 38 Provides additional fuel feed for a 19. Chain Tensioner cold start. Clutch Permits precise adjustment of chain Machine Support tension. Couples engine to chain sprocket when For resting machine on the ground. engine is accelerated beyond idle speed (not illustrated). HT 73...
-
Página 39: Specifications
15.4 lbs (7.0 kg) Stroke: 1.10 in (28 mm) - Part No. 3005 000 3905 Engine power to - Bar length: 30 cm (12“) ISO 8893: 1.2 bhp (0.9 kW) Idle speed: 3.000 rpm HT 73... -
Página 40: Special Accessories
Flat file 0814 252 3356 Warranty claims following repairs can be File holder 5605 750 4327 accepted only if the repair has been performed by an authorized STIHL Round file dealer using original STIHL replacement - Diameter 5/32" (4 mm) parts. -
Página 41: Stihl Incorporated Federal And California Emission Control Warranty Statement
California. STIHL service center as soon as a designed, built and equipped to meet the In other states, 1997 and later model problem exists. - Página 42 (see also instruction "Fuel"). warranty card to STIHL. If any emission owner if it is determined that a warranted Deviations from this recommendation related part on your engine is defective, part is defective.
- Página 43 / USA HT 73...
- Página 44 45, antes de usarlo. de la cadena ........61 Comuníquese con el concesionario o Revisión de la lubricación distribuidor de STIHL si no se entiende de la cadena ........62 alguna de las instrucciones dadas en el Ajuste del eje telescópico ....62 presente manual.
-
Página 45: Guía Para El Uso De Este Manual
Mejoramientos técnicos marcado en diferentes maneras: o los componentes individuales. La filosofía de STIHL es mejorar conti- Paso o procedimiento sin referirse Nota o sugerencia que no es esen- nuamente todos su productos. Como directamente a una ilustración. -
Página 46: Medidas De Seguridad
Vea la sección correspondiente de su Pida a su concesionario STIHL que le médico antes de utilizar el podador de manual del usuario para tener una des- enseñe el manejo del podador de varilla. - Página 47 La mayor parte de las herramientas Recomendamos las botas de seguridad motorizadas de STIHL se ofrecen con puntera de acero. El mismo puede interferir con algunos con un sistema antivibración ("AV") tipos de marcapasos. Para reducir el cuyo propósito es reducir la transmi-...
- Página 48 ANSI Z 87.1. de varilla de STIHL. Si bien es posible conectar al motor de STIHL ciertos Para evitar lesionarse el rostro, STIHL accesorios no autorizados, su uso recomienda también usar un protector...
- Página 49 Si se desconoce los riesgos asociados de varilla con las posibles emisiones de polvo, El podador de varilla de STIHL utiliza vapor y humo, obtenga la información Quite el protector de la cadena e inspec- una mezcla de aceite-gasolina como pertinente del contratista o de un orga- cione para verificar que está...
- Página 50 STIHL cuidadosamente de que ha quedado mal modo que la presión que se pueda apretada, o simplemente haber acumulado en el tanque se disipe soltarla y derramar com- lentamente.
- Página 51 Si no puede (por ej., monóxido de car- regular correctamente el ralentí, pida a bono) pueden ser incolo- su concesionario STIHL que revise el ros e inodoros. La electricidad puede saltar de un punto podador y haga los ajustes o reparacio- a otro al formar arcos en el aire.
- Página 52 No trabaje solo. Manténgase a una dor aprobado por NIOSH/MSHA para el distancia que le permita comunicarse material en uso. con otras personas en caso de necesitar ayuda. HT 73...
- Página 53 Des- Esta máquina no está diseñada para pués, establezca una ruta de escape y talar troncos. No está diseñada para ser retire todos los obstáculos. utilizada como palanca o pala en las ramas, raíces u otros objetos. HT 73...
- Página 54 Utilice solamente piezas de repuesto de sobre su cuerpo. Sostenga el podador STIHL para el mantenimiento y repara- de varilla a un ángulo no mayor que 60° ción. La utilización de piezas fabricadas respecto a la horizontal (vea la ilustra- por otras empresas puede causar lesio- ción).
- Página 55 única- No maneje nunca el podador de varilla si Antes de guardar la máquina durante un mente en el taller de servicio de STIHL. el silenciador está dañado, se ha per- período de más de algunos días, siem- dido o si fue modificado.
-
Página 56: Uso De La Máquina
(de diámetro grande) en varios tro- Usos típicos zos fáciles de manejar. Corte estándar La posición de trabajo más cómoda es mantener la herramienta a un ángulo de 60°, pero cualquier ángulo más pequeño puede usarse según el caso. HT 73... - Página 57 Para hacer esto, coloque el accesorio de corte y tire del mismo a lo ancho de la parte inferior de la rama, hasta llegar a la punta de la barra guía. Haga el corte transversal (2). HT 73...
-
Página 58: Montaje De La Barra Y La Cadena
(2) tope contra el damente 20 cm (8 pulg) del corte final. extremo izquierdo de la ranura de la Después haga el corte a ras (4), empe- caja. zando con un corte de distensión y ter- minando con el corte transversal. HT 73... -
Página 59: Tensado De La Cadena De Sierra
Revise la tensión de la cadena dedos. vea el capítulo "Instrucciones de frecuentemente – vea el capítulo "Ins- Ahora vea "Tensado de la cadena de manejo/Durante el funcionamiento". trucciones de manejo". sierra". Revise la tensión de la cadena. HT 73... -
Página 60: Combustible
Este motor está homologado para fun- En la mezcla, use únicamente aceite de cionar con gasolina sin plomo y una pro- STIHL para motor de dos tiempos o de combustible porción de mezcla de 50:1. aceites para motor de dos tiempos Mezcle únicamente el combustible... -
Página 61: Llenado De Combustible
Revise el nivel de aceite en el tanque en de combustible cuidadosamente de intervalos regulares y breves y llénelo modo que la presión que se pueda según sea necesario. haber acumulado en el tanque se disipe lentamente. HT 73... -
Página 62: Aceite De La Cadena
Si el nivel de aceite en el tanque no cambia, esto puede deberse a un problema en el suministro de aceite. Revise la lubricación de la cadena, limpie los conductos de aceite; comuní- quese con el concesionario STIHL, de ser necesario. HT 73... -
Página 63: Revisión De La Lubricación De La Cadena
Ajuste el eje al largo requerido. Ajuste el largo de la correa de modo Solicite al concesionario STIHL que lim- que el gancho con resorte (2), con Apriete el tornillo bien firme. -
Página 64: Arranque / Parada Del Motor
Meta la mano detrás de la cubierta cado. Esta es la posición de del filtro para oprimir el bulbo de la arranque del acelerador. bomba de combustible (9) al menos cinco veces, aunque el bulbo toda- vía esté lleno de combustible. HT 73... - Página 65 – Esto doblará el sobre un soporte elevado (por tubo y causará daño permanente al ejemplo, una rama, montículo u eje telescópico. objeto similar). Compruebe que no haya nadie den- tro del alcance del podador mien- tras está funcionando. HT 73...
- Página 66 – el No deje que el mango de arranque dedo pulgar debe quedar debajo de retroceda bruscamente; guíelo len- la caja del ventilador. tamente hacia el interior de la caja de modo que la cuerda se enrolle debidamente. HT 73...
- Página 67 Tire de la cuerda de arranque varias lizante se desplaza a la posición de veces para despejar la cámara de marcha #, y el motor retorna a ace- combustión. leración de ralentí. Abra el acelerador levemente. Caliente el motor por un período breve. HT 73...
-
Página 68: Instrucciones De Manejo
Es necesario volver a tensar las cade- de ser necesario. nas nuevas con mayor frecuencia que las que han estado en uso por algún tiempo. HT 73... -
Página 69: Limpieza Del Filtro De Aire
Suelte el tornillo (1) y saque la (agua tibia con jabón, por ejemplo) y cubierta del filtro (2). séquelos. Limpie toda la suciedad de alrede- dor del filtro. HT 73... -
Página 70: Manejo Del Motor
óptima bajo todas las condiciones de trabajo. Ajuste normal Revise la tensión de la cadena. Revise el filtro de aire e instale uno nuevo de ser necesario. Revise el chispero y límpielo o ins- tale uno nuevo de ser necesario. HT 73... -
Página 71: Chispero En Silenciador
Estos obstruido, instale uno nuevo. factores causan la formación de depósi- Empuje el chispero sobre el tos en la punta del aislador lo que puede dificultar el funcionamiento. extremo corto para instalarlo. HT 73... -
Página 72: Cuerda De Arranque
¡Sustituya la cuerda de arranque demasiado aceite en la mezcla de dañada oportunamente o pida al con- combustible. cesionario STIHL que se lo haga! filtro de aire sucio. condiciones de funcionamiento des- Para reducir el riesgo de incendios y favorables, por ej., funcionamiento lesiones por quemadura, use sola- a media aceleración. -
Página 73: Almacenamiento De La Máquina
Por lo tanto, acuda a un con- Limpie la máquina a fondo, preste cesionario de servicio autorizado STIHL atención especial a las aletas del para que sustituya la rueda dentada. cilindro y al filtro de aire. -
Página 74: Cuidado De La Barra Guía
Limpie periódicamente 1 = el agujero de entrada de aceite 2 = el conducto de aceite 3 = la ranura de la barra guía. ** consulte "Accesorios especiales" HT 73... - Página 75 A = Angulo de rectificación dor. B = Angulo de placa lateral Como estos requisitos pueden cum- plirse solamente después de una prác- tica constante y suficiente: Use un portalima** ** vea "Accesorios especiales" HT 73...
- Página 76 Para comprobar los ángulos 90° tengan el mismo largo. Esto puede ser muy demoroso – es mejor hacerlo en un Calibrador de rectificación STIHL – taller con una rectificadora eléctrica. N° de pieza 0000 893 4000 – Una herramienta universal para revisar los ángulos de rectificación y de la placa...
- Página 77 Calibrador de rectificación para ajustar los calibradores de profundidad a 0,45 mm (0.018 pulg): N° de pieza 0000 893 4000 Redondee los calibradores de profundi- dad hasta dejarlos paralelos con la marca grabada. HT 73...
-
Página 78: Tabla De Mantenimiento
Cadena de sierra Revisar la tensión de la cadena Afilar Revisar (desgaste, daño) Limpiar e invertir Barra guía Quitar las rebabas Reemplazar Revisar Rueda dentada de la cadena Reemplazar Concesionario STIHL * vea “Guía para el uso de este manual” HT 73... -
Página 79: Piezas Y Controles
18 Rueda dentada de la cadena 19 Tensor de cadena 20 Silenciador (con chispero) 21 Tanque de combustible 22 Tapa de llenado de combustible 23 Mango de arranque 24 Palanca del estrangulador 25 Tornillos de ajuste del carburador HT 73... - Página 80 Acopla el motor a la rueda dentada de la 19. Tensor de la cadena cadena cuando se acelera el motor Permite el ajuste preciso de la ten- sobre la velocidad de ralentí (no se ilus- sión de la cadena. tra). HT 73...
-
Página 81: Especificaciones
0,9 kW (1,2 bhp) sin barra y cadena, - Tipo: Rollomatic con Ralentí: 3000 rpm con tanques vacíos: 7,0 kg (15,4 lb) punta de rueda dentada - N° de pieza: 3005 000 3905 - Largo de barra: 30 cm (12 pulg) HT 73... -
Página 82: Accesorios Especiales
STIHL, el logotipo STIHl STIHl STIHl STIHl dentada de la y el símbolo de piezas de STIHL( cadena 0000 893 4101 En las piezas pequeñas, el símbolo puede aparecer solo. Grasa lubricante STIHL Tubo de 225 g/8 oz 0781 120 1111... -
Página 83: Estado De California
/ EE.UU Declaración de garantía de STIHL Incorporated sobre siste- mas de control de emisiones según normas Federales y del Estado de California Sus derechos y obligaciones de Si existe una condición amparada bajo no contemplados en la garantía, y no garantía, STIHL Incorporated reparará... - Página 84 STIHL y pre- remite la tarjeta de garantía a STIHL. servicio autorizado por STIHL. Todo tra- sente la tarjeta de garantía firmada.
- Página 85 / EE.UU HT 73...