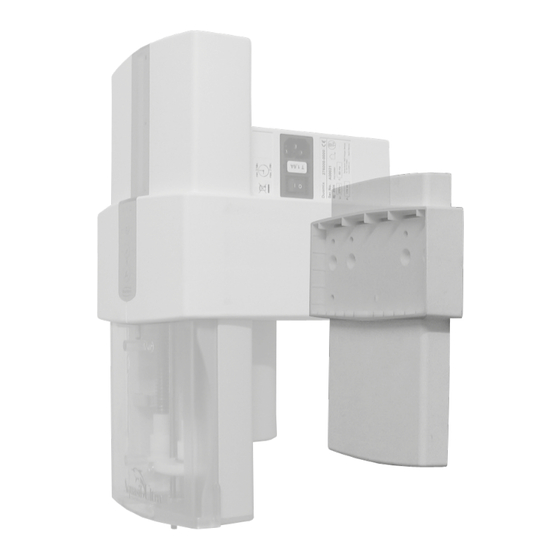
Resumen de contenidos para Renfert KULZER Dynamix speed 2
- Página 1 Dynamix®speed 2 Wandhalterung MONTAGEANLEITUNG Giving a hand to oral health. Giving a hand to oral health. Made in Germany...
- Página 2 - 2 -...
-
Página 3: Verwendete Symbole
⇒ Gerät zur Wand schwenken (Bild 9). ⇒ Gerät mit den zwei Blechschrauben (E) an der Wandmontageplatte befestigen (Bild 10). ⇒ Gerät wieder anschließen. REACH Informationen zu REACH und SVHC finden Sie auf unserer Internetseite unter www.renfert.com im Support Bereich. Änderungen vorbehalten - 1 -... -
Página 4: Standard Delivery
⇒ Install the self-tapping screws (E) to secure the unit to the wall mounting plate (Figure 10). ⇒ Reconnect the unit to the mains power supply. REACH Information on REACH and SVHC is available on our website www.renfert.com, in the Support area. Subject to modifications - 2 -... -
Página 5: Étendue De Livraison
⇒ Fixez l’appareil à la plaque de montage mural avec les deux vis à tôle (E) (fig. 10). ⇒ Rebranchez l’appareil. REACH Vous trouverez des informations sur REACH et SVHC sur notre site internet www.renfert.com dans la section Service. Sous réserve de modifications... - Página 6 ⇒ Fissare l’apparecchio con due viti per lamiera (E) sulla lastra per il montaggio a parete (fig. 10). ⇒ Riallacciare l’apparecchio. REACH Informazioni su REACH e SVHC si trovano sul nostro sito internet www.renfert.com nella sezione Sup- porto. Con riserva di modifiche...
-
Página 7: Volumen De Suministro
⇒ Fijar el aparato con los dos tornillos (E) para chapa en la placa de montaje mural (véase figura 10). ⇒ Volver a conectar el aparato. REACH Encontrará informaciones acerca del reglamento REACH y las sustancias SVHC en nuestra página Web www.renfert.com en el área Postventa. Bajo reserva de modificaciones - 5 -... - Página 8 ⇒ Bevestig het apparaat met de twee plaatschroeven (E) op de wandmontageplaat (foto 10). ⇒ Sluit het apparaat weer aan. REACH Informatie betreffende REACH en SVHC kunt u vinden op onze internetpagina www.renfert.com in het support-gedeelte. Wijzigingen voorbehouden - 6 -...
-
Página 9: Conteúdo Do Fornecimento
⇒ Ligar novamente o aparelho. REACH Informações sobre Registo, Avaliação, Autorização e Restrição dos Produtos Químicos (REACH) e sobre substâncias que suscitam elevada preocupação (SVHC) podem ser encontradas em nosso sítio Internet em www.renfert.com na seção Suporte. Alterações reservadas - 7 -... - Página 10 ⇒ Sväng in apparaten mot väggen (Bild 9). ⇒ Fäst apparaten på väggmonteringsplattan med de 2 stålskruvarna (E) (Bild 10). ⇒ Anslut apparaten igen. REACH Du hittar information om REACH och SVHC på vår webbplats på www.renfert.com i Support-delen. Med förbehåll för ändringar - 8 -...
-
Página 11: Inkludert I Leveransen
⇒ Fest enheten til platen for montering på vegg med de to plateskruene (E) (figur 10). ⇒ Kople enheten til igjen. REACH Du finner informasjon om REACH og SVHC på vår Internettside på www.renfert.com i Support-området. Med forbehold om endringer. - 9 -... -
Página 12: Piegādes Komplekts
⇒ piespiediet ierīci pie sienas (9. attēls), ⇒ ar divām metāla skrūvēm piestipriniet ierīci pie sienas montējamās plāksnes (E) (10. attēls). ⇒ Atkal pieslēdziet ierīci. REACH Informācija par REACH un SVHC atrodama mūsu tīmekļa vietnē www.renfert.com sadaļā “Support”. Paturam tiesības veikt izmaiņas - 10 -... -
Página 13: Tiekimo Komplektacija
⇒ Pasukite aparatą link sienos (9 pav.). ⇒ Dviem varžtais metalui pritvirtinkite aparatą prie sieninio montažo plokštės (E) (10 pav.). ⇒ Vėl prijunkite aparatą. REACH Informacijos apie REACH ir SVHC rasite mūsų interneto puslapyje ties www.renfert.com pagalbos srityje (Support). Galimi pakeitimai. - 11 -... - Página 14 ⇒ マウンティングべースを取り付け、6個のネジで固定します(写真 4)。 6個のネジ、すべてを使用して下さい! 壁マウンティングプレートの取り付け: ⇒ マウンティングプレートを使って、穴を開ける位置をマークします(写真 5)。 ⇒ 深さ55 mm 以上になるように、8 mmドリル で穴を開けます。穴にダボを挿し込みます。 ⇒ 壁掛け金具を固定用ネジとワッシャー(C)で固定します(図6)。 装置を掛けます。: ♦ マウンティングプレートのフック4個が、ユニットベースのスロット4個に適合します(写真 7)。 ♦ 電源コードをベース裏側の溝に通します(写真 7)。 装置を壁に取り付ける際、電源コードをつぶさないように注意して下さい! ⇒ ベースのスロットをマウンティングプレートのフックに合わせ、装置を掛けます(写真 8)。 ⇒ 装置の下部を壁方向に押し込みます(写真 9)。 ⇒ 2個のタッピングスクリューで、装置をマウンティングプレートに固定します (E)(写真 10)。 ⇒ 装置を再び電源につないで下さい。 REACH REACH及びSVHCの情報はウェブサイト www.renfert.com のサポートエリアを参照ください。 変更を留保します。 - 12 -...
- Página 16 Tel.: +49 7731 82 08-0 • Fax: +49 7731 82 08-70 www.renfert.com • info@renfert.com Renfert USA • 3718 Illinois Avenue • St. Charles IL 60174/USA Tel.: +1 6307 62 18 03 • Fax: +1 6307 62 97 87 www.renfert.com • info@renfertusa.com...


