Registrarse
Cargar
Manuales
Marcas
Daikin Manuales
Acondicionadores de Aire
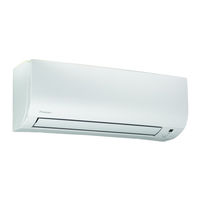
FTXP35M5V1B
Daikin FTXP35M5V1B Manuales
Manuales y guías de usuario para Daikin FTXP35M5V1B. Tenemos
9
Daikin FTXP35M5V1B manuales disponible para descarga gratuita en PDF: Manual De Instalación, Manual De Funcionamiento, Manual Del Usuario
Daikin FTXP35M5V1B Manual De Instalación (116 páginas)
Marca:
Daikin
| Categoría:
Acondicionadores de Aire
| Tamaño: 4.33 MB
Tabla de contenido
Tabla de Contenido
3
About the Documentation
3
About this Document
3
About the Box
3
Indoor Unit
3
To Remove the Accessories from the Indoor Unit
3
About the Unit
4
System Layout
4
Operation Range
4
Preparation
4
Preparing the Installation Site
4
Installation Site Requirements of the Indoor Unit
4
Preparing Refrigerant Piping
4
Refrigerant Piping Requirements
4
Refrigerant Piping Insulation
4
Installation
5
Opening the Indoor Unit
5
To Remove the Front Panel
5
To Re-Install the Front Panel
5
To Remove the Front Grille
5
To Re-Install the Front Grille
5
To Remove the Electrical Wiring Box Cover
5
To Open the Service Cover
5
Installing the Indoor Unit
6
To Install the Mounting Plate
6
To Drill a Wall Hole
6
To Remove the Pipe Port Cover
6
To Provide Drainage
6
Connecting the Refrigerant Piping
8
Guidelines When Connecting the Refrigerant Piping
8
To Connect the Refrigerant Piping to the Indoor Unit
8
Connecting the Electrical Wiring
8
To Connect the Electrical Wiring on the Indoor Unit
9
Finishing the Indoor Unit Installation
9
To Insulate the Drain Piping, Refrigerant Piping and Interconnection Cable
9
To Pass the Pipes through the Wall Hole
9
To Fix the Unit on the Mounting Plate
10
Configuration
10
To Set a Different Address
10
Commissioning
11
Checklist before Commissioning
11
To Perform a Test Run
11
To Perform a Test Run in Winter Season
11
Disposal
12
Technical Data
13
Wiring Diagram
13
So Entfernen Sie das Zubehör vom Innengerät
15
Über die Einheit
15
Systemanordnung
15
Betriebsbereich
15
Vorbereitung
15
Den Ort der Installation Vorbereiten
15
Anforderungen an den Installationsort des Innengeräts
15
Vorbereiten der Kältemittelleitungen
15
Anforderungen an Kältemittel-Rohrleitungen
15
Isolieren der Kältemittelleitungen
16
Installation
16
Öffnen der Inneneinheit
16
Die Frontblende Abnehmen
16
Die Frontblende wieder Anbringen
16
Das Frontgitter Abnehmen
16
Das Frontgitter wieder Anbringen
16
Die Elektroschaltkasten-Abdeckung Entfernen
16
Die Wartungsblende Öffnen
17
Die Inneneinheit Installieren
17
Die Montageplatte Installieren
17
Ein Loch in die Wand Bohren
17
Rohranschluss-Abdeckung Entfernen
18
Für einen Ablauf Sorgen
18
Anschließen der Kältemittelleitung
19
Richtlinien zum Anschließen von Kältemittelleitungen
19
So Schließen Sie die Kältemittelleitung an das Innengerät an
20
Anschließen der Elektrischen Leitungen
20
Elektrokabel an der Inneneinheit Anschließen
20
Abschließen der Installation des Innengeräts
21
Abflussrohr, Kältemittelrohrleitung und Verbindungskabel Isolieren
21
Die Rohre durch die Wanddurchführung Führen
21
Die Einheit auf der Montageplatte Befestigen
21
Erweiterte-Funktion
21
Eine andere Adresse Einstellen
21
Inbetriebnahme
23
Checkliste vor Inbetriebnahme
23
Probelauf Durchführen
23
Einen Probelauf während der Winterperiode Durchführen
23
Entsorgung
23
Technische Daten
24
Schaltplan
24
Propos de la Documentation
25
À Propos du Présent Document
25
Propos du Carton
25
Retrait des Accessoires de L'unité Intérieure
26
Propos de L'unité
26
Configuration du Système
26
Plage de Fonctionnement
26
Préparation
26
Préparation du Lieu D'installation
26
Exigences pour le Lieu D'installation de L'unité Intérieure
26
Préparation de la Tuyauterie de Réfrigérant
27
Exigences de la Tuyauterie de Réfrigérant
27
Isolation de la Tuyauterie de Réfrigérant
27
Installation
27
Ouverture de L'unité Intérieure
27
Dépose du Panneau Avant
27
Repose du Panneau Avant
27
Dépose de la Grille Avant
27
Repose de la Grille Avant
27
Dépose du Couvercle du Coffret Électrique
28
Ouverture du Couvercle D'entretien
28
Installation de L'unité Intérieure
28
Installation de la Plaque de Montage
28
Réalisation D'un Trou Dans le Mur
28
Enlèvement du Couvercle de L'orifice de Tuyau
29
Pour Fournir le Drainage
29
Raccordement de la Tuyauterie de Réfrigérant
30
Consignes pour le Raccordement de la Tuyauterie de Réfrigérant
30
Raccordement de la Tuyauterie de Réfrigérant à L'unité Intérieure
31
Raccordement du Câblage Électrique
31
Raccordement du Câblage Électrique Sur L'unité Intérieure
31
Finalisation de L'installation de L'unité Intérieure
32
Pour Isoler la Tuyauterie de Drainage, la Tuyauterie de Réfrigérant et le Câble D'interconnexion
32
Passage des Tuyaux à Travers les Trous de Mur
32
Fixation de L'unité Sur la Plaque de Montage
32
Configuration
32
Réglage des Différentes Adresses
32
Mise en Service
34
Liste de Contrôle Avant la Mise en Service
34
Essai de Fonctionnement
34
Pour Effectuer un Test en Hiver
34
Mise au Rebut
34
Données Techniques
35
Schéma de Câblage
35
Binnenunit
36
Toebehoren Uit de Binnenunit Verwijderen
36
Over de Unit
37
Systeemlay-Out
37
Werkingsgebied
37
Voorbereiding
37
Installatieplaats Voorbereiden
37
Vereisten Inzake de Plaats Waar de Binnenunit Geïnstalleerd Wordt
37
De Koelmiddelleidingen Voorbereiden
37
Vereisten Voor de Koelmiddelleidingen
37
De Koelleidingen Isoleren
37
Installatie
38
Binnenunit Openen
38
Voorpaneel Verwijderen
38
Voorpaneel Weer Aanbrengen
38
Voorrooster Verwijderen
38
Voorrooster Weer Aanbrengen
38
Deksel Elektrische Bedradingskast Verwijderen
38
Servicedeksel Openen
39
Binnenunit Installeren
39
Montageplaat Installeren
39
Een Muuropening Boren
39
Leidingpoortdeksel Verwijderen
39
Afvoer Voorzien
40
De Koelmiddelleiding Aansluiten
41
Richtlijnen Bij Het Aansluiten Van Koelmiddelleidingen
41
De Koelmiddelleidingen Op Binnenunit Aansluiten
41
De Elektrische Bedrading Aansluiten
41
Elektrische Bedrading Aansluiten Op de Binnenunit
42
De Installatie Van de Binnenunit Voltooien
42
Afvoerleiding, Koelmiddelleiding en Kabel Tussen de Units Isoleren
42
Leidingen Door de Muuropening Voeren
42
Binnenunit Op de Montageplaat Bevestigen
43
Configuratie
43
Een ander Adres Instellen
43
Inbedrijfstelling
44
Checklist Voor de Inbedrijfstelling
44
Proefdraaien
45
Proefdraaien in de Winter
45
Als Afval Verwijderen
45
Technische Gegevens
46
Bedradingsschema
46
Acerca de la Documentación
47
Acerca de Este Documento
47
Acerca de la Caja
47
Unidad Interior
47
Cómo Extraer Los Accesorios de la Unidad Interior
48
Acerca de la Unidad
48
Esquema del Sistema
48
Rango de Funcionamiento
48
Preparación
48
Preparación del Lugar de Instalación
48
Requisitos para el Emplazamiento de Instalación de la Unidad Interior
48
Preparación de las Tuberías de Refrigerante
48
Requisitos de las Tuberías de Refrigerante
48
Aislamiento de las Tuberías de Refrigerante
49
Instalación
49
Apertura de la Unidad Interior
49
Cómo Retirar el Panel Frontal
49
Cómo Volver a Instalar el Panel Frontal
49
Cómo Retirar la Rejilla Frontal
49
Cómo Volver a Instalar la Rejilla Frontal
49
Cómo Retirar la Cubierta de la Caja de Cableado Eléctrico
49
Cómo Abrir la Tapa de Servicio
50
Instalación de la Unidad Interior
50
Cómo Instalar la Placa de Montaje
50
Cómo Perforar un Orificio en la Pared
50
Cómo Retirar la Cubierta del Orificio de la Tubería
51
Cómo Habilitar un Drenaje Adecuado
51
Cómo Conectar las Tuberías de Refrigerante
52
Pautas al Conectar las Tuberías de Refrigerante
52
Cómo Conectar las Tuberías de Refrigerante a la Unidad Interior
53
Conexión del Cableado Eléctrico
53
Cómo Conectar el Cableado Eléctrico en la Unidad Interior
53
Finalización de la Instalación de la Unidad Interior
54
Cómo Aislar la Tubería de Drenaje, la Tubería de Refrigerante y el Cable de Interconexión
54
Cómo Pasar las Tuberías a Través del Orificio de la Pared
54
Cómo Fijar la Unidad en la Placa de Montaje
54
Configuration
54
Cómo Establecer una Dirección Distinta
54
Puesta en Marcha
56
Lista de Comprobación Antes de la Puesta en Servicio
56
Cómo Realizar una Prueba de Funcionamiento
56
Cómo Realizar una Prueba de Funcionamiento en Invierno
56
Eliminación
56
Datos Técnicos
57
Diagrama de Cableado
57
Rimozione Degli Accessori Dall'unità Interna
59
Informazioni Sull'unità
59
Layout Sistema
59
Portata DI Funzionamento
59
Preparazione
59
Preparazione del Luogo DI Installazione
59
Requisiti del Luogo D'installazione Per L'unità Interna
59
Preparazione Delle Tubazioni del Refrigerante
59
Requisiti Delle Tubazioni del Refrigerante
59
Isolante Per le Tubazioni del Refrigerante
60
Installazione
60
Apertura Dell'unità Interna
60
Rimozione del Pannello Anteriore
60
Reinstallazione del Pannello Anteriore
60
Rimozione Della Griglia Anteriore
60
Reinstallazione Della Griglia Anteriore
60
Rimozione del Coperchio Della Scatola Dei Collegamenti Elettrici
60
Apertura del Coperchio DI Servizio
61
Installazione Dell'unità Interna
61
Installazione Della Piastra DI Montaggio
61
Praticare un Foro Nella Parete
61
Rimozione del Coperchio Della Porta del Tubo
62
Per Fornire lo Scolo
62
Collegamento Delle Tubazioni del Refrigerante
63
Linea Guida Per Il Collegamento Delle Tubazioni del Refrigerante
63
Collegamento Delle Tubazioni del Refrigerante All'unità Interna
64
Collegamento del Cablaggio Elettrico
64
Collegamento del Cablaggio Elettrico All'unità Interna
64
Finitura Dell'installazione Dell'unità Interna
65
Isolamento Della Tubazione DI Drenaggio, Della Tubazione del Refrigerante E del Cavo DI Interconnessione
65
Passaggio Dei Tubi Attraverso Il Foro Della Parete
65
Fissaggio Dell'unità Sulla Piastra DI Montaggio
65
Configurazione
65
Impostazione DI un Indirizzo Diverso
65
Messa in Funzione
67
Elenco DI Controllo Prima Della Messa in Esercizio
67
Per Eseguire una Prova DI Funzionamento
67
Esecuzione DI una Prova DI Funzionamento in Inverno
67
Smaltimento
67
Dati Tecnici
68
Schema Dell'impianto Elettrico
68
Πληροφορίες Για Τα Έγγραφα Τεκμηρίωσης
69
Πληροφορίες Για Το Παρόν Έγγραφο
69
Πληροφορίες Για Τη Συσκευασία
69
Εσωτερική Μονάδα
70
Για Να Αφαιρέσετε Τα Εξαρτήματα Από Την Εσωτερική Μονάδα
70
Σχετικά Με Τη Μονάδα
70
Διάταξη Συστήματος
70
Εύρος Λειτουργίας
70
Προετοιμασία
70
Την Προετοιμασία Του Χώρου Εγκατάστασης
70
Απαιτήσεις Χώρου Εγκατάστασης Για Την Εσωτερική Μονάδα
70
Προετοιμασία Των Σωληνώσεων Ψυκτικού
71
Απαιτήσεις Σωλήνωσης Ψυκτικού
71
Μόνωση Σωληνώσεων Ψυκτικού
71
Εγκατάσταση
71
Άνοιγμα Της Εσωτερικής Μονάδας
71
Για Να Αφαιρέσετε Την Πρόσοψη
71
Για Να Τοποθετήσετε Ξανά Την Πρόσοψη
71
Για Να Αφαιρέσετε Τη Μπροστινή Σχάρα
71
Για Να Τοποθετήσετε Ξανά Τη Μπροστινή Σχάρα
72
Για Να Αφαιρέσετε Το Κάλυμμα Του Πίνακα Ηλεκτρικών Καλωδιώσεων
72
Για Να Ανοίξετε Το Κάλυμμα Συντήρησης
72
Εγκατάσταση Της Εσωτερικής Μονάδας
72
Για Να Εγκαταστήσετε Την Πλακέτα Προσάρτησης
72
Για Να Ανοίξετε Τρύπα Στον Τοίχο
73
Για Να Αφαιρέσετε Το Κάλυμμα Της Θύρας Εισαγωγής Σωλήνων
73
Παροχή Αποστράγγισης
73
Σύνδεση Των Σωληνώσεων Ψυκτικού
75
Οδηγίες Κατά Τη Σύνδεση Της Σωλήνωσης Ψυκτικού
75
Για Να Συνδέσετε Τις Σωληνώσεις Ψυκτικού Στην Εσωτερική Μονάδα
75
Σύνδεση Των Ηλεκτρικών Καλωδίων
75
Για Να Συνδέσετε Την Ηλεκτρική Καλωδίωση Στην Εσωτερική Μονάδα
75
Ολοκλήρωση Εγκατάστασης Της Εσωτερικής Μονάδας
76
Για Να Μονώσετε Τις Σωληνώσεις Αποχέτευσης, Τις Σωληνώσεις Ψυκτικού Και Το Καλώδιο Διασύνδεσης
76
Για Να Περάσετε Τους Σωλήνες Από Την Τρύπα Στον Τοίχο
76
Για Να Στερεώσετε Τη Μονάδα Στη Βάση Εγκατάστασης
76
Ρύθμιση Παραμέτρων
77
Για Να Ορίσετε Διαφορετική Διεύθυνση
77
Αρχική Εκκίνηση
78
Λίστα Ελέγχου Πριν Την Έναρξη Λειτουργίας
78
Εκτέλεση Μιας Δοκιμαστικής Λειτουργίας
79
Για Να Εκτελέσετε Δοκιμαστική Λειτουργία Κατά Τη Χειμερινή Περίοδο
79
Απόρριψη
79
Τεχνικά Χαρακτηριστικά
80
Διάγραμμα Καλωδίωσης
80
Acerca da Documentação
81
Acerca Deste Documento
81
Acerca da Caixa
81
Unidade de Interior
81
Para Retirar os Acessórios da Unidade de Interior
81
Acerca da Unidade
82
Projecto Do Sistema
82
Publicidad
Daikin FTXP35M5V1B Manual De Funcionamiento (116 páginas)
Marca:
Daikin
| Categoría:
Acondicionadores de Aire
| Tamaño: 2.95 MB
Tabla de contenido
Tabla de Contenido
2
About the Documentation
2
About this Document
2
About the System
3
Indoor Unit Display
3
About the User Interface
3
Components: User Interface
3
Status: User Interface LCD
3
To Operate the User Interface
4
Before Operation
4
To Fix the User Interface to the Wall
4
To Insert the Batteries
4
To Switch between Fahrenheit and Celsius
4
To Turn on the Power Supply
4
Operation
4
Operation Range
4
When to Use Which Feature
4
Operation Mode and Temperature Setpoint
5
To Start/Stop Operation and to Set the Temperature
5
Airflow Rate
5
Airflow Direction
5
Comfort Airflow Operation
6
Powerful Operation
6
Econo Operation
6
OFF/ON Timer Operation
7
Energy Saving and Optimum Operation
7
Maintenance and Service
8
Overview: Maintenance and Service
8
To Clean the Indoor Unit and User Interface
8
To Clean the Front Panel
9
To Clean the Air Filters
9
To Clean the Titanium Apatite Deodorizing Filter and the Silver Particle Filter (Ag-Ion Filter)
9
To Replace the Titanium Apatite Deodorizing Filter and the Silver Particle Filter (Ag-Ion Filter)
10
To Close the Front Panel
10
To Take Following Items into Account before a Long Idle Period
10
Troubleshooting
10
Symptoms that Are NOT System Malfunctions
11
Symptom: a Sound Like Water Flowing Is Heard
11
Symptom: a Blowing Sound Is Heard
11
Symptom: a Ticking Sound Is Heard
11
Symptom: a Whistling Sound Is Heard
11
Symptom: a Clicking Sound During Operation or Idle Time Is Heard
11
Symptom: a Clapping Sound Is Heard
11
Symptom: White Mist Comes out of a Unit (Indoor Unit)
11
Symptom: the Units Can Give off Odours
11
Symptom: the Outdoor Fan Rotates While the Air Conditioner Is Not in Operation
11
Inneneinheit
12
Über das System
13
Inneneinheit- Anzeige
13
Über die Benutzerschnittstelle
13
Komponenten: Benutzerschnittstelle
13
Status: LCD der Benutzerschnittstelle
13
Die Benutzerschnittstelle Bedienen
14
Vor der Inbetriebnahme
14
Benutzerschnittstelle an der Wand Befestigen
14
Batterien Einlegen
14
Zum Umschalten zwischen Fahrenheit und Celsius
14
Stromversorgung Einschalten
14
Betrieb
14
Betriebsbereich
14
Wie und Wann Bestimmte Funktionen Benutzt werden
15
Betriebsart und Temperatur-Sollwert
15
Betrieb Starten/Beenden und die Raumtemperatur Festlegen
16
Luftdurchsatz
16
Luftstromrichtung
16
Betrieb mit Komfort-Luftstrom
16
Leistungsstarker POWERFUL-Betrieb
17
Öko-Betrieb (Econo)
17
EIN/AUS-Timer
17
Energie Sparen und Optimaler Betrieb
18
Instandhaltung und Wartung
19
Übersicht: Instandhaltung und Wartung
19
Inneneinheit und Benutzerschnittstelle Reinigen
19
Die Frontblende Reinigen
20
Luftfilter Reinigen
20
Titan-Apatit-Desodorier-Filter und Silberpartikelfilter (Ag-Ion-Filter) Reinigen
20
Titan-Apatit-Desodorier-Filter und Silberpartikelfilter (Ag-Ion-Filter) Auswechseln
21
Die Frontblende Schließen
21
Vor Längerer Außerbetriebnahme zu Beachten
21
Fehlerdiagnose und -Beseitigung
21
Bei den Folgenden Symptomen Handelt es sich nicht um Störungen des Systems
21
Symptom: Sie Hören ein Betriebsgeräusch, das sich wie Fließendes Wasser Anhört
21
Symptom: ein Blasendes Geräusch ist zu Hören
22
Symptom: ein Tickendes Geräusch ist zu Hören
22
Symptom: ein Pfeifendes Geräusch ist zu Hören
22
Symptom: ein Klickendes Geräusch ist zu Hören während des Betriebs oder IM Leerlauf
22
Symptom: ein Klapp-Geräusch ist zu Hören
22
Symptom: aus einer Einheit Tritt Weißer Nebel aus (Inneneinheit)
22
Symptom: das Gerät Setzt Gerüche Frei
22
Symptom: der Außenventilator Dreht Sich, während das Klimagerät nicht Arbeitet
22
Fehler Beseitigen auf Grundlage von Fehlercodes
22
Entsorgung
22
Propos de la Documentation
23
À Propos du Présent Document
23
Propos du Système
23
Unité Intérieure
23
Affichage de L'unité Intérieure
24
A Propos de L'interface Utilisateur
24
Composants: Interface Utilisateur
24
Statut: Ecran LCD D'interface Utilisateur
24
Pour Utiliser L'interface Utilisateur
25
Avant Fonctionnement
25
Fixation de L'interface Utilisateur au Mur
25
Insertion des Piles
25
Pour Passer de Fahrenheit à Celsius
25
Mise Sous Tension
25
Fonctionnement
25
Plage de Fonctionnement
25
Quand Utiliser Quelle Fonctionnalité
26
Mode de Fonctionnement et Point de Consigne de Température
26
Pour Démarrer/Arrêter le Fonctionnement et Régler la Température
27
Taux de Flux D'air
27
Direction Flux D'air
27
Débit D'air de Confort
28
Fonctionnement en Mode Puissant
28
Fonctionnement Econo
28
Fonctionnement du Temporisateur ARRÊT/MARCHE
29
Economie D'énergie et Fonctionnement Optimal
30
Maintenance et Entretien
30
Vue D'ensemble: Maintenance et Entretien
30
Nettoyage de L'unité Intérieure et de L'interface Utilisateur
31
Nettoyage du Panneau Avant
31
Nettoyage des Filtres à Air
32
Nettoyage du Filtre Désodorisant à L'apatite de Titane et du Filtre à Particules D'argent (Filtre Ion Ag)
32
Remplacement du Filtre Désodorisant à L'apatite de Titane et du Filtre à Particules D'argent (Filtre Ion Ag)
32
Pour Fermer le Panneau Avant
33
Tenez Compte des Éléments Suivants Avant une Longue Période D'inutilisation
33
Dépannage
33
Symptômes Ne Constituant Pas des Dysfonctionnements du Système
34
Symptôme: on Entend un Bruit comme si L'eau Coulait
34
Symptôme: un Bruit de Souffle Est Entendu
34
Symptôme: un Bruit de Tic-Tac Est Entendu
34
Symptôme: un Sifflement Est Entendu
34
Symptôme: un Déclic pendant le Fonctionnement ou le Temps D'inactivité Est Entendu
34
Symptôme: on Entend un Bruit de Claquement
34
Symptôme: une Fumée Blanche Sort D'une Unité (Unité Intérieure)
34
Symptôme: les Unités Peuvent Dégager une Odeur
34
Symptôme: le Ventilateur Extérieur Tourne alors que le Climatiseur Est à L'arrêt
34
Over de Documentatie
35
Over Dit Document
35
Over Het Systeem
35
Binnenunit
35
Display Binnenunit
36
Over de Gebruikersinterface
36
Onderdelen: Gebruikersinterface
36
Status: Lcd Gebruikersinterface
36
Gebruik Van de Gebruikersinterface
37
Voor Het Gebruik
37
De Gebruikersinterface Op de Muur Bevestigen
37
Batterijen Plaatsen
37
Omschakelen Tussen Fahrenheit en Celsius
37
Voeding Inschakelen
37
Functie
37
Werkingsgebied
37
Wanneer Welke Functie Gebruiken
38
Bedrijfsstand en Temperatuurinstelpunt
38
Het Systeem Starten/Stoppen en de Temperatuur Instellen
38
Luchtstroomsnelheid
39
Uitblaasrichting
39
Comfort-Functie
39
Powerful-Functie
40
Econo-Functie
40
In-/Uitschakeltimer
40
Energie Besparen en Optimale Werking
41
Onderhoud en Service
41
Overzicht: Onderhoud en Service
41
Binnenunit en Gebruikersinterface Schoonmaken
42
Voorpaneel Schoonmaken
42
Luchtfilters Reinigen
43
Titaniumapatiet Luchtzuiveringsfilter en Zilverdeeltjesfilter (Ag-Ion-Filter) Reinigen
43
Titaniumapatiet Luchtzuiveringsfilter en Zilverdeeltjesfilter (Ag-Ion-Filter) Vervangen
43
Voorpaneel Sluiten
44
Aandachtspunten Voor Een Lange Periode Van Stilstand
44
Opsporen en Verhelpen Van Storingen
44
Symptomen die Geen Storingen Van Het Systeem Zijn
44
Symptoom: U Hoort Een Geluid Zoals Stromend Water
44
Symptoom: U Hoort Een Blaasgeluid
44
Symptoom: U Hoort Een Tikgeluid
44
Symptoom: U Hoort Een Fluitgeluid
44
Symptoom: U Hoort Een Klikgeluid Terwijl de Unit Werkt of Stilstaat
44
Symptoom: U Hoort Een Klapgeluid
44
Symptoom: de Ventilator Van de Buitenunit Draait Terwijl de Airconditioner Niet Wordt Gebruikt
45
Problemen Op Basis Van Storingscodes Oplossen
45
Als Afval Verwijderen
45
Unidad Interior
46
Acerca del Sistema
47
Pantalla de la Unidad Interior
47
Acerca de la Interfaz de Usuario
47
Componentes: Interfaz de Usuario
47
Estado: LCD de la Interfaz de Usuario
47
Cómo Manejar la Interfaz de Usuario
48
Antes de la Puesta en Marcha
48
Fijación de la Interfaz de Usuario en la Pared
48
Cómo Insertar las Baterías
48
Cambio entre Grados Fahrenheit y Celsius
48
Cómo Desconectar la Alimentación Eléctrica
48
Operación
49
Rango de Funcionamiento
49
Cuándo Utilizar Determinadas Funciones
49
Modo de Funcionamiento y Punto de Consigna de Temperatura
49
Cómo Iniciar/Detener el Funcionamiento y Ajustar la Temperatura
49
Caudal de Aire
50
Dirección del Flujo de Aire
50
Funcionamiento de Flujo de Aire de Comfort
50
Funcionamiento Powerful
50
Funcionamiento Econo
51
Funcionamiento del Temporizador de ENCENDIDO/APAGADO
51
Ahorro de Energía y Funcionamiento Óptimo
52
Mantenimiento y Servicio Técnico
53
Resumen: Mantenimiento y Servicio Técnico
53
Cómo Limpiar la Unidad Interior y la Interfaz de Usuario
53
Cómo Limpiar el Panel Frontal
53
Cómo Limpiar Los Filtros de Aire
54
Cómo Limpiar el Filtro Desodorizante de Apatito de Titanio y Filtro de Partículas de Plata (Filtro de Iones de Plata)
54
Cómo Sustituir el Filtro Desodorizante de Apatito de Titanio y Filtro de Partículas de Plata (Filtro de Iones de Plata)
54
Cómo Cerrar el Panel Frontal
55
Tenga en Cuenta Los Siguientes Puntos Antes de un Periodo de Inactividad Prolongado
55
Solución de Problemas
55
Los Siguientes Síntomas no Son Fallos del Sistema
55
Síntoma: Se Oye un Sonido de Agua Fluyendo
55
Síntoma: Se Oye un Sonido de Golpe
55
Síntoma: Se Oye un Sonido de Tictac
55
Síntoma: Se Oye un Sonido de Silbido
56
Síntoma: Se Oye un Sonido de Chasquido
56
Síntoma: Se Oye un Sonido de Estruendo
56
Síntoma: Sale Vaho Blanco de la Unidad (Unidad Interior)
56
Síntoma: las Unidades Pueden Desprender Olor
56
Síntoma: el Ventilador Exterior Gira cuando el Equipo de Aire Acondicionado no Está Funcionando
56
Resolución de Problemas en Función de Los Códigos de Error
56
Tratamiento de Desechos
56
Note Relative Alla Documentazione
57
Informazioni Su Questo Documento
57
Informazioni Sul Sistema
57
Unità Interna
57
Display Dell'unità Interna
58
Informazioni Sull'interfaccia Utente
58
Componenti: Interfaccia Utente
58
Stato: LCD Dell'interfaccia Utente
58
Utilizzo Dell'interfaccia Utente
59
Prima Dell'uso
59
Fissaggio Dell'interfaccia Utente Alla Parete
59
Inserimento Delle Batterie
59
Commutazione Tra Fahrenheit E Celsius
59
Attivazione Dell'alimentazione Elettrica
59
Funzionamento
60
Portata DI Funzionamento
60
Quando Usare Determinate Funzioni
60
Modalità DI Funzionamento E Setpoint Della Temperatura
60
Avvio/Arresto del Funzionamento E Impostazione Della Temperatura
61
Tasso del Flusso D'aria
61
Direzione Aria
61
Funzionamento "Comfort Airflow
61
Funzionamento in Modalità "Powerful
62
Funzionamento "Econo
62
Funzione DI ACCENSIONE/SPEGNIMENTO del Timer
62
Risparmio Energetico E Funzionamento Ottimale
63
Manutenzione E Assistenza
64
Panoramica: Manutenzione E Assistenza
64
Pulizia Dell'unità Interna E Dell'interfaccia Utente
64
Pulizia del Pannello Anteriore
65
Pulizia Dei Filtri Dell'aria
65
Daikin FTXP35M5V1B Manual De Funcionamiento (16 páginas)
Marca:
Daikin
| Categoría:
Acondicionadores de Aire
| Tamaño: 3.46 MB
Tabla de contenido
Tabla de Contenido
2
Acerca de la Documentación
2
Acerca de Este Documento
2
Instrucciones de Seguridad para el Usuario
3
Acerca del Sistema
4
Unidad Interior
4
Pantalla de la Unidad Interior
4
Acerca de la Interfaz de Usuario
5
Componentes: Controlador Remoto Inalámbrico
5
Estado: Pantalla LCD del Controlador Remoto Inalámbrico
5
Cómo Operar el Controlador Remoto Inalámbrico
5
Antes de la Puesta en Marcha
6
Cómo Montar el Soporte del Controlador Remoto Inalámbrico
6
Cómo Insertar las Baterías
6
Cambio entre Grados Fahrenheit y Celsius
6
Cómo Desconectar la Alimentación Eléctrica
6
Operación
6
Rango de Funcionamiento
6
Cuándo Utilizar Determinadas Funciones
6
Modo de Funcionamiento y Punto de Consigna de Temperatura
7
Cómo Iniciar/Detener el Modo de Funcionamiento y Ajustar la Temperatura
7
Caudal de Aire
7
Dirección del Flujo de Aire
8
Funcionamiento de Flujo de Aire de Comfort
8
Funcionamiento Powerful
9
Funcionamiento Econo
9
Funcionamiento del Temporizador de ENCENDIDO/APAGADO
9
Ahorro de Energía y Funcionamiento Óptimo
10
Mantenimiento y Servicio Técnico
10
Resumen: Mantenimiento y Servicio Técnico
10
Cómo Limpiar la Unidad Interior y el Controlador Remoto Inalámbrico
11
Cómo Limpiar el Panel Frontal
11
Cómo Limpiar Los Filtros de Aire
11
Cómo Limpiar el Filtro Desodorizante de Apatito de Titanio y Filtro de Partículas de Plata (Filtro de Iones de Plata)
12
Cómo Sustituir el Filtro Desodorizante de Apatito de Titanio y Filtro de Partículas de Plata (Filtro de Iones de Plata)
12
Cómo Cerrar el Panel Frontal
13
Tenga en Cuenta Los Siguientes Puntos Antes de un Periodo de Inactividad Prolongado
13
Solución de Problemas
13
Los Siguientes Síntomas no Son Fallos del Sistema
13
Síntoma: Se Oye un Sonido de Agua Fluyendo
13
Síntoma: Se Oye un Sonido de Golpe
13
Síntoma: Se Oye un Sonido de Tictac
13
Síntoma: Se Oye un Sonido de Silbido
13
Síntoma: Se Oye un Sonido de Chasquido
13
Síntoma: Se Oye un Sonido de Estruendo
14
Síntoma: Sale Vaho Blanco de la Unidad (Unidad Interior)
14
Síntoma: las Unidades Pueden Desprender Olor
14
Síntoma: el Ventilador Exterior Gira cuando el Equipo de Aire Acondicionado no Está Funcionando
14
Resolución de Problemas en Función de Los Códigos de Error
14
Información
14
Publicidad
Daikin FTXP35M5V1B Manual De Instalación (16 páginas)
Marca:
Daikin
| Categoría:
Acondicionadores de Aire
| Tamaño: 4.09 MB
Tabla de contenido
Tabla de Contenido
4
About this Document
4
About the Box
4
Indoor Unit
5
System Layout
5
Operation Range
5
Preparation
5
Preparing the Installation Site
5
Installation Site Requirements of the Indoor Unit
5
Preparing Refrigerant Piping
5
Refrigerant Piping Requirements
5
Refrigerant Piping Insulation
5
Installation
6
Opening the Indoor Unit
6
To Remove the Front Panel
6
To Re-Install the Front Panel
6
To Remove the Front Grille
6
To Re-Install the Front Grille
6
To Remove the Electrical Wiring Box Cover
6
To Open the Service Cover
6
Installing the Indoor Unit
7
To Install the Mounting Plate
7
To Drill a Wall Hole
7
To Remove the Pipe Port Cover
7
To Provide Drainage
7
Connecting the Refrigerant Piping
8
Guidelines When Connecting the Refrigerant Piping
8
To Connect the Refrigerant Piping to the Indoor Unit
9
Connecting the Electrical Wiring
9
To Connect the Electrical Wiring to the Indoor Unit
9
Finishing the Indoor Unit Installation
10
To Insulate the Drain Piping, Refrigerant Piping and Interconnection Cable
10
To Pass the Pipes through the Wall Hole
10
To Fix the Unit on the Mounting Plate
10
Configuration
10
To Set a Different Address
10
Commissioning
11
Checklist before Commissioning
11
To Perform a Test Run
11
To Perform a Test Run in Winter Season
11
Disposal
11
Technical Data
12
Wiring Diagram
12
Technical Engineering Data
12
A Subset of the Latest Technical Data Is Available on the Regional
12
Indoor Unit
12
Installation Manual
12
Daikin FTXP35M5V1B Manual De Instalación (16 páginas)
Equipo de aire acondicionado para habitaciones
Marca:
Daikin
| Categoría:
Acondicionadores de Aire
| Tamaño: 4.1 MB
Tabla de contenido
1 Acerca de Este Documento
4
2 Acerca de la Caja
4
Unidad Interior
5
Tabla de Contenido
4
3 Acerca de la Unidad
5
Esquema del Sistema
5
Rango de Funcionamiento
5
4 Preparación
5
Preparación del Lugar de Instalación
5
Requisitos para el Emplazamiento de Instalación de la Unidad Interior
5
Preparación de las Tuberías de Refrigerante
5
Requisitos de las Tuberías de Refrigerante
5
Aislamiento de las Tuberías de Refrigerante
6
5 Instalación
6
Apertura de la Unidad Interior
6
Cómo Retirar el Panel Frontal
6
Cómo Volver a Instalar el Panel Frontal
6
Cómo Retirar la Rejilla Frontal
6
Cómo Volver a Instalar la Rejilla Frontal
6
Cómo Retirar la Cubierta de la Caja de Cableado Eléctrico
6
Cómo Abrir la Tapa de Servicio
7
Instalación de la Unidad Interior
7
Cómo Instalar la Placa de Montaje
7
Cómo Perforar un Orificio en la Pared
7
Cómo Retirar la Cubierta del Orificio de la Tubería
7
Cómo Habilitar un Drenaje Adecuado
8
Cómo Conectar las Tuberías de Refrigerante
9
Pautas al Conectar las Tuberías de Refrigerante
9
Cómo Conectar las Tuberías de Refrigerante a la Unidad Interior
9
Conexión del Cableado Eléctrico
10
Conexión del Cableado Eléctrico a la Unidad Interior
10
Finalización de la Instalación de la Unidad Interior
10
Cómo Aislar la Tubería de Drenaje, la Tubería de Refrigerante y el Cable de Interconexión
10
Cómo Pasar las Tuberías a Través del Orificio de la Pared
11
Cómo Fijar la Unidad en la Placa de Montaje
11
6 Configuration
11
Cómo Establecer una Dirección Distinta
11
7 Puesta en Marcha
12
Lista de Comprobación Antes de la Puesta en Servicio
12
Cómo Realizar una Prueba de Funcionamiento
12
Cómo Realizar una Prueba de Funcionamiento en Invierno
12
8 Eliminación
12
9 Datos Técnicos
13
Diagrama de Cableado
13
Unidad Interior
13
Daikin FTXP35M5V1B Manual Del Usuario (16 páginas)
Marca:
Daikin
| Categoría:
Acondicionadores de Aire
| Tamaño: 4.1 MB
Tabla de contenido
1 Informationen zu diesem Dokument
4
Tabla de Contenido
4
2 Über die Verpackung
4
Innengerät
4
So Entfernen Sie das Zubehör vom Innengerät
4
3 Über die Einheit
5
Systemanordnung
5
Betriebsbereich
5
4 Vorbereitung
5
Den Ort der Installation Vorbereiten
5
Anforderungen an den Installationsort des Innengeräts
5
Vorbereiten der Kältemittelleitungen
5
Anforderungen an Kältemittel-Rohrleitungen
5
Isolieren der Kältemittelleitungen
6
5 Installation
6
Öffnen der Inneneinheit
6
Die Frontblende Abnehmen
6
Die Frontblende wieder Anbringen
6
Das Frontgitter Abnehmen
6
Das Frontgitter wieder Anbringen
6
Die Elektroschaltkasten-Abdeckung Entfernen
7
Die Wartungsblende Öffnen
7
Die Inneneinheit Installieren
7
Die Montageplatte Installieren
7
Ein Loch in die Wand Bohren
7
Rohranschluss-Abdeckung Entfernen
7
Für einen Ablauf Sorgen
8
Anschließen der Kältemittelleitung
9
Richtlinien zum Anschließen von Kältemittelleitungen
9
So Schließen Sie die Kältemittelleitung an das Innengerät an
9
Anschließen der Elektrischen Leitungen
10
Die Elektrischen Leitungen an die Inneneinheiten Anschließen
10
Abschließen der Installation des Innengeräts
10
Abflussrohr, Kältemittelrohrleitung und Verbindungskabel Isolieren
10
Die Rohre durch die Wanddurchführung Führen
11
Die Einheit auf der Montageplatte Befestigen
11
6 Erweiterte-Funktion
11
Eine andere Adresse Einstellen
11
7 Inbetriebnahme
12
Checkliste vor Inbetriebnahme
12
Probelauf Durchführen
12
Einen Probelauf während der Winterperiode Durchführen
12
8 Entsorgung
12
9 Technische Daten
13
Schaltplan
13
Daikin FTXP35M5V1B Manual De Funcionamiento (12 páginas)
Marca:
Daikin
| Categoría:
Acondicionadores de Aire
| Tamaño: 2.74 MB
Tabla de contenido
Tabla de Contenido
2
Acerca de la Documentación
2
Acerca de Este Documento
2
2 Acerca del Sistema
3
Unidad Interior
3
Pantalla de la Unidad Interior
3
Acerca de la Interfaz de Usuario
3
Componentes: Interfaz de Usuario
3
Estado: LCD de la Interfaz de Usuario
3
Cómo Manejar la Interfaz de Usuario
4
3 Antes de la Puesta en Marcha
4
Fijación de la Interfaz de Usuario en la Pared
4
Cómo Insertar las Baterías
4
Cambio entre Grados Fahrenheit y Celsius
4
Cómo Desconectar la Alimentación Eléctrica
4
4 Operación
4
Rango de Funcionamiento
4
Cuándo Utilizar Determinadas Funciones
4
Modo de Funcionamiento y Punto de Consigna de Temperatura
5
Cómo Iniciar/Detener el Funcionamiento y Ajustar la Temperatura
5
Caudal de Aire
5
Dirección del Flujo de Aire
6
Funcionamiento de Flujo de Aire de Comfort
6
Funcionamiento Powerful
6
Funcionamiento Econo
6
Funcionamiento del Temporizador de ENCENDIDO/APAGADO
7
5 Ahorro de Energía y Funcionamiento Óptimo
7
6 Mantenimiento y Servicio Técnico
8
Resumen: Mantenimiento y Servicio Técnico
8
Cómo Limpiar la Unidad Interior y la Interfaz de Usuario
9
Cómo Limpiar el Panel Frontal
9
Cómo Limpiar Los Filtros de Aire
9
Cómo Limpiar el Filtro Desodorizante de Apatito de Titanio y Filtro de Partículas de Plata (Filtro de Iones de Plata)
10
Cómo Sustituir el Filtro Desodorizante de Apatito de Titanio y Filtro de Partículas de Plata (Filtro de Iones de Plata)
10
Cómo Cerrar el Panel Frontal
10
Tenga en Cuenta Los Siguientes Puntos Antes de un Periodo de Inactividad Prolongado
10
7 Solución de Problemas
10
Los Siguientes Síntomas no Son Fallos del Sistema
11
Síntoma: Se Oye un Sonido de Agua Fluyendo
11
Síntoma: Se Oye un Sonido de Golpe
11
Síntoma: Se Oye un Sonido de Tictac
11
Síntoma: Se Oye un Sonido de Silbido
11
Síntoma: Se Oye un Sonido de Chasquido
11
Síntoma: Se Oye un Sonido de Estruendo
11
Síntoma: Sale Vaho Blanco de la Unidad (Unidad Interior)
11
Síntoma: las Unidades Pueden Desprender Olor
11
Síntoma: el Ventilador Exterior Gira cuando el Equipo de Aire Acondicionado no Está Funcionando
11
Daikin FTXP35M5V1B Manual De Instalación (12 páginas)
Marca:
Daikin
| Categoría:
Aire Acondicionados
| Tamaño: 3.36 MB
Tabla de contenido
Tabla de Contenido
2
Информация О Настоящем Документе
2
Информация О Блоке
2
Информация О
3
Информация
3
Снятие Аксессуаров С Внутреннего Блока
3
Справочная Информация О Блоках
3
Компоновка Системы
3
Рабочий Диапазон
3
Подготовка
3
Как Подготовить Место Установки
3
Требования К Месту Установки Внутреннего Блока
3
Подготовка Трубопровода Хладагента
3
Изоляция Трубопровода Хладагента
4
Монтаж
4
Открывание Внутреннего Блока
4
Как Снять Лицевую Панель
4
Как Установить Лицевую Панель На Место
4
Как Снять Переднюю Решетку
4
Как Установить Переднюю Решетку На Место
4
Как Снять Крышку С Распределительной Коробки
4
Монтаж Внутреннего Блока
5
Чтобы Открыть Сервисную Крышку
5
Установка Монтажной Пластины
5
Чтобы Просверлить Отверстие В Стене
5
Чтобы Снять Крышку Отверстия Под Трубопровод
6
Обустройство Дренажа
6
Соединение Труб Трубопровода Хладагента
7
Указания По Подсоединению Трубопроводов Хладагента
7
Соединение Трубопровода Хладагента С Внутренним Агрегатом
8
Подключение Электропроводки
8
Подключение Электропроводки К Внутреннему Information/ Блоку
8
Завершение Монтажа Внутреннего Агрегата
9
Чтобы Заизолировать Дренажные Трубы
9
Трубопровод Хладагента И Соединительный Язык Оригинальной Документации Английский. Документация На Кабель
9
Чтобы Пропустить Трубы Через Отверстие В Стене
9
Чтобы Зафиксировать Блок На Монтажной
9
Пластине
9
Конфигурирование
9
Настройка Других Адресов
9
Пусконаладка
11
Предпусковые Проверочные Операции
11
Порядок Выполнения Пробного Запуска
11
Пробный Запуск Зимой
11
Утилизация
11
Технические Данные
12
Схема Электропроводки
12
Daikin FTXP35M5V1B Manual De Funcionamiento (12 páginas)
Marca:
Daikin
| Categoría:
Acondicionadores de Aire
| Tamaño: 2.74 MB
Tabla de contenido
Tabla de Contenido
2
Acerca de Este Documento
2
Acerca del Sistema
3
Unidad Interior
3
Pantalla de la Unidad Interior
3
Acerca de la Interfaz de Usuario
3
Componentes: Interfaz de Usuario
3
Estado: LCD de la Interfaz de Usuario
3
Cómo Manejar la Interfaz de Usuario
4
Antes de la Puesta en Marcha
4
Fijación de la Interfaz de Usuario en la Pared
4
Cómo Insertar las Baterías
4
Cambio entre Grados Fahrenheit y Celsius
4
Cómo Desconectar la Alimentación Eléctrica
4
Operación
4
Rango de Funcionamiento
4
Cuándo Utilizar Determinadas Funciones
4
Modo de Funcionamiento y Punto de Consigna de Temperatura
5
Cómo Iniciar/Detener el Modo de Funcionamiento y Ajustar la Temperatura
5
Caudal de Aire
5
Dirección del Flujo de Aire
6
Funcionamiento de Flujo de Aire de Comfort
6
Funcionamiento Powerful
6
Funcionamiento Econo
6
Funcionamiento del Temporizador de ENCENDIDO/APAGADO
7
Ahorro de Energía y Funcionamiento Óptimo
7
Mantenimiento y Servicio Técnico
8
Resumen: Mantenimiento y Servicio Técnico
8
Cómo Limpiar la Unidad Interior y la Interfaz de Usuario
9
Cómo Limpiar el Panel Frontal
9
Cómo Limpiar Los Filtros de Aire
9
Cómo Limpiar el Filtro Desodorizante de Apatito de Titanio y Filtro de Partículas de Plata (Filtro de Iones de Plata)
9
Cómo Sustituir el Filtro Desodorizante de Apatito de Titanio y Filtro de Partículas de Plata (Filtro de Iones de Plata)
10
Cómo Cerrar el Panel Frontal
10
Tenga en Cuenta Los Siguientes Puntos Antes de un Periodo de Inactividad Prolongado
10
Solución de Problemas
10
Los Siguientes Síntomas no Son Fallos del Sistema
11
Síntoma: Se Oye un Sonido de Agua Fluyendo
11
Síntoma: Se Oye un Sonido de Golpe
11
Síntoma: Se Oye un Sonido de Tictac
11
Síntoma: Se Oye un Sonido de Silbido
11
Síntoma: Se Oye un Sonido de Chasquido
11
Síntoma: Se Oye un Sonido de Estruendo
11
Síntoma: Sale Vaho Blanco de la Unidad (Unidad Interior)
11
Síntoma: las Unidades Pueden Desprender Olor
11
Síntoma: el Ventilador Exterior Gira cuando el Equipo de Aire Acondicionado no Está Funcionando
11
Publicidad
Productos relacionados
Daikin FTXP35K2V1B
Daikin FTXP35L5V1B
Daikin FTXP35M5V1B9
Daikin FTXP35K3V1B
Daikin FTXP35N5V1B
Daikin FTXP20K2V1B
Daikin FTXP20M5V1B9
Daikin FTXP60L2V1B
Daikin FTXP25K3V1B
Daikin FTXP50K3V1B
Daikin Categorias
Acondicionadores de Aire
Bombas de Calor
Aire Acondicionados
Chillers de Aire
Controles Remotos
Más Daikin manuales
Login
Entrar
O
Iniciar sesión con Facebook
Iniciar sesión con Google
Cargar el manual
Cargar desde el disco
Cargar desde la URL