Tabla de contenido
Publicidad
Idiomas disponibles
Idiomas disponibles
Enlaces rápidos
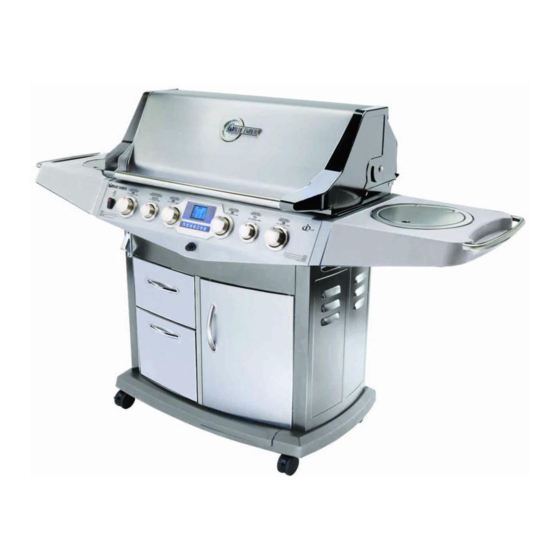
MODEL MAY NOT BE EXACTLY AS SHOWN.
The models and illustrations shown throughout this manual are
intended for general visual demonstration purposes only. The
model you have purchased may not be exactly as shown
throughout these instructions.
!
WARNING!
Hazardous Fire or Explosion may result if these
instructions are ignored.
It is the user's responsibility to see that this barbecue is properly
assembled, installed, maintained and cared for. Failure to follow
instructions in this manual could result in serious bodily injury
and/or property damage. Any modification to the grill is
dangerous and is not permitted.
!
CAUTION
some parts may contain sharp edges -especially if noted in the
manual. Wear protective gloves if necessary.
WARRANTY INFORMATION
Full Model No. from outer carton:
Date Purchased:
Serial Number
(
:
from rating plate)
SAVE THIS MANUAL FOR FUTURE REFERENCE
Installer must leave instructions with the consumer for future reference.
KEEP YOUR RECEIPT AS PROOF OF PURCHASE TO VALIDATE
THE WARRANTY. ATTACH YOUR RECEIPT TO THE INSIDE
COVER OF THIS MANUAL FOR EASY REFERENCE.
THIS APPLIANCE IS FOR OUTDOOR USE ONLY
Made in China
US-120309
EN
Outdoor Gas Barbeque/Grill
Assembly manual / Use & Care
IMPORTANT SAFETY INSTRUCTIONS
READ AND FOLLOW ALL SAFETY INSTRUCTIONS
Read and follow all instructions that are on the product or
provided with product.
SAVE THESE INSTRUCTIONS
important safety and operating instruction for power units.
IF YOU SMELL GAS:
1. Shut off gas supply to appliance.
2. Extinguish any open flame.
3. Open lid.
4. If odour continues, keep away from the appliance and
immediately call your gas supplier or your fire department.
• Do not store use gasoline or other flammable liquids or
vapours in the vicinity of this or any other appliance.
• An LP cylinder not connected for use shall not be stored in
the vicinity of this or any other appliance.
www.blueembergrills.com
Manufactured for
1-800-396-3838
In USA:
Fiesta Gas Grills, LLC.
One Fiesta Drive Dickson, TN. USA 37033
FGQ65079
(Propane or Natural
- This manual contains
DANGER!
!
!
WARNING!
SP5547-37
MODEL
Gas Series)
Publicidad
Tabla de contenido

Resumen de contenidos para BLUE EMBER GRILLS FGQ65079
- Página 1 Outdoor Gas Barbeque/Grill Assembly manual / Use & Care MODEL FGQ65079 (Propane or Natural Gas Series) MODEL MAY NOT BE EXACTLY AS SHOWN. IMPORTANT SAFETY INSTRUCTIONS The models and illustrations shown throughout this manual are intended for general visual demonstration purposes only. The...
-
Página 2: Tabla De Contenido
Combustion by-products produced when THANK YOU FOR using this product contain chemicals known to the state of California to cause cancer, birth PURCHASING THIS BARBEQUE WARNING defects, or other reproductive harm. We are dedicated to creating the ultimate barbeque Safety Symbols experience by providing you with all the right tools, The symbols and boxes shown below explain what each starting with this manual. -
Página 3: For Your Own Safety
FOR YOUR OWN SAFETY: • Liquid propane gas is not natural gas. The conversion or attempted use of natural gas in a liquid propane unit or • Only use your barbeque OUTDOORS in a well-ventilated liquid propane gas in a natural gas unit is dangerous and area and shall not be used in a building garage or any other will void your warranty. -
Página 4: Caring For Your Equipment
CARING FOR YOUR EQUIPMENT INSTALLATION WHEN DECIDING WHERE TO PLACE YOUR APPLIANCE, FOLLOW THESE MINIMUM THE INSTALLATION OF THIS APPLIANCE MUST CONFORM WITH LOCAL CLEARANCE DISTANCES TO ADJACENT WARNING CODES OR, IN THE ABSENCE OF LOCAL CODES: COMBUSTIBLE MATERIALS: • In Canada: must conform to CSA-B149.2 Propane Installation code or CSA B149.1 Natural Gas Installation 1 m (36") Fig. -
Página 5: L.P. Gas Cylinder
into the Type 1 system. The connection of a #510 P.O.L. fitting will not L.P. GAS CYLINDER provide the flow control or temperature shut-off features built into the complete Type 1 system. Gas cylinders manufactured today have mechanisms to provide We strongly recommend use of a propane cylinder with Q.C.C.I and worry free barbequing year round: O.P.D. -
Página 6: Transportation And Storage
TRANSPORTATION AND STORAGE: • Never store or transport the LP cylinder where temperatures can reach 125 F. • Do not leave an LP cylinder in a car on a hot day. ALTHOUGH IT IS SAFE WHEN USED • Do not use a damaged LP cylinder. Dented or rusty LP PROPERLY, CARELESS HANDLING OF THE cylinders or LP cylinders with a damaged valve may be hazardous PROPANE GAS CYLINDER COULD RESULT IN... -
Página 7: Hose & Regulator
LP CYLINDER EXCHANGE • Never attempt to attach this grill to the Many retailers that sell grills offer you the option of replacing self-contained LP gas system of a your empty LP cylinder through an exchange service. Use only home, camper trailer or motor home. those reputable exchange companies that inspect, precision fill, •... -
Página 8: Cleaning & Maintenance
• Follow the ‘LEAK TEST’ instructions before lighting your NATURAL GAS MODELS: barbeque for the first time, every time a propane cylinder is • Never use with propane, or any other gases. refilled, if any gas component is changed, if the regulator flow- •... -
Página 9: Perform A Leak Test
CLEANING & MAINTENANCE To keep your barbeque working at its peak efficiency as well as contribute HOW TO DO THE TESTING: to the safe operation of this unit, perform all of the operations below at 1. With the barbeque console control knobs in the ‘OFF’ position, least once a year - preferably at the start of each cooking season. - Página 10 PROPER INSTALLATION OF FAILURE TO FOLLOW ALL INSTRUCTIONS MAY RESULT IN A HAZARDOUS FIRE OR THE GREASE PAN EXPLOSION CAUSING SERIOUS BODILY WARNING SECURING THE GREASE PAN INJURY AND/OR PROPERTY DAMAGE 1 - Look at the back of your grill. With the grease pan removed, you CLEANING GREASE PAN should become familiar with the rail and locking system.
-
Página 11: Cleaning Other Parts Of Your Appliance
CASTING INTERIOR AND WARMING RACK: CLEANING OTHER PARTS OF At least once a year remove all components from inside your barbeque. YOUR APPLIANCE Loosen any cooking residue with a scraping tool for large particles and a brass barbeque brush for smaller particles. Scrub with hot water and a General Grill Cleaning: Do not mistake brown or black accumulation of strong detergent, then rinse thoroughly or spray barbeque degreaser grease and smoke for paint. -
Página 12: Using Your Appliance Correctly
USING YOUR APPLIANCE CORRECTLY BEFORE USING YOUR APPLIANCE READ ALL INSTRUCTIONS IN THIS MANUAL AND IQUEINSTRUCTION MANUAL USER GUIDE. Fig. 9A WARNING: ENSURE SIDE BURNER LID IS UP BEFORE LIGHTING SIDE BURNER. INTERNAL LIGHT LEFT BURNER *ROTISSERIE BURNER CENTER LEFT BURNER IGNITOR CENTER RIGHT MODEL MAY NOT BE... -
Página 13: Lighting
LIGHTING IF LIGHTING MAIN BURNERS ONLY, ENSURE SIDE BURNER KNOB Prior to lighting your barbeque, visually check all hoses before each CAUTION IS IN THE OFF POSITION. use for nicks, cracking, abrasions or cuts. If the hose is found to be damaged in any way, DO NOT USE YOUR BARBEQUE. - Página 14 SIDE BURNER (OPTIONAL) USING THE IGNITOR 1. Read instructions before lighting. 2. Raise side burner lid. 3. Push in and turn the side burner control knob to 'HIGH'. 4. Depress ignitor. Repeat if necessary (Figure 12A). 5. If burner does not light immediately (within five seconds), turn the burner control knob off, and wait 5 minutes to clear the gas.
-
Página 15: Rotisserie Cooking
REAR ROTISSERIE BURNER (OPTIONAL) USING THE IGNITOR 1. Read instructions before lighting. 2. Open the lid before lighting. 3. Push in and turn the rotisserie control knob to 'HIGH'. 4. Depress ignitor. Repeat if necessary (see Figure 12D). 5. If burner does not light immediately (within five seconds), turn the burner control knob off, and wait 5 minutes to clear the gas. -
Página 16: Using The Smoker Box
POSITIONING COOKING GRIDS Fig. 18 Cooking grids can be put into 3 different positions as shown in Figure 18. SMOKER BOX USING THE SMOKER BOX The smoker box cooks at low heat using presoaked wood chips or wood chunks. Finer chips ignite and produce smoke faster and larger wood chunks ignite more slowly and smoke for longer periods of time. -
Página 17: Relighting
RELIGHTING BREAKING IN THE MAIN BURNERS: SAFETY WARNING Close the MAIN CASTING LID ONLY and keep the temperature on "HIGH" for 20 minutes. DO NOT OPEN THE LID DURING THIS If the burner flame goes out when your barbeque is in operation, PROCESS. -
Página 18: Important Safeguards
IMPORTANT SAFEGUARDS READ AND FOLLOW ALL SAFETY INSTRUCTIONS Read and follow all instructions that are on the product or provided with product. The following basic safety precautions apply when using electrical appliances: • Read all instructions. • Do not touch surfaces that may be hot. Use handles or knobs provided. •... -
Página 19: Cooking Techniques
COOKING TECHNIQUES per side, depending on the size of the cut. Reduce heat and finish cooking to desired doneness with lid closed. Larger cuts such as roasts will need the indirect cooking method after searing for best PREHEATING THE BARBEQUE results (see below). -
Página 20: Trouble Shooting Guide
TROUBLE SHOOTING GUIDE PROBLEM POSSIBLE CAUSES CORRECTION Burner Will Not Light (match or ignitor) • Blocked venturi tubes • Clean out blockage (Page 7) or Burners Not Hot Enough • Cylinder or gas supply valve turned off • Open cylinder or gas supply valve •... - Página 21 LIMITED WARRANTY 1. LIMITED WARRANTY COVERAGE 5 YEAR LIMITED WARRANTY - STAINLESS STEEL BURNERS 1 YEAR LIMITED WARRANTY - ALL OTHER PARTS Blue Ember gas barbeque owners have the benefit of a limited warranty from the date of purchase against any and all defects in materials and workmanship during the period of warranty coverage specified.
-
Página 24: Caster Assembly
PRE-ASSEMBLED BARBEQUE ASSEMBLY 1 OF 2 If you purchased your barbeque pre-assembled, please refer to this page for caster & tank caddy assembly. The assembly instructions for the door and shelves are located on page 18. Otherwise please proceed to page 19 for full assembly procedures. TOOLS REQUIRED: •... -
Página 25: Important
PRE-ASSEMBLED BARBEQUE ASSEMBLY 2 OF 2 If you purchased your barbeque pre-assembled, please refer to page 17 for caster and tank caddy assembly. The assembly instructions for the door and self are located on this page. Other wise please proceed to page 19 for full assembly procedures. DOOR ASSEMBLY Please refer to FIG. -
Página 26: Tools Required
CASTERS ASSEMBLY FIG.1 NOTE: Some grill parts shown in the assembly steps may differ slightly in appearance from those on your particular grill model. However, the method of assembly remains the same. TOOLS REQUIRED: • Extra Common Nuts & Bolts are supplied. •... - Página 27 BASE CABINET ASSEMBLY • Attach Cabinet side panels to base as shown. • Attach bottle opener to left panel as shown. Assembled View SP53-16 1/4-20 NUT HEX HD FLANGED SP83-18 1/4"-20X.50" Left hand CARRIAGE BOLT Panel Right hand Panel SP84-18 1/4-20 X .5 HEX HD BOLT SP83-18 (2) 1/4"-20X.50"...
- Página 28 REAR PANEL ASSEMBLY Assembled • Attach rear panel by sliding notches over screws on side panels as View shown. Tighten screws. • Install Electrical box with Screws and Nuts as shown. Ensure Electrical box is installed so outlet covers open upwards. •...
- Página 29 TRIM PANEL AND CENTER SUPPORT ASSEMBLY SP53-16 #10-24 • Attach top trim panel as shown. Tighten screws. • Attach center support as shown. SP83-18 1/4"-20X.50" Tighten screws. CARRIAGE BOLT SP83-21 #10-24 SCREW SP83-18 1/4"-20X.50" CARRIAGE BOLT SP53-16 1/4-20 SP83-21 NUT HEX HD FLANGED #10-24 SCREW Front Trim Panel...
- Página 30 DRAWER RAIL BRACKETS ASSEMBLY • Attach left and right drawer rail brackets as shown. Tighten screws. Shelf Side Panels SP83-21 #10-24 SCREW SP83-21 #10-24 SCREW (8) FIG.6...
- Página 31 DRAWER ASSEMBLY Step 1 Install drawer handles as shown Step 2 SP71-21 8-32 X .313 FLAT HEAD Attach drawers to drawer slides as shown, tighten screws. SP41-16 #10-24 FLANGED HEX NUT (4) SP71-21 8-32 X .313 FLAT HEAD (8) Step 2 Shelf Side Rails SP41-16 #10-24...
-
Página 32: Heat Shield
LOWER HEAT SHIELD ASSEMBLY Assembled • Attach lower heat shield as shown. Tighten screws. View Heat Shield SP43-21 10-B X .375 SCREW SELF TAP SP43-21 10-B X .375 SCREW SELF TAP (5) FIG.8... -
Página 33: Door Assembly
DOOR ASSEMBLY • Install door handles as shown. • Slide top pins on doors into upper holes as shown. • A) Drop locking pins through lower holes in door into base assembly. • B) Once in position rotate pins into locked position as shown. - Página 34 CASTING ASSEMBLY REGARDING IMPROPER ASSEMBLY OF HOSE ON PROPANE AND NATURAL GAS FG/FGQ650 MODELS DURING THE ASSEMBLY PROCESS OF THE BASE ASSEMBLY STEP, THE CUSTOMER NEEDS TO ENSURE THAT THE HOSE IS UNTIED FROM BURNER BEFORE FINAL ASSEMBLY. CUSTOMER SHOULD RELEASE THE TIE AND PASS THE HOSE THROUGH THE GAP BETWEEN HEAT SHIELD AND FRONT PANEL BEFORE ASSEMBLING THE FIREBOX WARNING (BASE) TO THE CART (CABINET).
- Página 35 CASTING ASSEMBLY FIG.11 DANGER: DO NOT PASS HOSE ABOVE SHIELD HOSE MUST NOT TOUCH ANY PART OF THE BASE WARNING: DANGER ENSURE HOSE ASSEMBLY DOES NOT CONTACT THE CASTING, OR ANY OTHER PARTS WHICH WILL GET HOT. SP53-16 (4) 1/4-20 NUT HEX HD FLANGED SP86-18 (4) 1/4"...
- Página 36 CASTING ASSEMBLY CONT’D FIG.12 • Secure base casting as shown. • Plug wiring harness with jack into tank sensor connector found at back of tank caddy IMPORTANT: For NG models, direct the hose through the hole in the base as shown. Assembled View DANGER: DO NOT PASS HOSE ABOVE SHIELD HOSE MUST NOT...
-
Página 37: Grill Assembly
GRILL ASSEMBLY FIG.13 SOME PARTS MAY HAVE SHARP EDGES OR BURRS. HANDLE WITH CARE. CAUTION Step 2 Step 1 Step 3 Step 5 Step 4 Step 1 Step 6 • Rest the ends of heat plates & searing burner cover IGNITOR into notches inside casting as shown. -
Página 38: Side Shelf Assembly
SIDE SHELF ASSEMBLY FIG.14 Assembled View • Position side shelves onto shelf brackets as shown (A). Lift shelf and drop into locking position (B). Insert wingbolt into middle hole in bracket to lock shelf in position (C). • Position ice/wine bucket &... - Página 39 SIDE BURNER HOSE ASSEMBLY • Position hose into end of side burner venturi tube until grooves line up (A). Snap clip into the groove on side burner tube to secure parts (B). • Check hose to ensure it is securely positioned in tube end. •...
- Página 40 SECURING THE GREASE PAN ASSEMBLY FIG.16 SP43-21 .375 self tap screw Grease Pan Bracket Grease Tray • Assemble grease pan with brackets as shown using 10-b x .375 screw self tap screw (if not factory installed). Step 1 Step 3 Step 1-Look at the back of your grill.
- Página 41 SECURING THE GREASE PAN ASSEMBLY CORRECT INSTALLATION Push the grease pan forward as far as possible. When properly installed, the edge of the grease pan should not extend no more than one inch (2.5 cm) beyond the rear panel of the BBQ/grill box. The tabs of the grease pan will lock in place, securing it. INCORRECT INSTALLATION This picture shows a Grease Pan that is not properly installed.
- Página 42 PROVIDING POWER TO YOUR BARBEQUE Step 1 Plug the factory supplied, • three prong plug for the transformer into the receptacle box at the back of the unit. Transformer Cord Light Switch Wires Transformer Step 2 IMPORTANT: Assemble light switch wires to Internal Transformer box as shown.
- Página 43 TANK & HOSE/REGULATOR ASSEMBLY FOR PROPANE MODELS PLEASE FOLLOW FIG 18 & 19 • Position tank into tank support as shown. THIS BARBECUE IS DESIGNED TO BE USED ONLY WITH A 20LB WARNING (9.1KG) PROPANE CYLINDER FIG.18 WARNING: Before proceeding with the following steps, ensure you have read: •...
- Página 44 ADDITIONAL SAFTY PRECAUTIONS TO PREFORM When using your grill, it is best to: 1 - Place the propane tank into the tank pocket as shown, with the propane tank valve facing towards the FRONT of the cart. 2 - Attach hose and regulator as shown, facing towards the FRONT of the cart at all times during operation.
- Página 45 ROTISSERIE INSTALLATION FIG.21 • Remove warming rack and cooking grills as needed. • Slide rotisserie motor into bracket and assemble on the left side of the casting with 2 bolts and 2 nuts as shown. • Assemble Rotisserie kit as shown. •...
- Página 46 BULB REPLACEMENT INSTRUCTIONS NOTE: UNPLUG ALL POWER TO GRILL BEFORE REPLACING LIGHT. 1. Loosen two nuts. 2. Press tab on top of Glass Bezel. Light Rain Guard Reflector BULB Glass Gasket 4. Hold the Light Rain Guard, 3. Hold the Light Rain Guard, slowly remove the light BULB.
-
Página 47: How To Order Spare Parts
Bezel/Button (Bellows) for SP76-20 Ignitor Assy. SP5034-20 Side Burner Ignitor Wire 29-1/2" - FG Grills SP43-21 #10-B x 0.375" Self Tap, Truss Head, Phillips Screw SP115-12 Four Burner Assembly - FGQ65079 SP120-12 Burner Tube Assembly - FGQ65079 SP199-6 Burner Cross Ignitor Manual SP60-20... -
Página 48: Replacement Parts
Gas Barbeque Grill: ITEM QTY. SP PART No. DESCRIPTION SP285-9X Panel LH Assembly Model FGQ65079 SP309-9 Lower Heat Shield SP171-6X Front Bracket SP83-21 #10-24 x 0.5" Truss Head SS Phillips Screw HOW TO ORDER SP74-16 #10-24 K-Lock Hex Nut SPARE PARTS:... - Página 49 BEFORE OPERATING THE BARBECUE Grilling Safety Checklist Read and understand owner’s manual. Follow the “Important Safeguards” found in the Owner’s Manual. damaged hose. The grease pan and grease tray should be checked, cleaned and replaced regularly to prevent touch WARNING FAILURE TO ENSURE THE ABOVE MAY RESULT IN A HAZARDOUS FIRE OR EXPLOSION CAUSING SERIOUS BODILY INJURY AND/OR PROPERTY DAMAGE AND INVALIDATES WARRANTY...
-
Página 50: Warranty Information
Full Model No. from outer carton: / Número completo de modelo ubicado en la caja de cartón exterior: ______________________________________________________ Date Purchased: / Fecha de Compra: ____________________________________________________________________________________________________________ Serial Number (from rating plate): / Número de Serie (en la placa de especificaciones): __________________________________________________________________ FGQ65079-____/10... -
Página 51: Instrucciones Importantes De Seguridad
Barbacoa /Parrilla de gas para uso exterior Manual de ensamblaje y de uso y cuidado de su MODELO FGQ65079 IQUE (Serie de parrillas a gas propano o gas natural) ES POSIBLE QUE EL MODELO NO SEA EXACTAMENTE IGUAL AL QUE SE ILUSTRA... -
Página 52: Símbolos De Seguridad
MUCHAS GRACIAS POR Símbolos de seguridad Los símbolos y las casillas ilustradas más adelante COMPRAR ESTA PARRILLA explican lo que significa cada encabezado. Lea y cumpla todo lo indicado en los mensajes que se encuentran en el Nos dedicamos a crear los medios que le permitan manual. -
Página 53: Para Su Propia Seguridad
PARA SU PROPIA SEGURIDAD: • El gas propano líquido no es gas natural. El convertir una unidad de gas propano líquido para tratar de usarla con • Use la parrilla únicamente EN EXTERIORES, en un área gas natural, o viceversa, es peligroso y anulará la bien ventilada;... - Página 54 CÓMO CUIDAR SU EQUIPO INSTALACIÓN PARA PERSONAS QUE VIVEN EN APARTAMENTOS LA INSTALACIÓN DE ESTE APARATO DEBE CUMPLIR CON LO DISPUESTO EN LOS CÓDIGOS LOCALES O, EN AUSENCIA DE ESTOS: Pídale al administrador que le indique los requisitos y los códigos contra •...
-
Página 55: Tanque De Gas Propano
mediante el uso de adaptadores u otros métodos, puede ocasionar TANQUE DE GAS PROPANO daños materiales, incendios o lesiones e invalidar las importantes características de seguridad incorporadas en los dispositivos de tipo 1. Los tanques de gas que se fabrican actualmente tienen El uso de una unión P.O.L. -
Página 56: Transporte Y Almacenamiento
TRANSPORTE Y • Nunca guarde los tanques de gas de repuesto debajo de la parrilla, cerca de la misma, ni cerca de otras fuentes de calor. ALMACENAMIENTO • No mueva la parrilla cuando la esté usando ni mientras esté caliente. AUNQUE RESULTAN SEGUROS CUANDO SE •... -
Página 57: Cambio Del Tanque De Gas
CAMBIO DEL TANQUE DE GAS • Nunca intente instalar esta parrilla en el sistema autónomo de suministro de gas de comerciantes minoristas que venden este aparato, le ofrecen la una casa de remolque o de una casa opción de cambiar su tanque de gas vacío mediante un servicio de recambio. -
Página 58: Solo Para Unidades A Gas Propano Líquido
SOLO PARA UNIDADES A GAS PROPANO MODELOS A GAS NATURAL: LÍQUIDO: • Nunca use el aparato con gas propano u otro tipo de gas. • Use la unidad de regulador de presión y de manguera que viene con su • Debe desconectar de la tubería de suministro de gas tanto el aparato parrilla. -
Página 59: Haga Una Prueba De Fugas
LIMPIEZA Y MANTENIMIENTO Para que su parrilla funcione de manera óptima y segura, realice todos CÓMO REALIZAR LA PRUEBA: los pasos indicados a continuación al menos una vez al año; 1. Lleve las perillas de control de la consola a la posición de preferiblemente al inicio de cada temporada de parrilladas. -
Página 60: Limpieza Del Recipiente Para La Grasa
INSTALACIÓN CORRECTA DEL RECIPIENTE PARA EL NO OBSERVAR LAS ANTERIORES LA GRASA ADVERTENCIAS PUEDE PROVOCAR INCENDIOS O EXPLOSIONES PELIGROSAS QUE OCASIONEN SUJECIÓN DEL RECIPIENTE PARA LA GRASA ADVERTENCIA LESIONES GRAVES Y/O DAÑOS MATERIALES. 1 - Mire la parte posterior de su parrilla. Retire la bandeja para la grasa y familiarícese con el sistema de rieles y de seguro. -
Página 61: Limpieza De Otras Partes De La Parrilla
PIEZAS DE PLÁSTICO: LIMPIEZA DE OTRAS PARTES DE Lávelas con agua jabonosa tibia y séquelas con un paño. No limpie las LA PARRILLA piezas plásticas con citrisol, limpiadores abrasivos, productos para eliminar grasa ni limpiadores concentrados para parrillas. Las piezas se Limpieza general de la parrilla: No confunda la pintura con la pueden dañar y presentar fallas. -
Página 62: Controles
CONTROLES ANTES DE USAR SU APLICACIÓN LEYÓ TODAS LAS INSTRUCCIONES EN ESTA GUÍA DEL USUARIO DEL MANUAL Y DEL MANUAL DE INSTRUCCIÓN DE IQUE. ADVERTENCIA: ABRA Fig. 9A LA TAPA DE LA HORNILLA ANTES DE ENCENDERLA Y DÉJELA ABIERTA MIENTRAS ESTÉ ENCENDIDA O CALIENTE. -
Página 63: Quemador Principal
ENCENDIDO SI SÓLO VA A ENCENDER LOS QUEMADORES PRINCIPALES, ASEGÚRESE DE TENER LA Antes de encender su barbacoa, inspeccione visualmente todas las PERILLA DE LA HORNILLA LATERAL EN LA CUIDADO mangueras antes de cada uso para determinar si tuvieran POSICIÓN DE “OFF” (APAGADO) pinchaduras, raspaduras, abrasiones o cortadura. -
Página 64: Encendido Del Quemador Lateral
ENCENDIDO DEL QUEMADOR LATERAL (OPCIONAL) USANDO EL ENCENDEDOR 1. Lea las instrucciones antes de encender el aparato. 2. Levante la tapa del quemador lateral. 3. Pulse y gire una de las perillas de control a la posición "HIGH". 4. Presione el encendedor, repita si fuera necesario. (Fig 12A). 5. - Página 65 ENCENDIDO DEL QUEMADOR DEL ROSTISERO (OPCIONAL) UTILISATION DU DISPOSITIF D'ALLUMAGE 1. Lea las instrucciones antes de encender el aparato. 2. Levante la tapa de la parrilla antes de encenderla. 3. Pulse y gire una de las perillas de control a la posición HIGH". 4.
-
Página 66: Cámara De Ahumar
COLOCACIÓN DE LAS REJILLAS DE Fig. 18 COCCIÓN Las rejillas de cocción se pueden fijar en 3 posiciones, como se ilustra en la figura 18. Fig. 18 CÁMARA DE AHUMAR CÓMO USAR LA CÁMARA DE AHUMAR La cámara de ahumar cocina a bajo calor, con trocitos o trozos de madera previamente humedecidos. - Página 67 CÓMO VOLVER A ENCENDER tiempo sin preparar comida. Para que se ajuste la parrilla, enciéndala siguiendo las instrucciones que se indican en la EL APARATO consola o en este manual (vea las páginas 13, 14 y 15). ADVERTENCIA DE SEGURIDAD PERÍODO DE AJUSTE DE LOS QUEMADORES PRINCIPALES: Cierre únicamente la tapa de la pieza fundida principal y Si la llama del quemador se apaga mientras está...
-
Página 68: Medidas De Seguridad Importantes
MEDIDAS DE SEGURIDAD IMPORTANTES LEA Y SIGA TODAS LAS INSTRUCCIONES DE SEGURIDAD Lea y siga todas las instruciones que se encuentren en el producto o que vengan con éste. Las siguientes medidas de seguridad se aplican al uso de aparatos eléctricos: •... -
Página 69: Técnicas De Cocción
TÉCNICAS DE COCCIÓN cerdo. Coloque la carne a fuego directo durante 2 a 5 minutos por lado, según el tamaño de la pieza. Baje la temperatura y termine de cocinar con la tapa puesta hasta que el alimento llegue al punto deseado. Las piezas CÓMO CALENTAR LA PARRILLA más grandes, como los asados, necesitan cocinarse a fuego indirecto Se debe calentar el sistema de cocción y las rejillas antes de colocar los... -
Página 70: Guía Para Diagnóstico De Problemas
GUÍA PARA DIAGNÓSTICO DE PROBLEMAS PROBLEMA CAUSA PROBABLE CORRECCIÓN El quemador no enciende (ni con piloto • Tubos venturi bloqueados • Limpiar la obstrucción (Pág. 5) externa ni con el encendedor) • Válvula del cilindro del suministro de gas cerrada •... -
Página 71: Cobertura De La Garantía Limitada
GARANTÍA LIMITADA 1. COBERTURA DE LA GARANTÍA LIMITADA GARANTÍA LIMITADA DE 5 AÑOS - HORNILLA DEL ACERO INOXIDABLE GARANTÍA LIMITADA DE 1 AÑOS - EL RESTO DE LAS PIEZAS Los propietarios de las parrillas (BBQs) Blue Ember (Ámbar Azul) tienen el beneficio de la garantía limitada a partir de la fecha de compra contra todos los defectos de materiales y de mano de obra durante el periodo de cobertura especificado. -
Página 74: Herramientas Requeridas
ASAMBLEA PREMONTADA 1 DE LA BARBACOA DE 2 Si usted compró su barbacoa premontada, refiera por favor a esta página para el & del echador; montaje del carrito del tanque. Las instrucciones de asamblea para la puerta y los estantes están situados en la página 18. Si no proceda por favor a la página 19 para los procedimientos completos de la asamblea. -
Página 75: Asamblea De La Puerta
ASAMBLEA PREMONTADA 2 DE LA BARBACOA DE 2 Si usted compró su barbacoa premontada, refiera por favor a la página 17 para el montaje del echador y del carrito del tanque. Las instrucciones de asamblea para la puerta y el uno mismo se establecen en esta página. -
Página 76: Ensamblaje De Echadores
ENSAMBLAJE DE ECHADORES FIG.1 NOTA: Algunas de las piezas que se muestran en los diferentes pasos para el ensamblaje podrían diferir levemente de las de su modelo particular; sin embargo el método de ensamblaje es el mismo. HERRAMIENTAS REQERIDAS: • Las tuercas y los pernos comunesadicionales pueden ser provistos. •... -
Página 77: Ensamblaje Del Gabinete
ENSAMBLAJE DEL GABINETE • Instale los paneles laterales del gabinete en la base. • Instale el destapador de botellas en el panel izquierdo. Vista del ensamblaje SP53-16 1/4-20 TUERCAS HEX BRIDADA SP83-18 1/4"-20X.50" Panel PERNOS COCHE Izquierdo Panel Derecho SP84-18 1/4-20 X .5 PERNOS HEX SP83-18 (2) 1/4"-20X.50"... -
Página 78: Ensamblaje Del Panel Posterior
ENSAMBLAJE DEL PANEL POSTERIOR • Deslice el panel posterior y alinee sus orificios con los tornillos Vista del en los paneles laterales y ajuste los tornillos. Ensamblaje • Instale la caja eléctrica con los tornillos y tuercas, cerciorándose que las tapas de los tomacorrientes abran hacia arriba. -
Página 79: Panel De Ajuste Y Asamblea De Ayuda Del Centro
PANEL DE AJUSTE Y ASAMBLEA DE AYUDA DEL CENTRO SP53-16 1/4-20 • Una el panel de ajuste superior según lo TUERCA HEX BRUDADA demostrado. Apriete los tornillos. SP83-18 1/4"-20X.50" • Una la ayuda de centro según lo PERNO COCHE demostrado. Apriete los tornillos. SP83-21 #10-24 TORNILLO SP83-18 1/4"-20X.50"... -
Página 80: Asamblea De Soportes Del Carril Del Cajón
ASAMBLEA DE SOPORTES DEL CARRIL DEL CAJÓN • Una los soportes izquierdos y derechos del carril del drwer según lo demostrado. Apriete los tornillos. PANELES LATERALES DEL ESTANTE SP83-21 #10-24 SP83-21 #10-24 TORNILLO TORNILLO (8) FIG.6... -
Página 81: Asamblea Del Cajón
ASAMBLEA DEL CAJÓN Paso 1 Instale la manija del cajón según lo demostrado. Paso 2 SP71-21 8-32 X .313 CABEZA PLANA Una los cajones a las diapositivas del cajón según lo demostrado. Apriete los tornillos. SP41-16 #10-24 TUERCA DE TUERCA HEX. -
Página 82: Baje La Asamblea De Protector De Calor
BAJE LA ASAMBLEA DE PROTECTOR DE CALOR Vista del • Una un protector de calor más bajo según lo demostrado. ensablaje Apriete los tornillos. Protector de calor SP43-21 10-B X .375 GOLPECITO DEL UNO SP43-21 10-B X .375 MISMO DEL TORNILLO GOLPECITO DEL UNO MISMO DEL TORNILLO (5) FIG.8... -
Página 83: Ensamblaje De Las Puertas
ENSAMBLAJE DE LAS PUERTAS • Instale las manijas en las puertas. • Instale las clavijas que sirven de bisagras en el orificio superior de cada puerta. • A) Instale las clavijas en ángulo en la base en el orificio inferior en las puertas y en el orificio en la base del gabinete. -
Página 84: Ensamblaje Del Casco
ENSAMBLAJE DEL CASCO RESPECTO A LA INSTALACIÓN INCORRECTA DE LA MANGUERA DE LOS MODELOS FG/FGQ650 A PROPANO Y A GAS NATURAL DURANTE EL PROCESO DE ARMADO DE LA BASE, EL CLIENTE DEBE VERIFICAR QUE LA MANGUERA ESTÉ DESCONECTADA DEL QUEMADOR ANTES DEL ARMADO FINAL. ANTES DE INSTALAR LA CÁMARA DE COMBUSTIÓN (LA BASE) EN EL CARRITO (EL MUEBLE), EL CLIENTE DEBE ZAFAR LA MANGUERA Y PASARLA A TRAVÉS DEL ESPACIO ENTRE EL PROTECTOR CONTRA EL CALOR Y EL ADVERTENCIA... - Página 85 ENSAMBLAJE DEL CASCO FIG.11 PELIGRO: NO PASE LA MANGUERA POR SOBRE EL PROTECTOR. LA MANGUERA NO DEBE HACER CONTACTO CON NINGUNA PARTE DE LA BASE. ADVERTENCIA: ADVERTENCIA AVERIFIQUE QUE LA UNIDAD DE MANGUERA NO HAGA CONTACTO CON LA PIEZA FUNDIDA, NI CON CUALQUIER OTRA PIEZA QUE SE CALIENTE. SP53-16 1/4-20 TUERCAS HEX BRIDADAS SP86-18 1/4"...
-
Página 86: La Asamblea Del Bastidor Continuó
LA ASAMBLEA DEL BASTIDOR CONTINUÓ FIG.12 • Asegure el bastidor bajo según lo demostrado. • Empuje el mazo de cables con el enchufe, hacia el conector del sensor del tanque, ubicado en la parte posterior del carrito del tanque IMPORTANTE: En los modelos NG, pase la manguera a través del orificio de la base,... -
Página 87: Asamblea De La Rejilla
ASAMBLEA DE LA REJILLA FIG.13 ALGUNAS PIEZAS PUEDEN TENER BORDES O REBABAS AGUDOS. CUIDADO DIRIJA CON CUIDADO. Paso 2 Paso 1 Paso 3 Paso 5 Paso 4 Paso 1 Étape 6 • Apoye los extremos de las placas distribuidoras de calor en las ranuras en la base del casco. -
Página 88: Ensamblaje De La Repisa Lateral
ENSAMBLAJE DE LA REPISA LATERAL FIG.14 Vista del ensamblaje • Coloque las repisas laterales sobre los soportes (A). Levante la repisa y bájela a su posición de enganche (B). Inserte el perno mariposa en el orificio central del soporte para asegurar la repisa en posición (C). -
Página 89: Ensamblaje De La Manguera De La Hornilla Lateral
ENSAMBLAJE DE LA MANGUERA DE LA HORNILLA LATERAL • Deslice la manguera en el extremo del tubo venturi de la hornilla lateral hasta alinear las ranuras (A). Asegure el tubo ventura instalando la horquilla en la ranura del costado (B). •... -
Página 90: Cómo Fijar La Unidad De La Bandeja Para La Grasa
CÓMO FIJAR LA UNIDAD DE LA BANDEJA PARA LA GRASA FIG.12 SP43-21 Tornillo autorroscante de 0.375" Recipiente para la grasa Soporte Bandeja para la grasa • Arme el recipiente para la grasa con sus soportes y tornillos autorroscantes 10-B x 0.375", como se ilustra (si no viene armada de fábrica). -
Página 91: Armado De La Cómo Fijar Bandeja Para La Grasa
ARMADO DE LA CÓMO FIJAR BANDEJA PARA LA GRASA INSTALACIÓN CORRECTA Empuje la bandeja para la grasa hacia adelante, hasta que se detenga por completo. Cuando la bandeja para la grasa está instalada correctamente, su borde no debe sobresalir más de una pulgada (2.5 cm) del panel posterior de la parrilla. -
Página 92: Para Proveer Electricidad A Su Bbq
PARA PROVEER ELECTRICIDAD A SU BBQ Paso 1 • Conecte el enchufe de tres espigas suministrado por la fábrica para el transformador en el tomacorriente en la parte posterior de la unidad. Cordón del transformador Alambres del Interruptor de la Luz Transformador Paso 2 IMPORTANTE: Conecte los... -
Página 93: Ensamblaje De Manguera Y Regulador Al Tanque
ENSAMBLAJE DE MANGUERA Y REGULADOR AL TANQUE PARA MODELOS DE GAS PROPANO SIGA INSTRUCCIONES EN LA FIG. 18 & 19 • Coloque el cilindro en la base del gabinete. Esta barbacoa se diseña para ser utilizada solamente con a 20 libras. (9.1 kilogramos.) ADVERTENCIA cilindro del propano. -
Página 94: Para Modelos De Gas Natural Siga Instrucciones En La Fig
MEDIDAS DE PRECAUCIÓN ADICIONALES PARA UN BUEN DESEMPEÑO: Para usar la parrilla, lo mejor es: 1 - Colocar el tanque de gas propano en su lugar, como se ilustra, con la válvula del tanque orientada hacia la PARTE DELANTERA del carrito. 2 - Instale la manguera y el regulador como se ilustra, orientados hacia la PARTE DELANTERA del carrito en todo momento, cada vez que use la parrilla. -
Página 95: Instalacion Del Asador
INSTALACION DEL ASADOR FIG.21 • Retire la rejilla para calentar los alimentos y las rejillas de cocción, según sea necesario. • Instale el motor del asador en el soporte y fíjelo al lado izquierdo de la pieza fundida, con 2 pernos y 2 tuercas, como se ilustra. -
Página 96: Instrucciones Para Reemplazar El Foco
INSTRUCCIONES PARA REEMPLAZAR EL FOCO NOTA: desconecte Pestaña el suministro eléctrico al bbq antes de reemplazar el foco. 1. Afloje las 2 tuercas. 2. Presione la pestaña sobre el bisel del vidrio. Vea la foto. Protector de lluvia para la Reflector lámpara foco... -
Página 97: Descripción
#10X3/8 GOLPECITO DEL UNO MISMO DEL TORNILLO B SP115-12 Asamblea De Cuatro Hornillas SP120-12 Tubo de quemador - FGQ65079 SP199-6 Manual Cruzado De Ignitor De la Hornilla SP60-20 El alambre de tierra, el electrodo principal FG de la hornilla asa a la parilla... - Página 98 FABRICANTE INVALIDARA SP72-19 Manija Del Cajón/De la Puerta SP291-9 EL CAJÓN BAJA AUTOMATICAMENTE LA SP340-9X PANEL DELANTERO DEL CAJÓN SP5362-42X PUERTA DERECHA PARA MODELO FGQ65079 GRANTIA DE SU CON MANIJA BARBACOA. SP41-15 IMÁN SP17-32 EL PIN DE BISAGRA BAJA SP32-22 ECHADOR INDUSTRIAL 3”...
-
Página 99: Asado A La Parilla De La Lista De Comprobación De Safty
BEFORE OPERATING THE BARBECUE Asado a la parilla de la lista de comprobación de Safty Lea y asegúrese de comprender el manual del propietario. Acate las “Medidas de seguridad importantes” del Manual del propietario. NNunca sobrellene el cilindro del LP. Los cilindros sobrellenados pueden causar congelan-para arriba de regulador.