Tabla de contenido
Publicidad
Idiomas disponibles
Idiomas disponibles
Enlaces rápidos
Lowes.com/harborbreeze
Harbor Breeze ® is a registered trademark of LF,
LLC. All Rights Reserved.
ATTACH YOUR RECEIPT HERE
Serial Number
Purchase Date
Questions, problems, missing parts? Before returning to your retailer, call our customer
service department at 1-800-643-0067, 8 a.m. - 6 p.m., EST, Monday - Thursday
8 a.m. - 5 p.m., EST Friday.
EB15472
ITEM #0747605
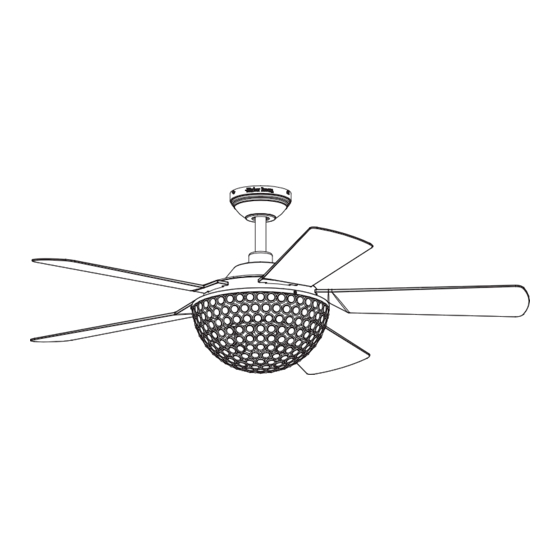
PARKLAKE CEILING FAN
MODEL #00878
UL #52-CHF
Español p. 16
Lowes.com/harborbreeze
1
Publicidad
Tabla de contenido
Solución de problemas

Manuales relacionados para Harbor Breeze 00878


Resumen de contenidos para Harbor Breeze 00878
- Página 1 ITEM #0747605 PARKLAKE CEILING FAN MODEL #00878 UL #52-CHF Español p. 16 Harbor Breeze ® is a registered trademark of LF, LLC. All Rights Reserved. ATTACH YOUR RECEIPT HERE Serial Number Purchase Date Questions, problems, missing parts? Before returning to your retailer, call our customer service department at 1-800-643-0067, 8 a.m.
-
Página 2: Tabla De Contenido
TABLE OF CONTENTS SAFETY INFORMATION • ELECTRIC SHOCK HAZARD - Do not install this fan with variable speed wall control or Safety Information ........................2 wall-mounted dimmer switch. It will permanently damage the fan’s remote control receiver and cause the fan’s functions to fail. Package Contents ........................4 Hardware Contents.......................5 Preparation ...........................5... -
Página 3: Package Contents
PACKAGE CONTENTS HARDWARE CONTENTS (shown actual size) Blade Screw Wire Connector Qty. 16 Qty. 9 PREPARATION PART DESCRIPTION QUANTITY PART DESCRIPTION QUANTITY Before beginning assembly of product, make sure all parts are present. Compare parts with package Mounting Bracket Blade contents list and hardware contents list. -
Página 4: Important
ASSEMBLY INSTRUCTIONS ASSEMBLY INSTRUCTIONS 1. Determine mounting method to use. 4. Remove the preassembled pin and clip from A - Downrod Mount downrod (E). Insert downrod (E) through canopy B - Angle Mount (B) and yoke cover (D). Thread wires from fan Important: If using the angle mount, check to motor assembly (F) through downrod (E). - Página 5 ASSEMBLY INSTRUCTIONS ASSEMBLY INSTRUCTIONS 7. Insert receiver from the remote pack (L) into mounting 10. Insert blade (H) through the slot in the motor bracket (A) with the flat side toward the ceiling. assembly (F), aligning the three screw holes in Connect the GREEN/GROUND wire from fan to the Black the blade (H) with the screw holes in the motor White...
-
Página 6: Assembly Instructions
ASSEMBLY INSTRUCTIONS ASSEMBLY INSTRUCTIONS 13. Remove one of the three screws from the fitter 16. Install bulbs (K) to sockets on light fitter assembly (I). plate (G). Loosen but do not remove the other two screws. IMPORTANT NOTE: Your fan has an energy-saving wattage limiter included. If you replace the bulbs with more than 190 watts, your fan will automatically turn off. -
Página 7: Operating Instructions
OPERATING INSTRUCTIONS 2. REVERSE SWITCH: When the season changes, you may want to change the Note: If you have more than one remote controlled fan installed in direction the fan blades spin. To switch between clockwise the same location, you may want to change the frequency of the and counterclockwise rotation, flip the fan reversal switch. -
Página 8: Troubleshooting
PART DESCRIPTION PART # process. Downrod 102200-0176BN Blade 108003-3047K6 Light Fitter Assembly 105000-0739BN Shade 991300-061200 Remote Pack 990700-009300 Printed in China Harbor Breeze ® is a registered trademark of LF, LLC. All Rights Reserved. Lowes.com/harborbreeze Lowes.com/harborbreeze... -
Página 9: Adjunte Su Recibo Aquí
ARTÍCULO # 0747605 VENTILADOR DE TECHO PARKLAKE MODELO # 00878 UL # 52-CHF Harbor Breeze es una marca registrada de LF, LLC. ® Todos los derechos reservados. ADJUNTE SU RECIBO AQUÍ Número de serie Fecha de compra ¿Preguntas, problemas, piezas faltantes? Antes de volver a la tienda, llame a nuestro Departamento de Servicio al Cliente al 1-800-643-0067, de lunes a jueves de 8 a.m. -
Página 10: Información De Seguridad
ÍNDICE INFORMACIÓN DE SEGURIDAD • RIESGO DE DESCARGA ELÉCTRICA: no instale este ventilador con un control de pared de Información de seguridad ....................17 velocidad variable o con un regulador de intensidad montado en la pared. Dañará el receptor del control remoto del ventilador de manera permanente y ocasionará fallas en las funciones Contenido del paquete .......................19 del ventilador. -
Página 11: Contenido Del Paquete
CONTENIDO DEL PAQUETE ADITAMENTOS (se muestran en tamaño real) Tornillo para aspas Conector de cables Cant. 16 Cant. 9 PREPARACIÓN PIEZA DESCRIPCIÓN CANTIDAD PIEZA DESCRIPCIÓN CANTIDAD Antes de comenzar a ensamblar el producto, asegúrese de tener todas las piezas. Compare las Soporte de montaje Aspa piezas con la lista del contenido del paquete y la lista del contenido de aditamentos. -
Página 12: Instrucciones De Ensamblaje
INSTRUCCIONES DE ENSAMBLAJE INSTRUCCIONES DE ENSAMBLAJE 1. Determine el método de montaje que utilizará. 4. Retire el pasador y el sujetador preensamblados A - Montaje de varilla en la varilla (E). Coloque la varilla (E) a través B - Montaje en ángulo de la base (B) y la cubierta de la horquilla (D). - Página 13 INSTRUCCIONES DE ENSAMBLAJE INSTRUCCIONES DE ENSAMBLAJE 7. Inserte el receptor del paquete remoto (L) en el 10. Inserte el aspa (H) a través de la ranura en soporte de montaje (A) con el lado plano orientado el ensamble del motor (F) y alinee los tres hacia el techo.
- Página 14 INSTRUCCIONES DE ENSAMBLAJE INSTRUCCIONES DE ENSAMBLAJE 13. Retire uno de los tres tornillos de la placa de 16. Instale las bombillas (K) en los portalámparas del soporte(G). Afloje los otros dos tornillos, pero ensamble del soporte de iluminación (I). no los retire. NOTA IMPORTANTE: Su ventilador cuenta con un fusible limitador que restringe el vataje y ahorra energía.
-
Página 15: Interruptor De Reversa
INSTRUCCIONES DE FUNCIONAMIENTO 2. INTERRUPTOR DE REVERSA: Cuando cambia la estación, quizá desee cambiar la dirección de Nota: Si tiene más de un ventilador operado por control remoto giro de las aspas del ventilador. Para alternar entre la dirección de instalado en la misma ubicación, se recomienda cambiar la Tecla las manecillas del reloj y la dirección contraria a las manecillas del... -
Página 16: Solución De Problemas
27. Asegúrese de que Pantalla 991300-061200 la alimentación al ventilador esté Paquete remoto 990700-009300 apagada antes de comenzar con el proceso de sincronización. Impreso en China Harbor Breeze ® es una marca registrada de LF, LLC. Todos los derechos reservados. Lowes.com/harborbreeze Lowes.com/harborbreeze...