Tabla de contenido
Publicidad
Idiomas disponibles
Idiomas disponibles
Enlaces rápidos
Harbor Breeze® is a registered trademark
of LF, LLC. All Rights Reserved.
ATTACH YOUR RECEIPT HERE
Serial Number
Questions, problems, missing parts? Before returning to your retailer, call our customer
service department at 1-888-567-2055, 8 a.m. - 5 p.m., EST, Monday - Friday.
EB13235
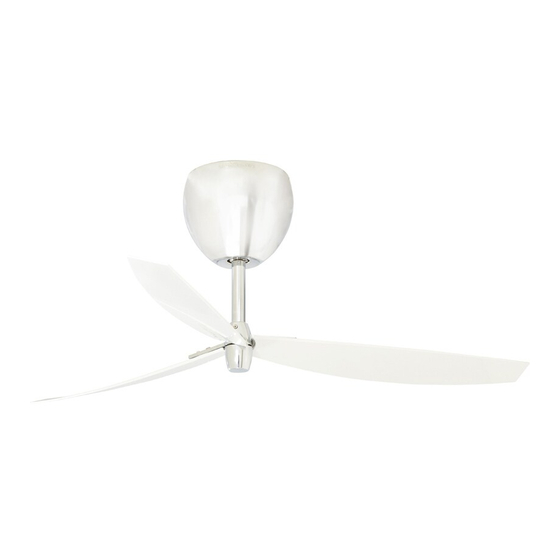
BLUE HILL CEILING FAN
Purchase Date
1
ITEM #0232646
MODEL #LP8221LCH
Español p. 15
Lowes.com/harborbreeze
Publicidad
Capítulos
Tabla de contenido
Solución de problemas

Manuales relacionados para Harbor Breeze LP8221LCH


Resumen de contenidos para Harbor Breeze LP8221LCH
- Página 1 ITEM #0232646 BLUE HILL CEILING FAN MODEL #LP8221LCH Harbor Breeze® is a registered trademark of LF, LLC. All Rights Reserved. Español p. 15 ATTACH YOUR RECEIPT HERE Serial Number Purchase Date Questions, problems, missing parts? Before returning to your retailer, call our customer service department at 1-888-567-2055, 8 a.m.
-
Página 2: Tabla De Contenido
TABLE OF CONTENTS Package Contents ......................... Hardware Contents ........................Safety Information ......................... Preparation ........................... Assembly Instructions ........................Wiring Instructions ........................Final Assembly Instructions ......................Operating Instructions ........................Care and Maintenance ......................... Troubleshooting ..........................Warranty ............................Replacement Parts List ........................ Lowes.com/harborbreeze... -
Página 3: Package Contents
PACKAGE CONTENTS PART DESCRIPTION QUANTITY Motor Assembly Blade Remote Receiver (preassembled to Motor Assembly (A)) Lowes.com/harborbreeze... -
Página 4: Hardware Contents
HARDWARE CONTENTS (shown actual size) Flat Nylon Washer Lock Nut Wire Serrated Head Connector Screw Qty. 13 Qty. 5 Qty. 4 Qty. 13 SAFETY INFORMATION Please read and understand this entire manual before attempting to assemble, operate or install the product. •... -
Página 5: Preparation
SAFETY INFORMATION and can radiate radio frequency energy and, if not installed and used in accordance with the instructions, may cause harmful interference to radio or television reception, which can be determined by turning the equipment off and on, the user is encouraged to try to correct the interference by one or more of the following measures: - Reorient or relocate the receiving antenna. -
Página 6: Assembly Instructions
ASSEMBLY INSTRUCTIONS 1. Secure metal octagonal outlet box (not included) directly to the building structure. NOTE: Supply wires omitted for clarity. WARNING To avoid possible electrical shock, be sure electricity is turned off at the main fuse box before assembly. 2. -
Página 7: Wiring Instructions
ASSEMBLY INSTRUCTIONS 4. Hook the ceiling support cable from motor assembly (A) to the hook on the ceiling plate. WIRING INSTRUCTIONS WARNING To avoid possible electrical shock, be sure electricity is turned off at the main fuse box before wiring. NOTE: If you are not sure if the outlet box is grounded, contact a licensed electrician for advice, as it must be grounded for safe operation. -
Página 8: Final Assembly Instructions
FINAL ASSEMBLY INSTRUCTIONS NOTE: This step is applicable after the necessary wiring is completed. Hardware Used Nylon Lock Nut 2. Securely attach motor assembly (A) by twisting clockwise onto the ceiling plate. 3. Remove the blade bushing cover from the blade (B). -
Página 9: Operating Instructions
FINAL ASSEMBLY INSTRUCTIONS 4. Position the blades (B) onto the blade arms of motor assembly (A) with threaded posts showing. Make sure the blades (B) are fully seated against the blade arms of motor assembly (A). Install and tighten serrated head screws (AA) with flat washers (BB) to secure the blades (B) to the blade arms of motor assembly (A). - Página 10 OPERATING INSTRUCTIONS 3. To make fan operational, install 12-volt battery (included in remote control package) into the remote (C). CAUTION If you are not expecting to use the remote for a long period of time, remove the battery to prevent damage to the remote. Be sure to store the remote away from excess heat or humidity.
-
Página 11: Care And Maintenance
OPERATING INSTRUCTIONS 5. Remote (C) functions: Fan speed: I = minimum speed II = low speed III = medium low speed IV = medium speed V = medium high speed VI = high speed Button: Turns the fan off. Reverse button: Controls fan direction. -
Página 12: Troubleshooting
TROUBLESHOOTING PROBLEM POSSIBLE CAUSE CORRECTIVE ACTION 1. Check main and branch circuit Fan will not start. 1. Fuse or circuit breaker blown. fuses or circuit breakers. 2. Check line wire connections to 2. Loose power line connections to the fan. fan. -
Página 13: Warranty
WARRANTY The manufacturer warrants this fan to be free from defects in workmanship and material present at time of shipment from the factory. The warranty terms from the date of purchase. The motor has a lifetime warranty and a 2 year warranty for all remaining components. This warranty applies only to the original purchaser. -
Página 14: Replacement Parts List
Motor Assembly AMA8221LCH Blade AP822103WH Remote TR34WH Receiver Unit RECAN125S Serrated Head Screw HDWBM8221CH Flat Washers HDWBM8221CH Nylon Lock Nut HDWHW8221 Wire Connector HDWWNUTS4 Printed in China Harbor Breeze® is a registered trademark of LF, LLC. All Rights Reserved. Lowes.com/harborbreeze... -
Página 15: Ventilador De Techo Blue Hill
ARTÍCULO #0232646 VENTILADOR DE TECHO BLUE HILL MODELO #LP8221LCH Harbor Breeze® es una marca registrada de LF, LLC. Todos los derechos reservados. ADJUNTAR SU RECIBO AQUÍ Número de serie Fecha de compra ¿Preguntas, problemas, piezas faltantes? Antes de volver a la tienda, llame a nuestro Departamento de Servicio al Cliente al 1-888-567-2055, 8 a.m. - Página 16 ÍNDICE Contenido del paquete ........................Aditamentos ........................... Información de seguridad ......................Preparación ........................... Instrucciones de ensamblaje ......................Instrucciones de cableado ......................Instrucciones de ensamblaje finales ....................Instrucciones de funcionamiento ....................Cuidado y mantenimiento ......................Solución de problemas ........................Garantía ............................Lista de piezas de repuesto......................
-
Página 17: Contenido Del Paquete
CONTENIDO DEL PAQUETE PIEZA DESCRIPCIÓN CANTIDAD Ensamble del motor Aspa Control remoto de mano Unidad receptora (preensamblado en el ensamble de motor (A)) Lowes.com/harborbreeze... -
Página 18: Aditamentos
ADITAMENTOS (Se muestan en tamaño real) Arandelas Contratuerca Planas de nailon Conectores Tornillo de de cable cabeza dentada Cant. 13 Cant. 5 Cant. 4 Cant. 13 INFORMACIÓN DE SEGURIDAD Lea y comprenda completamente este manual antes de intentar ensamblar, usar o instalar el producto. - Página 19 INFORMACIÓN DE SEGURIDAD Nota: Tras someterlo a las pruebas correspondientes, se ha determinado que este equipo cumple con los límites establecidos para dispositivos digitales de Clase B de conformidad con la parte 15 de la Normativa FCC. Estos límites se han establecido con el objetivo de aportar una protección razonable contra interferencias perjudiciales cuando el equipo se utiliza en el hogar.
-
Página 20: Preparación
PREPARACIÓN Antes de comenzar a ensamblar el producto, asegúrese de tener todas las piezas. Compare las piezas con la lista del contenido del paquete y lista de aditamentos. No intente ensamblar el producto si falta alguna pieza o si éstas están dañadas. Tiempo estimado de ensamblaje: 60 minutos Herramientas necesarias para el ensamblaje (no se incluyen): Destornillador Phillips, destornillador de punta plana de 1/4”, pinzas pelacables y escalera de tijera. -
Página 21: Instrucciones De Ensamblaje
INSTRUCCIONES DE ENSAMBLAJE 1. Asegure la caja de salida octagonal de metal (no se incluye) directamente a la estructura del NOTA: Se omiten los cables de suministro para mayor claridad. ADVERTENCIA Para evitar una posible descarga eléctrica, asegúrese de cortar la alimentación eléctrica de la caja de fusibles principal antes del ensamblaje el ventilador. - Página 22 INSTRUCCIONES DE ENSAMBLAJE 4. Cuelgue la unidad del motor (A) al gancho en la placa de techo. Lowes.com/harborbreeze...
-
Página 23: Instrucciones De Cableado
INSTRUCCIONES DE CABLEADO ADVERTENCIA Para evitar una posible descarga eléctrica, asegúrese de cortar la alimentación eléctrica de la caja de fusibles principal antes de cableado el ventilador. NOTA: Si no está seguro de si la caja de salida tiene conexión a tierra, pida consejo a un electricista certificado, ya que debe tener conexión a tierra para un funcionamiento seguro. -
Página 24: Instrucciones De Ensamblaje Finales
INSTRUCCIONES DE ENSAMBLAJE FINALES NOTA: Este paso se debe realizar luego de completar la instalación eléctrica necesaria. Aditamentos utilizados Contratuerca de nailon 2. Fije firmemente el ensamble del motor (A) girándolo en dirección de las manecillas del reloj en la placa del techo. 3. - Página 25 INSTRUCCIONES DE ENSAMBLAJE FINALES 4. Coloque las aspas (B) en los brazos del aspa del ensamble del motor (A) con los postes roscados que se muestran. Asegúrese de que el borde inferior del aspa (B) completamente asentado sobre los brazos del aspa del ensamble del motor (A).
-
Página 26: Instrucciones De Funcionamiento
INSTRUCCIONES DE FUNCIONAMIENTO 1. Restablezca la alimentación eléctrica en la caja de salida volviendo a conectar la electricidad de la caja de fusibles principal. ADVERTENCIA No utilice este ventilador con un controlador variable de pared (Rheostat) o un regulador de intensidad. Si lo hiciera podría dañar la unidad del mando a distancia del ventilador de techo. - Página 27 INSTRUCCIONES DE FUNCIONAMIENTO 4. Siga los pasos que se muestran a continuación para ajustar el control remoto (C): 1) Cuando encienda su ventilador, no pulse ningún botón(es) antes de pulsar el botón “SET” (Configurar), ya que de lo contrario fallaría el proceso de aprendizaje.
-
Página 28: Cuidado Y Mantenimiento
INSTRUCCIONES DE FUNCIONAMIENTO 6. El receptor ofrece la siguiente función protectora: Posición de bloqueo: El motor CC posee una función de seguridad integrada para evitar la obstrucción de las palas durante el funcionamiento del ventilador. Si algo obstruyera las palas del ventilador, el motor dejaría de funcionar tras 30 segundos de interrupción. -
Página 29: Solución De Problemas
SOLUCIÓN DE PROBLEMAS PROBLEMA CAUSA POSIBLE ACCIÓN CORRECTIVA El ventilador 1. Se fundió un fusible o el interruptor de 1. Revise los fusibles del circuito no arranca. circuito. de derivación y del circuito principal o los interruptores de circuito. 2. Revise las conexiones del cable 2. -
Página 30: Garantía
GARANTÍA El fabricante garantiza, de por vida, (con limitaciones) que este ventilador no presenta defectos ni de fabricación ni en los materiales presentes en el momento del transporte desde la fábrica a partir de la fecha de compra. Esta garantía es válida sólo para el comprador original. El fabricante acepta reparar dichos defectos sin cargo o, según nuestro criterio, reemplazar el ventilador de techo por un modelo comparable o superior. -
Página 31: Lista De Piezas De Repuesto
Control remoto de mano TR34WH Unidad receptora RECAN125S Tornillo de cabeza dentada HDWBM8221CH Arandelas Planas HDWBM8221CH Contratuerca de nailon HDWHW8221 Conectores de cable HDWWNUTS4 Impreso en China Harbor Breeze® es una marca registrada de LF, LLC. Todos los derechos reservados. Lowes.com/harborbreeze...