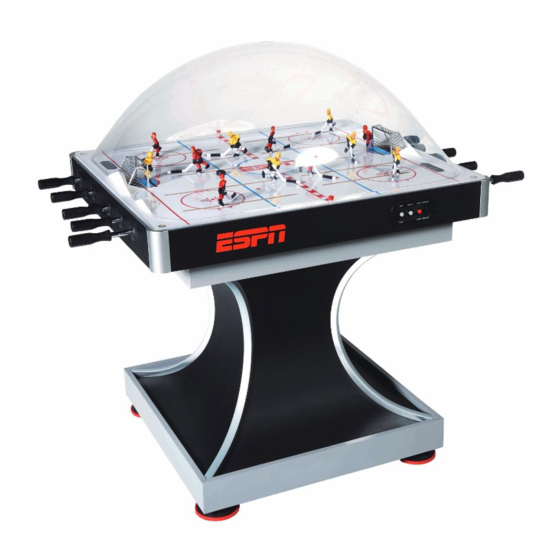
Tabla de contenido
Publicidad
Enlaces rápidos
ASSEMBLY INSTRUCTIONS
INSTRUCCIONES DE ARMADO
ATTENTION
DO NOT RETURN
TO THE STORE
Contact
MD Sports
Customer Service
* For additional resources and Frequently
Asked Questions, please visit us at
themdsports.com
TM
MODEL/MODELO: AWH042_017E
ATENCIÓN
NO DEVOLVERLO
A LA TIENDA
Contacto
MD Sports
Servicio al Cliente
* Por mayor información y Preguntas
Frecuentes, favor visitarnos en
themdsports.com
SAM'S US
Publicidad
Tabla de contenido

Resumen de contenidos para MD SPORTS AWH042_017E
- Página 1 MODEL/MODELO: AWH042_017E SAM’S US ASSEMBLY INSTRUCTIONS INSTRUCCIONES DE ARMADO ATTENTION ATENCIÓN DO NOT RETURN NO DEVOLVERLO TO THE STORE A LA TIENDA Contact Contacto MD Sports MD Sports Customer Service Servicio al Cliente * For additional resources and Frequently * Por mayor información y Preguntas...
-
Página 2: Garantía Limita De 90 Dias
Please contact with retailer for their return policy. de mesa/superficies dañado tiene que ser devuelto a la tienda. Por favor comunique con el minorista por su política de devolución. AWH042_017E www.themdsports.com (Continued on the next page.) (Continúe en la siguiente página.) -
Página 3: Tools Required
No tener niños en el Adultos fuertes interior. No utilizar ni guardar animales domesticos area de ensamble necesarios el producto en lugares del area de ensamble humedos o mojados AWH042_017E www.themdsports.com (Continued on the next page.) (Continúe en la siguiente página.) - Página 4 Español English AWH042_017E PARTS LIST / LISTA DE PARTES FOR FIG. 6 FOR FIG. 2 FOR FIG. 2 FOR FIG. 2 Nivelador de Bottom Pedestal Pedestal de fondo Top Pedestal Pedestal superior Mainframe Unidad Principal Leg Leveler Pierna FOR FIG. 1 FOR FIG.
-
Página 5: Instrucciones De Ensamblaje
Español English AWH042_017E PARTS LIST / LISTA DE PARTES FOR FIG. 1, 8 FOR FIG. 1, 2, 7, 9 FOR FIG. 1, 8 FOR FIG. 6 Tirador 3/16" Nut Tuerca 3/16" Allen Key Llave Allen Wrench Llave Inglesa Handle FOR FIG. 9 FOR FIG. - Página 6 / Nota: Se requieren por lo menos 2 adultos para mover la mesa por seguridad. FIG. 1 Assembly / Montaje FIG. 1 AWH042_017E www.themdsports.com (Continued on the next page.) (Continúe en la siguiente página.)
- Página 7 1. Coloque las Correas de Adorno (#29) a los márgenes del vástago de la mesa. 2. Inserte los tornillos en el correcto órden de A, B, C, D, E. AWH042_017E www.themdsports.com (Continued on the next page.) (Continúe en la siguiente página.)
- Página 8 Remove the Playfield (#8) from the Mainframe (#1). / Remueva la Campo del Juego (#8) del Unidad Principal (#1). X 10 X 10 X 10 X 10 X 10 AWH042_017E www.themdsports.com (Continued on the next page.) (Continúe en la siguiente página.)
- Página 9 Español English FIG. 7 FIG. 5 Assembly / Montaje FIG. 5 FIG. 8 X 12 AWH042_017E www.themdsports.com (Continued on the next page.) (Continúe en la siguiente página.)
- Página 10 (#P1 & #P2) and the Adapter (#38). FIG. 9A P1 & P2 / Conecte los Cables de Exposición de Marcador (#P1 & #P2) y el adaptador (#38). FIG. 9B AWH042_017E www.themdsports.com (Continued on the next page.) (Continúe en la siguiente página.)
- Página 11 / Nota: Inserte cada portero (#14 y #18) y cada jugador (#13, #15, #17, #19) en cada caja de engranaje en el sentido indicado. FIG. 10B AWH042_017E www.themdsports.com (Continued on the next page.) (Continúe en la siguiente página.)
-
Página 12: Electronic Connections Diagram / Diagrama De Conexión Electrónica
Sensor - Short with Sensor - Long START MINUTES SOUND POWER ON / Cable agarrarrugas / Cable agarrarrugas con sensor - Corto con sensor - Largo RESET ON/OFF POWER OFF AWH042_017E www.themdsports.com (Continued on the next page.) (Continúe en la siguiente página.) -
Página 13: Operacion Del Marcador Electronico
-- Consulte el proveedor o un técnico experienciado de -- Consult the dealer or an experienced radio/TV technician radio/televisión por ayudas for help. YOU ARE NOW READY TO PLAY! ¡USTED ESTA AHORA LISTO PARA JUGAR! AWH042_017E www.themdsports.com (The last page) (La ultima página)


