Tabla de contenido
Publicidad
Idiomas disponibles
Idiomas disponibles
Enlaces rápidos
Nice
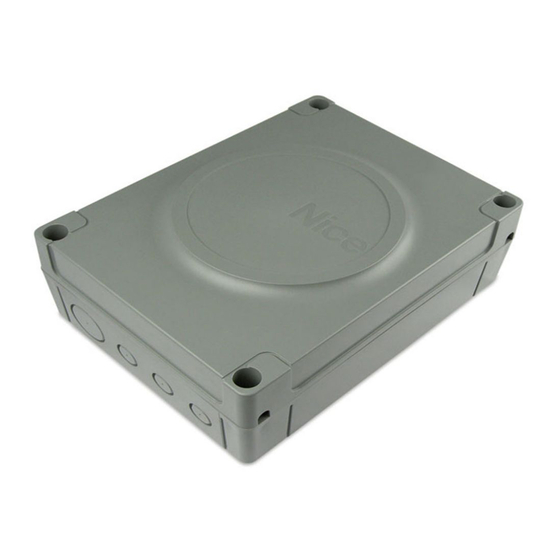
MC824L
Control unit
EN - Instructions and warnings for installation and use
IT - Istruzioni ed avvertenze per l'installazione e l'uso
FR - Instructions et avertissements pour l'installation et l'utilisation
ES - Instrucciones y advertencias para la instalación y el uso
DE - Installierungs-und Gebrauchsanleitungen und Hinweise
PL - Instrukcje i ostrzeżenia do instalacji i użytkowania
NL - Aanwijzingen en aanbevelingen voor installatie en gebruik
Publicidad
Tabla de contenido

Manuales relacionados para Nice MC824L


Resumen de contenidos para Nice MC824L
- Página 1 Nice MC824L Control unit EN - Instructions and warnings for installation and use IT - Istruzioni ed avvertenze per l’installazione e l’uso FR - Instructions et avertissements pour l’installation et l’utilisation ES - Instrucciones y advertencias para la instalación y el uso DE - Installierungs-und Gebrauchsanleitungen und Hinweise PL - Instrukcje i ostrzeżenia do instalacji i użytkowania...
- Página 2 232 mm 122 mm...
- Página 3 Electric lock (Led) Photocell (Led) Digital Transponder keyboard reader selector Flashing light Courtesy light 24V 4W NC NO NO NC P.P. STOP – 24 Vcc FLASH S.C.A. BLUEBUS P.P. STOP OPEN CLOSE...
- Página 4 L1 L2 L3 L4 L5 L6 L7 L8...
-
Página 5: General Warnings
>>> Attention! – In order to avoid any danger from inadvertent resetting of the thermal cut-off device, this appliance must MC824L is an electronic control unit for the automation of swing gates. IM- PORTANT! – Any other use than as specified herein or in environmental... - Página 6 TABLE 1 - Technical specifications of electrical cables (fig. 2b) Connection Cable type Maximum admissible length CONTROL UNIT POWER cable 1 cable 3 x 1,5 mm 30 m (note 1) 1 cable 2 x 0,5 mm 20 m FLASHING LIGHT with aerial cable 1 shielded cable type RG58 20 m (less than 5 m recommended) BLUEBUS DEVICES cable...
-
Página 7: Electrical Connections
A and Table 2. At the end of the installation procedure or following the removal of photocells Fig. 2a shows an example of an automation system set up with Nice compo- or other devices, the self-learning procedure for these devices must be per- nents: formed. -
Página 8: Learning In Combined Mode
On reaching the position, release the key to stop the manoeuvre. To vices must undergo a specific test for functionality and correct interaction with MC824L. Refer to the instruction manuals of the individual devices. memorise the position, press and hold down the “Set” key for at least 3 seconds and then release it (after 2 seconds LED L5 remains on and on 4.1 - Testing... -
Página 9: Level One Programming (On-Off Functions)
Table 8. The parameters can be set on a scale from 1 to 8. To check the value corre- For all the above-mentioned documentation, Nice provides instruction manu- sponding to each LED see Table 8. IMPORTANT – In the programming proce- als, guides and pre-filled forms through its technical support service. - Página 10 TABLE 7 - Second level functions Input Parameter Value Description (level) 5 seconds 15 seconds 30 seconds Sets the pause time, namely the 45 seconds Pause time which lapses before auto- Time matic closure. This will only take 60 seconds effect if closing is active.
-
Página 11: Deleting The Memory
Table 11 shows the cause and solution for each type of signal. nected from the electrical power supply. It is possible to verify faults that have occurred during the last 8 manoeuvres. For devices other than the MC824L follow the instructions given in the relevant See Table 12. maintenance programmes. - Página 12 TABLE 9 - Maintenance light Signal Number of manoeuvres Light on for 2 seconds at the start of the opening manoeuvre. Below 80% of the limit Light flashing for the entire duration of the manoeuvre. Between 81% and 100% of the limit Light flashing continuously.
-
Página 13: Technical Characteristics Of The Product
WARNINGS: • All technical characteristics stated refer to an ambient tempera- the CLOSE command) ture of 20°C (±5°C). • Nice S.p.a reserves the right to modify the product at any • Radio connector: SM connector for SMXI, OXI and OXIFM family receivers time while maintaining the same functionalities and intended use. - Página 14 terminal (NO, NC or 8.2 kΩ resistance contact). • Self-learning of leaf travel and automatic calculation of deceleration and partial opening points (vary ac- cording to installation) • Operating temperature: -20°C ... +50°C • Use in particularly acid, saline or potentially explosive atmospheres: •...
-
Página 15: Avvertenze Generali
• Nella rete di alimentazione dell’impianto prevedere un dispositivo di MC824L è una centrale elettronica per l’automatizzazione di cancelli ad ante battenti. AT TENZIONE! – Qualsiasi altro uso diverso da quello descritto disconnessione (non in dotazione) con una distanza di apertura dei... - Página 16 TABELLA 1 - Caratteristiche tecniche dei cavi elettrici (fig. 2b) Collegamento Tipo di cavo Lunghezza massima consentita Cavo ALIMENTAZIONE CENTRALE DI COMANDO 1 cavo 3 x 1,5 mm 30 m (nota 1) 1 cavo 2 x 0,5 mm 20 m Cavo LAMPEGGIANTE con antenna 1 cavo schermato tipo RG58 20 m (consigliato minore di 5 m)
-
Página 17: Collegamenti Elettrici
(potrebbero iniziare a lampeggiare i Led “L3” e “L4”). mando, deve essere effettuato tramite il sistema “Bluebus” di Nice. 3.1 - Descrizione dei collegamenti elettrici 3.7 - Apprendimento delle posizioni degli arresti meccanici e delle altre posizioni dell’anta... -
Página 18: Apprendimento In Modo Manuale
TABELLA 4 - Posizioni dell’anta Posizione Descrizione Posizione 0 Posizione di massima chiusura: quando l’anta 1 batte (motore M1) sull’arresto meccanico di chiusura Posizione 0 Posizione di massima chiusura: quando l’anta 2 batte (motore M2) sull’arresto meccanico di chiusura Posizione SA Sfasamento in apertura: quando l’anta 2 supera questa (motore M2) posizione, inizia l’apertura dell’anta 1... -
Página 19: Messa In Servizio
MC824L; quin- collegamenti elettrici effettuati, l’analisi dei rischi presenti e le relative soluzio- di, fare riferimento ai manuali istruzioni dei singoli dispositivi. - Página 20 TABELLA 7 - Funzioni di secondo livello Led di Parametro Valore Descrizione entrata (livello) 5 secondi 15 secondi 30 secondi Regola il tempo di pausa, cioè il 45 secondi Tempo tem po prima della richiusura auto- Pausa matica. Ha effetto solo se la Chiu- 60 secondi sura è...
- Página 21 10 secondi tra la pressione di un tasto e l’altro. Trascorso questo tempo, la procedura termina automaticamente memorizzando le modifiche fatte fino a Per la centrale di comando MC824L, sono previsti i seguenti accessori (opzio- quel momento. nali): ricevitori della famiglia SMXI, OXI, il programmatore Oview, il pannello ad 5.3 - Funzioni speciali...
- Página 22 TABELLA 9 - Spia manutenzione Segnalazione Numero di manovre Spia accesa per 2 secondi, all’inizio della manovra di apertura. Inferiore all’80% del limite Spia che lammpeggia per tutta la durata della manovra. Tra l’81% e il 100% del limite Spia che lampeggia di continuo. Oltre il 100% del limite TABELLA 10 - Segnalazioni del segnalatore lampeggiante (FLASH) Lampeggi...
-
Página 23: Manutenzione Del Prodotto
Scollegare la centrale dall’alimentazione elettrica. nale qualificato. Per gli altri dispositivi diversi da MC824L seguire quanto previsto nei rispettivi Questo prodotto è costituito da vari tipi di materiali: alcuni possono essere rici- piani manutenzione. -
Página 24: Caratteristiche Tecniche Del Prodotto
CARATTERISTICHE TECNICHE DEL PRODOTTO AVVERTENZE • Tutte le caratteristiche tecniche riportate, sono riferite ad una temperatura ambientale di 20°C (± 5°C). • Nice S.p.a. si riserva il diritto di ap- portare modifiche al prodotto in qualsiasi momento lo riterrà necessario, man- tenendone comunque la stessa funzionalità... -
Página 25: Instructions Générales
III. MC824L est une logique électronique pour l’automatisation de portails bat- tants. ATTENTION ! – Toute autre utilisation que celle décrite et dans • Pendant l’installation, manipuler le produit avec soin en évitant tout des conditions ambiantes différentes de celles indiquées dans ce guide... - Página 26 TABLEAU 1 - Caractéristiques techniques des câbles électriques (fig. 2b) Connexion Type de câble Longueur maximum admise Câble ALIMENTATION LOGIQUE DE COMMANDE 1 câble 3 x 1,5 mm 30 m (note 1) 1 câble 2 x 0,5 mm 20 m Câble CLIGNOTANT avec antenne 1 câble blindé...
-
Página 27: Branchements Électriques
3.4 - Adressage des dispositifs connectés à MC824L a) Logique de commande ; b) Opérateur ; c) Indicateur clignotant ; d) Photo- cellule ; e) Clavier numérique - Lecteur à transpondeur - Sélecteur à clé ; f) Co- Pour permettre à... -
Página 28: Avertissements
TABLEAU 4 - Positions du vantail Position Description Position 0 Position de fermeture maximum : quand le vantail 1 bat sur (moteur M1) la butée mécanique de fermeture Position 0 Position de fermeture maximum : quand le vantail 2 bat sur (moteur M2) la butée mécanique de fermeture Position SA Décalage en ouverture : quand le vantail 2 dépasse cette (moteur M2) position l’ouverture du vantail 1 commence Position SC Décalage en fermeture : quand le vantail 1 se trouve en des- (moteur M1) sous de cette position la fermeture du vantail 2 commence... -
Página 29: Essai Et Mise En Service
été effectuées avec résultat positif. spécifique, aussi bien en ce qui concerne leur bon fonctionnement que leur in- 1 Réaliser le dossier technique de l’automatisation qui devra comprendre les teraction correcte avec MC824L ; se référer par conséquent aux guides d’ins- documents suivants : le dessin d’ensemble de l’automatisation, le schéma tructions de chaque dispositif. des connexions électriques effectuées, l’analyse des risques présents et les 4.1 - Essai... - Página 30 TABLEAU 7 - Fonctions de deuxième niveau Paramètre Valeur Description d’entrée (niveau) 5 secondes 15 secondes Règle le temps de pause, à savoir 30 secondes le temps qui s’écoule avant la Temps 45 secondes refermetu re automatique. La fonction de pause 60 secondes n’a d’effet que si la fermeture est 80 secondes...
-
Página 31: Programmation Du Premier Niveau (On-Off)
Note – Pour programmer plusieurs paramètres, durant l’exécution de la procédure, il faut répéter les opérations du point 03 au point 07 durant la phase pro- prement dite. 03. au bout de 2 secondes environ, le portail effectuera la manœuvre désirée Pour toute la documentation citée, Nice, à travers son service après-vente, met à disposition des notices d’instructions, des guides et des formulaires prérem- en mode « action maintenue » c’est-à-dire que l’actionnement du portail plis. Voir également sur : www.nice-service.com... - Página 32 TABLEAU 9 - Voyant maintenance Signalisation Nombre de manœuvres Voyant allumé pendant 2 secondes, au début de la manœuvre d’ouverture. Inférieur à 80 % de la limite Voyant qui clignote pendant toute la durée de la manœuvre. Entre 81 % et 100 % de la limite Voyant qui clignote de manière continue.
-
Página 33: Connexion Du Programmateur Oview
TABLEAU 12 - Liste historique des anomalies Presser et maintenir enfoncée la touche « Set » pendant environ 3 s ; Relâcher la touche quand la Led « L1 » commence à clignoter ; Presser la touche « » ou « » pour se déplacer de la Led clignotante à la Led L8 (« Led d’entrée ») pour le paramètre « Liste anomalies » ; Presser et maintenir enfoncée la touche « Set » jusqu’à la fin du point 06 ; Attendre environ 3 secondes, jusqu’à ce que les Leds qui représentent les niveaux correspondant aux manœuvres qui ont présenté... -
Página 34: Mise Au Rebut Du Produit
électrique de la logique de commande. • Fonctions en auto-apprentissage : • Auto-apprentissage des disposi- Pour les dispositifs différents de MC824L, suivre ce qui est prévu dans le plan tifs connectés à la sortie BlueBus. • Auto-apprentissage du type de dispo- de maintenance respectif. -
Página 35: Advertencias Generales
• En la red de alimentación de la instalación, colocar un dispositivo de desconexión (no suministrado) con una distancia de apertura de los MC824L es una central electrónica para la automatización de cancelas con contactos que permita la desconexión completa en las condiciones hojas de batiente. -
Página 36: Conexión
TABLA 1 - Características técnicas de los cables eléctricos (fig. 2b) Conexión Tipo de cable Longitud máxima admitida Cable ALIMENTACIÓN CENTRAL DE MANDO 1 cable 3 x 1,5 mm 30 m (nota 1) 1 cable 2 x 0,5 mm 20 m Cable LUZ INTERMITENTE con antena 1 cable blindado tipo RG58 20 m (aconsejado menos de 5 m) -
Página 37: Conexiones Eléctricas
(después de unos 3 segundos). con la central de mando, debe hacerse mediante el sistema “Bluebus” de Nice. 03. Espere algunos segundos para que la central complete el aprendizaje de 3.1 - Descripción de las conexiones eléctricas... -
Página 38: Aprendizaje En Modo Manual
TABLA 4 - Posiciones de la hojia Posición Descripción Posición 0 Posición de cierre máximo: cuando la hoja 1 choca con- (motor M1) tra el tope mecánico de cierre Posición 0 Posición de cierre máximo: cuando la hoja 2 choca con- (motor M2) tra el tope mecánico de cierre Posición SA... -
Página 39: Ensayo Y Puesta En Servicio
Conviene hacer varios ensayos para evaluar el movimiento de las hojas y comprobar los posibles defectos de montaje o de regulación, Para toda la documentación mencionada, Nice pone a disposición, a través de TABLA 5 - Funciones de primer nivel Funzción... - Página 40 TABLA 7 - Funciones de segundo nivel Led de Parámetro Valor Descripción entrada (nivel) 5 segundos 15 segundos 30 segundos Regula el tiempo de pausa, es 45 segundos Tiempo decir el tiempo antes del cierre au- de pausa tomático. Es válido sólo si el Cierre 60 segundos está...
-
Página 41: Programación Del Primer Nivel (On-Off)
Para la central de mando MC824L están disponibles los siguientes accesorios (opcionales): receptores de la familia SMXI, OXI y el programador Oview, el pa- 5.3 - Funciones especiales nel de energía solar Solemyo y la batería compensadora mod. - Página 42 TABLA 9 - Indicador mantenimiento Señalización Número de movimientos Indicador encendido durante 2 segundos al inicio del movimiento de apertura. Inferior al 80% del límite Indicador que destella durante toda la duración del movimiento. Entre el 81% y el 100% del límite Indicador que destella continuamente.
-
Página 43: Conexión Del Sistema De Energía Solar Solemyo
¡ATENCIÓN! – Cuando el automatismo está alimentado por el sistema ducto, desconecte la central de la alimentación eléctrica. “Solemyo”, NO DEBE ESTAR ALIMENTADO simultáneamente por la red Para los demás dispositivos diferentes de MC824L siga las instrucciones men- eléctrica. cionadas en los planes de mantenimiento correspondientes. -
Página 44: Eliminación Del Producto
CARACTERÍSTICAS TÉCNICAS DEL PRODUCTO ADVERTENCIAS: • Todas las características técnicas indicadas se refieren a una temperatura de 20°C (± 5°C). • Nice S.p.a. se reserva el derecho de mo- dificar el producto en cualquier momento que lo considere necesario, mante- niendo las mismas funcionalidades y el mismo uso previsto. -
Página 45: Allgemeine Hinweise
Überspannungskategorie III garantiert. • Das Produkt bei der Installation vorsichtig handhaben und Quet- MC824L ist eine elektronische Steuerung zur Automatisierung von Toren mit Drehflügeln. ACHTUNG! – Jeder andere Einsatz, auch unter anderen Be- schungen, Stöße, Herunterfallen sowie den Kontakt mit Flüssigkeiten dingungen, als in dieser Gebrauchsanleitung aufgeführt, ist als falsch... - Página 46 TABELLE 1 – Technische Eigenschaften der Stromkabel (Abb. 2b) Anschluss Kabelart Zulässige Höchstlänge STROMKABEL STEUERUNG 1 Kabel 3 x 1,5 mm 30 m (Anmerkung 1) 1 Kabel 2 x 0,5 mm 20 m KABEL für BLINKLEUCHTE mit Antenne 1 Abschirmkabel Typ RG58 20 m (weniger als 5 m wird empfohlen) Kabel BLUEBUS-VORRICHTUNGEN 1 Kabel 2 x 0,5 mm...
-
Página 47: Elektrische Anschlüsse
über die Klemmen P.P. (Plus) und STOP (Minus) angeschlossen werden (Abb. 6). Die Stromspannung beträgt 24 Vcc (-30% ÷ +50%) mit einem maxi- Die Abb. 2a zeigt als Beispiel eine mit Teilen von Nice ausgeführte Automati- mal erhältlichen Strom von 200 mA. -
Página 48: Manuelles Erlernungsverfahren
TABELLE 4 - Flügelpositionen Position Beschreibung Position 0 Position der maximalen Schließung: Wenn der Flügel 1 (motor M1) auf den mechanischen Schließanschlag stößt Position 0 Position der maximalen Schließung: Wenn der Flügel 2 (motor M2) auf den mechanischen Schließanschlag stößt Position SA Verschiebung bei Öffnung: wenn der Flügel 2 diese Posi- (motor M2) -
Página 49: Abnahme Und Inbetriebsetzung
Die Inbetriebsetzung darf erst erfolgen, nachdem alle Abnahmephasen gen werden, was die Funktionstüchtigkeit angeht, aber auch bezüglich ihrer erfolgreich beendet sind. korrekten Wirkung mit MC824L, somit muss man sich auf die Gebrauchsanlei- tung der einzelnen Vorrichtungen beziehen. 1 Die technischen Unterlagen der Automatisierung zusammenstellen, die folgen des umfassen müssen: Gesamtzeichnung der Automatisierung,... - Página 50 TABELLE 7 - Funktionen zweites Niveau Eingangs- Parameter Wert Beschreibung (Niveau) 5 Sekunden 15 Sekunden 30 Sekunden Stellt die Pausezeit ein bzw. die 45 Sekunden Zeit vor dem automatischen Pausezeit Schließen. Wirkt nur, falls die 60 Sekunden Schließung aktiviert ist. 80 Sekunden 120 Sekunden 180 Sekunden...
-
Página 51: Programmierung Erstes Niveau (On-Off)
02. die Schaltung innerhalb von 3 Sekunden erneut betätigen und weiter be- vorliegenden Gefahren und Risiken korrekt informieren. tätigen; Bezüglich der oben genannten Dokumentation stellt Nice über seinen techni- 03. Nach zirka 2 Sekunden führt das Tor die gewünschte Bewegung im Mo- schen Kundendienst folgendes zur Verfügung: Gebrauchsanleitungen, Anlei- dus “Todmannfunktion”... - Página 52 TABELLE 9 - Wartungsmeldeleuchte Meldung Bewegungsanzahl 2 Sekunden lang eingeschaltete Meldeleuchte, zu Beginn der Öffnungsbewegung. Unter 80% des Grenzwertes Meldeleuchte, die über die ganze Dauer der Bewegung blinkt. Zwischen 81% und 100% des Grenzwertes Meldeleuchte, die ständig blinkt. Über 100% des Grenzwertes TABELLE 10 - Meldungen der Blinkleuchte (FLASH) Blinken Problem...
-
Página 53: Anschluss Eines Funkempfängers
TABELLE 12 - Archiv der aufgetretenen Störungen Mindestens 3 Sekunden lang auf die Taste “Set” drücken und gedrückt halten; Die Taste loslassen, wenn die LED “L1” zu blinken beginnt; Die Taste “” oder “” drücken, um das Blinken auf die LED L8, die “Eingangs-LED” des Parameters “Alarmhistorik“ zu verschieben”;... -
Página 54: Wartung Des Produktes
TECHNISCHE MERKMALE DES PRODUKTS HINWEISE: • Alle angegebenen technischen Merkmale beziehen sich auf eine Temperatur von 20°C (± 5°C). • Nice S.p.a. behält sich das Recht vor, jederzeit als nötig betrachtete Änderungen am Produkt vorzunehmen, wobei Funktiona- litäten und Einsatzzweck beibehalten werden. -
Página 55: Ostrzeżenia Ogólne
OPIS URZĄDZENIA I JEGO PRZEZNACZENIE jące (nieznajdujące się na wyposażeniu), którego odległość pomię- dzy stykami podczas otwarcia zapewnia całkowite odłączenie w wa- runkach określonych przez III kategorią przepięciową. MC824L jest centralą elektroniczną umożliwiającą automatyzowanie bram • Podczas montażu, należy delikatnie obchodzić się z urządzeniem, skrzydłowych. UWAGA! – Każde inne zastosowanie odmienne od opisa- nego oraz zastosowanie w warunkach środowiskowych odmiennych chroniąc je przed zgnieceniem, uderzeniem, upadkiem lub kontak- od podanych w tej instrukcji obsługi jest niewłaściwe i zabronione! - Página 56 TABELA 1 - Parametry techniczne przewodów elektrycznych (rys. 2b) Podłączenie Rodzaj przewodu Maksymalna dozwolona długość Przewód ZASILANIA CENTRALI STERUJĄCEJ 1 przewód 3 x 1,5 mm 30 m (uwaga 1) 1 przewód 2 x 0,5 mm 20 m Przewód LAMPY OSTRZEGAWCZEJ z anteną 1 przewód koncentryczny, ekranowany typu RG58 20 m (zalecany jest przewód krótszy od 5 m) Przewód URZĄDZEŃ BLUEBUS 1 przewód 2 x 0,5 mm 20 m (uwaga 2)
-
Página 57: Podłączenia Elektryczne
(rys. 3-B); • Sprawdź, czy lampa ostrzegawcza podłączona do wyjścia FLASH jest wyłą- 03. Przykręć obudowę (rys. 3-C); czona (nie świeci). 04. Teraz jest możliwe wykonanie podłączeń elektrycznych: patrz rozdz. 3. Jeżeli jest inaczej odłącz zasilanie centrali i sprawdź połączenia elektryczne. Ostrzeżenie! – Aby móc włożyć osłony przewodów elektrycznych, musisz wy- wiercić otwory w dolnej ściance obudowy centrali. Uwaga – Jeżeli to koniecz- 3.6 - Rozpoznawanie urządzeń podłączonych do MC824L ne możesz wykorzystać boczne wejście dla przewodów ale tylko w przypadku Po pierwszym włączeniu urządzenia rozpoznaj z pomocą centrali urządzenia zastosowania odpowiednich złączek przeznaczonych dla osłon kablowych - w podłączone do wejść “Bluebus” i “Stop”. celu uszczelnienia połączenia. UWAGA! – Faza rozpoznawania musi być wykonana również, jeśli do Aby dokonać montażu innych urządzeń występujących w automatyce odwołaj tych wejść nie są podłączone żadne urządzenia. -
Página 58: Programowanie W Trybie Automatycznym
TABELA 4 - Położenia skrzydeł Położenia Dioda Opis Położenia 0 Położenie maksymalnego zamknięcia: kiedy skrzydło 1 (siłownik M1) opiera się o ogranicznik mechaniczny zamykania Położenia 0 Położenie maksymalnego zamknięcia: kiedy skrzydło 2 (siłownik M2) opiera się o ogranicznik mechaniczny zamykania Położenia SA Przesunięcie fazowe podczas otwierania: kiedy skrzydło 2 (siłownik M2) osiąga to położenie rozpoczyna się otwieranie skrzydła 1 Położenia SC Przesunięcie fazowe podczas zamykania: kiedy skrzydło 1 (siłownik M1) osiąga to położenie, rozpoczyna się zamykanie skrzydła 2 Położenia 1 Położenie maksymalnego otwarcia: kiedy skrzydło 1 opiera (siłownik M1) się o ogranicznik mechaniczny otwierania Położenia 1 Położenie maksymalnego otwarcia: kiedy skrzydło 2 opiera (siłownik M2) się o ogranicznik mechaniczny otwierania łącznie pozycje „SA“ i „SC“ lub tylko jedną z nich. zwolnij, (po 2 sek. dioda L3 zapali się na stałe a po zwolnieniu przycisku “Set” zaczyna migać dioda L4). -
Página 59: Odbiór I Przekazanie Do Eksploatacji
4.2 - Przekazanie do eksploatacji w szczególności wszystkich wymogów normy EN 12445, która ustala metody wykonywania prób kontrolnych automatyki do bram. Przekazanie automatyki do eksploatacji może nastąpić dopiero po wy- Urządzenia dodatkowe muszą być poddawane specyficznym próbom odbior- konaniu wszystkich faz próby odbiorczej z wynikiem pozytywnym. czym, zarówno pod względem funkcjonalności jak i ich prawidłowego wza- 1 Przygotuj książkę techniczną automatyki, która musi zawierać następujące jemnego oddziaływania z MC824L; w związku z tym odwołaj się do instrukcji dokumenty: rysunek całościowy automatyki, schemat wykonanych połą- obsługi konkretnych urządzeń. czeń elektrycznych, analizę występujących zagrożeń i odnośne rozwiązania 4.1 - Odbiór techniczny zastosowane w automatyce, deklarację zgodności producenta dla wszyst- kich zastosowanych urządzeń oraz deklarację zgodności całości automatyki Kolejność operacji wykonywanych podczas odbioru technicznego, opisana w - wypełnioną przez instalatora. - Página 60 TABELA 7 - Funkcje drugiego poziomu Dioda Dioda Parametr Wartość Opis wejścia (poziom) 5 sekund 15 sekund Reguluje czas trwania przerwy, 30 sekund czyli zwłokę przed zamknięciem 45 sekund Czas trwania automatycznym. Działa wyłącznie, przerwy 60 sekund jeśli “automatyczne zamknięcie” 80 sekund jest aktywne. 120 sekund 180 sekund Otwarcie > Stop > zamknięcie > Stop > ...
-
Página 61: Programowanie Pierwszego Poziomu (On-Off)
Jest wtedy możliwe sterowanie automatyką w trybie ręcznym (“w obecności 6 Przed wprowadzeniem automatyki do użytku Twoim obowiązkiem jest od- użytkownika”), postępując w następujący sposób: powiednie poinformowanie właściciela o zagrożeniach i utrzymującym się ryzyku szczątkowym. 01. Wyślij z pomocą nadajnika lub przełącznika kluczowego, itp. polecenie, aby uruchomić bramę. Jeżeli wszystkie urządzenia funkcjonują prawidło- Aby umożliwić przygotowanie całej zacytowanej wyżej dokumentacji firma wo brama będzie działać prawidłowo, w przeciwnym przypadku należy Nice, poprzez własny serwis techniczny oddaje do Twojej dyspozycji: instrukcje postępować jak opisano niżej: obsługi, przewodniki i wstępnie wypełnione formularze. Przejrzyj również stronę 02. w ciągu 3 sekund ponownie uaktywnij polecenie i przytrzymaj sygnał (przy- internetową: www.nice-service.com cisk, przekręcony kluczyk itp.); 03. po upływie około 2 sekund brama wykona żądany manewr w trybie ręcz- nym (“w obecności użytkownika”), czyli będzie się poruszać wyłącznie PROGRAMOWANIE dopóki sygnał będzie aktywny. Jeżeli urządzenia zabezpieczające nie funkcjonują prawidłowo, lampa ostrze- gawcza wykona kilka krótkich błysków, umożliwiających rozpoznanie rodzaju Na centrali znajdują się 3 przyciski OPEN (), STOP (SET), CLOSE (), które problemu (przeczytaj rozdział 6 - Tabela 10). - Página 62 TABELA 9 - Kontrolka konserwacji Sygnalizacja Ilość manewrów Kontrolka świeci się przez 2 sekundy na początku każdego manewru. Poniżej 80% limitu Kontrolka miga przez cały czas trwania manewru. Od 81% do 100% limitu Kontrolka miga stale. Powyżej 100% limitu TABELA 10 - Sygnalizacja lampy ostrzegawczej (FLASH) Błyski Problem Rozwiązanie...
-
Página 63: Rozszerzenie Wiadomości
Wyjście “światełko nocne” włącza się i wyłącza w trybie “Krok po kroku” tor Oview, umożliwiający całkowite i szybkie zarządzanie procesem programo- wania, zmiany parametrów i diagnostyki całej automatyki. Aby uzyskać dostęp ROZSZERZENIE WIADOMOŚCI do złącza należy postępować jak pokazano na rys. 9 i podłączyć przewód do odpowiedniego gniazda. Programator Oview może być podłączany do kilku centrali jednocześnie, (do 5 centrali - bez przestrzegania szczególnych środków ostrożności, do 60 centrali - śledząc specjalne zalecenia), może być Dla centrali sterującej MC824L są przewidziane następujące akcesoria (opcjo- również podłączany do centrali podczas zwykłego funkcjonowania automaty- nalne): odbiorniki z rodziny SMXI, OXI, programator Oview, panel zasilany ener- gią słoneczną Solemyo i akumulator awaryjny mod. PS324. ki. W tym przypadku Oview może być używany do bezpośredniego wysyła- nia poleceń do centrali, wykorzystując menu “użytkownika”. Za jego pomocą 7.1 - Podłączenie odbiornika radiowego jest również możliwe aktualizowanie oprogramowania centrali. Jeżeli w centrali znajduje się odbiornik radiowy należący do rodziny OXI, wykorzystując Oview... -
Página 64: Konserwacja Urządzenia
• Zasilanie MC824L: 230 Vpp (+10% -15%) 50/60 Hz • Zasilanie MC824L/V1: 120 Vpp (+10% -15%) 50/60 Hz • Moc znamionowa pobierana z sieci elektrycznej: 100 W • Moc pobierana przez złącze akumulatora centrali w trybie “stan czu- wania-Wszystkie urządzenia”... -
Página 65: Algemene Aanbevelingen En Voorzorgsmaatregelen
Zet het product MC824L is een elektronische besturingseenheid voor de automatisering van poorten met draaivleugels. LET OP! – Ieder gebruik dat afwijkt van het-... - Página 66 TABEL 1 - Technische gegevens van de elektriciteitskabels (afb. 2b) Aansluiting Type kabel Maximaal toegestane lengte Kabel voor STROOMTOEVOER BESTURINGSEENHEID 1 kabel 3 x 1,5 mm 30 m (opmerking 1) 1 kabel 2 x 0,5 mm 20 m Kabel KNIPPERLICHT met antenne 1 afgeschermde kabel type RG58 20 m (aanbevolen: minder dan 5 m) Kabel BLUEBUS INRICHTINGEN...
-
Página 67: Installatie
2b en “Tabel 1 - Technische gegevens van de elektriciteitskabels”. • Geduren- de het plaatsen van de buizen voor het doorvoeren van de elektriciteitskabels 3.4 - Adressering van de met de MC824L verbonden inrichtingen en de invoer van de kabels in de kast van de besturingseenheid, dient u er re-... -
Página 68: Zelflering In Automatische Modus
TABEL 4 - Posities van het vleugel Positie Beschrijving Positie 0 Positie voor maximale sluiting: wanneer de vleugel 1 de me- (motor M1) chanische stop voor de sluitbeweging raakt Positie 0 Positie voor maximale sluiting: wanneer de vleugel 2 de me- (motor M2) chanische stop voor de sluitbeweging raakt Positie SA... -
Página 69: Controle Van De Beweging Van De Vleugels Van De Poort
MC824L; raadpleeg de instructiehandleidingen van de afzonderlijke in- ningsmanoeuvre een versnellingsfase, een fase met constante snelheid, richtingen. - Página 70 TABEL 7 - Functies tweede niveau Ingang- Parameter Waarde Beschrijving sled (niveau) 5 seconden 15 seconden 30 seconden Stelt de pauzetijd in, d.w.z. de tijd 45 seconden voordat de poort automatisch weer Pauzetijd gesloten wordt. Heeft alleen uitwerking 60 seconden als de functie Sluiting actief is.
-
Página 71: Inbedrijfstelling
02. binnen 3 seconden de instructie opnieuw activeren en actief houden; Voor alle vermelde documentatie stelt Nice, via haar technische assistentie- 03. na ongeveer 2 seconden zal de poort de vereiste manoeuvre uitvoeren in dienst, ter beschikking: instructiehandleidingen, gidsen en vooringevulde for- de modus met “persoon aanwezig”;... - Página 72 TABEL 9 - Lampje onderhoud Signalering Aantal manoeuvres Lampje brandt 2 seconden, aan het begin van de openingsmanoeuvre. Minder dan 80% van de limiet Lampje brandt voor de hele duur van de manoeuvre. Tussen ’81% en 100% van de limiet Lampje brandt voortdurend.
-
Página 73: Verdere Details
(handleiding voor het oplossen van problemen) Bepaalde inrichtingen geven signaleringen af aan de hand waarvan de wer- Voor de besturingseenheid MC824L zijn de volgende (optionele) accessoires kingsstatus of eventuele storingen herkend kunnen worden. voorzien: ontvangers van de familie SMXI, OXI, de programmeereenheid Oview, Als op de uitgang FLASH op de besturingseenheid een knipperlicht wordt aan- het zonnepaneel Solemyo en de bufferbatterij mod. -
Página 74: Aansluiting Van Het Zonne-Energiesysteem Solemyo
• Programmeerbare functies: 8 functies van het type ON-OFF en 8 instel- bare functies Volg voor de andere inrichtingen die niet tot de MC824L behoren de aanwijzin- • Functies zelflering: • Zelflering van de inrichtingen die verbonden zijn met gen van het desbetreffende onderhoudsplan daarvoor op. -
Página 75: Apéndice
Appendix • CE declaration of conformity • Instructions and warnings for the user Appendice • Dichiarazione CE di conformità • Istruzioni ed avvertenze destinate all’utilizzatore Addenda • Déclaration CE de conformité • Instructions et recommandations destinées à l’utilisateur Apéndice • Declaración de conformidad CE •... - Página 76 Nota - Il contenuto di questa dichiarazione corrisponde a quanto dichia- official document deposited at the registered offices of Nice S.p.a. and in rato nel documento ufficiale depositato presso la sede di Nice S.p.a., e in particular to the last revision available before printing this manual. The text particolare, alla sua ultima revisione disponibile prima della stampa di que- herein has been re-edited for editorial purposes.
- Página 77 Note - Le contenu de cette déclaration de conformité correspond à ce qui Nota - El contenido de esta declaración corresponde a aquello declarado est déclaré dans le document officiel, déposé au siège de Nice S.p.a., et en en el documento oficial depositado en la sede de Nice S.p.a., y en particu- particulier à...
- Página 78 Autorisierte Person zur Ausstellung der Technischen Dokumenta- Osoba autoryzowana do przygotowania dokumentacji technicznej: tion: NICE S.p.A., via Pezza Alta n° 13, 31046 Rustignè di Oderzo (TV) NICE S.p.A., via Pezza Alta nr 13, 31046 Rustignè di Oderzo (TV) Italia Italien Typ urządzenia: Centrala sterująca na 2 silniki 24Vps.
- Página 79 Opmerking - De inhoud van deze verklaring stemt overeen met hetgeen verklaard is in het officiële document dat is neergelegd bij de vestiging van Nice S.p.a., en in het bijzonder aan de laatste revisie hiervan die voor het afdrukken van deze handleiding beschikbaar was. De hier beschreven tekst werd om uitgeversredenen heraangepast.
- Página 80 Instructions and warnings for the user Before using the automation for the first time, ask the installer to performed by the user are to clean the photocell lenses (use a soft explain the origin of residual risks and devote a few minutes to reading and slightly damp cloth) and remove any leaves or stones that may obstruct the automation.
- Página 81 Istruzioni ed avvertenze destinate all’utilizzatore Prima di usare per la prima volta l’automazione, fatevi spiegare dall’in- oppure con un selettore a chiave, ecc. Se tutto funziona corret- stallatore l’origine dei rischi residui e dedicate qualche minuto alla let- tamente il cancello si muoverà regolarmente, altrimenti procedere come di seguito;...
- Página 82 Instructions et recommandations destinées à l’utilisateur Avant d’utiliser pour la première fois l’automatisme, faites-vous expli- ment, le portail bougera régulièrement, en cas contraire procéder quer par l’installateur l’origine des risques résiduels et consacrez comme suit : quelques minutes à la lecture de ce guide d’instructions et d’avertis- 02.
-
Página 83: Instrucciones Y Advertencias Destinadas Al Usuario
Instrucciones y advertencias destinadas al usuario Antes de utilizar por primera vez el automatismo, pida a su instalador re querido en modalidad “hombre presente”, es decir que la can- que le explique el origen de los riesgos residuales y lea este manual cela se guirá... - Página 84 Anweisungen und Hinweise für den Benutzer Bevor Sie die Automatisierung zum ersten Mal verwenden, lassen Sie gehen; sich von Ihrem Installateur erklären, wie Restrisiken entstehen können, 02. Die Schaltvorrichtung innerhalb von 3 Sekunden erneut betätigen und widmen Sie dem Lesen der Anweisungen und Hinweise für den und weiter betätigen;...
- Página 85 Instrukcje i zalecenia przeznaczone dla użytkownika Przed użyciem automatyki po raz pierwszy poproś instalatora o wyja- cjonuje prawidłowo brama będzie się poruszać prawidłowo, w śnienie źródła ryzyka szczątkowego i poświęć kilka minut na przeczy- przeciwnym przypadku należy postępować jak opisano niżej: tanie niniejszej instrukcji i zaleceń przeznaczonych dla użytkownika, 02. W ciągu 3 sekund ponownie włącz polecenie i przytrzymaj wci- dostarczonej przez osobę, która zainstalowała automatykę. Przecho- śnięty przycisk/przekręcony kluczyk; wuj tę instrukcję, aby móc ją wykorzystać w przyszłości w przypadku 03. Po upłynięciu około 2 sekund brama wykona żądany manewr wystąpienia wszelkich wątpliwości i przekaż ją ewentualnemu nowe- w trybie ręcznym “w obecności użytkownika”; czyli będzie mu właścicielowi automatyki. się nadal przesuwać wyłącznie, dopóki polecenie będzie nadal UWAGA! – Zakupiona automatyka jest urządzeniem, które aktywne. wiernie wykonuje Twoje polecenia; nieodpowiedzialna i niewła- WAŻNE! –...
-
Página 86: Aanwijzingen En Aanbevelingen Voor De Gebruiker
Aanwijzingen en aanbevelingen voor de gebruiker Laat u, voordat u de automatisering voor de eerste keer gaat gebrui- normaal bewegen, als dit niet zo is gaat u als volgt te werk: ken, door de installateur uitleggen welke restrisico’s er zijn en besteed 02. - Página 88 Nice SpA Oderzo TV Italia www.niceforyou.com info@niceforyou.com...