Tabla de contenido
Publicidad
Idiomas disponibles
Idiomas disponibles
Enlaces rápidos
NEDERLANDS
Hartelijk gefeliciteerd met de aanschaf van uw
In de bijgaande Snelstart handleiding wordt stap voor stap uitgelegd hoe u de Conceptronic
Conceptronic Wireless Media Player kunt instellen en gebruiken.
In geval van problemen adviseren wij u onze support-site te bezoeken (ga naar:
www.conceptronic.net en klik op 'Support'). Hier vindt u een database met veelgestelde
vragen waar u hoogstwaarschijnlijk de oplossing voor uw probleem kunt vinden.
Heeft u andere vragen over uw product die u niet op de website kunt vinden, neem dan
contact met ons op via e-mail: support@conceptronic.net.
Voor meer informatie over Conceptronic producten kunt u terecht op de Conceptronic
website: www.conceptronic.net.
De software configuratie beschreven in deze handleiding kan afwijken op uw computer. Dit is
afhankelijk van het besturingssysteem dat u gebruikt.
1. Pakket Inhoud
De volgende onderdelen dienen aanwezig te zijn in de verpakking van de Conceptronic Wireless
Media Player:
•
Conceptronic C54WMP Wireless Media Player
•
Productstandaard voor C54WMP
•
Spanningsadapter, 5v DC, 2A
•
Afstandsbediening
•
2x AAA Batterijen voor de afstandsbediening
•
RCA A/V Kabel (1x RCA composiet, 2x RCA Audio)
•
Scart Adapter (3x RCA naar SCART)
•
Component conversie kabel (3x RCA Female voor Component kabel)
Conceptronic C54WMP
Snelstart handleiding
Conceptronic Wireless Media Player.
1
Publicidad
Tabla de contenido

Manuales relacionados para Conceptronic C54WMP


Resumen de contenidos para Conceptronic C54WMP
- Página 1 Hartelijk gefeliciteerd met de aanschaf van uw Conceptronic Wireless Media Player. In de bijgaande Snelstart handleiding wordt stap voor stap uitgelegd hoe u de Conceptronic Conceptronic Wireless Media Player kunt instellen en gebruiken. In geval van problemen adviseren wij u onze support-site te bezoeken (ga naar: www.conceptronic.net en klik op ‘Support’).
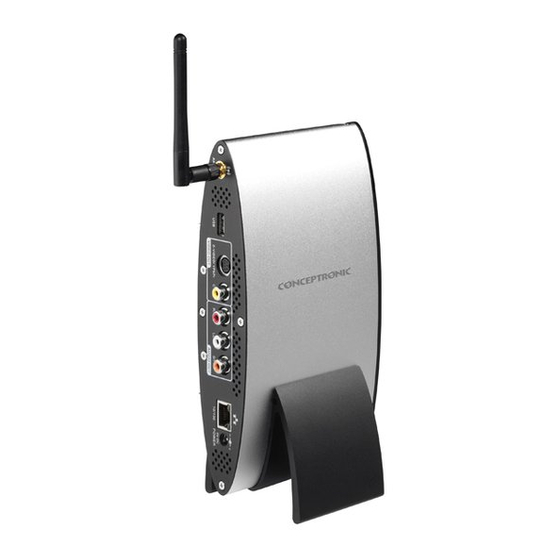
- Página 2 USB Host aansluiting voor het upgraden van de Firmware en voor het aansluiten van opslagapparatuur zoals een externe Hard Disk of USB Flash Drive. Om multimediabestanden te kunnen afspelen via de C54WMP dient het apparaat verbonden te zijn met een netwerk die voorzien is van een Media server.
- Página 3 NEDERLANDS 3. Uitleg van de afstandsbediening...
- Página 4 VOL - Verhoog het volume. Verlaag het volume. Verwijder/Voeg achtergrond muziek toe. NUMBER 1-9 Numerieke toetsen 1-9. Configureer A-B repeat mode. Numerieke toets 0 Sneltoets voor iRADIO URL invoer. SETUP Open het Setup Menu van de C54WMP. SORT Sorteer de bestandslijst.
-
Página 5: De C54Wmp Aansluiten Op Uw Netwerk En Tv
Om gebruik te kunnen maken van streaming mogelijkheden zoals het luisteren naar een online radio station is een breedband internet verbinding benodigd. Let op: De Conceptronic C54WMP gebruikt een UPnP A/V cliënt voor het afspelen van geluid en video. U dient te beschikken over hardware met UPnP A/V Server mogelijkheden, een UPnP A/V Server applicatie of installeer de meegeleverde Conceptronic Media Server software. - Página 6 De afstandsbediening is benodigd om het apparaat aan en uit te zetten. Zet uw TV aan en selecteer het juiste AV kanaal. De Conceptronic C54WMP zal tijdens het starten het Conceptronic Startscherm weergeven. 5. Setup & configuratie bij het 1e gebruik Let op: In deze handleiding zullen vaste IP adressen gebruikt worden om diverse functies van de Conceptronic C54WMP uit te leggen.
- Página 7 NEDERLANDS Wanneer u de Conceptronic C54WMP voor de eerste keer aanzet dient u deze te configureren. De onderstaande melding, getoond op uw TV, zal uw vragen om een taal te kiezen voor het apparaat. Na de taalselectie zal de C54WMP het netwerk initialiseren.
- Página 8 De bedrade configuratie is nu gereed voor gebruik. Ga verder bij ‘Hoofdstuk 6’ voor het gebruik van de C54WMP Media Speler. Let op: De C54WMP zal standaard op zoek gaan naar een DHCP server. Als de C54WMP correct is ingesteld zal het IP adres onderin beeld getoond worden. Als het scherm: IP: 0.0.0.0 toont kan het apparaat geen DHCP server vinden.
- Página 9 De instellingen voor de draadloze verbinding kunnen aangepast worden via ‘Setup’ – ‘Draadloos Netwerk Configureren’. Let op: De C54WMP zal standaard op zoek gaan naar een DHCP server. Als de C54WMP correct is ingesteld zal het IP adres onderin beeld getoond worden. Als het scherm: IP: 0.0.0.0 toont kan het apparaat geen DHCP server vinden.
- Página 10 Schakel de C54WMP in en ga naar ‘Setup’, ‘Draadloos Netwerk Configureren’. Plaats de USB Flash Drive in de USB poort van de C54WMP. De C54WMP zal de WCN instellingen automatisch detecteren en vragen of u deze wilt toepassen. Bevestig deze vraag. De instellingen worden opgeslagen.
-
Página 11: Handmatig Een Ip Adres Instellen Op De C54Wmp
Schakel de C54WMP in en ga naar ‘Setup’, ‘Draadloos Netwerk Configureren’. Plaats de USB Flash Drive in de USB poort van de C54WMP. De C54WMP zal de WCN instellingen automatisch detecteren en vragen of u deze wilt toepassen. Bevestig deze vraag. De instellingen worden opgeslagen. - Página 12 NEDERLANDS Als de DHCP functie is uitgeschakeld worden de standaard instellingen getoond. IP adres C54WMP : 192.168.1.50 Subnet masker : 255.255.255.0 Gateway adres : 192.168.1.1 (router als gateway) DNS (Dynamic Name Server) : 192.168.1.1 U kunt deze instellingen wijzigen naar uw eigen netwerkinstellingen door de opties te selecteren.
-
Página 13: De Wireless Media Player Gebruiken
NEDERLANDS 6. De Wireless Media Player gebruiken Als de configuratie van de C54WMP is voltooid wordt het hoofdmenu getoond met 4 opties: Music Selecteer Music om muziek af te spelen. Photo Selecteer Photo om foto’s te bekijken. Video Selecteer Video om video’s / films te bekijken. - Página 14 NEDERLANDS 6.2 Video De Conceptronic C54WMP ondersteund MPEG1, MPEG2 & MPEG4, VOB, AVI en andere video formaten. Met gebruik van de Media Server Software kan ‘transcoding’ gebruikt worden. De computer zal het geselecteerde videobestand realtime omzetten in een formaat wat door de Conceptronic C54WMP afgespeeld kan worden.
- Página 15 Gebruik de bedieningsknoppen (21) om door de films te bladeren en druk op de ‘Play’ (5) knop om het weergeven te starten. De C54WMP zal de film laden voor het afspelen begint. Dit kan enkele seconden duren en wordt aangegeven met een ‘Loading’ bericht.
- Página 16 NEDERLANDS Gebruik de Omhoog/Omlaag knoppen (21) om de lijst met videobestanden als onscreen tekst te laten zien. Druk op ‘OK’ (20) om het nieuw geselecteerde bestand af te spelen of druk op ‘Back’ (14) om de onscreen lijst te verbergen. Druk op de Links toets (21) kom terug te gaan naar het selectiemenu.
- Página 17 NEDERLANDS 6.3 Music gebruik: Als de optie ‘Music’ via het hoofdmenu of op de afstandsbediening (groene knop) is geselecteerd krijgt u een overzicht te zien van de beschikbare Media Servers (UPnP/AV) en/of de aangesloten USB apparaten. In het menu zijn diverse opties beschikbaar: Achtergrondmuziek (BGM).
- Página 18 NEDERLANDS De aangeboden muziekmappen kunnen variëren. Dit is afhankelijk van de geselecteerde Media Server. De meeste Media Servers bieden de volgende opties: Album, Artiest, Genre, Alle muziekbestanden. Selecteer de optie die u wilt gebruiken. Let op: Zorg dat de inhoud van uw Media Server is vernieuwd voor u deze selecteert via het menu. De inhoud wordt geïndexeerd en zonder een vernieuwing zullen nieuwe bestanden niet getoond worden.
- Página 19 De Achtergrondmuziek optie kan op 2 manieren worden gebruikt: Plaats muziek in de BGM lijst en speel deze af, of de BGM lijst wordt automatisch gespeeld als u de C54WMP aanzet. Dit werkt alleen als de nummers in de BGM lijst op een aangesloten USB apparaat staan.
- Página 20 Zorg ervoor dat deze URL correct wordt overgenomen. Wij adviseren om gebruik te maken van de SHOUTcast website voor het toevoegen van extra radio stations. (http://www.shoutcast.com). Er is geen directe SHOUTcast optie mogelijk via het ‘iRadio’ menu. De C54WMP heeft alleen directe toegang tot Live365.com.
- Página 21 NEDERLANDS Let op: De Conceptronic C54WMP beschikt over een Onscreen toetsenboard welke gebruikt kan worden voor het invoeren van URL’s of de namen van radio stations. Het Onscreen toetsenbord ondersteund alleen de standaard Latijnse karakters. Speciale karakters zoals áäñß worden niet ondersteund.
- Página 22 NEDERLANDS 6.4 Pictures gebruik: Als de optie ‘Photo’ via het hoofdmenu of op de afstandsbediening (gele knop) is geselecteerd krijgt u een overzicht te zien van de beschikbare Media Servers (UPnP/AV) en/of de aangesloten USB apparaten. Het apparaat onthoud standaard welke map het laatst is bezocht wanneer terug gegaan wordt naar het hoofdmenu via de ‘Home’...
- Página 23 Deze optie werkt alleen als er muziek aan de BGM optie is toegevoegd (Zie hoofdstuk 5.3). 7. Conceptronic Media (UPnP A/V) Server Installatie Voor u gebruik kunt maken van de Conceptronic C54WMP heeft u een UPnP A/V compatible Media Server nodig zoals de Conceptronic CH3SNAS, de CH3WNAS of een ander UPnP A/V apparaat.
- Página 24 “Volgende” om door te gaan. Klik op “Volgende” om te beginnen met de installatie van de software. Als de installatie gereed is kunt u de optie “Launch Conceptronic DMS” kiezen om de software direct te starten. Klik op “Voltooien” om het installatieprogramma af te sluiten.
- Página 25 NEDERLANDS Media Importeren In dit menu kunt u: • De Media Server starten. • De Media Server stoppen. • Een map met mediabestanden toevoegen. • Een of meerdere mappen verversen. • Een of meer gedeelde mappen verwijderen. Als er een nieuwe map met mediabestanden wordt toegevoegd zal deze automatisch doorzocht worden op afspeelbare mediabestanden.
- Página 26 Systeem U kunt de Server Naam wijzigen in een eigen naam. De Server Naam zal getoond worden op de TV als de C54WMP zoekt naar Media Servers. De gewijzigde naam zal actief worden als de server gestopt en gestart is.
- Página 27 Schakel de Transcoding optie in. Let op: Door middel van ‘transcoding’ is het mogelijk om mediabestanden die niet direct ondersteund worden door de C54WMP toch af te spelen. De kwaliteit van de gecodeerde media kan variëren. Scannen op de volgende...
- Página 28 Let op: Als een Media Server apparaat of software pakket niet gedetecteerd wordt door de Conceptronic C54WMP, controleer dan de mogelijkheden en configuratie van het betreffende apparaat/softwarepakket. Als het apparaat compatible is en correct geconfigureerd zal de C54WMP het apparaat tonen als beschikbare Media Server op uw TV.
- Página 29 NEDERLANDS 10. Systeem Configuratie Via de Systeem Configuratie kunt u de volgende instellingen wijzigen: Taal: OSD Taal (On Screen Display). Beschikbare talen : Engels, Spaans, Duits, Nederlands, Turks, Portugees, Italiaans, Frans. TV Mode Instellingen Selecteer de gewenste videoinstellingen TV Systeem : PAL of NTSC.
- Página 30 NEDERLANDS Beeldinstellingen Wijzig de TV instellingen. Helderheid, Contrast, Tint en Verzadiging instellingen. Photo Display Setup Selecteer de gewenste foto instellingen. Schermbeveiliging : Uit/Aan. Foto-weergave : Lijst/Voorbeeld. Slide Show Tijd : 2 tot 30 seconden, 1 minuut en 2 minuten. Schaal : Originele grootte, Aanpassen op schermformaat.
-
Página 31: Declaration Of Ce Conformity
Declaration of CE Conformity The manufacturer 2L International BV Address Databankweg 7 3821 AL Amersfoort, the Netherlands Hereby declares that the product Type 54MBPS WIRELESS MEDIA PLAYER/DMA Product C08-126 Complies with following directives: 1999/5/EEC R&TTE directive: Telecommunications Terminal Equipment and Satellite Earth Station Equipment 2004/108/EEC EMC directive:... -
Página 32: Package Contents
The enclosed Hardware Installation Guide gives you a step-by-step explanation of how to install the Conceptronic Wireless Media Player. When problems occur, we advise you to go to our support-site (go to www.conceptronic.net and click ‘Support’. Here you will find the Frequently Asked Questions Database. - Página 33 USB Host Connector for Firmware upgrades & expanding the usability of the device with Hard disk or USB Memory dongle. To play media the C54WMP must be connected to a network with a media server. The Conceptronic C54WMP supports the following media file formats: •...
- Página 34 ENGLISH 3. The Remote Control Explained...
- Página 35 ENGLISH KEYPAD FUNCTION DESCRIPTION POWER Activate/Exit the Standby Mode of the Wireless Media Player. MUTE Mute Audio. HOME Return to Main Menu. Fast rewind the media file during playback. 1. Play or Pause music file PLAY / PAUSE 2. Start Photo slideshow Fast forward the media file during playback.
- Página 36 Internet. Note: The Conceptronic C54WMP is using an UPnP A/V client to play audio and video. You need to have hardware with UPnP A/V Server functionality, a third party UPnP A/V Server application or install the provided Conceptronic Media Server software.
-
Página 37: Hardware Installation
You need to use the remote control to turn on/off the device. Turn on your TV and select the correct Video Channel. Your Conceptronic C54WMP will show the Conceptronic start-up screen when turning on the device. 5. First time setup & configuration... - Página 38 ENGLISH When you turn on the Conceptronic C54WMP (Digital Media Player) you need to configure it. The message displayed on your TV is asking in which language you want to use the device. After the language selection the C54WMP Adapter will initialize the network.
- Página 39 IP address on the bottom of the screen. If the screen is showing: IP: 0.0.0.0 the device could not find an IP address and you have to configure the C54WMP IP Network settings manually (Chapter 5.4).
- Página 40 IP address on the bottom of the screen. If the screen is showing: IP: 0.0.0.0 the device could not find an IP address and you have to configure the C54WMP IP Network settings manually (Chapter 5.4).
- Página 41 Turn on the C54WMP and go to ‘Setup’, ‘Wireless Setup’. Insert the USB flash drive in the USB port of the C54WMP. The C54WMP will auto detect the available WCN configuration files and will ask you if you want to apply the settings. Please confirm. The settings will be saved to the configuration.
- Página 42 Turn on the C54WMP and go to ‘Setup’, ‘Wireless Setup’. Insert the USB flash drive in the USB port of the C54WMP. The C54WMP will auto detect the available WCN configuration files and will ask you if you want to apply the settings. Please confirm. The settings will be saved to the configuration.
- Página 43 To save the settings in the memory of the C54WMP you have to press the left direction key (21) and you will be asked to save the changes or cancel the changes. Select ‘Save’.
- Página 44 Select Setup if you want to configure / change settings of the C54WMP. Note: Before you can play Music, Video or Photos, make sure you have a Media Server running. If you don’t have a Media Server running, please proceed to Chapter 7 for the Conceptronic Media Server Installation. 6.1 Quick Selecting With the Blue, Green, Yellow and Red buttons of your remote control it is easy to switch fast between the various playback options of the C54WMP.
-
Página 45: First Time Usage
ENGLISH 6.2 Video The Conceptronic C54WMP is supporting MPEG1, MPEG2 & MPEG4, video formats as well as VOB, AVI and other formats. With the Media Server Software it’s possible to use ‘transcoding’. This means that your computer will decode the video format in a format which can be used with the Conceptronic C54WMP. - Página 46 Use the direction keys (21) to browse through the movies and press the play (5) button to start the movie. After starting the movie, the Conceptronic C54WMP will load the movie. This can take a few seconds and is indicated with a loading message.
- Página 47 ENGLISH Use the Up / Down key (21) to display the video files as onscreen display. Press OK (20) to play the selected video file, or press “back” (14) button the close the file list. Press the Left (21) key for going back to the file selection menu. Zoom: use Zoom (12) to enlarge or shrink the screen.
- Página 48 ENGLISH In the main menu there are several options available: Background Music (BGM). Live 365. My Radio. Available Media Servers. By default the device will remember what is the last folder visited when pressing home for returning to the main menu when selecting Video, Music or Pictures again. You have to use the back button (left arrow key (21)) to return to the previous screen to select another folder or another UPnP AV/Source.
- Página 49 ENGLISH Some Media Servers offer: Album, Artists, Genre, all-tracks selections. Please select the feature you prefer. Note: Make sure you have refreshed the content of the media server when selecting the Media Server through the menu. Content will be indexed and without a refresh new music will not be shown.
- Página 50 There are 2 purposes for the background music: Put music in the BGM list and play it, or the Background music can auto start when turning on the C54WMP. This is only working when you select background music from a USB drive. Live365 We have added the Live365.com internet radio music service into the Conceptronic C54WMP.
- Página 51 SHOUTcast directory available through our iRadio menu. Only direct access to Live365.com is possible. Note: The Conceptronic C54WMP has a built in On Screen Keyboard which can be used to enter the URL’s and names of radio stations. Only basic Latin characters are supported. Special characters from Latin Extended character...
- Página 52 ENGLISH 6.4 Pictures First time usage: If you select ‘Pictures’ through the start menu or from your remote control (yellow button) you will see a screen with an overview of available Media-Servers (UPnP/AV) and/or the connected USB device. By default the device will remember what is the last folder visited when pressing home for returning to the main menu when selecting Video, Music or Pictures again.
- Página 53 ENGLISH If you select a Media Server device it will show you available folders. The folders shown are provided by the Media Server. It is possible that in some situations not all offered folders have functionality. This depends on the used Media Server. The pictures option and the folders you select work as a filter.
- Página 54 Chapter 5.3) 7. Conceptronic Media (UPnP A/V) Server installation Before you can use the Conceptronic C54WMP you need to install an UPnP A/V compatible Server such as the Conceptronic CH3SNAS or CH3WNAS hard disk enclosures or any other UPnP A/V device.
- Página 55 ENGLISH Click “Next” to start the installation of the application. You will be notified when the installation is finished. If you want to launch the Conceptronic Media Server directly after installation, check the checkbox “Launch Conceptronic DMS”. Click “Finish” to exit the installation program.
- Página 56 ENGLISH System You can change the Server Name into a server name you desire. The server name will be shown on your screen when detecting Media Servers through your player setup. The changed server name will be active when you stop the server and start it again.
- Página 57 Transcoding Setting Select the transcoding quality. 9. Alternative Media Servers You can use alternative media servers with the Conceptronic C54WMP if the server is UPnP A/V 1.0 compatible. Microsoft Windows XP and Windows Vista Microsoft Windows XP and Windows Vista offer a Media Server through the Windows Media Player.
- Página 58 If a Media Server device or software package cannot be detected by the Conceptronic C54WMP, please check the capabilities and setup of that particular device/software package. When the device is compatible and setup correctly our C54WMP will show the device as selectable device on your TV system.
-
Página 59: System Setup
ENGLISH 10. System Setup Through the system setup menu you can change: Language: OSD Language (On Screen Display). Available languages : English, Spanish, German, Dutch, Turkish, Portuguese, Italian, French. TV Mode Setup Select the desired video setup TV System : PAL or NTSC. TV Output : P-Scan: YPbPr, S-Video, Interlace YUV. - Página 60 ENGLISH Video Setup Adjust the desired TV screen display. Brightness, Contrast, Hue & Saturation settings. Photo Display Setup Select the desired Photo properties. Screen saver : On/Off. Photo display setup : List/Thumbnail. Slide Show Time : 2 to 30 seconds, 1 minute and 2 minutes. Background music (BGM) : Off, Repeat one, Repeat all.
-
Página 61: Declaration Of Ce Conformity
Declaration of CE Conformity The manufacturer 2L International BV Address Databankweg 7 3821 AL Amersfoort, the Netherlands Hereby declares that the product Type 54MBPS WIRELESS MEDIA PLAYER/DMA Product C08-126 Complies with following directives: 1999/5/EEC R&TTE directive: Telecommunications Terminal Equipment and Satellite Earth Station Equipment 2004/108/EEC EMC directive:... -
Página 62: Contenido Del Paquete
Conceptronic. En caso de surgir cualquier problema, visite nuestra página web de asistencia técnica (haga clic en el apartado “Soporte” de www.conceptronic.net). Aquí encontrará la base de datos de las preguntas más frecuentes o FAQ. Si tiene otras preguntas sobre el producto que no figuran en nuestro sitio web, póngase en contacto con nosotros por correo electrónico: apoyo@conceptronic.net... -
Página 63: Características
Conector Host USB para poder actualizar el firmware y expandir las posibilidades del equipo con un disco duro o una memoria USB. Para reproducir contenidos multimedia debe conectar el C54WMP a una red con un servidor multimedia. El C54WMP de Conceptronic es compatible con los siguientes formatos multimedia: •... - Página 64 ESPAÑOL 3. Descripción del mando a distancia...
- Página 65 ESPAÑOL Núm TECLA DESCRIPCIÓN DE SU FUNCIÓN POWER Activa o sale del modo Standby del reproductor inalámbrico multimedia. MUTE Función de silencio. HOME Vuelve al menú principal. Rebobinado rápido del archivo durante su reproducción. 1. Reproduce o pausa un archivo de música PLAY / PAUSE 2.
-
Página 66: Conectar El C54Wmp A Su Red Y Televisor
Internet como por ejemplo escuchar una emisora de radio que emita por Internet. Nota: El C54WMP de Conceptronic utiliza un cliente UPnP A/V para reproducir audio y vídeo. Se necesita hardware con funcionalidad de servidor UPnP A/V, o una aplicación de servidor UPnP A/V, o instalar el software de servidor multimedia Conceptronic proporcionado. -
Página 67: Instalación Del Hardware
Necesitará utilizar el mando a distancia para encender o apagar el dispositivo. Encienda su televisor y seleccione el canal de video adecuado. Cuando encienda su C54WMP de Conceptronic se mostrará la pantalla de inicio. 5. Instalación y primera configuración Nota: En este manual utilizamos algunas direcciones IP para explicar las características y... - Página 68 ESPAÑOL Después de haber seleccionado el idioma, el adaptador del C54WMP inicializará la red. Automáticamente aparecerá el asistente para la configuración de red. También puede acceder a este menú desde el menú de configuración seleccionando “Asistente de red” Seleccione el tipo de conexión que utilizará: “Wired” (con cable) o “Wireless” (inalámbrico).
-
Página 69: Configuración De La Conexión Con Cable
El indicador de potencia de la señal tiene 3 colores: rojo, amarillo y verde. Si el indicador está en verde, significa que dispone de la mejor conexión posible entre el C54WMP y su punto de acceso. El amarillo significa aceptable para un uso normal, y el rojo significa que debe cambiar la orientación del C54WMP o de su punto de acceso. -
Página 70: Uso De Windows Connect Now 2.0 Con El C54Wmp De Conceptronic
Nota: El C54WMP por defecto buscará un servidor DHCP. Si el C54WMP está configurado correctamente, verá una dirección IP en la parte inferior de la pantalla. Si la pantalla muestra: IP: 0.0.0.0, significa que el dispositivo no pudo encontrar ninguna dirección IP y deberá... - Página 71 USB. Windows XP Con Microsoft Windows XP puede configurar el C54WMP mediante el WCN de la siguiente manera: Vaya a “Inicio” y luego a “Mis sitios de red”. Se mostrarán las redes disponibles. Seleccione la opción “Configurar una red inalámbrica...” en la parte izquierda de la ventana.
-
Página 72: Configuración Manual De La Dirección Ip Del C54Wmp
Windows Vista Con Microsoft Windows Vista puede configurar el C54WMP mediante WCN de la siguiente manera: Vaya a “Inicio” y a continuación a “Red”. Haga clic en el botón “Añadir dispositivo inalámbrico” situado en la parte superior de la ventana. - Página 73 él. Para acceder al siguiente campo, pulse “OK”. Para guardar la configuración en la memoria del C54WMP debe pulsar la tecla de dirección “izquierda” (21) y se le preguntará si quiere guardar o cancelar los cambios. Seleccione “Save”...
-
Página 74: Utilización Del Reproductor Multimedia Inalámbrico
Video Seleccione “Video” si desea ver películas o vídeos. Setup Seleccione “Setup” si desea configurar o cambiar alguna configuración del C54WMP. Nota: Antes de poder reproducir música, vídeo o ver fotos, deberá tener un servidor multimedia activo. Si no tiene un servidor multimedia activo, vea el Capítulo 7 para instalar el servidor multimedia de Conceptronic. -
Página 75: Primera Utilización
El C54WMP de Conceptronic es compatible con los formatos de vídeo MPEG1, MPEG2 y MPEG4, VOB, AVI y otros formatos. Con el software de servidor multimedia podrá utilizar la característica “transcoding”. Esto significa que su PC decodificará el formato de vídeo hacia un formato que su C54WMP de Conceptronic pueda utilizar. Primera utilización: Si selecciona “Video”... - Página 76 Utilice las teclas de dirección (21) para seleccionar una película y pulse el botón “Play” (5) para su reproducción. Espere unos segundos mientras el C54WMP de Conceptronic carga la película. El proceso puede tardar unos segundos, y será indicado mediante el siguiente mensaje: Nota: El tiempo de carga depende de la calidad de la conexión y del servidor multimedia.
- Página 77 ESPAÑOL Utilice “Prev” (8) para seleccionar el archivo de vídeo anterior. Utilice “Next” (9) para seleccionar el archivo de vídeo siguiente. Si una carpeta contiene muchos archivos de vídeo, puede ir de una página a otra utilizando las teclas “Prev” (8) o “Next” (9). Utilice las teclas “Arriba”...
- Página 78 ESPAÑOL 6.3 Música Primera utilización: Si selecciona “Música” en el menú principal o mediante el botón verde del mando a distancia, verá una pantalla que mostrará los servidores multimedia disponibles (UPnP/AV) y los dispositivos USB conectados. En el menú principal hay disponibles varias opciones: Background Music (BGM) (Música de fondo).
- Página 79 ESPAÑOL Las carpetas disponibles para seleccionar y reproducir música depende del tipo, marca y versión del software del servidor multimedia. Algunos servidores multimedia ofrecen: álbum, artista, género, selección de todas las pistas... Seleccione la característica deseada. Nota: Asegúrese de haber actualizado el contenido del servidor multimedia cuando seleccione el servidor mediante el menú, ya que se mostraría el contenido pero no los nuevos archivos de música.
- Página 80 C54WMP. Esta característica sólo funcionará si selecciona música de fondo de un dispositivo USB. Live365 Hemos añadido el servicio Live365.com de radio y música por Internet al C54WMP de Conceptronic. Para reproducir emisoras de radio de Internet deberá disponer de una conexión de red (LAN/WLAN) para poder conectarse a Internet.
- Página 81 ESPAÑOL Puede activar la casilla “Remember my password” (recordar contraseña) para que se le recuerde su información personal, de forma que no tenga que introducir de nuevo su nombre de usuario y contraseña la próxima vez que utilice esta característica. Puede añadir hasta 99 emisoras de radio favoritas en “My Radio”...
- Página 82 ESPAÑOL Nota: El C54WMP de Conceptronic incorpora una utilidad de “teclado en pantalla” para poder introducir las direcciones URL y los nombres de las emisoras de radio. Sólo incorpora los caracteres Latin básicos; los caracteres especiales de Latin Extended como áäñß no están...
- Página 83 ESPAÑOL 6.4 Imágenes Primera utilización: Si selecciona “Pictures” (Imágenes) en el menú principal o mediante el botón amarillo del mando a distancia, verá una pantalla que mostrará los servidores multimedia disponibles (UPnP/AV) y los dispositivos USB conectados. Por defecto, el dispositivo recordará cuál fue la última carpeta visitada cuando vuelva a pulsar la tecla “Home”...
-
Página 84: Mostrar Imágenes
BGM (Consulte el capítulo 5.3). 7. Instalación del servidor multimedia (UPnP A/V) de Conceptronic Antes de poder utilizar el C54WMP de Conceptronic necesitará instalar un servidor UPnP A/V compatible como los discos duros externos CH3SNAS o CH3WNAS o cualquier otro dispositivo UPnP A/V. - Página 85 Conceptronic después de su instalación, active la casilla “Iniciar el DMS Conceptronic”. Haga clic en “Finalizar” para salir del programa de instalación. El software multimedia de Conceptronic está instalado en su ordenador. Puede acceder a él a través de la carpeta Conceptronic en la sección Programas del Menú Inicio.
-
Página 86: Configuración Del Servidor Multimedia De Conceptronic
ESPAÑOL 8. Configuración del servidor multimedia de Conceptronic Sección “Media files” Después de importar archivos a la base de datos del servidor multimedia, aquí verá la lista de todos los archivos detectados. Sección “Media Import” En esta sección podrá: •... - Página 87 ESPAÑOL Sección “System” Puede cambiar el nombre del servidor por el nombre que usted desee. El nombre del servidor aparecerá en pantalla cuando se estén detectando servidores multimedia desde un reproductor. El nuevo nombre del servidor será activo una vez haya detenido e iniciado de nuevo el servidor. Opciones En esta sección puede cambiar las opciones de configuración del software del servidor multimedia.
-
Página 88: Otros Servidores Multimedia
Reproductor de Windows Media. Inicie el Reproductor de Windows Media, seleccione “Herramientas”, “Biblioteca Multimedia” y “Configurar compartir”. Aquí puede permitir el acceso y personalizar la configuración del C54WMP de Conceptronic. Mediante la opción “Supervisar carpetas” podrá agregar o quitar contenido que quiera compartir. -
Página 89: Otro Software
: www.orb.com Nota: Si el C54WMP de Conceptronic no puede detectar un servidor multimedia o un paquete de software determinado, compruebe las compatibilidades y la correcta instalación de ese dispositivo o software. Cuando el dispositivo es compatible y está correctamente instalado,... -
Página 90: Configuración Del Sistema
ESPAÑOL 10. Configuración del sistema Mediante el menú de configuración del sistema podrá cambiar los siguientes elementos: Language (Idioma): OSD Language (Idioma OSD) (Visualización en pantalla). Idiomas disponibles: Inglés, español, alemán, neerlandés, turco, portugués, italiano, francés. TV Mode Setup (Configuración del modo de TV) Seleccione la configuración de vídeo deseada. -
Página 91: Configuración De Presentación De Fotos
ESPAÑOL Configuración de vídeo Ajuste cómo desea ver la imagen en pantalla. Brightness (brillo), Contrast (contraste), Hue (color) y Saturation (saturación). Configuración de presentación de fotos Seleccione las propiedades de imagen deseadas. Screen saver (Protector de pantalla): Activado / desactivado. Photo display setup (vista de imágenes): Lista / Mosaico. -
Página 92: Declaración De Conformidad
Declara mediante este documento que el producto Tipo 54MBPS WIRELESS MEDIA PLAYER/DMA Producto C08-126 Marca Conceptronic Cumple con las siguientes directivas: Directiva 1999/5/EEC R&TTE (transpuesta a la legislación española mediante RD 1890/2000): Equipos terminales de telecomunicación y equipos de estaciones terrestres de comunicaciones por satélite Directiva EMC 2004/108/CE EMC Directiva 2004/108/EEC EMC (transpuesta a la legislación... - Página 93 Conceptronic Wireless Media Player installiert werden muss. Sollten irgendwelche Probleme auftreten, empfehlen wir ihnen, auf unsere Support-Seite im Internet zu gehen (www.conceptronic.net) und auf 'Support’ zu klicken. Dort werden sie die "Frequently Asked Questions" Datenbank finden. Falls sie andere Fragen zu ihrem Produkt haben und sie diese nicht auf unserer Website finden können, kontaktieren sie uns bitte per E-Mail: support@conceptronic.net...
- Página 94 Einfaches Menü für Einrichtung und Konfiguration • USB-Host-Anschluss für Firmware-Upgrades und den Ausbau der Gerätfunktionen mit Festplatten- oder USB-Speicher-Dongle Für die Wiedergabe von Media-Dateien muss der C54WMP über ein Netzwerk mit einem Media-Server verbunden sein. Der Conceptronic C54WMP unterstützt die folgenden Media-Dateiformate: •...
- Página 95 DEUTSCH 3. Erläuterungen zur Fernbedienung...
- Página 96 DEUTSCH TASTE FUNKTIONSBESCHREIBUNG POWER Aktivieren/Beenden des Standy-Modus des Wireless Media Players MUTE Stummschalten von Audio HOME Zurückkehren ins Hauptmenü Schnellrücklauf von Media-Dateien während der Wiedergabe 1. Wiedergabe / Anhalten einer Musik-Datei PLAY / PAUSE 2. Starten von Diashows Schnellvorlauf von Media-Dateien während der Wiedergabe STOP Anhalten der gegenwärtigen Wiedergabe 1.
- Página 97 Wenn Sie Streaming-Dienste nutzen und z.B. Radiosender hören möchten, die über das Internet ausgestrahlt werden, ist es vorteilhaft, wenn Sie eine Breitband-Internetverbindung haben. Hinweis: Der C54WMP von Conceptronic verwendet einen UPnP A/V-Client für die Wiedergabe von Audio und Video. Sie benötigen Hardware mit UPnP A/V-Server-Funktion oder eine UPnP A/V-Server Anwendung von einem anderen Unternehmen oder müssen die im Lieferumfang...
-
Página 98: Installation Der Hardware
Die Fernbedienung wird mit 2 AAA Batterien betrieben (im Lieferumfang enthalten). Sie müssen zum Ein-/Ausschalten des Geräts die Fernbedienung verwenden. Schalten Sie Ihren Fernseher ein und wählen Sie den richtigen Videokanal. Ihr Conceptronic C54WMP zeigt nach Einschalten des Geräts den Startbildschirm an. 5. Erste Einrichtung und Konfiguration Hinweis: In diesem Handbuch verwenden wir bestimmte IP-Adressen, um die Eigenschaften und Funktionen des Conceptronic C54WMP zu erklären. - Página 99 DEUTSCH Nach dem Einschalten des Conceptronic C54WMP (Digital Media Player) müssen Sie das Gerät konfigurieren. Auf dem Bildschirm Ihres Fernsehers erscheint eine Meldung mit der Frage, in welcher Sprache Sie das Gerät verwenden möchten. Nachdem Sie die Sprache ausgewählt haben, initialisiert der C54WMP Adapter das Netzwerk.
- Página 100 Verbindung zwischen dem C54WMP und Ihrem Access Point. Gelb ist akzeptabel für die normale Verwendung. Wenn die Signalstärke des Access Points rot ist, ist es vorteilhaft, die Position des C54WMP oder des Access Points zu ändern. Hinweis: Es ist nicht empfehlenswert, Filme mit hohen Bandbreitenströmen wiederzugeben, wenn die Anzeige auf rot oder gelb steht.
- Página 101 DEUTSCH Wenn Sie in Ihrem Access Point Verschlüsselungseinstellungen vorgenommen haben, müssen Sie für den C54WMP dieselben Einstellungen, mit denen Sie Ihren Access Point konfiguriert haben, verwenden. Der C54WMP erkennt automatisch, welche Wireless-Konfiguration für die Verbindung mit einem Access Point erforderlich ist. Wenn der Access Point mit WPA verschlüsselt ist, erkennt das Gerät dies und Sie müssen lediglich den Private Shared Key (PSK) eingeben.
- Página 102 Schalten Sie den C54WMP ein und gehen Sie zu ‘Einstellungen’ [Setup], ‚Wireless-Einstellungen’ [Wireless Setup]. Geben Sie das USB-Flashlaufwerk in den USB-Port des C54WMP ein. Der C54WMP erkennt automatisch die verfügbaren WCN-Konfigurationsdateien und fragt Sie, ob Sie die Einstellungen übernehmen wollen. Bestätigen Sie dies. Die Einstellungen werden für die Konfiguration gespeichert. Entfernen Sie das USB-Flashlaufwerk.
- Página 103 Nachdem die Einstellungen gespeichert sind, klicken Sie auf ‚Close’ [Schließen] und entfernen Sie das USB-Flashlaufwerk vom Computer. Schalten Sie den C54WMP ein und gehen Sie zu ‘Setup’ [Einstellungen], ‚Wireless Setup [Wireless- Einstellungen]. Führen Sie das USB-Flashlaufwerk in den USB-Port des C54WMP ein. Der C54WMP erkennt automatisch die verfügbaren WCN-Konfigurationsdateien und fragt Sie, ob Sie die Einstellungen...
- Página 104 DEUTSCH 5.4 Manuelle Einstellung der IP-Adresse für den C54WMP Sie müssen die IP-Adresse des C54WMP manuell einstellen, wenn in Ihrem Netzwerk kein DHCP- Server vorhanden ist. Drücken Sie Setup (29) auf der Fernbedienung oder wählen Sie das Setup-Symbol im Hauptmenü auf dem Bildschirm.
- Página 105 Einstellungen und drücken Sie erneut ‚OK’, um zum nächsten Feld zu gehen. Sie müssen die Richtungstaste 'Links' (21) drücken, um die Einstellungen auf dem C54WMP zu speichern. Sie werden gefragt, ob Sie die Änderungen speichern oder löschen möchten. Wählen Sie ‚Speichern’...
- Página 106 Der Conceptronic C54WMP unterstützt MPEG1, MPEG2 und MPEG4, Videoformate und VOB, AVI sowie andere Formate. Mit der Media Server Software können Sie die ‚Transcodierungs’-Funktion verwenden. Das bedeutet, dass Ihr Computer die Videoformate in ein Format decodiert, das der Conceptronic C54WMP lesen kann. Erstmalige Verwendung: Wenn Sie über das Startmenü...
- Página 107 Durchsuchen Sie mithilfe der Richtungstasten (21) die Filme und drücken Sie die Taste Play (5), um den gewünschten Film zu starten. Nachdem Sie den Film gestartet haben, lädt der Conceptronic C54WMP diesen. Dies kann einige Sekunden dauern und es erscheint eine entsprechende Meldung.
- Página 108 Hinweis: Wenn die Taste ‘Rew’ oder ‘FF’ gedrückt wird, hält möglicherweise das Bild an. Der C54WMP führt den Rücklauf oder Schnellvorlauf des Videos im Hintergrund durch. Drücken Sie die Taste ‚Play’ (5), um die Wiedergabe wieder aufzunehmen. Drücken Sie die Taste ‚Prev’ (7), um die vorherige Videodatei auszuwählen.
- Página 109 DEUTSCH 6.3 Musik Erstmalige Verwendung: Wenn Sie über das Startmenü oder über die Fernbedienung (grüne Taste) ‚Music’ wählen, erscheint ein Bildschirm mit einem Überblick über alle verfügbaren Media Server (UPnp/AV) und/oder die verbundenen USB-Geräte. Im Hauptmenü stehen verschiedenen Optionen zur Verfügung: Hintergrundmusik (BGM).
- Página 110 DEUTSCH Welcher Ordner für die Auswahl und Wiedergabe von Musik verfügbar ist, hängt von der Art, Marke und Software-Version Ihres Media Servers ab. Einige Media Server bieten die Optionen Album, Interpret, Genre, alle Titel. Wählen Sie die gewünschte Option. Hinweis: Stellen Sie sicher, dass Sie den Inhalt des Media Servers aktualisiert haben, wenn Sie den Media Server über das Menü...
- Página 111 Es gibt zwei Optionen für die Hintergrundmusik: Sie können Musiktitel der HGM-Liste hinzufügen und diese wiedergeben, oder die Hintergrundmusik kann automatisch gestartet werden, wenn der C54WMP eingeschaltet wird. Dies funktioniert nur dann, wenn Sie Hintergrundmusik aus einem USB-Laufwerk wählen. Live365 Wir haben die Option Internetradio Live365.com dem Conceptronic C54WMP hinzugefügt.
- Página 112 DEUTSCH Sie können das Kästchen aktivieren, damit Ihre Informationen für zukünftige Anwendungen gespeichert werden. So müssen Sie nicht jedes Mal Ihren Benutzernamen und Ihr Passwort erneut eingeben, wenn Sie diese Funktion verwenden möchten. Sie können bis zu 99 Sender unter ‚Radio’ [My Radio] hinzufügen, indem Sie die Taste ‚BGM’ (25) drücken und ‚Hinzufügen’...
- Página 113 DEUTSCH Hinweis: Der Conceptronic C54WMP hat eine integrierte Onscreen-Tastatur, über die Sie die URLs und Namen der Radiosender eingeben können. Es werden nur lateinische Grundbuchstaben unterstützt. Sonderzeichen aus den erweiterten lateinischen Buchstaben wie áäñß werden nicht unterstützt.
- Página 114 DEUTSCH 4.4 Bilder Erstmalige Verwendung: Wenn Sie über das Startmenü oder über die Fernbedienung (blaue Taste) ‚Bilder’ [Pictures] wählen, erscheint ein Bildschirm mit einem Überblick über alle verfügbaren Media Server (UPnp/AV) und/oder die verbundenen USB-Geräte. Standardmäßig erinnert sich das Gerät daran, welcher Ordner zuletzt aufgerufen wurde, sobald Sie ‚Home’...
- Página 115 DEUTSCH Hinweis: Stellen Sie sicher, dass Sie den Inhalt des Media Servers aktualisiert haben, wenn Sie den Media Server über das Menü auswählen. Die Inhalte werden indiziert und falls keine Neuanzeige (Aktualisierung) durchgeführt wurde, werden neue Bilder nicht angezeigt. Bilder anzeigen Um Bilder anzuzeigen: Wählen Sie einen Media Server, wählen Sie das Bilder-Untermenü...
- Página 116 DEUTSCH 7. Installation des Conceptronic Media (UPnP A/V) Servers Bevor Sie den Conceptronic C54WMP verwenden können, müssen Sie einen UPnP A/V-kompatiblen Server wie die Conceptronic Festplattengehäuse CH3SNAS oder CH3WNAS oder ein anderes UPnP A/V-Gerät installieren. Die im Lieferumfang enthaltene CD-ROM enthält das Media Server Software-Programm von Conceptronic.
- Página 117 Sie das Kästchen „Conceptronic DMS starten“. Klicken Sie auf „Fertigstellen“, um das Installationsprogramm zu schließen. Damit ist die Conceptronic Media Software auf Ihrem Computer installiert. Sie können auf diese über den Conceptronic-Ordner unter Programme im Startmenü zugreifen. 8. Konfiguration des Conceptronic Media Servers Media-Datei-Seite Nachdem Sie Dateien auf die Datenbank des Media Servers importiert haben, können Sie einen...
- Página 118 DEUTSCH System Sie können den Namen des Servers in einen beliebigen Namen ändern. Der Server-Name wird auf dem Bildschirm angezeigt, wenn über Ihre Player-Einstellungen Media Server entdeckt werden. Der geänderte Server-Name wird aktiv, wenn Sie den Server stoppen und wieder starten.
- Página 119 Server Software durchsucht werden. Transcoding Setting [Transcodierungs-Einstellungen] Auswahl der Transcodierungs-Qualität. 9. Alternative Media Server Sie können mit dem Conceptronic C54WMP auch andere Media Server verwenden, vorausgesetzt, diese sind UPnP A/V 1.0-kompatibel. Microsoft Windows XP und Windows Vista Microsoft Windows XP und Windows Vista bieten einen Media Server über den Windows Media Player.
- Página 120 Wenn ein Media Server-Gerät oder Softwarepaket vom Conceptronic C54WMP nicht erkannt wird, überprüfen Sie bitte die Kapazitäten und Einstellungen des betreffenden Geräts/Softwarepakets. Wenn das Gerät kompatibel und korrekt eingestellt ist, zeigt der Conceptronic C54WMP das Gerät als auswählbares Gerät auf Ihrem Fernsehbildschirm an.
-
Página 121: Systemeinstellungen
DEUTSCH 10. Systemeinstellungen Über das Systemeinstellungsmenü können Sie Folgendes ändern: Sprache: Auf dem Bildschirm angezeigte Sprache (Onscreen-Display). Verfügbare Sprachen : Englisch, Spanisch, Deutsch, Niederländisch, Türkisch, Portugiesisch, Italienisch, Französisch. Einstellungen TV-Modus Wählen Sie die gewünschten Video-Einstellungen. TV-System : PAL oder NTSC. TV-Ausgang : P-Scan: YPbPr, S-Video, Interlace YUV. -
Página 122: Video-Einstellungen
DEUTSCH Video-Einstellungen Einstellen der gewünschten TV-Bildschirmanzeige. Helligkeits-, Kontrast-, Farbton- und Sättigungseinstellungen. Einstellungen Fotoanzeige Auswahl der gewünschten Fotoeigenschaften. Bildschirmschoner : Ein/Aus. Einstellungen Fotoanzeige : Liste/Minibilder. Zeit Diashow : 2 bis 30 Sekunden, 1 Minute und 2 Minuten. Hintergrundmusik (HGM). : Aus, einen wiederholen, alle wiederholen. Skalieren : Originalgröße, an Fenstergröße angepasst. -
Página 123: Ce-Konformitätserklärung
CE - Konformitätserklärung Der Hersteller 2L International BV Adresse Databankweg 7 3821 AL Amersfoort, Niederlande erklärt hiermit, dass das Produkt 54MBPS WIRELESS MEDIA PLAYER/DMA Produkt C08-126 den folgenden Richtlinien entspricht: 1999/5/EWG R&TTE-Direktive: Telekommunikations-Endgerät und Satellitenbodenstation 2004/108/EWG EMV-Richtlinie: Elektromagnetische Verträglichkeit 73/23/EWG Niederspannungs-Richtlinie Elektrische Betriebsmittel zur Verwendung innerhalb bestimmter Spannungsgrenzen... -
Página 124: Contenu Du Coffret
En cas de doute, nous vous conseillons de vous reporter à notre site de support technique (sur www.conceptronic.net en cliquant sur « Support ». Vous y trouverez la base de donnée de la Foire aux Questions (FAQ, Frequently Asked Questions). - Página 125 WMA jusqu'à 192 Kbps ou VBR. • fichiers audio WAV. D'autres fichiers peuvent être lus avec un serveur multimédia avec des fonctions de transcodage. Avec l'aide de votre PC le fichier sera décodé en temps réel sur un format utilisable par le C54WMP de Conceptronic.
- Página 126 FRANÇAIS 3. Explication de la télécommande...
- Página 127 FRANÇAIS CLAVIER DESCRIPTION DE LA FONCTION POWER Activer/Sortir du mode Veille du Lecteur Multimédia Sans Fils. MUTE Mettre le son en mode muet. HOME Revenir au Menu Principal. Rembobinage rapide du fichier multimédia pendant la lecture. 1. Lecture ou Pause du fichier de musique. PLAY / PAUSE 2.
- Página 128 écouter une station de radio diffusée sur Internet. Remarque: Le C54WMP de Conceptronic utilise un client A/V UPnP pour lire les fichiers audio et vidéo. Vous devez disposer des hardwares avec une fonction Serveur A/V UpnP, une application de Serveur A/V tiers UPnP ou installer le logiciel Media Server de Conceptronic.
- Página 129 La télécommande utiliser 2 piles AAA (fournies). Vous devez utiliser la télécommande pour allumer/éteindre l'appareil. Allumez votre poste de TV et sélectionnez la Chaîne Vidéo. Votre C54WMP de Conceptronic affiche un écran de démarrage de Conceptronic lorsque vous allumez l'appareil.
- Página 130 FRANÇAIS Après sélection de la langue, l’Adaptateur du C54WMP initialisera le réseau. Le gestionnaire de configuration du réseau se lancera alors automatiquement. Vous pouvez également accéder à ce menu via le menu d’installation (sélectionnez ‘Network Wizard’(‘Gestionnaire de Réseau’)). Sélectionnez le Type de Connexion préférée : "Wired’[Câblée] ou "Wireless’. [Sans Fils] Remarque: Lorsque vous utilisez des transmissions de données sur bande large, nous vous...
- Página 131 C54WMP et votre point d'accès. Un indicateur jaune est acceptable pour une utilisation normale et lorsque la force du signal du point d'accès est rouge, cela signifie que vous devez changer la position de votre C54WMP ou de votre point d'accès.
-
Página 132: Utiliser Windows Connect Now 2.0 Avec C54Wmp De Conceptronic
FRANÇAIS La partie sans fils du C54WMP détecte automatiquement quel type de configuration est nécessaire pour se connecter vers un point d'accès. Si les points d'accès sont cryptés avec WPA, l'appareil le détecte et vous n'avez qu'à entrer la clé partagée privée (PSK). - Página 133 Allumez le C54WMP et allez dans "Configuration", "Configuration Sans Fils". Insérez la clé USB dans le port USB du C54WMP. Le C54WMP détectera automatiquement les fichiers de configuration WCN et vous demandera si vous voulez appliquer les paramètres. Veuillez confirmer.
- Página 134 Allumez le C54WMP et allez dans "Configuration", "Configuration Sans Fils". Insérez la clé USB dans le port USB du C54WMP. Le C54WMP détectera automatiquement les fichiers de configuration WCN et vous demandera si vous voulez appliquer les paramètres. Veuillez confirmer.
- Página 135 "OK" pour aller au champ suivant. Pour enregistrer les paramètres dans la mémoire du C54WMP, vous devez appuyer sur la touche de direction gauche (21) ; le système vous demande alors d'enregistrer les modifications ou de les...
- Página 136 Sélectionnez Video si vous voulez voir des films / vidéos. Setup Sélectionnez Setup si vous voulez configurer / modifier les paramètres du C54WMP. Remarque: Avant de lire de la Musique, de la Vidéo ou des Photos, vérifiez que le Serveur Multimédia fonctionne bien.
-
Página 137: Première Utilisation
Le C54WMP de Conceptronic supporte les formats MPEG1, MPEG2 et MPEG4 ainsi que VOB, AVI et d'autres formats. Avec le Software du Serveur Multimédia, il est possible d'utiliser le "transcodage". Ceci signifie que votre ordinateur décodera le format vidéo dans un format qui pourra être utilisé avec le C54WMP de Conceptronic. Première utilisation : Si vous sélectionnez "Video", dans le menu de démarrage ou sur votre télécommande (touche bleue),... -
Página 138: Fonctions De Lecture Vidéo
Utilisez les touches de direction (21) pour naviguer dans les films et appuyez sur la touche Play (5) pour faire démarrer le film. Lorsque le film a démarré, le C54WMP de Conceptronic charge le film. Cela peut prendre quelques secondes, la durée est indiquée par un avis de chargement en cours. - Página 139 FRANÇAIS Utilisez Prev (7) pour sélectionner le fichier vidéo précédent. Utilisez Next (8) pour sélectionner le fichier vidéo suivant. Si un répertoire contient plusieurs fichiers vidéo, vous pouvez naviguer dans les pages en utilisant les touches Prev (8) ou Next (9). Utilisez la touche Up/Down (21) pour afficher les fichiers vidéo comme affichage à...
- Página 140 FRANÇAIS Dans le menu principal plusieurs options sont disponibles : Musique de Fond (BGM). Live 365. My Radio. Serveurs Multimédias Disponibles. Par défaut le dispositif se souvient du dernier répertoire visité lorsque vous appuyez sur home pour revenir au menu principal ou lorsque vous sélectionnez de nouveau Video, Music ou Pictures. Vous devez utiliser le bouton retour (touche fléchée à...
- Página 141 FRANÇAIS Le répertoire affiché pour sélectionner et lire de la musique dépend du type, de la marque ou de la version du software de votre Serveur Multimédia. Certains Serveurs Multimédias proposent : les sélections Album, Artistes, Genre, toutes pistes. Veuillez sélectionner la fonction que vous préférez. Remarque: Vérifiez que le contenu du serveur multimédia a bien été...
- Página 142 à partir d'un lecteur USB. Live365 Nous avons ajouté le service de musique par radio sur Internet Live365.com dans le C54WMP de Conceptronic. Pour lire des stations de radio d'Internet, vous devez disposer d'une connexion de réseau (LAN/WLAN) qui peut se connecter à...
- Página 143 FRANÇAIS Vous pouvez sélectionner la case à cocher pour rappeler vos informations personnelles. De cette manière vous n'aurez plus à entrer votre nom d'utilisateur et votre mot de passe la prochaine fois que vous utiliserez ce site. Vous pouvez ajouter jusqu'à 99 stations préférées sur "My RAdio" en appuyant sur la touche BGM (25); puis sélectionnez "Add".
- Página 144 FRANÇAIS Remarque: Le C54WMP de Conceptronic a un Clavier à l'Écran intégré qui peut être utilisé pour entrer les URL et les noms des stations de radio. Seuls les caractères latins basiques sont supportés. Les caractères spéciaux des feuilles de caractères Latin Extended comme áäñß ne sont pas supportés.
- Página 145 FRANÇAIS 6.4 Photos Première utilisation: Si vous sélectionnez "Pictures", dans le menu de démarrage ou sur votre télécommande (touche jaune), vous voyez un écran avec un aperçu des Serveurs Multimédias disponibles (UPnP/AV) et/ou le dispositif USB connecté. Par défaut le dispositif se souvient du dernier répertoire visité lorsque vous appuyez sur home pour revenir au menu principal lorsque vous sélectionnez de nouveau Video, Music ou Pictures.
-
Página 146: Afficher Des Images
BGM (Voir chapitre 5.3). 7. Installation du Serveur Multimédia de Conceptronic (UPnP A/V) Avant d'utiliser le C54WMP de Conceptronic, vous devez installer un Serveur UPnP A/V compatible tels que les boîtiers de disque dur CH3SNAS ou CH3WNAS ou un autre dispositif UPnP A/V. - Página 147 Conceptronic DMS". Cliquez sur “Finish” pour quitter le programme d'installation. Le Software Multimédia de Conceptronic est à présent installé sur votre ordinateur. Vous pouvez y accéder par le répertoire de Conceptronic dans la section Programmes de votre Menu de Démarrage.
- Página 148 FRANÇAIS 8. Configuration du Serveur Multimédia de Conceptronic Section de Fichiers Multimédias Après avoir importé des fichiers dans la base de données de Serveur Multimédia, vous verrez un aperçu de tous les fichiers scannés. Importation Multimédia Dans cette partie vous pouvez : •...
- Página 149 FRANÇAIS Système Vous pouvez modifier le Nom du Serveur dans un nom de serveur que vous souhaitez. Le nom du serveur sera affiché à l'écran lorsque vous détectez les Serveurs Multimédias dans la configuration du lecteur. Le nom du serveur modifié sera actif lorsque vous arrêtez le serveur et le relancez.
- Página 150 Sélectionne les types de fichiers qui seront scannés par le Software de Serveur Multimédia. Transcoding Setting Sélectionne la qualité du transcodage. 9. Serveurs Multimédia Alternatifs Vous pouvez utiliser des serveurs multimédias alternatifs avec le C54WMP de Conceptronic si le serveur est compatible UPnP A/V 1.0.
-
Página 151: Autres Softwares Alternatifs
Si un dispositif de Serveur Multimédia ou un package de software ne peut pas être détecté par le C54WMP de Conceptronic, veuillez vérifier les capacités et la configuration de ce dispositif / package de software. Si le dispositif est compatible et correctement configuré, votre C54WMP affiche le dispositif comme un dispositif qui... -
Página 152: Réglages Du Système
FRANÇAIS 10. Réglages du Système Dans le menu de configuration du système vous pouvez modifier : Langue: OSD Language (Langue de l'affichage à l'écran). Langues disponibles : Anglais, espagnol, allemand, hollandais, turc, portugais, italien, français. Réglage du mode TV Sélectionnez le réglage de vidéo souhaité. Système de TV : PAL ou NTSC. - Página 153 FRANÇAIS Réglage Vidéo Réglez l'affichage souhaité sur l'écran TV. Paramètres de Clarté, Contraste, Teinte & Saturation. Réglage de l'Affichage des Photos Sélectionnez les propriétés des photos souhaitées. Économiseur d’Écran : On/Off. Réglage de l'Affichage des Photos : Liste/Vignettes. Durée de la Présentation de Diapositives : 2 à...
-
Página 154: Déclaration De Conformité Ce
Déclaration de Conformité CE Le fabricant 2L International BV Adresse Databankweg 7 3821 AL Amersfoort, the Netherlands (Pays-Bas) Atteste, par la présente, que le produit Type 54MBPS WIRELESS MEDIA PLAYER/DMA Produit C08-126 Observe les directives suivantes: 1999/5/EEC Directive R&TTE relative aux: Équipements Terminaux de Télécommunications et Équipements Radioélectriques (Telecommunications Terminal Equipment and Satellite Earth Station Equipment) -
Página 155: Contenuto Della Confezione
Wireless Media Player di Conceptronic. In caso di problemi, si consiglia di consultare il sito di supporto (collegandosi con la pagina www.conceptronic.net e facendo clic sull’opzione “Support”, in cui è contenuto il banco dati delle FAQ (Domande più frequenti). In caso di quesiti di altro tipo in merito al prodotto acquistato, per i quali il sito web non è in grado di offrire risposta, potete mettervi in contatto con noi via e-mail all’indirizzo:... -
Página 156: Caratteristiche
Connettore USB Host per aggiornamenti del firmware e per espansione delle funzionalità del dispositivo con un disco rigido o con un dongle USB Per riprodurre file media, il C54WMP deve essere collegato a una rete con un media server. Il C54WMP di Conceptronic supporta i seguenti formati di file media: •... - Página 157 ITALIANO 3. Spiegazione del telecomando...
- Página 158 ITALIANO TASTI DESCRIZIONE DELLA FUNZIONE ACCESO/SPENTO Attiva o esce dalla modalità Standby del Wireless Media Player. MUTE Silenzia l’audio. HOME Torna al Menu principale. Riavvolgimento veloce del media file durante la riproduzione. 1. Riproduce o mette in pausa il file musicale PLAY / PAUSE 2.
-
Página 159: Come Collegare Il C54Wmp A Una Rete O A Una Tv
ITALIANO 4. Come collegare il C54WMP a una rete o a una TV Per poter usare il C54WMP di Conceptronic è necessario disporre di quanto segue: Una rete senza fili (802.11b/g/n) o cablata (10/100/1000). Uno o più computer con installato Windows 2000, Windows XP o Windows Vista. -
Página 160: Installazione Dell'hArdware
È necessario usare il telecomando per accendere e spegnere il dispositivo. Accendere la TV e selezionare il canale video corretto. Il C54WMP di Conceptronic mostrerà la videata di inizio di Conceptronic non appena verrà acceso il dispositivo. 5. Configurazione la prima volta che viene usato... - Página 161 ITALIANO Quando verrà acceso il C54WMP (Media Player Digitale) di Conceptronic sarà necessario configurarlo. Il messaggio che apparirà sullo schermo televisivo chiederà in quale lingua si desidera usare il dispositivo. Dopo aver selezionato la lingua, l’Adattatore del C54WMP inizializzerà la rete.
- Página 162 L’indicatore della potenza del segnale può essere di tre colori: rosso, giallo o verde. Se è verde ciò vuol dire che si sta utilizzando la miglior connessione possibile fra il C54WMP e l’Access Point. Il giallo significa che è un segnale accettabile per un uso normale e quando la potenza del segnale dell’Access Point è...
- Página 163 Nota: per default il C54WMP cercherà un server DHCP. Se il C54WMP è configurato correttamente, apparirà un indirizzo IP nella parte inferiore dello schermo. Se lo schermo mostra: IP: 0.0.0.0 ciò significa che il dispositivo non avrà rilevato nessun indirizzo IP e sarà necessario...
- Página 164 USB. Windows XP Qui di seguito si mostra come configurare il C54WMP attraverso WCN nel caso di Microsoft Windows Fare clic su ‘Start’, ‘My Network Places’ (Risorse di rete). Verranno mostrate le risorse di rete. Selezionare l’opzione ‘Set up a wireless network…’ (Configurazione di rete senza fili) che si trova sulla sinistra della finestra.
- Página 165 ITALIANO Introdurre l’unità flash USB nella porta USB del C54WMP. Il C54WMP rileverà automaticamente i file di configurazione WCN disponibili e chiederà all’utente se desidera applicare tali parametri. Accettare. I parametri verranno così memorizzati nella configurazione. Estrarre l’unità flash USB.
- Página 166 Ora i parametri corretti sono quelli utilizzati. Si consiglia di riavviare il dispositivo per assicurarsi che siano utilizzati i parametri wireless appropriati. 5.4 Configurazione manuale dell’indirizzo IP per il C54WMP Quando non esiste nessun server DHCP disponibile nella rete in uso, è necessario realizzare manualmente la configurazione dell’indirizzo IP del C54WMP.
-
Página 167: Selezione Rapida
‘OK’ per accedere al campo successivo. Per salvare la configurazione nella memoria del C54WMP si dovrà premere il tasto di direzione sinistra (21) e verrà chiesto se si desidera salvare i cambiamenti o eliminarli. Selezionare ‘Save’... - Página 168 Menu principale, premere il pulsante Home (3). 6.2 Video Il C54WMP di Conceptronic supporta i formati video MPEG1, MPEG2 e MPEG4, oltre a quelli VOB, AVI e altri ancora. Grazie la software del Media Server è possibile usare l’opzione di ‘transcodifica’. Ciò vuol dire che il computer decodificherà...
- Página 169 Usare i tasti di direzione (21) per sfogliare i film e premere il pulsante Play (5) per iniziarne la riproduzione. Dopo aver selezionato il film, il C54WMP di Conceptronic lo caricherà. Si tratta di un processo che potrebbe durare alcuni secondi, ed è indicato dal messaggio di caricamento in corso.
- Página 170 ITALIANO Se una cartella contiene molti file video, è possibile sfogliarli di pagina in pagina usando i pulsanti Prev (8) e Next (9). Usare i tasti Su e Giù (21) per visualizzare i file video come immagini da schermo. Premere OK (20) per riprodurre il file video selezionato, o premere “Back”...
- Página 171 ITALIANO 6.3 Musica La prima volta che viene usato: Quando si seleziona ‘Musica’ sul menu di avvio del telecomando (pulsante verde) apparirà una videata con un’anteprima dei Media Server disponibili (UPnP/AV) e/o del dispositivo USB connesso. Nel menu principale appaiono diverse opzioni disponibili: Background Music (BGM).
- Página 172 ITALIANO La cartella offerta per selezionare e riprodurre musica dipenderà dal tipo, dalla marca o dalla versione del software del Media Server in uso. Alcuni Media Server offrono: Album, Artista, Genere, Seleziona tutte le tracce. Selezionare la funzione desiderata. Nota: assicurarsi di aver aggiornato il contenuto del Media Server quando viene selezionata l’opzione Media Server nel menu.
- Página 173 USB. Live365 Il C54WMP di Conceptronic è dotato di un servizio di musica radio via Internet Live365.com. Per ascoltare le stazioni radio via Internet è necessario disporre di una connessione di rete (LAN/WLAN) per potersi collegare a Internet.
- Página 174 ITALIANO Si può selezionare la casella per memorizzare le informazioni personali. In questo modo non sarà necessario introdurre nome utente e password ogni volta che verrà usata questa funzione. È possibile aggiungere fino a un massimo di 99 stazioni radio preferite a ‘My Radio’ (La mia radio) premendo il pulsante BGM (25) e selezionando ‘Add’...
- Página 175 ITALIANO Nota: il C54WMP di Conceptronic dispone di una tastiera a video incorporata che si può usare per introdurre le URL e i nomi delle stazioni radio. Sono supportati solo i caratteri principali dell’alfabeto latino. I caratteri speciali dell’alfabeto latino come áäñß non sono supportati.
- Página 176 ITALIANO 6.4 Immagini La prima volta che viene usato: Quando si seleziona ‘Pictures’ sul menu di avvio del telecomando (pulsante giallo) apparirà una videata con un’anteprima dei Media Server disponibili (UPnP/AV) e/o del dispositivo USB connesso. Per default il dispositivo memorizza l’ultima cartella visitata, ogni volta che verrà premuto Home per tornare al menu principale, quando verrà...
- Página 177 7. Installazione del Media (UPnP A/V) Server di Conceptronic Prima di poter usare il C54WMP di Conceptronic è necessario installare un Server compatibile con UPnP A/V come i box per hard disk CH3SNAS o CH3WNAS di Conceptronic o qualsiasi altro dispositivo UPnP A/V.
- Página 178 Conceptronic DMS” (Aprir DMS di Conceptronic). Fare clic su “Finish” (Fine) per uscire dal programma di installazione. Il Media Software di Conceptronic è stato installato sul computer. È possibile accedervi mediante la cartella di Conceptronic nella sezione Programmi del menu Start.
- Página 179 ITALIANO 8. Configurazione del Media Server di Conceptronic Sezione relativa ai file media Dopo aver importato i file nella banca dati del Media Server apparirà un elenco dei file scannerizzati. Importazione media In questa sezione è possibile: • Aprire il Media Server.
- Página 180 ITALIANO Sistema È possibile dare al Server il nome che si preferisce. Il nome del Server apparirà sullo schermo ogni volta che rileverà dei Media Server attraverso la configurazione del lettore. Il nome del Server modificato sarà attivo solo dopo aver chiuso e riaperto il Server.
- Página 181 Transcoding Setting selezionare la qualità di transcodifica. 9. Media Server alternativi È possibile usare Media Server alternativi con il C54WMP di Conceptronic, sempre e quando essi siano compatibili con il sistema UPnP A/V 1.0. Microsoft Windows XP e Windows Vista Microsoft Windows XP e Windows Vista offrono un Media Server attraverso il Windows Media Player.
- Página 182 : www.orb.com Nota: se il C54WMP di Conceptronic non è in grado di rilevare un dispositivo di Media Server o un pacchetto di software, verificare le capacità e i parametri di configurazione del dispositivo/pacchetto di software in questione. Quando il dispositivo è compatibile e la configurazione è...
-
Página 183: Configurazione Del Sistema
ITALIANO 10. Configurazione del sistema Grazie al menu relativo alla configurazione del sistema è possibile modificare: Language (Lingua): OSD Language (On Screen Display) (Lingua OSD (Menu a video)). Lingue disponibili : inglese, spagnolo, tedesco, olandese, turco, portoghese, italiano ,francese. TV Mode Setup (Configurazione modalità TV) Selezionare l’impostazione video desiderata TV System (Sistema TV) : PAL o NTSC. - Página 184 ITALIANO Video Setup (Configurazione video) Regolare il sistema di visualizzazione dello schermo TV Luminosità, Contrasto Tonalità e saturazione Photo Display Setup (Configurazione visualizzazione foto) Selezionare le proprietà immagini desiderate. Screen saver (Salvaschermo) : acceso/spento. Photo display setup (Conf. visual. foto) : List/Thumbnail.
-
Página 185: Dichiarazione Di Conformità Ce
Dichiarazione di conformità CE Il fabbricante 2L International BV Indirizzo Databankweg 7 3821 AL Amersfoort, Paesi Bassi dichiara qui di seguito che il prodotto Tipo 54MBPS WIRELESS MEDIA PLAYER/DMA Prodotto C08-126 risulta in conformità a quanto previsto dalle seguenti direttive comunitarie: 1999/5/CE: Direttiva R&TTE Apparecchiature terminali di telecomunicazione e... -
Página 186: Conteúdo Da Embalagem
Se tiver outras questões relativas ao nosso produto e não as conseguir encontrar no nosso webiste, pode-nos contactar através do e-mail: apoyo@conceptronic.net Para mais informações sobre produtos de Conceptronic, por favor visite o Web Site da Conceptronic: www.conceptronic.net 1. Conteúdo da embalagem A embalagem do Reprodutor Multimédia sem Fios da Conceptronic contém os seguintes elementos:... - Página 187 Conector host USB para actualizações de Firmware e para ampliar a utilidade do dispositivo com um disco rígido ou um dongle de memória USB. Para reproduzir ficheiros multimédia o C54WMP precisa de estar ligado a uma rede com um servidor multimédia.
- Página 188 PORTUGUÊS 3. Descrição do Controlo Remoto...
- Página 189 PORTUGUÊS Nº TECLA DESCRIÇÃO DA FUNÇÃO POWER Activar/Desactivar o Modo de Espera do Reprodutor Multimédia sem Fios. MUTE Desactivar Áudio. HOME Regressar ao Menu Principal. Retornar rapidamente nos ficheiros durante a reprodução. 1. Reproduzir ou Interromper momentaneamente a reprodução de ficheiros de PLAY / PAUSE música.
- Página 190 Internet. Nota: O C54WMP da Conceptronic utiliza UPnP A/V cliente para reproduzir áudio e vídeo. É preciso ter um equipamento com a funcionalidade UPnP A/V Servidor, uma aplicação UPnP A/V Servidor de uma terceira parte ou instalar o software do Servidor Multimédia da...
-
Página 191: Instalação Do Hardware
PORTUGUÊS 4.1 Instalação do hardware Nota: Se tiver uma rede LAN com fios deverá utilizar um cabo Ethernet para ligar o C54WMP da Conceptronic ao router ou switch. Verifique que tipo de cabo pode utilizar para o seu televisor: •... - Página 192 PORTUGUÊS Depois de ter seleccionado o idioma, o Adaptador C54WMP vai iniciar a rede. O assistente de configuração da rede arranca automaticamente. Também pode aceder a este menu através do menu de configuração (seleccione ‘Network Wizard’ (Assistente de Rede)). Seleccione o tipo de ligação que preferir: “Com fios” ou “Sem fios”.
- Página 193 O indicador de intensidade do sinal pode ter três cores: vermelho, amarelo e verde. Se o indicador está verde, significa que a ligação entre o C54WMP e o seu ponto de acesso é a melhor possível; se está amarelo, significa que é aceitável para um uso normal; e se o indicador de intensidade do sinal do seu ponto de acesso, está...
- Página 194 Se tiver estabelecido parâmetros de encriptação no seu ponto de acesso terá de introduzir os mesmos parâmetros no C54WMP. A parte Sem fios do C54WMP detectará automaticamente o tipo de configuração necessária para a ligação com um ponto de acesso. Se o ponto de acesso estiver encriptado com WPA, o dispositivo detectará...
- Página 195 Não feche o assistente no computador. Ligue o C54WMP e vá a “Configuração”, “Configuração Sem fios”. Insira a drive USB flash na porta USB do C54WMP. O C54WMP detectará automaticamente os ficheiros de configuração WCN disponíveis e perguntará se deseja aplicar os parâmetros. Confirme. Os parâmetros de configuração serão guardados.
- Página 196 Depois de salvar os parâmetros, clique em “Fechar” e retire a drive USB flash do computador. Ligue o C54WMP e vá a “Configuração”, “Configuração Sem fios”. Insira a drive USB flash na porta USB do C54WMP. O C54WMP detectará automaticamente os ficheiros de configuração WCN disponíveis e perguntará se deseja aplicar os parâmetros. Confirme. Os parâmetros de configuração serão guardados.
- Página 197 Para realizar modificações prima “OK”, use as teclas de direcção Esquerda ou Direita (21) para modificar o parâmetro e prima “OK” novamente para passar ao campo seguinte. Para guardar os valores na memória do C54WMP prima a tecla de direcção Esquerda (21). Ser-lhe-á perguntado se deseja salvar o cancelar as modificações. Seleccione “Salvar”.
- Página 198 Seleccione Foto se desejar ver imagens com o Reprodutor Multimédia. - Vídeo Seleccione Vídeo se desejar ver filmes / vídeos. - Configuração Seleccione Configuração se desejar configurar / modificar parâmetros do C54WMP. Nota: Antes reproduzir Música, Vídeo ou Fotos, assegure-se de ter um Servidor Multimédia activo.
- Página 199 PORTUGUÊS 6.2 Vídeo O C54WMP da Conceptronic suporta os formatos de vídeo MPEG1, MPEG2, MPEG4, VOB e AVI, entre outros. Com o Software do Servidor Multimédia é possível utilizar “transcodificação”. Isto significa que o computador descodificará o formato de vídeo, passando-o a um formato que possa ser utilizado com o C54WMP da Conceptronic.
- Página 200 Use as teclas de direcção (21) para ir de um filme a outro e prima o botão Play (5) para dar início à reprodução do filme desejado. Antes de ser reproduzido, o filme será carregado pelo C54WMP da Conceptronic. Isto pode tardar alguns segundos e será indicado mediante a mensagem “a carregar”.
- Página 201 PORTUGUÊS Anterior – Prima o botão Prev (7) para seleccionar o ficheiro de vídeo anterior. Seguinte – Prima o botão Next (8) para seleccionar o próximo ficheiro de vídeo. Se a pasta contiver muitos ficheiros de vídeo poderá mover-se de uma página à outra mediante os botões Prev (8) e Next (9).
- Página 202 PORTUGUÊS 6.3 Música Uso pela primeira vez Se seleccionar “Música” através do menu inicial ou mediante o controlo remoto (botão verde) aparecerá um ecrã com uma visão geral dos Servidores Multimédia disponíveis (UPnP A/V) e/ou do dispositivo USB ligado. No menu principal estão disponíveis várias opções: Música de fundo (BGM) Live 365 Meu Rádio.
- Página 203 PORTUGUÊS A pasta apresentada para seleccionar e reproduzir música depende do tipo, marca ou versão de software do seu Servidor Multimédia. Alguns Servidores Multimédia apresentam: Álbum, Artistas, Género, selecção de todas as pistas. Seleccione o que preferir. Nota: Assegure-se de ter actualizado o conteúdo do servidor multimédia quando seleccionar o Servidor Multimédia através do menu.
- Página 204 A opção música de fundo tem duas finalidades: pôr música na lista de música de fundo e reproduzir esses ficheiros; ou iniciar automaticamente a reprodução de música de fundo ao ligar o C54WMP. Isto só funcionará se a música de fundo for seleccionada de uma drive USB.
- Página 205 PORTUGUÊS Pode marcar a caixa correspondente para que seja recordada a sua informação pessoal. Fazendo isso, não será preciso digitar o seu nome de utilizador e password novamente nas próximas vezes que usar esta funcionalidade. Pode adicionar até 99 estações favoritas em “Meu Rádio”, premindo a tecla BGM (25) e seleccionando “Adicionar”.
- Página 206 PORTUGUÊS Nota: O C54WMP da Conceptronic inclui um teclado no ecrã que pode ser utilizado para introduzir os URL e os nomes das estações de rádio. São suportados apenas caracteres latim básico. Não são suportados caracteres especiais latim estendido, como áäñß.
- Página 207 PORTUGUÊS 5.5 Fotos Uso pela primeira vez Se seleccionar “Foto” através do menu iniciar ou mediante o controlo remoto (botão amarelo) aparecerá um ecrã com uma visão geral dos Servidores Multimédia disponíveis (UPnP A/V) e/ou do dispositivo USB ligado. De modo predeterminado, o dispositivo recordará qual foi a última pasta visitada ao pressionar a tecla Home para retornar ao menu principal ao seleccionar Vídeo, Música ou Foto novamente.
- Página 208 (ver Capítulo 5.3) 7. Instalação do Servidor Multimédia (UPnP A/V) da Conceptronic Antes de poder utilizar o C54WMP da Conceptronic é preciso instalar um servidor compatível UPnP A/V, como o CH3SNAS ou o CH3WNAS da Conceptronic, ou qualquer outro dispositivo UPnP A/V.
- Página 209 Multimédia da Conceptronic directamente após a instalação, marque a caixa “Executar DMS da Conceptronic”. Clique em “Concluir” para sair do programa de instalação. O software do Servidor Multimédia da Conceptronic já está instalado no seu computador. Poderá aceder ao mesmo através da pasta Conceptronic dos Programas do Menu Iniciar.
-
Página 210: Importar Ficheiros Multimédia
PORTUGUÊS 8. Configuração do Servidor Multimédia da Conceptronic Secção de Ficheiros Multimédia Depois de importar ficheiros para a base de dados do Servidor Multimédia poderá ter uma visão geral de todos os ficheiros encontrados. Importar ficheiros multimédia Neste ecrã poderá: •... - Página 211 PORTUGUÊS Sistema O Nome do Servidor poderá ser mudado por outro nome que preferir. O nome do servidor aparecerá no ecrã ao serem detectados Servidores Multimédia através da configuração do reprodutor. O nome modificado do servidor estará activo quando o servidor for iniciado novamente depois de ter sido parado.
-
Página 212: Servidores Multimédia Alternativos
Tipo de ficheiros a serem procurados Seleccione que tipo de ficheiros o software do Servidor Multimédia deve procurar. Parâmetros de Transcodificação Seleccione a qualidade da transcodificação. 9. Servidores Multimédia Alternativos Podem ser usados servidores multimédia alternativos com o C54WMP da Conceptronic se tais servidores forem compatíveis com UPnP A/V 1.0. -
Página 213: Outros Softwares Alternativos
Se um dispositivo Servidor Multimédia ou um pacote de software não puder ser detectado pelo C54WMP da Conceptronic, verifique a compatibilidade e a configuração desse dispositivo ou pacote de software em particular. Se o dispositivo for compatível e a configuração for correcta, o C54WMP indicará no televisor que tal dispositivo pode ser seleccionado. -
Página 214: Configuração Do Sistema
PORTUGUÊS 10. Configuração do Sistema Através do menu de configuração do sistema pode-se modificar: Idioma Idioma OSD (On Screen Display). Idiomas disponíveis: inglês, espanhol, alemão, holandês, turco, português, italiano, francês. Configuração Modo TV Seleccione a configuração de vídeo pretendida Sistema de TV: PAL ou NTSC. - Página 215 PORTUGUÊS Configuração de Vídeo Ajuste os parâmetros do ecrã do televisor. Ajustes de Brilho, Contraste, Tom e Saturação. Configuração de Exibição de Fotos Seleccione as propriedades desejadas para Foto. Protector de Ecrã: Activado/Desactivado. Configuração de exibição de fotos: Lista/Miniaturas. Tempo de Apresentação de diapositivos: 2 a 30 segundos, 1 minuto e 2 minutos.
-
Página 216: Declaração De Conformidade Ce
Declaração de Conformidade CE O fabricante 2L International BV Morada Databankweg 7 3821 AL Amersfoort, Países Baixos Declara que o produto Tipo 54MBPS WIRELESS MEDIA PLAYER/DMA Produto C08-126 Cumpre as seguintes directivas: 1999/5/EEC Directiva R&TTE: Equipamento Terminal de Telecomunicações e Equipamento das Estações Terrestres de Comunicações Via Satélite 2004/108/EEC Directiva CEM:... -
Página 217: A Csomag Tartalma
Conceptronic vezeték nélküli médialejátszót telepíteni. Ha problémával szembesül, azt tanácsoljuk, keresse fel terméktámogató webhelyünket (menjen a www.conceptronic.net webcímhez), majd kattintson a „Support”-ra. Itt pedig keresse meg a gyakran ismétlődő kérdések (GYIK) elnevezésű adatbázist. Ha további kérdése volna a termékkel kapcsolatban és arra választ webhelyünkön nem talál, forduljon hozzánk e-mailben: support@conceptronic.net... - Página 218 MP3, akár 320 Kb/s-ig vagy VBR. • WMA, akár 192 Kb/s-ig vagy VBR. • WAV audiofájlok. A médiaszervernek „transcoding” tulajdonságokkal történő alkalmazása révén további fájlok is lejátszhatók. PC segítségével a fájl valós időben dekódolható egy a Conceptronic C54WMP által használható formátummá.
- Página 219 MAGYAR 3. A távirányító jelmagyarázata...
- Página 220 MAGYAR KEZELŐ- A FUNKCIÓ LEÍRÁSA BILLENTYŰZET POWER A vezeték nélküli médialejátszó készenléti üzemmódjának be-/kikapcsolása. MUTE A hang elnémítása. HOME Vissza a főmenübe. Gyors visszatekerés a médiafájlban, lejátszáskor. 1. Zenei fájl lejátszása vagy megszakítása. PLAY / PAUSE 2. Fényképek vetítésének indítása. Gyors előretekerés a médiafájlban, lejátszáskor.
- Página 221 Megjegyzés: A Conceptronic C54WMP UPnP A/V ügyfelet alkalmaz az audió és videó lejátszására. Ehhez az UPnP A/V szerver célalkalmasságával rendelkező hardverre, a harmadik fél tulajdonát képező UPnP A/V szerver alkalmazására van szükség, vagy telepítsen az erre a célra szolgáló...
- Página 222 Az eszköz be-/kikapcsolásához távirányítóra van szükség. Kapcsolja be a tévét és jelölje ki a megfelelő videocsatornát. Az eszköz bekapcsolásakor a Conceptronic C54WMP a Conceptronic indítóképernyőjét jeleníti meg. 5. Első alkalommal történő indítás és a konfiguráció Megjegyzés: Kézikönyvünkben bizonyos IP-címeket alkalmazunk a Conceptronic C54WMP tulajdonságainak és célalkalmasságának elmagyarázása.
- Página 223 MAGYAR A nyelv kiválasztása után a C54WMP adapter inicializálja a hálózatot. A hálózatbeállító varázsló automatikusan elindul. Ehhez a menühöz a beállítások menüjén keresztül lehet hozzáférni (válassza ki a „Network Wizard”-ot). Jelölje ki az előnyben részesített csatlakozás típusát: „Wired”(vezetékes) vagy „Wireless” (vezeték nélküli).
- Página 224 C54WMP és az elérési pont között. A sárga a megszokott alkalmazás szempontjából elfogadható jelerősséget jelent, és ha az elérési pont jelerőssége piros, akkor azt javasoljuk, hogy változtasson a C54WMP vagy az elérési pont pozícióján. Megjegyzés: Nem javasoljuk nagy adatfolyam-sávszélességű filmeknek az indikátoron piros vagy...
- Página 225 Ha az elérési pontnál titkosítás-beállításokat eszközölt, ugyanezeket a beállításokat ugyanúgy kell bevinnie a C54WMP-be, ahogyan azt az elérési pontnál konfigurálta. A C54WMP vezeték nélküli része automatikusan érzékeli, milyen konfiguráció szükséges az adott elérési ponthoz történő csatlakoztatás érdekében. Ha az elérési pont WPA-val lett titkosítva, az eszköz ezt érzékeli, ezért kizárólag a saját megosztott kulcsot (PSK) kell beírni.
- Página 226 Windows XP A Microsoft Windows XP alatt – a WCN segítségével – a C54WMP az alábbiak szerint konfigurálható: Kattintson a „Start”-ra, majd a „My Network Places”-re. A hálózati szomszédság jelenik meg. Jelölje ki a „Set up a wireless network…” opciót az ablak bal oldalán.
- Página 227 USB flash-meghajtón, de javasoljuk, hogy a beállításokat inkább törölje. Windows Vista A Microsoft Windows Vista alatt – a WCN segítségével – a C54WMP az alábbiak szerint konfigurálható: Kattintson a „Start”-ra, majd a „Network”-re. Kattintson az ablak tetején az „Add a Wireless Device” gombra.
- Página 228 MAGYAR 5.4 IP-cím kézi beállítása a C54WMP-nél A C54WMP IP-címét olyankor kell kézzel beállítani, ha nincs szabad DHCP-szerver a hálózaton. Nyomja meg a Setup-ot (29) a távirányítón, vagy jelölje ki a képernyőn megjelenő főmenün a telepítőikont. Jelölje ki a következő funkciót: Network Setup, majd nyomja le az OK-t, ha be kívánja lépni az IP- konfigurációba.
- Página 229 (21), majd ismét nyomja meg az „OK”-t, ha a következő mezőre kíván továbblépni. A beállításoknak a C54WMP memóriájába történő elmentéséhez a balra mutató iránybillentyűt (21) kell megnyomnia, mire a berendezés majd megkérdezi, hogy a változtatásokat el kívánják-e menteni vagy pedig törölni szeretnék-e.
- Página 230 (kezdőlap) (3) gombot. 6.2 Videó A Conceptronic C54WMP az MPEG1, MPEG2 és MPEG4 videoformátumot, valamint a VOB, AVI és egyéb formátumokat támogatja. A médiaszerver programja segítségével lehetőség nyílik a „transcoding” alkalmazására. Mindez azt jelenti, hogy a számítógép a videoformátumot abban a formátumban fogja dekódolni, amely a...
- Página 231 Az iránybillentyűk (21) segítségével böngészhet a filmek között, majd nyomja le a lejátszás (5) gombot, ha a filmet el is kívánja indítani. A film elindítása után a Conceptronic C54WMP betölti a filmet. Mindez csupán néhány másodpercet vesz igénybe, egyszersmind az alábbi betöltési üzenet jelenik meg.
- Página 232 MAGYAR Az előző videofájl kijelöléséhez használja a Prev-et (7). A következő videofájl kijelöléséhez használja a Next-et (8). Ha egy mappa sok videofájlt tartalmaz, az oldalakon a Prev (8) vagy Next (9) gomb segítségével böngészhet. Ha a videofájlokat ugyanúgy kívánja megjeleníteni, mint ahogyan a képernyőn megjelennek, használja az Up/Down (fel/le) billentyűt (21).
- Página 233 MAGYAR 6.3 Zene Első alkalommal történő használatkor: Ha a „Music”-ot a start menün vagy a távirányítón (zöld gomb) segítségével jelöli ki, a képernyőn az elérhető médiaszerverek (UPnP/AV) és/vagy a csatlakoztatott USB-eszköz áttekintése látható. A főmenün több opció is rendelkezésre áll: Háttérzene (BGM).
- Página 234 MAGYAR A zene kijelölésére és lejátszására felkínált mappa az adott médiaszerver típusától, márkájától vagy szoftververziójától függ. Bizonyos médiaszerverek az alábbiakat kínálják: Album (album), Artists (előadók), Genre (műfaj), all-tracks (összes zeneszám) kijelölése. A kívánt tulajdonságot jelölje ki. Megjegyzés: Ügyeljen arra, hogy a médiaszervernek a menü segítségével történő kijelölésekor a médiaszerver tartalma frissítődjön.
- Página 235 A háttérzenének kettős célja van: Zene elhelyezni a BGM-listán, majd annak lejátszása, illetve a háttérzene automatikus indítása a C54WMP bekapcsolásakor. Ez csak olyankor működik, amikor a háttérzenét USB-meghajtóról jelölik Live365 A Conceptronic C54WMP-t a Live365.com internetes rádió zenei szolgáltatásával egészítettük ki.
- Página 236 MAGYAR Ha személyes adatainkat meg kívánjuk jegyeztetni, kijelölhetjük a jelölőnégyzetet. Így nem kell a felhasználónevet és a jelszót ismét beírnunk, amikor ezt a tulajdonságot alkalmazzuk. A BGM-billentyű (25) megnyomásával akár 99 kedvenc állomás is hozzáadható a „My Radio”-hoz, majd kijelölhető az „Add”. A zenei (music) főmenün kijelölhető...
- Página 237 MAGYAR Megjegyzés: A Conceptronic C54WMP-nek beépített billentyűzete van a képernyőn, amely csak a rádióadók URL-jének és nevének beírására használható. Csak az alapvető latin karakterek támogatottak. A bővített latin karaktertáblázatokból származó különleges karakterek (pl. áäñß) nem támogatottak.
- Página 238 MAGYAR 6.4 Képek Első alkalommal történő használatkor: Ha a start menü segítségével vagy a távirányítóval (sárga gomb) a „Pictures”-t választja, a képernyőn az elérhető médiaszerverek (UPnP/AV) és/vagy a csatlakoztatott USB-eszköz áttekintése látható. A Video, Music vagy Pictures ismételt kijelölésekor a főmenübe történő visszatérés érdekében a home (kezdőlap) megnyomásával az eszköz alapértelmezésben emlékezni fog, melyik volt az utoljára felkeresett mappa.
- Página 239 Mielőtt a Conceptronic C54WMP-t használná, UPnP A/V-kompatibilis szervert, például Conceptronic CH3SNAS vagy CH3WNAS merevlemezházat vagy valamilyen UPnP A/V eszközt kell telepítenie. A szállított CD-ROM a Conceptronic médiaszerverhez szükséges programot is tartalmazza. Ha – hardver formájában – nincs UPnP A/V szervere, saját PC-jét a Conceptronic médiaszerver...
- Página 240 „Launch Conceptronic DMS” jelölőnégyzetet. A telepítőprogramból történő kilépéshez kattintson a „Finish”-re. A Conceptronic médiaszoftver ezután már telepítve van a számítógépre. A start menü Programs (programok) részében található Conceptronic mappa segítségével pedig hozzá is férhető.
- Página 241 MAGYAR 8. A Conceptronic médiaszerver konfigurációja Media files (médiafájlok) rész Fájloknak a médiaszerver adatbázisába történő importálása után áttekintést kaphat az összes beolvasott fájlról. Media Import (médiaimportálás) Ebben a részben a következőket teheti: • Elindíthatja a médiaszervert. • Leállíthatja a médiaszervert.
- Página 242 MAGYAR System (rendszer) A szerver nevét megváltoztathatja a kívánt szervernévre. A médiaszervereknek a lejátszó telepítésének segítségével történő érzékelésekor a képernyőn megjelenik a szerver neve. A megváltoztatott szervernév pedig akkor aktív, amikor a szervert leállítják, majd újraindítják.
- Página 243 File Types to scan Jelölje ki, hogy a médiaszerver szoftverjének milyen fájltípusokat kell majd beolvasnia. Transcoding Setting Jelölje ki a transcoding minőségét. 9. Alternatív médiaszerverek Alternatív médiaszervereket a Conceptronic C54WMP-vel együtt olyankor lehet használni, amikor a szerver az UPnP A/V 1.0-val kompatibilis.
- Página 244 : www.tversity.com TwonkyVision Media Server : www.twonkymedia.com : www.orb.com Megjegyzés: Ha a Conceptronic C54WMP nem képes médiaszerver-eszközt vagy programcsomagot érzékelni, akkor ellenőrizni kell annak az adott eszköznek/szoftvercsomagnak a képességeit és a telepítését. Ha az eszköz kompatibilis és megfelelően telepítve is lett, a C54WMP az eszközt a tévérendszerben választható...
- Página 245 MAGYAR 10. System Setup (rendszer telepítése) A rendszertelepítő menü segítségével a következőket lehet megváltoztatni: Nyelv: OSD nyelv (megjelenítés a képernyőn). Rendelkezésre álló nyelvek : angol, spanyol, német, holland, török, portugál, olasz, francia. Tévé üzemmód beállítása Jelölje ki a kívánt videobeállítást Tévérendszer : PAL vagy NTSC.
- Página 246 MAGYAR Megjegyzés: Az eszköz bekapcsolásakor lehetséges a zene automatikus indítása. Ha folyamszerű rádióadást konfigurál vagy zenét tartalmazó USB-eszközt használ, a kívánt funkciót kijelölheti elsőként indítandónak is. Videó beállítása Állítsa be a tévéképernyő kívánt megjelenítését. Fényerő, kontraszt, árnyalat és telítettség beállítása. Fényképek megjelenítésének beállítása Jelölje ki a fényképtulajdonságokat.
-
Página 247: Declaration Of Ce Conformity
Declaration of CE Conformity The manufacturer 2L International BV Address Databankweg 7 3821 AL Amersfoort, the Netherlands Hereby declares that the product Type 54MBPS WIRELESS MEDIA PLAYER/DMA Product C08-126 Complies with following directives: 1999/5/EEC R&TTE directive: Telecommunications Terminal Equipment and Satellite Earth Station Equipment 2004/108/EEC EMC directive:... -
Página 248: Paket İçeriği
Ürününüzle ilgili başka sorularınız varsa ve bunların yanıtlarını web sitemizde bulamıyorsanız, bize e-posta ile ulaşın: support@conceptronic.net Conceptronic ürünleri ile ilgili daha fazla bilgi için, lütfen Conceptronic Web Sitesini ziyaret edin: www.conceptronic.net Aşağıda açıklanan yazılım yüklemesi bilgisayarınızdaki yüklemeden biraz daha farklı olabilir. - Página 249 • Firmware yükseltmeleri ve Sabit Disk ya da USB Bellek ile cihaz kullanılırlığını genişletmek için USB Host Konnektör. Ortam oynatımı için C54WMP’nin bir ortam sunuculu ağa bağlı olması gerekir. Conceptronic C54WMP aşağıdaki ortam ortam formatlarını destekler: • MPEG 1, 2, 4 sıkıştırılmış ses ve video dosyaları.
- Página 250 TÜRKÇE 3. Uzaktan Kumanda Açıklaması...
- Página 251 TÜRKÇE TUŞ TAKIMI FONKSİYON TANIMI POWER (GÜÇ- Kablosuz Media Player’ı Çalıştırır/Bekleme Modundan Çıkarır. AÇMA/KAPAMA) MUTE (SESSİZ) Sesi Kısar. HOME (ANA mENÜ) Ana Menüyü getirir. Ortam dosyası oynatılırken hızlı geri sarar. PLAY / PAUSE 1. Müzik dosyasını Oynatır ya da Duraklatır (OYNAT / 2.
- Página 252 İnternet bağlantısına sahip olmak yararlı olacaktır. Not: Conceptronic C54WMP, ses ve video oynatımı için bir UPnP A/V istemci kullanmaktadır. Bunun için UPnP A/V Sunucu özellikli bir donanıma, üçüncü parti bir UPnP A/V Sunucu uygulamasına ya da birlikte verilen Conceptronic Ortam Sunucu yazılımına ihtiyacınız...
- Página 253 TÜRKÇE 4.1 Donanım Kurulumu Not: Kablolu bir yerel alan ağına sahipseniz, Conceptronic C54WMP’yi router ya da switch’e bağlamak için bir Ethernet kablosu kullanmanız gerekir. Televizyonunuz için ne tür bir kablo kullanabileceğinizi belirleyin: • Bileşen (Y, Pb, Pr). • S-Video. •...
- Página 254 TÜRKÇE Dil seçiminden sonra C54WMP Adaptörü ağı başlatır. Ağ yapılandırma sihirbazı otomatik olarak başlayacaktır. Bu menüye ayar menüsünden de erişebilirsiniz (‘Network Wizard (Ağ Sihirbazı)’nı seçin). Tercih edilen Bağlantı Türünü seçin: ‘Wired (Kablolu)’ ya da ‘Wireless (Kablosuz)’. Not: Yüksek bant genişlikli yayınlar kullanırken kablolu bağlantıyı kullanmanızı tavsiye ederiz, WLAN’da sinyal kalitesi veri ve performansı...
- Página 255 C54WMP kullanılabilir erişim noktalarını arayacaktır. Erişim noktalarınız SSID yayınladığında seçim yapabilirsiniz. Sinyal gücü göstergesinde 3 renk olabilir: kırmızı, sarı ve yeşil. Gösterge yeşil ise C54WMP ve erişim noktanız arasında olası en iyi bağlantıya sahipsiniz demektir. Sarı, normal kullanım için kabul edilebilir. Erişim noktası sinyal gücü kırmızı olduğunda C54WMP ya da erişim noktanızın konumunu değiştirmenizi öneririz.
- Página 256 Varsayılan olarak C54WMP bir DHCP sunucu arayacaktır. C54WMP doğru olarak yapılandırılırsa ekranın altında bir IP adresi bulacaksınız. Ekranda IP: 0.0.0.0 görülüyorsa cihaz bir IP adresi bulamamıştır, bu durumda C54WMP IP Ağ ayarlarını manuel olarak yapılandırmak zorundasınız (Bölüm 5.4). 5.3 Conceptronic C54WMP ile Windows Connect Now 2.0’ın kullanımı...
- Página 257 TÜRKÇE Windows XP Microsoft Windows XP altında WCN içinden C54WMP yapılandırmasını aşağıdaki gibi yapabilirsiniz ‘Start (Başlat)’, ‘My Network Places (Ağ Bağlantılarım)’a tıklayın. Ağ Komşularım gösterilecektir. Pencerenin sol tarafında ‘Set up a wireless network… (Kablosuz ağ kur...)’ seçeneğini seçin. Kablosuz Ağ Kurulum Sihirbazı ekrana gelecektir. Devam etmek için ‘Next (İleri)’ye tıklayın.
-
Página 258: Windows Vista
Artık doğru ayarlar kullanılacaktır. Doğru kablosuz ayarların kullanıldığından emin olmak için cihazı yeniden başlatmanızı tavsiye ederiz. 5.4 C54WMP’ye Manuel IP Adresi Girilmesi Ağda kullanılabilir DHCP sunucu olmadığı durumlarda C54WMP’nin IP adresini manuel olarak girmeniz gerekir. Uzaktan kumanda üzerinde Ayarlar (29) tuşuna basın ya da ekranda ana menüde bulunan ayarlar simgesini seçin. - Página 259 Değişiklik yapmak için ‘OK (Tamam)’a basın, ayarı değiştirmek için sol ya da sağ yön tuşunu (21) kullanın ve bir sonraki alana gitmek için tekrar ‘OK (Tamam)’a basın. C54WMP’nin belleğindeki ayarları kaydetmek için sol yön tuşuna (21) basmanız gerekir, ardından değişiklikleri kaydetmeniz ya da iptal etmeniz istenecektir. ‘Save (Kaydet)’i seçin.
- Página 260 Conceptronic Ortam Sunucusu Kurulumu için Bölüm 7’ye ilerleyin. 6.1 Hızlı Seçim Uzaktan kumandanızın Mavi, Yeşil, Sarı ve Kırmızı düğmeleri ile C54WMP’nin çeşitli oynatma seçenekleri arasında kolayca hızlı geçiş yapabilirsiniz. Video için mavi düğmeye, müzik için yeşil düğmeye, resim için sarı düğmeye ve internet radyosu için kırmızı...
- Página 261 TÜRKÇE 6.2 Video Conceptronic C54WMP MPEG1, MPEG2, MPEG4, video formatlarını olduğu kadar VOB, AVI ve diğer formatları da desteklemektedir. Ortam Sunucusu Yazılımı ile ‘transcoding (kod çevrimi)’ kullanımı mümkündür. Bu, bilgisayarınız, video formatının kodunu Conceptronic C54WMP ile kullanılabilir bir formatta çözecek demektir.
- Página 262 Geri sarmak için Rew (4), hızlı ileri sarmak için FF (6) düğmelerini kullanın. Not: “rew” ya da “ff” sırasında oynatım işlemi donabilir. C54WMP arka planda içeriği hızlı geri ya da ileri saracaktır. Oynatım işlemine kaldığı yerden devam etmek için “oynat” (5)
-
Página 263: İlk Kullanım
TÜRKÇE Önceki video dosyasını seçmek için Prev (8) düğmesini kullanın. Sonraki video dosyasını seçmek için Next (9) düğmesini kullanın. Klasörde bir çok video dosyası bulunuyorsa Prev (8) ya da Next (9) düğmelerini kullanarak sayfalara göz atabilirsiniz. Video dosyalarını ekran görüntüsü olarak göstermek için Up / Down tuşunu (21) kullanın. Seçilen video dosyasını... - Página 264 TÜRKÇE Ana menüde kullanılabilir birçok seçenek mevcuttur: Arka plan müziği (BGM). Live 365. My Radio (Radyolarım) Kullanılabilir Ortam Sunucuları. Video, müzik ya da resim dosyasını tekrar seçerken, cihaz, varsayılan olarak ana menüye dönmek için ana menü tuşuna bastığınızda son ziyaret edilen klasörü hatırlayacaktır. Başka bir klasör ya da başka bir UPnP AV/Kaynak seçmek amacıyla önceki ekrana dönmek için geri düğmesini (sol ok tuşu (21)) kullanmanız gerekir.
- Página 265 TÜRKÇE Not: Menüden Ortam Sunucusunu seçerken ortam sunucusunun içeriğini tazelediğinizden emin olun. İçerik alfabetik olarak listelenir ve tazeleme olmadan yeni müzik dosyaları gösterilmez. Bir müzik dosyası desteklenmiyorsa ekranınızda aşağıdaki mesajı göreceksiniz: Müzik çalmak ve duraklatmak için Oynat/Duraklat (5) düğmesine basın. Müziği durdurmak için Durdur (7) düğmesine basın.
- Página 266 Bu işlemi BGM tuşuna (25) basarak yapabilirsiniz. Arka plan müziğinde 2 amaç vardır: BGM listesine müzik ekleyin ve çalın ya da C54WMP’yi açtığınızda arka plan müziği otomatik olarak başlayabilir. Bu, sadece bir USB bellekten arka plan müziği seçtiğinizde çalışmaktadır. Live365 Conceptronic C54WMP’ye Live365.com İnternet radyosu müzik servisini eklemiş...
- Página 267 (http://www.shoutcast.com). iRadio menüsü içinden SHOUTcast dizinine doğrudan erişim yoktur. Sadece Live365.com’a doğrudan erişim mümkündür. Not: Conceptronic C54WMP, radyo istasyonlarının ad ve URL’lerini girmek için kullanılabilen yerleşik bir Ekran Üstü Klavyeye sahiptir. Sadece temel Latince karakterler desteklenir. áäñß gibi Genişletilmiş Latin karakter...
- Página 268 TÜRKÇE 6.4 Resimler İlk kullanım: Başlat menüsünden ya da uzaktan kumandanızın (sarı düğmesinden) ‘Pictures (Resimler)’i seçerseniz kullanılabilir Ortam Sunucuları (UPnP/AV) ve/veya bağlı USB aygıtlarının özetini gösteren bir ekran göreceksiniz. Video, müzik ya da resim tekrar seçilirken, cihaz, varsayılan olarak ana menüye dönmek için ana menü...
- Página 269 TÜRKÇE Bir Ortam Sunucu cihaz seçerseniz, bu, kullanılabilir klasörleri gösterecektir. Gösterilen klasörler Ortam Sunucusu tarafından sağlanmaktadır. Bazı durumlarda sunulan tüm klasörlerin işlevsel olmaması mümkündür. Bu, kullanılan Ortam Sunucusuna bağlıdır. Resimler seçeneği ve seçtiğiniz klasörler filtre olarak çalışır. Sadece televizyon ekranınızın sağ üst köşesinde yazan ortamı...
- Página 270 çalışmaktadır (Bölüm 5.3’te açıklanmıştır) 7. Conceptronic Ortam (UPnP A/V) Sunucusu kurulumu Conceptronic C54WMP’yi kullanmadan önce Conceptronic CH3SNAS ya da CH3WNAS sabit disk muhafazaları ya da başka bir UPnP A/V cihazı gibi bir UPnP A/V uyumlu Sunucu kurmanız gerekir. Birlikte verilen CD-ROM, Conceptronic Ortam Sunucusu yazılım programını içermektedir.
- Página 271 Sunucusunu çalıştırmak isterseniz, “Launch Conceptronic DMS (Conceptronic DMS’yi Başlat)” onay kutusunu işaretleyin. Kurulum programından çıkmak için “Finish (Son)”a tıklayın. Conceptronic Ortam Yazılımı bilgisayarınıza yüklenmiştir. Yazılıma Başlat - Programlar bölümündeki Conceptronic klasörü içinden erişebilirsiniz. 8. Conceptronic Ortam Sunucusu Yapılandırması Ortam Dosyaları Seçimi Ortam Sunucusu veri tabanına dosya aktardıktan sonra taranan tüm dosyaların bir özetini...
- Página 272 TÜRKÇE Ortam Aktarma Bu bölümde: • Ortam Sunucusunu başlatabilirsiniz. • Ortam Sunucusunu durdurabilirsiniz. • Bir klasör ekleyebilirsiniz. • Bir klasör ya da tüm klasörleri tazeleyebilirsiniz. • Paylaşımlı bir klasörü ya da tüm klasörleri silebilirsiniz. Ortam içerikli bir klasör eklerken klasör içeriği otomatik olarak taranacaktır. Sistem Sunucu Adını...
- Página 273 Açılışta yazılımı küçültülmüş olarak çalıştırır. Enable Transcoding (Kod çevrimini etkinleştir) Kod çevrimi seçeneğini etkinleştirir. Not: ‘Transcoding’ içinden C54WMP’ donanımı tarafından doğrudan desteklenmeyen içeriği oynatmak mümkündür. Kod çevrimli içeriğin kalitesi değişebilir. File Types to scan (Taranacak dosya türleri) Ortam Sunucusu Yazılımı tarafından taranacak dosya türlerini seçer.
- Página 274 TÜRKÇE 9. Alternatif Ortam Sunucuları Sunucu UPnP A/V 1.0 uyumlu ise Conceptronic C54WMP’li alternatif ortam sunucuları kullanabilirsiniz. Microsoft Windows XP ve Windows Vista Microsoft Windows XP ve Windows Vista, Windows Media Player içinden bir Ortam Sunucusu sunmaktadır. Media Player’ı başlatın, Tools (Araçlar) ve library (kütüphane)’yi seçin ve Paylaştırmayı yapılandırın.
- Página 275 TwonkyVision Media Server : http://www.twonkymedia.com : http://www.orb.com Not: Ortam Sunucu cihazı ya da yazılım paketi Conceptronic C54WMP tarafından algılanamazsa lütfen belirli cihaz/yazılım paketlerinin özellik ve ayarlarını kontrol edin. Cihaz uyumlu olduğunda ve doğru olarak kurulduğunda C54WMP tarafından televizyon sisteminizde seçilebilir cihaz olarak gösterilecektir.
-
Página 276: Sistem Ayarları
TÜRKÇE 10. Sistem Ayarları Sistem ayarları menüsünden değiştirebileceğiniz ayarlar şunlardır: Language (Dil) OSD Dili (Ekran Görüntüsü). Kullanılabilir diller : İngilizce, İspanyolca, Almanca, Hollandaca, Türkçe, Portekizce, İtalyanca, Fransızca. TV Mode Setup (TV Modu Ayarları) Arzu edilen video ayarlarını seçer TV Sistemi : PAL ya da NTSC. - Página 277 TÜRKÇE Video Setup (Video Ayarları) Arzu edilen TV ekran görüntüsü ayarlarını yapar. Parlaklık, Kontrast, Renk Tonu ve Doygunluk ayarları. Photo Display Setup (Fotoğraf Görüntü Ayarları) Arzu edilen Fotoğraf özelliklerini seçer. Ekran koruyucu : Açık/Kapalı. Fotoğraf görüntü ayarı : Liste/Minyatür. Slayt Gösterisi Süresi : 2 ila 30 saniye, 1 dakika ve 2 dakika.
- Página 278 Declaration of CE Conformity The manufacturer 2L International BV Address Databankweg 7 3821 AL Amersfoort, the Netherlands Hereby declares that the product Type 54MBPS WIRELESS MEDIA PLAYER/DMA Product C08-126 Complies with following directives: 1999/5/EEC R&TTE directive: Telecommunications Terminal Equipment and Satellite Earth Station Equipment 2004/108/EEC EMC directive:...
-
Página 279: Licence Agreement
LICENCE AGREEMENT Licensing Information This Conceptronic product C54WMP includes copyrighted third-party software licensed under the terms of the GNU General Public License. Please see The GNU General Public License for the exact terms and conditions of this license. Specially, the following parts of this product are subject to the GNU GPL: [Player side] Linux kernel 2.4.21 (GPL) - Página 280 Availability of source code Conceptronic. has eposed the full source code of the GPL licensed software, including any scripts to control compilation and installation of the object code. All future firmware updates will also be accompanied with their respective source code. For...
- Página 281 LICENCE AGREEMENT GNU GENERAL PUBLIC LICENSE Version 2, June 1991 Copyright (C) 1989, 1991 Free Software Foundation, Inc. Temple Place, Suite 330, Boston, MA 02111-1307 USA Everyone is permitted to copy and distribute verbatim copies of this license document, but changing it is not allowed. Preamble The licenses for most software are designed to take away your freedom to share and change it.
- Página 282 LICENCE AGREEMENT 1. You may copy and distribute verbatim copies of the Program's source code as you receive it, in any medium, provided that you conspicuously and appropriately publish on each copy an appropriate copyright notice and disclaimer of warranty; keep intact all the notices that refer to this License and to the absence of any warranty;...
- Página 283 LICENCE AGREEMENT If distribution of executable or object code is made by offering access to copy from a designated place, then offering equivalent access to copy the source code from the same place counts as distribution of the source code, even though third parties are not compelled to copy the source along with the object code.
- Página 284 LICENCE AGREEMENT NO WARRANTY 11. BECAUSE THE PROGRAM IS LICENSED FREE OF CHARGE, THERE IS NO WARRANTY FOR THE PROGRAM, TO THE EXTENT PERMITTED BY APPLICABLE LAW. EXCEPT WHEN OTHERWISE STATED IN WRITING THE COPYRIGHT HOLDERS AND/OR OTHER PARTIES PROVIDE THE PROGRAM "AS IS" WITHOUT WARRANTY OF ANY KIND, EITHER EXPRESSED OR IMPLIED, INCLUDING, BUT NOT LIMITED TO, THE IMPLIED WARRANTIES OF MERCHANTABILITY AND FITNESS FOR A PARTICULAR PURPOSE.
- Página 285 LICENCE AGREEMENT GNU LESSER GENERAL PUBLIC LICENSE Version 2.1, February 1999 Copyright (C) 1991, 1999 Free Software Foundation, Inc. 51 Franklin Street, Fifth Floor, Boston, MA 02110-1301 USA Everyone is permitted to copy and distribute verbatim copies of this license document, but changing it is not allowed. [This is the first released version of the Lesser GPL.
- Página 286 LICENCE AGREEMENT free programs. These disadvantages are the reason we use the ordinary General Public License for many libraries. However, the Lesser license provides advantages in certain special circumstances. For example, on rare occasions, there may be a special need to encourage the widest possible use of a certain library, so that it becomes a de-facto standard.
- Página 287 LICENCE AGREEMENT b) You must cause the files modified to carry prominent notices stating that you changed the files and the date of any change. c) You must cause the whole of the work to be licensed at no charge to all third parties under the terms of this License. d) If a facility in the modified Library refers to a function or a table of data to be supplied by an application program that uses the facility, other than as an argument passed when the facility is invoked, then you must make a good faith effort to ensure that, in the event an application does not supply such function or...
- Página 288 LICENCE AGREEMENT significant if the work can be linked without the Library, or if the work is itself a library. The threshold for this to be true is not precisely defined by law. If such an object file uses only numerical parameters, data structure layouts and accessors, and small macros and small inline functions (ten lines or less in length), then the use of the object file is unrestricted, regardless of whether it is legally a derivative work.
- Página 289 LICENCE AGREEMENT b) Give prominent notice with the combined library of the fact that part of it is a work based on the Library, and explaining where to find the accompanying uncombined form of the same work. 8. You may not copy, modify, sublicense, link with, or distribute the Library except as expressly provided under this License.
- Página 290 LICENCE AGREEMENT NO WARRANTY 15. BECAUSE THE LIBRARY IS LICENSED FREE OF CHARGE, THERE IS NO WARRANTY FOR THE LIBRARY, TO THE EXTENT PERMITTED BY APPLICABLE LAW. EXCEPT WHEN OTHERWISE STATED IN WRITING THE COPYRIGHT HOLDERS AND/OR OTHER PARTIES PROVIDE THE LIBRARY "AS IS" WITHOUT WARRANTY OF ANY KIND, EITHER EXPRESSED OR IMPLIED, INCLUDING, BUT NOT LIMITED TO, THE IMPLIED WARRANTIES OF MERCHANTABILITY AND FITNESS FOR A PARTICULAR PURPOSE.
- Página 291 DECLARATION OF CE CONFIRMITY The manufacturer Conceptronic Address Databankweg 7 3821 AL Amersfoort, the Netherlands Hereby declares that the product Type 54MBPS WIRELESS MEDIA PLAYER/DMA Product C08-126 Complies with following directives: 1999/5/EEC R&TTE directive: Telecommunications Terminal Equipment and Satellite Earth Station Equipment...