Tabla de contenido
Publicidad
Enlaces rápidos
TM
MODEL/MODELO: 1642137
Sears/Kmart USA
ASSEMBLY INSTRUCTIONS
INSTRUCCIONES DE ARMADO
ATTENTION
ATENCIÓN
DO NOT RETURN
NO DEVOLVERLO
TO THE STORE
A LA TIENDA
Contact
Contacto
MD Sports
MD Sports
Customer Service
Servicio al Cliente
Toll Free: 877-885-1635
Llamados gratuitos: 877-885-1635
* For additional resources and Frequently
* Por mayor información y Preguntas
Ask Questions, please visit us at
Frecuentes, favor visitarnos en
themdsports.com
themdsports.com
Publicidad
Tabla de contenido

Manuales relacionados para MD SPORTS 1642137


Resumen de contenidos para MD SPORTS 1642137
- Página 1 MODEL/MODELO: 1642137 Sears/Kmart USA ASSEMBLY INSTRUCTIONS INSTRUCCIONES DE ARMADO ATTENTION ATENCIÓN DO NOT RETURN NO DEVOLVERLO TO THE STORE A LA TIENDA Contact Contacto MD Sports MD Sports Customer Service Servicio al Cliente Toll Free: 877-885-1635 Llamados gratuitos: 877-885-1635 * For additional resources and Frequently * Por mayor información y Preguntas...
-
Página 2: Garantía Limita De 90 Dias
Por favor comunique con el minorista por su política de devolución. (Continued on the next page.) (Continúe en la siguiente página.) www.themdsports.com 1642137... -
Página 3: Tools Required
Mantener alejados a los exterior. Solo para uso en interior. necesarios area de ensamble animales domesticos No utilizar ni guardar el producto en del area de ensamble lugares humedos o mojados (Continued on the next page.) (Continúe en la siguiente página.) www.themdsports.com 1642137... - Página 4 English Español 1642137 PARTS LIST / LISTA DE PARTES Superficie de Curved Outer Leg Pierna Exterior Curved Inner Leg Pierna Interior Table Surface - 2 Superficie de Table Surface - 1 with Cap Curvado con Gorra with Cap Curvado con Gorra...
-
Página 5: Pre-Installed Parts / Piezas Preinstaladas
English Español 1642137 PRE-INSTALLED PARTS / PIEZAS PREINSTALADAS Gorra de Pierna Gorra de Pierna Inner Leg Cap Outer Leg Cap Exterio Interior ASSEMBLY INSTRUCTIONS: INSTRUCCIONES DE ENSAMBLAJE: 1. Find a clean, level place to begin the assembly of your 1. Encuentre un lugar limpio, plano para comenzar el Table Tennis Table Game. - Página 6 4. Adjunte la Correa de Seguridad Larga (#13) y 2 Correas three Screws (#23). See FIG. 1. de Seguridad Corta (#14) a la Superficie de Mesa (#1 & #2) usando 3 Tornillos (#23). Vea la FIG. 1. 1642137 www.themdsports.com (Continued on the next page.) (Continúe en la siguiente página.)
- Página 7 Tornillos (#A8) por Corchete de Pierna. Vea la FIG. 2A. 7. Repeat the above steps for the other table half. 7. Repita dichos pasos para la otra mitad de mesa. 1642137 www.themdsports.com (Continued on the next page.) (Continúe en la siguiente página.)
- Página 8 Inner Leg (#4). la Pierna Interior Curvao (#6). 11. Repeat the above steps for the other table half. 11. Repita dichos pasos para la otra mitad de mesa. 1642137 www.themdsports.com (Continued on the next page.) (Continúe en la siguiente página.)
- Página 9 15. Repeat above steps for other Table Surface. NOTA: Asegúrese que todos los Delantales están NOTE: Make sure all Aprons are inside the Plastic dentro de los Rincones Plástico. Corners. 1642137 www.themdsports.com (Continued on the next page.) (Continúe en la siguiente página.)
- Página 10 NOTE: Do not tighten securely at this time. Arandelas (#A5) y 2 Tuercas (#A7) por Marco. Vea la FIG. 5. NOTA: No haga bien apretado en este momento. 1642137 www.themdsports.com (Continued on the next page.) (Continúe en la siguiente página.)
- Página 11 DAÑOS EN LAS PATAS CAUTION: Two strong adults are recommended to turn PRECAUCION: Recomienda voltear la mesa por cuatro the table over as shown. adultos fuertes como mostrado. 1642137 www.themdsports.com (Continued on the next page.) (Continúe en la siguiente página.)
- Página 12 Nuts (#A7) per Frame. See FIG. 7. y 2 Tuercas (#A7) por Marco. Vea la FIG. 7. Now go back and tighten all the connections. Ahora vuelva y aprieta todas las conexiones. 1642137 www.themdsports.com (Continued on the next page.) (Continúe en la siguiente página.)
-
Página 13: Hardware After Assembly / Hardware Luego De La Ensambladura
Washer (#8) and one Nut (#A7) per Gravity Lock. Arandelas (#A5), 1 Arandela “T” (#8) y 1 Tuerca (#A7). See FIG. 8A. por Cerradura de Gravedad. Vea la FIG. 8A. 1642137 www.themdsports.com (Continued on the next page.) (Continúe en la siguiente página.) - Página 14 (#15) a través del centro de la mesa y deslice la red post on the opposite side. See FIG. 9A. sobre el poste al lado opuesto. Vea la FIG. 9A. 1642137 www.themdsports.com (Continued on the next page.) (Continúe en la siguiente página.)
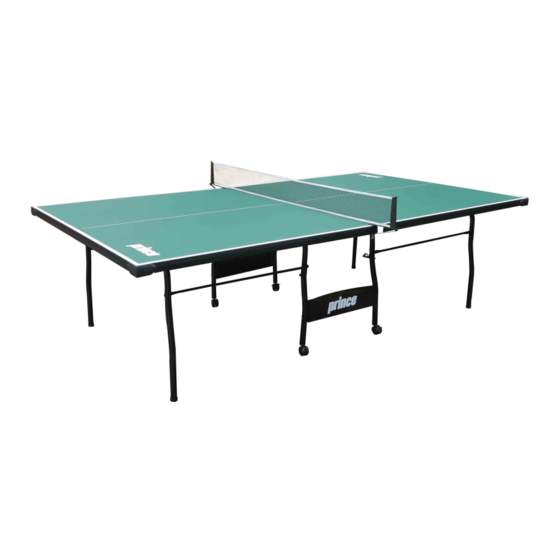
- Página 15 YOU ARE NOW READY TO PLAY! ¡USTED ESTA AHORA LISTO PARA JUGAR! 1642137 www.themdsports.com (The last page) (La ultima página)