
Manuales relacionados para Steren AMP-040SD


Resumen de contenidos para Steren AMP-040SD
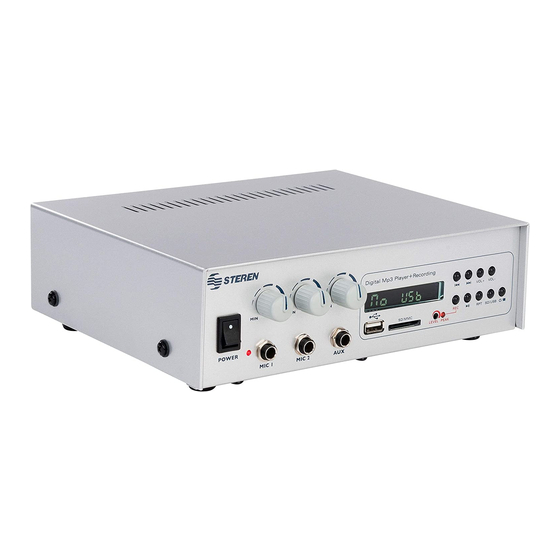
- Página 1 AMP-040SD Amplificador con lector SD DE 40W Manual de instrucciones VOL + VOL - MAXM RPT SD/USB SD/MMC POWER LEVEL PEAK MIC 1M IC 2 V0.1 0515a...
- Página 2 Amplificador con lector SD de 40W. Por favor revise el manual completamente para estar seguro de instalar y poder operar apropiadamente este producto. Para apoyo, compras y todo lo nuevo que tiene Steren, visite nuestro sitio Web en: www.steren.com...
-
Página 3: Importante
IMPORTANTE Antes de utilizar su nuevo Amplificador de audio, por favor lea las siguientes recomendaciones: • Verifique la línea de voltaje antes de utilizar el equipo. Su amplificador ha sido configurado de fábrica con un voltaje predeterminado de 120Vca. Conectar el amplificador a una línea de voltaje diferente a la que utiliza puede provocar fuego y dañar el equipo. -
Página 4: Instalación
INSTALACIÓN - Para asegurar la correcta operación y evitar posibles daños al equipo, coloque la unidad en una superficie firme y plana. Cuando coloque la unidad en un estante, asegúrese de que el estante y cualquier equipo para montar puede soportar el peso del amplificador. - Asegúrese de que el equipo cuenta con la suficiente ventilación, tanto en la parte superior como inferior. - Página 5 CONTENIDO CONTROLES CONEXIONES OPERACIÓN REALIZAR UNA GRABACIÓN ESPECIFICACIONES CARACTERÍSTICAS Su nuevo amplificador cuenta con un reproductor de tarjetas SD. • Potencia de 40W • 3 entradas 6,3mm para 2 micrófonos y 1 auxiliar. • Controles de volumen independientes. • Salida de línea de 70V...
-
Página 6: Controles
CONTROLES Panel frontal Panel posterior... -
Página 7: Panel Frontal
Panel frontal 1. INTERRUPTOR DE ENCENDIDO / APAGADO DEL AMPLIFICADOR. 2. LED INDICADOR DE ENCENDIDO. 3. ENTRADA DE MICRÓFONO 1. 4. ENTRADA DE MICRÓFONO 2. 5. ENTRADA DE AUXILIAR: Conecte un equipo de audio externo con conector 6,3mm. 6. RANURA PARA MEMORIA SD. 7. -
Página 8: Conexiones
CONEXIONES E n l a p a r t e f r o n t a l 1.- En las entradas MIC1, MIC2 puede conectar 2 micrófonos con Conector plug 6,3mm. 6,3mm 2.- En la entrada AUX puede conectar un equipo de audio externo como un sintonizador de radio, un reproductor de CD o ADAPTADOR... -
Página 9: En La Parte Posterior
En la parte posterior FIG1 4 ohms 8 ohms 1.- Para conectar los altavoces puede conectarlos de diferentes formas, por 8 ohms ejemplo: FIG2 16 ohms • Altavoces ohms 8 ohms conectados en paralelo para obtener una impedancia de 4 ohms (FIG1). 8 ohms •... -
Página 10: Alimentación
Se limita el paso de potencia. En el caso de una instalación en donde se trabajen varias bocinas con mucha potencia, se tiene la seguridad de que aunque se quedará conectada una sola, ésta no disiparía más potencia de la que le entrega el transformador, ni el amplificador sufriría un daño. -
Página 11: Operación
OPERACIÓN Una vez realizadas las conexiones correspondientes: 1. Ajuste el nivel de volumen al mínimo. 2. Presione el interruptor de encendido del amplificador. 3. Encienda el equipo que desee utilizar. 4. Gradualmente ajuste el volumen a un nivel óptimo. 5. Para reproducir archivos en formato MP3 de una tarjeta SD, presione el botón de VOL +V OL -... -
Página 12: Realizar Una Grabación
REALIZAR UNA GRABACIÓN Con su nuevo amplificador puede realizar grabaciones cuando usted conecte un micrófono u otro equipo en la entrada AUX, estas grabaciones se almacenarán en la tarjeta SD que esté conectada. Para realizar una grabación presione el botón “REC”... -
Página 13: Especificaciones
ESPECIFICACIONES Alimentación: 127 V~ 60 Hz / 12 V - - - Consumo: 500 mA / 2,1 A Rango de frecuencia: 150 – 15 000Hz Impedancia: 4, 8 y 16 ohms Potencia de salida: 15Wrms / 40Wmax Consumo nominal: 46,8 kWh/mes Consumo en espera: No aplica El diseño del producto y las especificaciones pueden cambiar... - Página 14 1.- Para hacer efectiva la garantía, presente esta póliza y el producto, en donde fue adquirido o en Electrónica Steren S.A. de C.V. 2.- Electrónica Steren S.A de C.V. se compromete a reparar el producto en caso de estar defectuoso sin ningún cargo al consumidor. Los gastos de transportación serán cubiertos por el proveedor.
- Página 16 AMP-040SD 40W amplifier with SD card reader Instruction manual VOL + VOL - MAXM RPT SD/USB SD/MMC POWER LEVEL PEAK MIC 1M IC 2 V0.1 0515a...
- Página 17 40W PA AMPLIFIER WITH SD CARD READER AMP-040SD Thank You on purchasing your new Steren product. This manual includes all the feature operations and troubleshooting necessary to install and operate your new 40W PA amplifier with SD card reader. Please review this manual thoroughly to ensure proper installation and operation of this product.
-
Página 18: Important
IMPORTANT Before using your new Audio amplifier, please read the following recommendations: • Verify line voltage before use Your new amplifier has been factory-configured for use with 120 volt AC line current. Connecting the amplifier to a line voltage other than that for which it is intended can create a safety and fire hazard, and may damage the amplifier. -
Página 19: Installation Location
INSTALLATION LOCATION - To ensure proper operation and to avoid the potential for safety hazards, place the unit on a firm and level surface. When placing the unit on a shelf, be certain that the shelf and any mounting hardware can support the amplifier’s weight. -
Página 20: Tabla De Contenido
CONTENT CONTROLS CONNECTIONS HOW TO USE RECORDING SPECIFICATIONS FEATURES • 40W power output. • Three 6.3mm input jack for 2 microphones and one auxiliary. • Independent volume controls. • 70V line input. -
Página 21: Controls
CONTROLS Front panel Rear panel... -
Página 22: Front Panel
Front panel 1. Amplifier´s On / Off switch. 2. In-Use LED indicator. 3. MIC 1: Microphone 1 input. 4. MIC 2: Microphone 2 input. 5. AUX INPUT: Allows to connect an external audio system. 6. SD SLOT. 7. RECORDING VOLUME ADJUST. 8. -
Página 23: Connections
CONNECTIONS F r o n t p a n e l 1. - Insert a microphone either on MIC1 or MIC2 or in both. 6.3mm PLUG 2. - In the AUX input connect an external audio system such as: CD player, radio tuner, MP3 3.5mm-6.3mm ADAPTER player. - Página 24 R e a r p a n e l FIG1 4 ohms 8 ohms 1. - To connect the speakers you can plug in different ways, for example: 8 ohms • Two 8ohm speakers parallel to get FIG2 16 ohms 8 ohms an impedance of 4 ohms.
-
Página 25: Power Input
Power Input 1. - You can connect a 12V - - - battery. Simply connect the battery´s positive terminal to the input (+) from the amplifier and the battery´s negative pole to the input (-) from the amplifier as shown in the figure. POSITIVE (+) NEGATIVE (-) BATTERY... -
Página 26: How To Use
HOW TO USE 1. - Set the volume level to the minimum. 2. - Press On/Off button in the amplifier. 3. - Power on the device that you want to use (CD player, microphones or an external audio system). 4. - Gradually, raise the volume level to an optimum level. 5. -
Página 27: Recording
RECORDING With your new amplifier you can record connecting a microphone or connecting an external audio system, these recordings are stored on the connected SD memory. To record press “REC” twice. The display will VOL +V OL - show rEC and the device will began recording. To stop recording press “REC”. -
Página 28: Specifications
SPECIFICATIONS Input: 127V~ 60Hz / 12V - - - Power consumption: 500 mA 2.1 A Frequency response: 150 – 15 000Hz Impedance: 4, 8 & 16 ohms Power output: 15Wrms / 40Wmax Nominal consumption: 46.8 kWh/month Stand-by power consumption: Not applicable Product design and specifications are subject to change without previous notice. - Página 29 Part number: AMP-040SD Brand: Steren WARRANTY This Steren product is warranted under normal usage against defects in workmanship and materials to the original purchaser for one year from the date of purchase. CONDITIONS 1.- This warranty card with all the required information, invoice, product box or package, and product, must be presented when warranty service is required.