Tabla de contenido
Publicidad
Idiomas disponibles
Idiomas disponibles
Enlaces rápidos
Publicidad
Capítulos
Tabla de contenido
Solución de problemas

Manuales relacionados para Carel huniDisk Serie


Resumen de contenidos para Carel huniDisk Serie
- Página 1 humiDisk humidifi cador centrífugo centrifugal humidifi er Manual del usuario User manual NO POWER & SIGNAL CABLES TOGETHER READ CAREFULLY IN THE TEXT! I n t e g r a t e d C o n t r o l S o l u t i o n s & E n e r g y S a v i n g s...
- Página 2 Warning L’installazione del prodotto deve obbligatoriamente comprendere la connessione di messa a terra, usando l’apposito morsetto giallo-verde in morsettiera. Non utilizzare il neutro come connessione a terra. The product must be installed with the earthconnected, using the special yellow-green terminal on the terminal block.
- Página 3 Manual del usuario...
- Página 4 Asegúrese de que la instalación, el uso y el mantenimiento se realicen de acuerdo con las instrucciones incluidas en el presente manual. Cualquier otro uso del dispositivo y modifi cación efectuada en la unidad sin la autorización de CAREL S.p.A. se considerará inapropiado.
-
Página 5: Tabla De Contenido
4.1 Tarjeta electrónica ..........................16 4.2 I dip-switch ..............................16 4.3 Regulación de la capacidad de humectación .................16 4.4 Ciclo de lavado/vaciado ........................16 4.5 Ciclo de lavado/vaciado utilizando cuadros eléctricos CAREL ............16 5. DISPOSITIVO ANTIHIELO PARA HUMIDISK 5.1 Montaje ..............................17 6. MANTENIMIENTO 6.1 Limpieza del fi... - Página 6 11.2 Tabla de datos técnicos del HumiDisk 65 ....................26 11.3 Características eléctricas de los cuadros eléctricos UCQ065D100 y UCQ065D200 ....27 11.4 Características técnicas del humidostato DN33Z9HR20 CAREL ..........27 11.5 Características técnicas del humidostato mecánico UCHUMM0000 ........27 11.6 Lista de piezas de repuesto para el HumiDisk 10 ...................28...
-
Página 7: Introducción
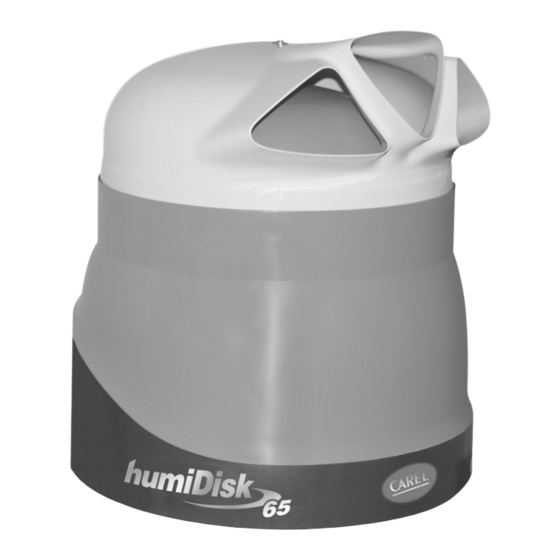
1. INTRODUCCIÓN El HumDisk es un humidifi cador de aire que funciona según el principio de la pulverización del agua por me- dio de la fuerza centrífuga. El aparato puede ser alimentado con agua potable o con agua desmineralizada. El aparato se presenta en dos versiones: HumiDisk con producción de 1 kg/h de agua atomizada, aproximadamente. -
Página 8: Humidostato Y Sonda De Humedad
1.5 Humidostato y sonda de humedad Código Descripción Notas UCHUMM0000 Humidostato mecánico de ambiente 20...90% H.R. Tab. 1.d Sondas de ambiente (sólo para HumiDisk Código Descripción Notas ASWH100000 Sonda de humedad ambiente 10...90% H.R. ASWC110000 Sonda de temperatura-humedad ambiente Para utilizarse sólo con los cuadros 0...50 °C 10...90% H.R. -
Página 9: Instalación
1. INSTALACIÓN 2.1 Material suministrado El siguiente material se suministra de serie con el aparato. Antes de comenzar el trabajo, compruebe que va incluido en el paquete todo el material que se detalla a continuación. Para HumiDisk • 1 humidifi cador modelo HumiDisk •... -
Página 10: Posicionamiento
2.3 Posicionamiento Nota: El HumiDisk se debe instalar en posición horizontal, con el fi ltro del aire hacia abajo, levantado sobre el suelo como se indica en las fi guras 2.c, 2.d, 2.e. Cualquier otra posición puede comprometer el buen funcionamiento del aparato. -
Página 11: Instalación Con El Aparato Colgado
HumiDisk Para instalar el humidifi cador en la pared, utilice el soporte y los tornillos suministrados. Se puede utilizar el soporte como plantilla para marcar los agujeros en la pared. Respete las distancias indicadas en el párrafo 2.3, y antes de taladrar los agujeros, asegúrese de que el soporte está a nivel. Asegúrese de que la pared puede soportar el peso del aparato en condiciones de funcionamiento normales. -
Página 12: Conexiones Eléctricas
2.6 Conexiones eléctricas La instalación requiere la utilización de un humidostato todo/nada que controle el funcionamiento del humidifi cador: es posible sin embargo utilizar, en su lugar, un contacto simple todo/nada con la única diferencia de que el aparato se debe arrancar y parar manualmente. La elección, no obstante, no infl uye en el procedimiento de instalación descrito a continuación. -
Página 13: Conexiones Hidráulicas
2.6.3 Cableado Importante: El cable fl exible que se ha de utilizar para las conexiones eléctricas debe estar protegido por lo menos por una cubierta ordinaria de PVC y respetar la norma 227 IEC 53 (CENELEC H05VV-F o H05VVH2-F o superior). Cableado del HumiDisk (fi... -
Página 14: Operaciones FI Nales
Conexiones hidráulicas del HumiDisk 10° < Fig. 2.v Conexiones hidráulicas del HumiDisk Fig. 2.z 2.8 Operaciones fi nales Asegúrese de que todos los cables están colocados correctamente dentro del aparato, como se muestra en las fi guras 2.t y 2.u. En el HumiDisk , verifi... -
Página 15: Arranque, Control Y Parada
3. ARRANQUE, CONTROL Y PARADA 3.1 Comprobaciones preliminares Antes de poner en funcionamiento el humidifi cador, compruebe que: • Todas las conexiones eléctricas e hidráulicas se han conectado según las instrucciones descritas en este manual. • No hay fugas de agua en el circuito. •... -
Página 16: El Controlador Electróncico Del Humidisk
4.5 Ciclo de lavado/vaciado utilizando cuadros eléctricos CAREL Nota: Cuando se utilizan los cuadros eléctricos CAREL es posible ejecutar el ciclo de lavado aunque el humidifi cador, en el estado de encendido, sea activado por la sonda de humedad para un nuevo ciclo de producción. -
Página 17: Dispositivo Antihielo Para Humidisk
5. DISPOSITIVO ANTIHIELO PARA humiDisk El dispositivo antihielo es necesario cuando el HumiDisk está instalado en un ambiente en el que la temperatura puede descender por debajo de 0 °C. ATENCIÓN: Respete los límites de funcionamiento indicados en la Tab. 11.b. En tal caso, de hecho, puede formarse hielo dentro del aparato y afectar al buen funcionamiento del mis- mo. -
Página 18: Mantenimiento
6. MANTENIMIENTO El HumiDisk está diseñado para garantizar un funcionamiento efi ciente y exento de fallos durante un largo periodo de tiempo. Sin embargo, es necesario llevar a cabo una serie de operaciones de mantenimiento simples, cuya frecuencia depende de las condiciones del ambiente en el que está funcionando el HumiDisk y de la calidad del agua de alimentación. -
Página 19: Inspección Y Limpieza Del Sifón De Drenaje
6.2 Inspección y limpieza del sifón de drenaje Puede ser necesario limpiar periódicamente el sifón de drenaje: la acumulación de suciedad dentro del sifón de drenaje puede comprometer el buen funcionamiento. Cuando sea necesaria la limpieza, proceda del siguiente modo: 6.2.1 HumiDisk (fi... -
Página 20: Almacenaje
7. ALMACENAJE • Conserve el aparato en un ambiente con temperatura comprendida entre -10°C y +60°C. • Mientras el aparato esté embalado manténgalo en posición vertical. • No poner encima de la caja otros objetos pesados. 7.1 Comprobaciones a realizar antes y después de un periodo de inactividad largo 7.1.1 Antes •... -
Página 21: Cuadros Eléctricos Carel, Opcionales
Estos cuadros eléctricos permiten un control más preciso de la humedad deseada en el ambiente, dado que se utilizan junto con las sondas de humedad CAREL y además permiten una gestión particular de los ciclos de drenaje del agua introduciendo las funciones de lavado no sólo al fi nal de cada ciclo de humec- tación, sino también al inicio. -
Página 22: Salidas De Alarma
8.1.4 Salidas de alarma En el cuadro eléctrico hay tres terminales para las salidas de relé (NC, C, NO) que se activan en los siguientes casos: • Alarma de sonda. • Alarma de humedad baja. • Alarma de humedad alta. •... -
Página 23: Salida De Alarmas
Atención: Para las conexiones eléctricas, utilice conductores aislados con una sección mínima de 1,5 mm Acceda a la caja de empalmes desmontando el fi ltro del aire, como se describe en el capítulo 6. Los cuadros con n. de serie inferior a 148220 tienen un control IRDR, y superior a 148220 tienen un control DN33 8.2.1 Conexión del cuadro eléctrico UCQ065D200 al primer humidifi... -
Página 24: Humidostato Dn33Z9Hr20 Presente En Los Cuadros Eléctricos Ucq065D100 Y Ucq065D200
9. HUMIDOSTATO DN33Z9HR20 PRESENTE EN LOS CUADROS ELÉCTRICOS UCQ065D100 Y UCQ065D200 El HumiDisk puede ser manejado por un cuadro eléctrico (cód. UCQ065D100; UCQ065D2000) que tiene el controlador electrónico basado en microprocesador DN33Z9HR20. El controlador tiene un funciona- miento todo/nada y puede mostrar constantemente el valor de la humedad leído por la sonda; además, está... -
Página 25: Confi Guración De Los Parámetros Fundamentales
9.1 Confi guración de los parámetros fundamentales Confi guración del punto de consigna (St1) • Pulse SEL durante unos segundos. • En el display aparecerá St1. • Suelte el botón SEL. • En el display aparece el valor actual de SET 1, parpadeando. •... -
Página 26: Dimensiones Y Pesos
10. DIMENSIONES Y PESOS 10.1 HumiDisk 312 mm 302 mm 390 mm Peso 4,3 Kg Fig. 10.a 10.2 HumiDisk 565 mm 505 mm 610 mm Peso 17,6 Kg Fig. 10.b 11. CARACTERÍSTICAS TÉCNICAS 11.1 Tabla de datos técnicos del HumiDisk Capacidad de humectación 1 kg/h (2,2 lb/h) a 230 V 50 Hz, 1.2 kg/h (2,6 lb/h) a 110 V 60 Hz... -
Página 27: Características Eléctricas De Los Cuadros Eléctricos Ucq065D100 Y Ucq065D200
Terminales de muelle, sección 0,2…2,5 mm Montaje En pared Caja Plástico Contaminación ambiental Normal Tab. 11.c 11.4 Características técnicas del humidostato DN33Z9HR20 CAREL Alimentación 230 Vca ±10% Entrada de potencia 3 VA Rango de funcionamiento 0T50 °C Resolución 0,1 % H.R. -
Página 28: Lista De Piezas De Repuesto Para El Humidisk 10
11.6 Lista de piezas de repuesto para el HumiDisk Nº en el dibujo CAREL Descripción Código CAREL Difusor UC10KD0000 Cubierta del motor UC10KC0000 Motor eléctrico 230 V 50 Hz UC10KM0000 Condensador del motor 230 V 50 Hz UC10KCM000 Motor eléctrico 110 V 60 Hz... -
Página 29: Lista De Piezas De Respuesto Para El Humidisk 65
11.7 Lista de piezas de respuesto para el HumiDisk Posición Descripción Código Difusor UCKD000000 Cubierta del motor UCKC000000 Motor eléctrico 230 V 50 Hz UCKM000000 Motor eléctrico 110 V 60 Hz UCKM000010 Corona dentada UCKCD00000 Disco atomizador equilibrado UCKDS00000 Electroválvula con regulador UCKETV0000 Electroválvula con regulador UCKETV0010... -
Página 30: Problemas Y Soluciones
12. PROBLEMAS Y SOLUCIONES 12.1 El humidifi cador no arranca Posibles causas Solución No hay alimentación eléctrica Comprobar las conexiones eléctricas desde el cuadro de control hasta el bloque de terminales del humidifi cador. El condensador de arranque del motor se ha Sustituir el condensador por otro similar. - Página 31 User manual...
- Página 32 The installation, operation and maintenance operations must be performed in compliance with the instruc- tions provided in this manual. All other uses and modifi cations made to the appliance that are not authorised by CAREL S.p.A. are con- sidered incorrect.
- Página 33 4.1 Electronic board .............................16 4.2 Dip-switch ...............................16 4.3 Adjusting the humidifi cation capacity ....................16 4.4 Washing/emptying cycle ........................16 4.5 Washing/emptying cycle using CAREL electrical panels ..............16 5. ANTIFREEZE DEVICE FOR HUMIDISK 5.1 Assembly ..............................17 6. MAINTENANCE 6.1 Cleaning the air fi lter..........................18 6.2 Inspecting and cleaning the drain siphon ..................19...
- Página 34 65 ...................26 11.3 Electrical specifi cations of electrical panels UCQ065D100 ............27 and UCQ065D200 ............................27 11.4 Technical specifi cations of the CAREL DN33Z9HR20 humidistat ..........27 11.5 Technical specifi cations of the UCHUMM0000 mechanical humidistat .........27 11.6 List of spare parts for humiDisk 10 ........................28...
-
Página 35: Introduction
1. INTRODUCTION humiDisk is an air humidifi er and operates on the principle of atomising water by centrifugal force. The appliance can operate either on drinking or demineralised water. The appliance s supplied in two versions: humiDisk with production of around 1 kg/h of atomised water. humiDisk with production of around 6.5 kg/h of atomised water. -
Página 36: Humidistat And Humidity Probes
1.5 Humidistat and humidity probes code description notes UCHUMM0000 mechanical room humidistat 20 to 90% RH Tab. 1.d Room probes (humiDisk only) code description notes ASWH100000 humidity room probe 10 to 90% RH ASWC110000 room temperature-humidity probe to be used only with electrical panels code 0 to 50 °C 10 to 90% RH UCQ065D100 and UCQ065D200. -
Página 37: Installation
1. INSTALLATION 2.1 Material supplied The following materials are supplied as standard with the appliance. Check that all the material listed below is included in the packaging before starting work. For humiDisk • 1 humiDisk model humidifi er; • 1 technical installation manual (this manual); •... -
Página 38: Positioning
2.3 Positioning Note: the humidisk must be installed in a horizontal position, with the air fi lter facing downwards, raised above the ground, as shown in fi gures 2.c, 2.d, 2.e. Any other position will compromise the correct opera- tion of the appliance. To allow maintenance to be carried out where necessary and for the correct operation of the applian- ce, the minimum suggested distances must be maintained when positioning the humidifi... -
Página 39: Hanging Installation
humiDisk To install the humidifi er on the wall, use the bracket and the screws supplied. The bracket can be used as a template to mark the holes on the wall. Maintain the distances indicated in paragraph 2.3, and make sure that the bracket is level before drilling the holes. -
Página 40: Electrical Connections
2.6 Electrical connections Installation requires the use of an ON/OFF humidistat that controls the operation of the humidifi er: in place of this, however, a simple ON/OFF contact can be used, with the only difference that the appliance must be started and stopped manually. This choice however does not in any way infl uence the installation procedure described below. -
Página 41: Water Connections
2.6.3 Wiring Important: The fl exible cable used for the electric connections must be at least protected by an ordinary PVC sheath and comply with the 227 IEC 53 standards (CENELEC H05VV-F or H05VVH2-F or better). Wiring humiDisk (Fig. 2.t): •... -
Página 42: Final Operations
Water connections on the humiDisk 10° < Fig. 2.v Water connections on the humiDisk Fig. 2.z 2.8 Final operations Make sure that all the wires are positioned properly inside the appliance as shown in Figs 2.t and 2.u. For the humiDisk check that the junction box is properly closed and positioned correctly, and that the spring is tightened. -
Página 43: Starting, Control And Stopping
3. STARTING, CONTROL AND STOPPING 3.1 Preliminary checks Before starting up the humidifi er check that: • all the electrical and water connections have been completed according to the instructions described in this manual; • there are no water leaks in the circuit; •... -
Página 44: Electronic Controller For Humidisk
4.5 Washing/emptying cycle using CAREL electrical panels Note: when using the CAREL electrical panels, the washing cycle can be extended when the humidifi er, in On status, is activated by the humidity probe for a new production cycle (see chapter 9 in the manual). -
Página 45: Antifreeze Device For Humidisk
5. ANTIFREEZE DEVICE FOR humiDisk The antifreeze device is required when the humiDisk is installed in an environment where the tempera- ture may drop below 0°C. IMPORTANT: observe the operating limits shown Tab. 11.b. If this happens, in fact, ice may form inside the appliance and affect correct operation. The appliance is already designed to fi... -
Página 46: Maintenance
6. MAINTENANCE humiDisk is designed to ensure effi cient and faultless operation for an extended time. However, a number of simple maintenance operations need to be carried out, at a frequency that depends on the environmen- tal conditions that the humiDisk operates in and on the quality of the supply water. IMPORTANT: Before carrying out any maintenance, open (switch off) the main switch and wait for the appliance to come to a complete stop. -
Página 47: Inspecting And Cleaning The Drain Siphon
6.2 Inspecting and cleaning the drain siphon The drain siphon may need to be cleaned periodically: the accumulation of dirt inside the siphon may compromise operation. When cleaning is required, proceed as follows: 6.2.1 humiDisk (Fig. 6.c) • remove the air fi lter; •... -
Página 48: Storage
7. STORAGE • Keep the appliance in an environment with a temperature range between -10°C and +60°C. • When the appliance is still packaged, keep it upright. • Do not stack any other heavy objects on the box. 7.1 Checks to be performed before and after an extended period of inactivity 7.1.1 Before •... -
Página 49: Optional Carel Electrical Panels
These electrical panels allow more precise control of the desired humidity in the environment, given that they are used together with the CAREL humidity probes, and in addition allow special management of the water drain cycles by introducing the washing functions not only at the end of each humidifi cation cycle, but also at the start. -
Página 50: Alarm Outputs
8.1.4 Alarm outputs The electrical panel features three terminals for the outputs of the relay (NC, C, NO) that is activated in the following events: • probe alarm; • low humidity alarm; • high humidity alarm; • malfunction of the controller. 8.1.5 Remote ON/OFF Terminals 4 and 5 on the electrical panel: the panel leaves the factory with terminals 4 and 5 jumpered, and the humidifi... -
Página 51: Power Connection
Important: make sure to use insulated wires with a minimum cross-section of 1.5 mm for the electrical connections. Access the humidifi er junction box by removing the air fi lter, as described in chapter 6. Panels with serial numbers up to 148220 have the IRDR controller, while higher numbers have the DN33 controller 8.2.1 Connecting the electrical panel UCQ065D200 to the fi... -
Página 52: Humidistat Dn33Z9Hr20 On Electrical Panels Ucq065D100 And Ucq065D200
9. HUMIDISTAT DN33Z9HR20 ON ELECTRICAL PANELS UCQ065D100 AND UCQ065D200 humiDisk can be managed by an electrical panel (code UCQ065D100; UCQ065D2000) featuring the DN33Z9HR20 microprocessor electronic controller. The controller has ON/OFF operation and can con- stantly display the humidity value read by the probe; in addition, a remote ON/OFF contact and an alarm output are available. -
Página 53: Setting The Fundamental Parameters
9.1 Setting the fundamental parameters Setting the set point (St1) • press SEL for a few seconds; • the display will show St1; • release the SEL button; • the display will show the current value of SET 1, fl ashing; •... -
Página 54: Dimensions And Weights
10. DIMENSIONS AND WEIGHTS 10.1 humiDisk 312 mm 302 mm 390 mm Weight 4.3 Kg Fig. 10.a 10.2 humiDisk 565 mm 505 mm 610 mm Weight 17.6 Kg Fig. 10.b 11.TECHNICAL SPECIFICATIONS 11.1 Table of technical specifi cations for humiDisk Humidifi... -
Página 55: Electrical Specifi Cations Of Electrical Panels Ucq065D100
0.2 to 2.5 mm Assembly wall mounted Case plastic Environmental pollution normal Tab. 11.c 11.4 Technical specifi cations of the CAREL DN33Z9HR20 humidistat Power supply 230 Vac ±10% Power input 3 VA Operating range 0T50 °C Resolution 0.1 % RH... -
Página 56: List Of Spare Parts For Humidisk 10
11.6 List of spare parts for humiDisk NO. ON CAREL DRAWING description CAREL CODE diffuser UC10KD0000 motor cover UC10KC0000 electric motor, 230 V 50 Hz UC10KM0000 motor capacitor, 230 V 50 Hz UC10KCM000 electric motor, 110 V 60 Hz UC10KM0010... - Página 57 11.7 List of spare parts for humiDisk posizione description code diffuser UCKD000000 motor cover UCKC000000 electric motor, 230 V 50 Hz UCKM000000 electric motor, 110 V 60 Hz UCKM000010 toothed ring UCKCD00000 balanced atomising disk UCKDS00000 solenoid valve with regulator UCKETV0000 solenoid valve with regulator UCKETV0010...
-
Página 58: Troubleshooting
12. TROUBLESHOOTING 12.1 The humidifi er won’t start Possible cause Solution No power supply Check the electrical connections from the control panel to the terminal block in the humidifi er. The motor start capacitor has blown Replace the capacitor with a similar part. Tab. - Página 60 Agenzia / Agency: CAREL INDUSTRIES - HQs Via dell’Industria, 11 - 35020 Brugine - Padova (Italy) Tel. (+39) 049.9716611 - Fax (+39) 049.9716600 e-mail: carel@carel.com - www.carel.com...