Tabla de contenido
Solución de problemas

Resumen de contenidos para Omcan PE-IT-0024-S
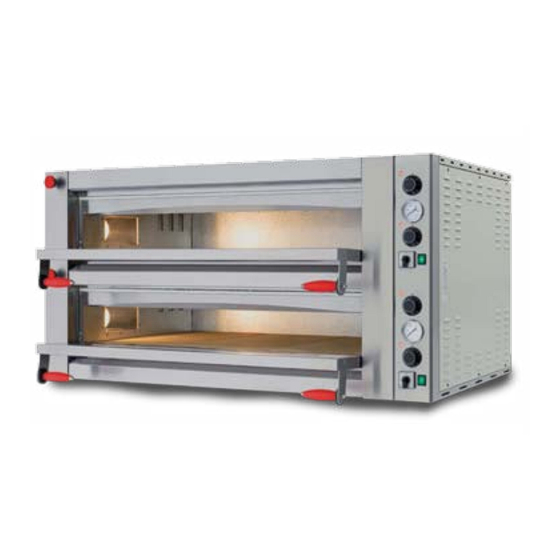
- Página 1 Pizza Ovens Models PE-IT-0024-S, 0048-D, 0049-D, 0049-DD Instruction Manual Revised - 11/14/2014 Toll Free: 1-800-465-0234 Fax: 905-607-0234 Email: sales@omcan.com www.omcan.com...
-
Página 2: Tabla De Contenido
Table of Contents Model PE-IT-0024-S / Model PE-IT-0048-D Model PE-IT-0049-D / Model PE-IT-0049-DD Section Page General Information ------------------------------------------------------------------------------------------------- 3 - 4 Safety and Warranty ------------------------------------------------------------------------------------------------- 4 - 5 Technical Specifications ------------------------------------------------------------------------------------------------ 5 Installation ------------------------------------------------------------------------------------------------------------------ 6 Operation ------------------------------------------------------------------------------------------------------------- 7 - 13... -
Página 3: General Information
If the package has suffered rough handling, bumps or damage (visible or concealed), please note it on the bill of lading before accepting the delivery and contact Omcan within 24 hours, so we may initiate a claim with the carrier. A detailed report on the extent of the damage caused to the machine must be filled out within three days, from the delivery date shown in the shipping documents. -
Página 4: Revise El Paquete A Su Llegada
Si el paquete ha sufrido un manejo de poco cuidado, golpes o daños (visible o oculto) por favor anote en la factura antes de aceptar la entrega y contacte Omcan dentro de las 24 horas, de modo que podamos iniciar una reclamación con la compañia. -
Página 5: Year Warranty
In any case, for suitable recycling, we suggest disposing of the products separately (differentiated waste) according to the current norms. DO NOT DISCARD ANY PACKAGING MATERIALS IN THE ENVIRONMENT! Technical Specifications Model PE-IT-0024-S PE-IT-0048-D PE-IT-0049-D PE-IT-0049-DD Maximum 842°F / 450°C... -
Página 6: Installation
Installation Installation must be executed by qualified personnel in compliance with local and national regulations. OVEN POSITIONING Ensure that the oven is put on a stand with the suitable carrying capacity and that is flat. After unpacking the oven from its packing, position it in prepared location, taking into account the minimum distances. -
Página 7: Operation
Operation DIGITAL OVEN START UP AND USE COMMAND PANEL DESCRIPTION Digital control panel Main switch Cooking chamber light switch The digital control panel allows the separate setting of top heating’s elements and bottom heating’s elements, furnishing in real time the information on the temperatures. It also allows the activation and set point of the timer, and the delay of lighting. - Página 8 Operation pushing once the touch Programme 2 is taken back and “P2” is shown. A minimum three seconds lasting push enables the modification of the bottom temperature (of the selected programme). INCREMENT VALUE KEY / VISUALIZATION TOP TEMPERATURE When the display shows the average baking chamber temperature, pushing once the touch top temperature is shown.
-
Página 9: Start Up Phase
Operation TOP TEMPERATURE ICON: It is active when the top probe temperature is showed on the display. This icon flashes during the variation of the top temperature set point. BOTTOM TEMPERATURE ICON: It is active when the bottom probe temperature is showed on the display. -
Página 10: Working Phase
Operation GENERAL INDICATIONS FOR A GOOD COOKING Generally for the food products it is not advisable to give precise temperature and baking time, because of their different characteristics. Particularly, regarding pizza and similar products, time and temperatures depend on the shape and thickness of the dough, as well as on the quantity and typology of the additional ingredients. For those reasons it is always advisable to carry out previously some baking tests, (particularly when it is an absolute new oven), with the aim of understanding as much as possible the characteristics and the functioning of the oven. -
Página 11: Setting The Date And Time
Operation SETTING THE DATE AND TIME The date and time must be set when the expansion with RTC is used for delayed start (parameter P20 = 2). With the card OFF, press the CLOCK key for 3 seconds, and the display will show the label dd followed by the day of the week from 1 to 7 (1= Monday, 7 = Sunday). - Página 12 Operation MECHANICAL OVEN START UP AND USE COMMAND PANEL DESCRIPTION Top heating elements Thermostat for the regulation function pilot light of top temperatures Digital control thermometer Bottom heating elements function pilot light Thermostat for the regulation of bottom temperatures Cooking chamber light switch Main switch FIRST LIGHTING OF THE OVEN At the first use of the appliance it is advisable to heat the empty oven to eliminate bad smells caused by the...
- Página 13 Operation the shape and thickness of the dough, as well as on the quantity and typology of the additional ingredients. For those reasons it is always advisable to carry out previously some baking tests, (particularly when it is an absolute new oven), with the aim of understanding as much as possible the characteristics and the functioning of the oven.
-
Página 14: Maintenance
Maintenance Before performing any maintenance operations, including cleaning, take the following precautions: • Ensure that the oven is not working end completely cold. • Ensure that the electrical power is not present. • Make certain that the electrical power cannot be accidentally reinserted. Disconnect the plug from the electrical power socket. -
Página 15: Troubleshooting
Troubleshooting WORKING ERRORS SYMPTOM POSSIBLE CAUSE SUGGESTED REMEDY The oven does not switch on. No electric Energy in the net. Check the general contactor, the socket, the plug, and the supply cable. Main switch off (positioned on "0"). Rotate the main switch to position "1". -
Página 16: French Instructions
Troubleshooting Card probe damage. Card probe damage. All heating Replace the card elements probe. disconnection (top and bottom) and buzzer intermittent sound. Probe temperature Insufficient oven air Disconnection Wait until the too high. circulation due to of all heating temperature of non respect of the elements (top the switch panel... - Página 17 French Instructions • La zone doit être sec. • La zone doit disposer de sources d’eau et de chaleur à une distance suffisante. • Ventilation et l’éclairage doivent être adaptés et conformes aux normes d’hygiène et de sécurité prévues par les lois en vigueur. •...
-
Página 18: Spécifications Techniques
French Instructions SPÉCIFICATIONS TECHNIQUES Modèle PE-IT-0024-S PE-IT-0048-D PE-IT-0049-D PE-IT-0049-DD Température 842°F / 450°C Maximale Électrique 220V/60/3 Puissance 6.6 kW 13.2 kW 18 kW Volume 23.7 Cu. Ft. 36.7 Cu. Ft. 48.7 Cu. Ft. Dimensions de la 27.6” x 27.6” x 5.9”... -
Página 19: Mise A La Terre
French Instructions Le raccordement électrique (fiche) doit être facilement accessible, aussi après l’installation du four. La distance entre l’appareil et la prise doit être suffisante pour ne pas provoquer des tensions dans le câble d’alimentation. En outre, le câble ne doit pas être situé en dessous de la base de support de la machine. Si le câble d’alimentation électrique est endommagé, il doit être remplacé... -
Página 20: Fonction Des Touches
French Instructions FONCTION DES TOUCHES ON/OFF Lorsque le panneau de commande numérique est en position Off (désactivé) une poussée permet au commutateur sur le même. Lorsque le panneau de commande numérique est «on», la pression continue pendant trois secondes permet déplace en «Off» (désactivé). KEY TOP / PROGRAMME P1 Lorsque le panneau de commande numérique est actif (et l’écran affiche la température moyenne de la chambre de cuisson), poussant une fois le programme touche 1 est repris et le signal «P1»... -
Página 21: Signification Des Icônes De L'ÉCran
French Instructions START/STOP KEY Lorsque le panneau de commande numérique est active: • Après avoir réglé la mise en marche, la simple pression retardée de démarrage / arrêt tactile permet le compte à rebours de l’interrupteur retard sur. • Lorsque le commutateur retard sur le compte à rebours est en cours de processus, un trois secondes poussée de la touche marche / arrêt durables permet de déconnecter le même. -
Página 22: Travail De La Phase
French Instructions Procédure: • Ouvrir complètement la vanne de l’extracteur. • Mettez l’interrupteur principal en position «1» après avoir vérifié que le four est relié à l’alimentation. • Faites chauffer les éléments de chauffage en appuyant sur le bouton marche / arrêt sur le panneau de commande numérique. -
Página 23: Réglage De La Date Et De L'HEure
French Instructions mettre en la pizza / s pour la cuisson, procéder comme suit: • Ouvrez la porte du four par les poignées appropriées. • Pour éclairer la chambre intérieure, réglez le bouton d’éclairage (B) dans la position «1». • Mettez au four la pizza / s à... -
Página 24: Utilisation De Valve Exauster
French Instructions MISE DEPART DIFFERE Le départ différé peut être réglé que lorsque la carte est sous tension et la minuterie est pas utilisé pour le comptage. Départ différé peut être réglé pour le même jour et pour les 6 jours qui suivent (par exemple, le mercredi il est possible de définir le début programmé... -
Página 25: Phase De Démarrage
French Instructions MÉCANIQUE FOUR DEMARRAGE ET UTILISATION COMMANDE DESCRIPTION DU PANNEAU Top éléments chauffants Thermostat pour la régulation fonction veilleuse de la température du sommet Thermomètre de contrôle numérique Bas éléments chauffants fonction veilleuse Thermostat pour la régulation des températures de fond Commutateur d’éclairage de Interrupteur principal la chambre de cuisson... - Página 26 French Instructions similaires, du temps et de la température dépend de la forme et de l’épaisseur de la pâte, ainsi que sur la quantité et la typologie des ingrédients supplémentaires. Pour ces raisons, il est toujours conseillé d’effectuer auparavant des tests de cuisson, (surtout quand il est un nouveau four absolue), dans le but de comprendre autant que possible les caractéristiques et le fonctionnement du four.
- Página 27 French Instructions ENTRETIEN Avant d’effectuer des opérations de maintenance, y compris le nettoyage, prenez les précautions suivantes: • Assurez-vous que le four ne fonctionne pas fin complètement froid. • Assurez-vous que l’alimentation électrique est absent. • Assurez-vous que la puissance électrique ne peut pas être accidentellement réinséré. Débranchez la fiche de la prise de courant électrique.
- Página 28 French Instructions DÉPANNAGE ERREURS DE TRAVAIL SYMPTÔMES CAUSE POSSIBLE SOLUTION SUGGÉRÉE Le four ne se met pas en marche. Aucune énergie électrique dans le Vérifiez le contacteur général, filet. la prise, la fiche et le câble d’alimentation. Interrupteur principal (positionnée Tournez le commutateur principal à...
- Página 29 French Instructions ERREURS DE CONTRÔLEUR AFFICHER LES ALARMES SENS CAUSES EFFET SOLUTIONS ALARMES POSSIBLES Dommage de Top sonde de Top éléments Se reconnecter et sonde supérieure connexion de la chauffants / ou remplacer la ou connexion de la sonde défectueuse déconnexion et sonde supérieure.
-
Página 30: Spanish Instructions
Spanish Instructions SEGURIDAD Y GARANTÍA ADVERTENCIAS PARA EL INSTALADOR Compruebe que la ubicación del horno está en cumplimiento con las regulaciones locales y nacionales. • Se adhieren a las instrucciones de este manual. • No ejecutar las conexiones eléctricas con cables temporales o sin aislamiento. •... -
Página 31: Instalación
En cualquier caso, para el reciclaje adecuado, le sugerimos comercialización de esos productos por separado (residuos diferenciados) de acuerdo con las normas vigentes. NO DESECHE LOS MATERIALES DE EMBALAJE EN EL MEDIO AMBIENTE! ESPECIFICACIONES TÉCNICAS Modelo PE-IT-0024-S PE-IT-0048-D PE-IT-0049-D PE-IT-0049-DD Temperatura Máxima 842°F / 450°C... -
Página 32: Equipo De Conexión
Spanish Instructions EQUIPO DE CONEXIÓN Conexión eléctrica El horno no se proporciona con el cable de fuente de alimentación. Al conectar el aparato eléctrico, un interruptor diferencial automático debe ser interpuesto con una distancia de apertura entre los contactos de al menos 3 mm. -
Página 33: Operación
Spanish Instructions OPERACIÓN DIGITAL HORNO PUESTA EN MARCHA Y USO COMANDO DESCRIPCIÓN DEL PANEL Panel de control digital Interruptor principal Interruptor de la luz cámara de cocción El panel de control digital permite el ajuste independiente de los elementos de la parte superior de la calefacción y elementos de calefacción inferior, el suministro en tiempo real la información sobre las temperaturas. -
Página 34: Significado De Los Iconos De La Pantalla
Spanish Instructions CLAVE DE FONDO DEL PROGRAMA / P2 Cuando el panel de control digital está activo (y la pantalla muestra la temperatura media de hornear cámara), pulsando una vez el toque Programa 2 se toma de nuevo y “P2” se muestra. Un mínimo de tres segundos de duración de empuje permite la modificación de la temperatura del fondo (del programa seleccionado). -
Página 35: Primera Iluminación Del Horno
Spanish Instructions °F FAHRENHEIT ICONO: Es activa cuando la temperatura se encuentra en Fahrenheit. ICONO DE TEMPERATURA TOP: Es activa cuando la temperatura de la sonda superior se mostró en la pantalla. Este icono parpadea durante la variación del punto de consigna de temperatura de la parte superior. -
Página 36: Función De Digital Panel De Control
Spanish Instructions de los elementos de calentamiento para alcanzar y mantener las temperaturas establecidas en el programa utilizado (P1 o P2). FUNCIÓN DE DIGITAL PANEL DE CONTROL Las principales funciones del panel de control digital son: • La visualización de las temperaturas de la cámara de hornear (promedio superior e inferior). •... -
Página 37: Acceso Rápido Del Programa
Spanish Instructions Evite el aceite y las grasas para caer en la parte inferior; si entran en la temperatura alta puede quemar. ACCESO RÁPIDO DEL PROGRAMA Pulse la tecla superior para acceder a los puntos de ajuste de temperatura relacionados con el programa 1 (parámetros P3 y P4), pulse la tecla en lugar ABAJO para acceder a los puntos de ajuste de temperatura relacionados con el programa 2 (parámetros P5 y P6). -
Página 38: Uso De Valvula Exauster
Spanish Instructions USO DE VALVULA EXAUSTER Por la válvula aspirador el operador puede regular los vapores de cocción y los humos fluir hacia fuera de la cámara de cocción, mientras que en la misma se mantiene el calor. Es aconsejable mantener la válvula totalmente cerrada cuando el horno está... - Página 39 Spanish Instructions • Deje el horno de trabajo (vacío) durante al menos 8 horas a la temperatura de 300 ° antes de proceder a la primera cocción. PUESTA EN MARCHA DE FASE Después de conectar el horno a la red eléctrica girar el interruptor principal en la posición “1”. La pantalla del termómetro digital muestra la temperatura media real de la cámara de cocción.
-
Página 40: Uso De Valvula Aspirador
Spanish Instructions USO DE VALVULA ASPIRADOR Mientras bicarbonato de regular la válvula de acuerdo con las exigencias. Horno es radiante; así, la temperatura de consigna se alcanza en menor tiempo posible. Por la válvula aspirador el operador puede regular los vapores de cocción y los humos fluir hacia fuera de la cámara de cocción, mientras que en la misma se mantiene el calor. -
Página 41: Limpieza Externa Del Horno
Spanish Instructions llevarlos a cabo por una aspiradora adecuada. Al final, limpiar la piedra refractaria con un paño húmedo. LIMPIEZA EXTERNA DEL HORNO Áreas externas del horno de limpieza, partes externas en acero inoxidable, vidrio de la puerta, y panel de interruptores, deben llevarse a cabo en el horno frío y al suministro de energía eléctrica desconectada. -
Página 42: Errores Del Controlador
Spanish Instructions La temperatura continúa subiendo Tarjeta de potencia contactores Compruebe y, si es necesario, por encima del conjunto de termo / contactos bloqueados (elementos reemplace la tarjeta de temporizador. de calefacción siempre contactores. suministran). Contactos Thermo / temporizador Verificar y si es necesario sustituir defectuosos. - Página 43 Spanish Instructions Sonda de Insuficiente Desconexión Esperar hasta que temperatura circulación de de todos los la temperatura de demasiado alta. aire del horno elementos de la zona de panel debido a la falta calentamiento de conmutación de respeto de las (superior e inferior) disminuye por distancias mínimas...
-
Página 44: Parts Breakdown
Parts Breakdown Model PE-IT-0024-S 40637 Model PE-IT-0048-D 40638 Model PE-IT-0049-D 40641 Model PE-IT-0049-DD 40643... - Página 45 Parts Breakdown Model PE-IT-0024-S 40637 Model PE-IT-0048-D 40638 Model PE-IT-0049-D 40641 Model PE-IT-0049-DD 40643...
- Página 46 Parts Breakdown Model PE-IT-0024-S 40637 Model PE-IT-0048-D 40638 Model PE-IT-0049-D 40641 Model PE-IT-0049-DD 40643...
- Página 47 Parts Breakdown Model PE-IT-0024-S 40637 Model PE-IT-0048-D 40638 Model PE-IT-0049-D 40641 Model PE-IT-0049-DD 40643...
- Página 48 Parts Breakdown Model PE-IT-0024-S 40637 Model PE-IT-0048-D 40638 Model PE-IT-0049-D 40641 Model PE-IT-0049-DD 40643...
- Página 49 Parts Breakdown Model PE-IT-0024-S 40637 Model PE-IT-0048-D 40638 Model PE-IT-0049-D 40641 Model PE-IT-0049-DD 40643...
- Página 50 Parts Breakdown Model PE-IT-0024-S 40637 Description Position Description Position Description Position Complete Oven Door Cord Shot Pin Ø 3x16 Door Assembly Resistance 400 W 230V Hexagonal Nut DIN 934 M6 Professional Glass Ceramic Terminal Board PA220FV 12 Spring Sheet Poles 16sqmm 750V-76A...
- Página 51 Parts Breakdown Model PE-IT-0048-D 40638 Description Position Description Position Description Position Complete Oven Door Cord Shot Pin Ø 3x16 Door Assembly Resistance 400 W 230V Hexagonal Nut DIN 934 M6 Terminal Board PA220FV 12 Glass Ceramic Sheet Spring Poles 16sqmm 750V-76A Oven Door-Frame Assembly Plastic Shim CF06H4080-1810 Cord Support...
- Página 52 Parts Breakdown Model PE-IT-0049-D 40641 Description Position Description Position Description Position Complete Oven Door Resistance 400 W 230V Hexagonal Nut DIN 934 M6 Terminal Board PA220FV 12 Complete Oven Assembly Spring Poles 16sqmm 750V-76A Glass Ceramic Sheet Plastic Shim CF06H4080-1810 Cord Support 865x94x4mm “SIPREM”...
- Página 53 Parts Breakdown Model PE-IT-0049-DD 40643 Description Position Description Position Description Position Full Oven Door Resistance 400 W 230V Hex Nut DIN 934 M6 Terminal PA220FV 12 Pole Together with the Oven Door Spring 16sqmm 750V-76A Glass-Ceramic Plate Plastic Spacer CF06H4080-1810 Support Rope 865x94x4mm Together with Double Door...
-
Página 54: Electrical Schematics
Electrical Schematics Model PE-IT-0024-S 40637... - Página 55 Electrical Schematics Model PE-IT-0048-D 40638...
- Página 56 Electrical Schematics Model PE-IT-0049-D 40641...
- Página 57 Electrical Schematics Model PE-IT-0049-DD 40643...
-
Página 58: Notes
Notes ________________________________________________________________________________________ ________________________________________________________________________________________ ________________________________________________________________________________________ ________________________________________________________________________________________ ________________________________________________________________________________________ ________________________________________________________________________________________ ________________________________________________________________________________________ ________________________________________________________________________________________ ________________________________________________________________________________________ ________________________________________________________________________________________ ________________________________________________________________________________________ ________________________________________________________________________________________ ________________________________________________________________________________________ ________________________________________________________________________________________ ________________________________________________________________________________________ ________________________________________________________________________________________ ________________________________________________________________________________________ ________________________________________________________________________________________ ________________________________________________________________________________________ ________________________________________________________________________________________ ________________________________________________________________________________________ ________________________________________________________________________________________ ________________________________________________________________________________________ ________________________________________________________________________________________... -
Página 59: Warranty Registration
Warranty Registration Thank you for purchasing an Omcan product. To register your warranty for this product, complete the information below, tear off the card at the perforation and then send to the address specified below. You can also register online by visiting: Merci d’avoir acheté... - Página 60 Since 1951 Omcan has grown to become a leading distributor of equipment and supplies to the North American food service industry. Our success over these many years can be attributed to our commitment to strengthen and develop new and existing relationships with our valued customers and manufacturers.