Capítulos
Tabla de contenido
Solución de problemas

Manuales relacionados para Swann DVR4-5000


Resumen de contenidos para Swann DVR4-5000
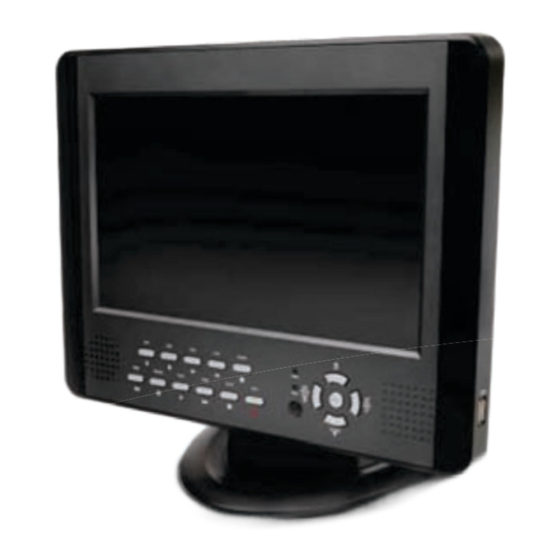
- Página 1 Advanced security made easy DVR4-5000™ 4 Channel Digital Video Recorder with Built-In 10.2” LCD Screen Operating Instructions SW349-DAT www.swannsecurity.com SR349-DAT-60010-130809...
-
Página 2: Before You Begin
Choose something that you’ll remember, but that others would be unlikely to guess. · If you do manage to lock yourself out of the DVR, you’ll need to contact us at the Swann Technical Support Telephone Helpdesk - the number is on the back cover. -
Página 3: Tabla De Contenido
Contents Before You Begin Contents Package Contents Overview DVR Layout Connections & Installation Connecting Cameras and Power Adapter Connecting and Using the Mouse Turning the DVR On/Off and Auto Recovery Menu Operation Accessing and Navigating the Menu System Setting DVR Time Image Display Single Camera View Multi Camera View... -
Página 4: Package Contents
The DVR4-5000 is also easy to use: we’ve included a PS2 mouse which makes navigating through the menus a breeze. There’s also a remote control for added convenience. -
Página 5: Front Panel
Layout of DVR Front Panel 1. Quad & Channels 1 to 4 5. FWD (Fast-Forward) 9. UP / DOWN Changes the viewing mode on Press to speed up playback. The Used for navigation and to the DVR. Channels 1 through 4 more FWD is pressed, the faster change values in the menus. -
Página 6: Dvr Layout
DVR Layout (cont) Remote Control 1. Channel 1 - 4, Quad 2. Rew Functions: 3. Play All buttons on the remote control operate 4. Fwd in exactly the same manner as their 5. REC namesake on the front panel of the DVR. 6. -
Página 7: Connecting Cameras And Power Adapter
Connecting Cameras and Power Adapters Connect the Power and BNC ends of the MaxiBright Camera to an Extension Tips and Tricks Cable. Connecting the cameras and the DVR is relatively Connect the end of the BNC Extension straight forward. However, there are a couple of Cable to a Video Input on the back of things that can go amiss, particularly if you’re not the DVR. -
Página 8: Connecting And Using The Mouse
DVR, use the master power switch on the rear panel. Auto-Recovery Feature The DVR4-5000™ is equipped with an Auto-Recovery feature. Should a power outage occur while you are recording the DVR will automatically resume recording once power is restored. -
Página 9: Menu Operation
Menu Operation Accessing and Navigating the Menu System The main Setup Menu can be accessed by pressing the MENU/ESC Button To navigate the menus, you can use the UP arrow or CH1 to move UP, and the DOWN arrow or CH2 to move DOWN. CH3 will move LEFT and CH4 will move RIGHT. -
Página 10: Image Display
Image Display Single Camera View 1. Current Camera Channel 2. Motion Detection Icon 3. Recording Icon 4. Main Display 5. Current Date & Time 6. Mute Audio 7. No Camera Signal Icon MUTE Multi Camera View Multi Camera View with 4 Cameras Multi Camera View with No Cameras... -
Página 11: Camera Menu
Camera Menu The Camera menu allows you to change visual attributes on each of the camera channels. Channel: Display the attributes of currently selected camera 1-4. Display: Turn the selected camera On or Off in the main display. Brightness, Contrast, Hue, Saturation: Using the mouse or the UP & DOWN buttons highlight the display option you want to change. -
Página 12: Screen Menu
Record Menu (cont) Record Quality: Set the image quality of the recordings from Normal, High or Highest. Note: higher image quality settings use more hard drive space is taken up by recordings. Record Schedule: Set different recording modes depending on the time of day. The Record Schedule allows you to set the recording mode for each hour of the day based on a 24 hour clock. -
Página 13: Motion Detection Menu
Motion Detection Menu The Motion Detection menu allows you to set motion options for each camera. It is located in the Alarm menu. Note: The DVR detects motion based on the level of change in the picture. Channel: Select which camera attributes to change from camera 1-4. Select which camera attributes to change from camera 1-4. -
Página 14: Audio Menu
Audio Menu The Audio menu sets the audio recording and volume options. Note: You must have a camera with audio or a powered microphone to record or monitor audio. Record: Set to ON to record audio from the Audio Input on the back of the DVR. Channel: You can use either channel 1 or 2, both at once or none at all. -
Página 15: Time Search
F/W Upgrade: Displays the current firmware version and allows future upgrades via a USB Flash Drive. Do not remove the Flash Drive while the firmware is updat- ing as it may damage the DVR. Only use updates authorized by Swann. When complete, remove the Flash Drive and restart the DVR. -
Página 16: Language Menu
Load Setup Default: Reset all settings on the DVR to factory defaults. Starting the DVR With a New Hard Drive When starting the DVR4-5000™ for the first time or starting the DVR after changing to a new hard drive, the DVR will configure the hard drive for use. Fol- low the on screen prompts to configure the hard drive. -
Página 17: Changing The Hard Drive
Installing or Changing a Hard Drive IMPORTANT NOTE: The following instructions are for installing or changing the hard drive. If your DVR4-5000™ already has a hard drive pre-installed, and you don’t want to change it, disregard these steps. Installing / Changing a Hard Drive in the DVR4-5000™... -
Página 18: Backing Up Footage To Pc
Backing Up Footage to PC The DVR4-5000™ has a backup feature via the USB port on the back of the DVR. The DVR accepts most flash drives or thumbdrives. The flash drive / thumbdrive must be formatted to the FAT32 file system. Please see your flash drive’s / thumb- drive’s instructions regarding formatting. -
Página 19: Viewing Backup Footage On A Pc
Viewing Backup Footage on a PC Using the VVFPlayer software View backed up footage from the DVR4-5000™ with the included VVFPlayer software located on the CD. 1. Put the CD in the CD drive. If it does not open automatically, click START open MY COMPUTER and Double click the CD drive. -
Página 20: Extract Footage From A Larger Video Clip
Viewing Backup Footage on a PC (cont) Extract footage from a larger video clip When dealing with larger backup files it may be necessary to extract smaller clips. The following describes how to extract footage and export to a new .VVF file. Open and play the clip to extract from. -
Página 21: Troubleshooting Guide
Solution: Analog wireless cameras suffer from interference. The DVR interprets the change of image as motion and records. Swann recommends the use of wired cameras or digital wireless cameras such as the ADW-300 for DVR recording. -
Página 22: Technical Specifications
Technical Specifications Video/Audio Video Format NTSC or PAL Video Inputs 4 Composite BNC Inputs Video Outputs 1 Composite BNC Output Display Resolution NTSC: 720 x 480 PAL: 720 x 576 Display Frame Rate NTSC: 120fps PAL: 100fps Audio Input 2 x RCA Audio Output 1 x RCA Speakers... -
Página 23: Warranty Information
Swann. The end user is responsible for all freight charges incurred to send the product to Swann’s repair centres. - Página 24 1-800-627-2799 (option 1) 0800 479 266 (M-F, 9am-5pm US PT) INTERNATIONAL +61 3 8412 4610 See http://www.worldtimeserver.com for information on time zones and the current time in Melbourne, Australia compared to your local time. © Swann Communications 2009 Advanced security made easy™...
-
Página 25: Grabadora De Video Digital De 4 Canales
Advanced security made easy Grabadora de Video Digital de 4 Canales DVR4-5000™ con Pantalla LCD Integrada de 10.2” Instrucciones de Uso SW349-DAT www.swannsecurity.com SR349-DAT-60020-130809... -
Página 26: Antes De Comenzar
• Para asegurar su continua privacidad, le sugerimos altamente cambiar la contraseña tan pronto como sea posible. Escoja algo que recordará, pero que los demás difícilmente adivinen. • Si se queda bloqueado el DVR, necesitará contactarnos al Escritorio de Ayuda Telefónica para Soporte Técnico de Swann, el número está en la cubierta posterior. -
Página 27: Índice
Índice Antes de que Comience Índice Contenido del Paquete Vista General Diseño del DVR Conexiones e Instalación Conectando las Cámaras y el Adaptador de Corriente Conectando y Usando el Mouse Encendiendo y Apagando el DVR y Auto Recuperación Funcionamiento del Menú Accediendo y Navegando el Sistema de Menú... -
Página 28: Contenido Del Paquete
El DVR4-5000 es también fácil de usar: incluimos un mouse PS2 que hace de la navegación por los menús algo por demás sencillo. También tiene un control remoto para mayor comodidad. -
Página 29: Diseño Del Dvr
Diseño del DVR Panel Frontal 1. Cuádruple y Canales 1 a 4 5. FWD (Avance Rápido) 9. UP / DOWN Cambia el modo de visual- Presione para acelerar la repro- Usados para navegar o cambiar ización en el DVR. Los canales ducción. -
Página 30: Control Remoto
Diseño del DVR (continuación) Control Remoto 1. Canal 1 - 4, Quad Funciones: 2. Rew Todos los botones en el control remoto 3. Play funcionan exactamente igual como sus 4. Fwd similares en el panel frontal del DVR. 5. REC hecho, control remoto... -
Página 31: Conectando Cámaras Y Adaptadores De Corriente
Conectando Cámaras y Adaptadores de Corriente Conecte los extremos de Corriente y BNC de la Cámara MaxiBright a un Cable de Consejos y Trucos Extensión. El conectar las cámaras y el DVR es un proceso relativamente Conecte el extreme del Cable de Extensión directo. -
Página 32: Conectando Y Usando El Mouse
Característica de Auto-Recuperación El DVR4-5000™ está equipado con una característica de Auto-Recuperación. En caso de que haya una falla en el suministro de corriente mientras está grabando el DVR continuará grabando automáticamente una vez que se reestablezca el sumi-... -
Página 33: Funcionamiento Del Menú
Funcionamiento del Menú Accediendo y Navegando el Sistema de Menú El Menú de Ajustes principal puede ser accedido al presionar el Botón MENU/ESC Para navegar los menús presione las teclas de las fl echas direccionales AR- RIBA y ABAJO. Para cambiar selecciones use REBOBINAR y AVANCE RÁPIDO. Para seleccionar una opción resaltada presione el botón SET. -
Página 34: Imagen De Pantalla
Imagen de Pantalla Vista de Cámara Sencilla 1. Canal de Cámara Actual 2. Ícono de Detección de Movimiento 3. Ícono de Grabación 4. Pantalla Principal 5. Fecha y Hora Actual 6. Enmudecer Audio 7. Ícono de Sin Señal de Cámara MUTE Vista Multi-Cámara Vista Multi Cámara con 4 Cámaras... -
Página 35: Menú De Cámara
Menú de Cámara El menú de cámara le permite cambiar los atributos visuales de cada una de los canales de cámara. Canal: Muestra los atributos de la cámara 1 a 4 actualmente seleccionada. Mostrar: Encienda o apague la cámara seleccionada en la pantalla principal. Brillo, Contraste, Color, Saturación: Usando el mouse o los botones ARRIBA y ABAJO resalte la opción de pantalla que desea cambiar. -
Página 36: Menú De Detección De Movimiento
Menú de Grabación (continuación) Calidad de Grabación: Ajuste la calidad de imagen de las grabaciones entre Normal, Alta y Superior. Nota: un ajuste de calidad de imagen superior usa más espacio en disco duro para las grabaciones. Duración de Grabación de Evento: Cuando la Detección de Movimiento está active, la Duración de Grabación de Evento es la longitud de tiempo en segundos que el DVR grabará... -
Página 37: Riba, Abajo, Rebobina Y Avance Rápido
Menú de Detección de Movimiento Área de Movimiento: Seleccione el área de la Cámara para detectar movimiento que ocurra fuera del área designada no activará la grabación. Use el mouse o los botones AR- RIBA, ABAJO, REBOBINA y AVANCE RÁPIDO para mover cursor. -
Página 38: Menú De Audio
Nota: la contraseña predeterminada es “111111”. Si ha perdido u olvidó su contraseña contacte a Swann Communica- tions para asistencia. -
Página 39: Búsqueda Por Tiempo
Unidad Flash USB. No remueva la Unidad Flash mientras el fi rmware se está actualizando ya que esto puede dañar el DVR. Sólo use actualiza- ciones autorizadas por Swann. Cuando termine, remueva la Unidad Flash y reinicie el DVR. -
Página 40: Menú De Idioma
Iniciando el DVR con un Disco Duro Nuevo Cuando inicie el DVR4-5000™ por primera vez o inicie el DVR después de cam- biar a un nuevo disco duro, el DVR confi gurará el disco duro para su uso. Siga las indicaciones en pantalla para confi... -
Página 41: Instalando O Cambiando Un Disco Duro
Instalando o Cambiando un Disco Duro NOTA IMPORTANTE: Las siguientes instrucciones son para la instalación o cambio del disco duro. Si su DVR4-5000™ tiene ya un disco duro preinstalado, y no lo quiere cambiar, no tome en cuenta estos pasos. -
Página 42: Respaldando Secuencia En Su Pc
Respaldando Secuencia en una PC El DVR4-5000™ cuenta con una característica de respaldo vía puerto USB que se encuentra en la parte posterior del DVR. El DVR acepta la mayoría de las unidades fl ash o thumbdrives. La unidad fl ash / thumbdrive debe formatearse a un sistema de archivos FAT32. -
Página 43: Viendo Secuencias Respaldadas En Una Pc
Usando el software VVFPlayer Using the VVFPlayer software Viendo secuencia respaldada del DVR4-5000™ con el software VVFPlayer in- cluido localizado en el CD. 1. Ponga el CD en la unidad de CD. Si no se abre automáticamente, de clic en Inicio, abra Mi PC y de doble clic en la unidad de CD. -
Página 44: Extraer Secuencia De Un Video Clip Más Grande
Viendo Secuencia Respaldada en una PC Extraer secuencia de un video clip más grande Cuando trate con archivos de respaldo más grandes puede ser necesario extraer clips más pequeños. A continuación se describe cómo extraer secuencia y expor- tarla a un nuevo archivo .VVF. Abra y reproduzca el clip al que se le va a extraer. -
Página 45: Guía Para Resolver Problemas
Solución: Las cámaras inalámbricas sufren de interferencia. El DVR interpreta el cambio de imagen como movimiento y lo graba. Swann el uso de cámaras con cable o cámaras inalámbricas digitales tales como la ADW-300 para grabar con un DVR. -
Página 46: Especifi Caciones Técnicas
Technical Specifications Video/Audio Formato de Video NTSC o PAL Entradas de Video 4 Entradas de BNC Compuesto Salidas de Video Salida de BNC Compuesto Resolución de Pantalla NTSC: 720 x 480 PAL: 720 x 576 Velocidad de Cuadro de Pantalla NTSC: 120cps PAL: 100cps... -
Página 47: Información Sobre La Garantía
El usuario fi nal asume los costos de fl etes incurrido para enviar el producto a los centros de reparación de Swann. El usuario fi nal se responsabiliza de los costos de envío en que incurran cuando envía desde y hacia cualquier país distinto al país de origen. -
Página 48: Soporte Técnico Swann
(Lunes-Viernes 9am-5pm Aus ET) Devoluciones Internacional 562-777-2551 +61 3 8412 4610 (Lunes-Viernes, 9am-5pm PT) (Lunes-Viernes, 9am-5pm Aus Ver http://www.worldtimeserver.com para obtener información acerca de las distintas zonas horarias y la hora en Melbourne Australia, comparada con su hora local. © Swann Communications 2009...