Tabla de contenido
Publicidad
Idiomas disponibles
Idiomas disponibles
Enlaces rápidos
6. Post Installation - Troubleshooting Guide
Problem
Possible
To Diagnose
Cause
Hot/cold reversed
Lines reversed/car-
Hot/cold reversed
tridge installed upside
down
No water/low flow
One or both supplies
No water/low flow
not on to the unit
Leak or drip from
Grommets not sealing
Leak/drip from spout
spout
properly
Only hot/no cold –
Balancing spool stuck
Only hot/no cold – Only cold/
Only cold/no hot
no hot
Stacking (Water
Choice of pipe/distance
Water comes out of spout
comes out of
between valve and
and showerhead at the same
the showerhead
showerhead less than
time
during tub fill
46"/multiple elbows/
mode)
anything restricting
flow of water exiting
valve
Flow restriction
Water comes out of spout
between valve and tub
and showerhead at the same
spout
time causing restriction
Valve installed upside
Remove cartridge and ver-
ify that the outlet hole is in
down
proper location (should be
down). "Up" is on the top of
the valve
Restricted tem-
Handle (more common
In the off position, able to
in knob models) is
turn the handle both clock-
perature range
installed upside down
wise and counterclockwise
Temperature limit stop
Remove handle and see
out of position
Step 5.3
Not able to install
Valve installed too far
Handle does not install
handle/handle
back from finished wall
rubs up against
escutcheon
Handle is hard to
Cartridge stem is diffi-
Difficult movement from
turn
cult to rotate
handle
INS10795 - 6/18
©2018 Moen Incorporated
Remedy
Rotate cartridge stem 180˚
so that the notch is facing
down towards the drain.
Turn both water supply
valves counterclockwise to
the on position
Replace cartridge
Replace cartridge
Remove tub spout and
flush out debris – Replace
undersized line or fittings
Remove tub spout and
flush out debris – Replace
undersized line or fittings
Remove valve and reinstall
in the proper orientation
Remove handle, rotate
180˚, re-install
Position temperature limit
stop to desired tempera-
ture position
Contact Moen for assis-
tance.
Replace cartridge or
lubricate
www.moen.com
For further assistance, contact Moen at:
USA: 1-800-289-6636 or visit www.moen.com
Canada: 1-800-465-6130 or visit www.moen.ca
E12
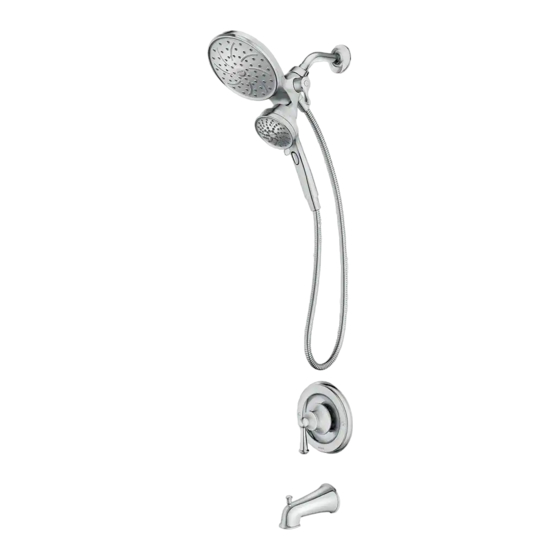
One Handle Tub/Shower Valve Trim
One Handle Shower Only Valve Trim
Spot Resist™ Stainless and Spot Resist™ Brushed Nickel Finishes:
Moen recommends cleaning the Spot Resist finish with a mild soap, rinsing thoroughly with
warm water and drying with a clean, soft cloth. Never use cleaners containing abrasives (including
abrasive sponges or steel wool), ammonia, bleach or sodium hypochlorite, organic solvents (e.g. alco-
hols) or other harsh chemicals (e.g. lime scale removers) to clean the Spot Resist finish, as they may
damage the finish. Failure to comply with these cleaning instructions may void Moen's warranty.
Installation Instructions
Styles and parts vary by model.
For Warranty Support
Model Number
Installation Date
INS10795- 6/18
E1
Publicidad
Capítulos
Tabla de contenido

Manuales relacionados para Moen INS10795- 6


Resumen de contenidos para Moen INS10795- 6
- Página 1 Spot Resist™ Stainless and Spot Resist™ Brushed Nickel Finishes: Handle is hard to Cartridge stem is diffi- Difficult movement from Replace cartridge or Moen recommends cleaning the Spot Resist finish with a mild soap, rinsing thoroughly with turn cult to rotate handle lubricate warm water and drying with a clean, soft cloth.
-
Página 2: Tabla De Contenido
Visit Moen.com for product specific parts diagrams. Styles and parts vary by model. Thank you for choosing Moen. Tub/Shower Parts Supplied Installs behind wall. Installs on wall exterior. Please Contact Moen First For Installation Help, Missing or Replacement Parts CANADA... -
Página 3: Copper
Please follow all local building and plumbing codes. Copper Helpful Tools Helpful Tools For safety and ease of faucet replacement, For safety and ease of faucet replacement, Moen recommends the use Moen recommends the use of these helpful tools. of these helpful tools. Torch Safety Glasses... -
Página 4: Installation Schematics
3. Installing Your Valve Moen has provided a plaster ground attached to the valve to be used as an installation and alignment guide. The plaster ground comes attached to the valve in the standard configuration from the factory. The plaster ground may Ensure cartridge clip is installed prior to escutcheon installation. -
Página 5: Shower Arm
4.4. i n . IPS (threaded) spouts are designed to screw onto a 4. Installing Your Moen Tub/Shower Trim pipe with 1/2 inch male pipe threads. To determine Thread seal tape the proper pipe length, measure from the inside... -
Página 6: Setting The Temperature Limit Stop
(original sales receipt) from the original consumer purchaser must accompany all warranty Turn on the hot and cold claims. Defects or damage caused by the use of other than genuine Moen parts is not covered by this water supply to check for If temperature exceeds 120 degrees, go to step 5.3. -
Página 7: Guía De Solución De Problemas Post-Instalación Problema Posible Causa Para Diagnosticar
Acabado inoxidable Spot Resist™ y níquel cepillado Spot Resist™: de posición temperatura deseada Moen recomienda limpiar el acabado Spot Resist con un jabón suave, enjuagar bien con agua tibia y No se puede insta- La válvula está insta- No se puede instalar el Póngase en contacto con... -
Página 8: Para Obtener Ayuda De Instalación, Piezas Faltantes O De Recambio
Visite Moen.com para consultar diagramas de piezas de pro- Gracias por elegir Moen. ductos específicos. Los estilos y piezas varían por el modelo. Piezas provistas para tina/regadera Se instala detrás de la pared. Se instala en la parte exterior de la pared. -
Página 9: Herramientas Útiles
Herramientas útiles Herramientas útiles Para que el cambio de la llave sea Para que el cambio de la llave sea fácil y seguro, Moen le recomienda fácil y seguro, Moen le recomienda usar estas útiles herramientas. usar estas útiles herramientas. -
Página 10: Esquema De Instalación - Medidas Para Un Desempeño Ideal De La Tina/Regadera
3. Instalación de la válvula Moen ha provisto una plantilla de yeso adherida a la válvula para ser utilizada como guía de instalación y alineación. La plantilla de yeso viene adherida a la válvula en la configuración estándar de fábrica. -
Página 11: Instalación De La Terminación Moen Para Tina/Regadera
(y) y desde el adaptador roscado i n . dentro del surtidor de la tina hasta la base del 4. Instalación de la terminación Moen para tina/regadera mismo (x) y luego agregue 1/4”. Coloque cinta Cinta para sellar roscas... -
Página 12: Ajuste Del Tope De Límite De Temperatura Y Finalización De La Instalación De La Tina/Regadera
Moen le informará sobre el procedimiento a seguir cuando haga una reclamación bajo garantía. Simplemente escriba a Moen Incorporated a la dirección indicada a continuación. - Página 13 à la position tion appropriée de température voulue Finis Acier inoxydable et Nickel brossé Spot Resist Moen recommande de nettoyer le fini Spot Resist comme suit : utiliser un savon doux, bien rincer à l’eau Impossible La soupape est Impossible d’installer la Contacter Moen pour chaude et l’essuyer avec un chiffon doux et propre.
-
Página 14: Pièces De Douche/Baignoire Fournies
Visiter Moen.com pour obtenir les diagrammes de pièces particulières du produit. Nous vous remercions d’avoir choisi Moen. Les styles et les pièces peuvent varier selon le modèle choisi. Pièces de douche/baignoire fournies Veuillez d’abord contacter Moen Installation derrière le mur. -
Página 15: Cuivre
Veuillez vous conformer aux codes de plomberie et de construction locaux. Cuivre Outils utiles Outils utiles Pour votre sécurité et faciliter Pour votre sécurité et faciliter l’installation, Moen suggère l’utilisation l’installation, Moen suggère l’utilisation des outils suivants. des outils suivants. Lunettes de sécurité Ruban à mesurer Chalumeau Lunettes de sécurité... -
Página 16: Schéma D'iNstallation
3. Installation de la soupape Moen a fourni un arrêt d’enduit fixé à la soupape à utiliser pour servir de guide d’installation et d’alignement. L’arrêt d’enduit est fixé à la soupape selon la configuration standard de l’usine. -
Página 17: Installation De Votre Garniture De Douche/Baignoire Moen
à partir de l’intérieur du pli du coude jusqu’au mur (y), puis de l’adaptateur fileté à l’intérieur du bec de baignoire jusqu’à la base du 4. Installation de votre garniture de douche/baignoire Moen bec de baignoire (x), puis ajouter 1/4 po. Placer Ruban d'étanchéité... -
Página 18: Garantie
Moen. Garantie à vie limitée Moen Les produits Moen ont été fabriqués selon les normes de qualité et de main-d’œuvre les plus élevées. Moen garantit à la personne ayant acheté le robinet originalement, aussi longtemps qu’elle est propriétaire du Tourner le levier dans le sens contraire domicile où...