Tabla de contenido
Publicidad
Idiomas disponibles
Idiomas disponibles
Enlaces rápidos
Harbor Breeze
is a registered trademark of LF,
®
LLC. All Rights Reserved.
ATTACH YOUR RECEIPT HERE
Serial Number
Purchase Date
Questions, problems, missing parts? Before returning to your retailer, call our
customer service department at 1-866-473-4537, 8 a.m. - 6 p.m., EST, Monday -
Thursday, 8 a.m. - 5 p.m., EST Friday
PH18860
ITEM #1158773
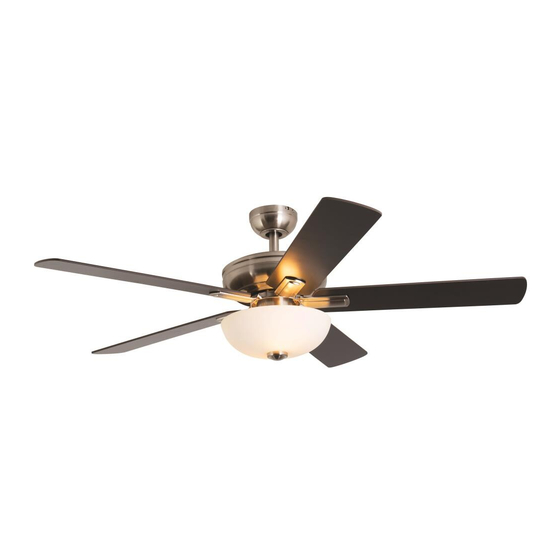
KITSILANO
CEILING FAN
MODEL #00960
UL MODEL #52-KITS
Español p. 17
1
Publicidad
Capítulos
Tabla de contenido
Solución de problemas

Manuales relacionados para Harbor Breeze 00960


Resumen de contenidos para Harbor Breeze 00960
- Página 1 ITEM #1158773 KITSILANO CEILING FAN MODEL #00960 UL MODEL #52-KITS Harbor Breeze is a registered trademark of LF, ® Español p. 17 LLC. All Rights Reserved. ATTACH YOUR RECEIPT HERE Serial Number Purchase Date Questions, problems, missing parts? Before returning to your retailer, call our customer service department at 1-866-473-4537, 8 a.m.
-
Página 2: Tabla De Contenido
TABLE OF CONTENTS PACKAGE CONTENTS Package Contents...................... 3 Hardware Contents..................... 4 Preparation ....................... 4 Safety Information....................... 5 Assembly Instructions ....................6 Wiring......................9 Final Installation......................9 Operating Instructions ....................14 Care and Maintenance ..................... 15 Troubleshooting......................15 Warranty..........................16 Replacement Parts List ..................... 16 PART DESCRIPTION QUANTITY... -
Página 3: Hardware Contents
HARDWARE CONTENTS SAFETY INFORMATION READ AND SAVE THESE INSTRUCTIONS Please read and understand this entire manual before attempting to assemble, operate or install the product. • When using an existing outlet box, be sure the box is securely attached to the building structure and can support the full weight of the fan, so to avoid potential serious injury or death. -
Página 4: Assembly Instructions
ASSEMBLY INSTRUCTIONS ASSEMBLY INSTRUCTIONS 1. Determine mounting method to use. 4. Install the mounting bracket (A) to the outlet box (not included) using the two Downrod Mount (standard or angled ceiling) screws provided with the outlet box. IMPORTANT: lf using the angle mount, check Outlet box Securely tighten the two screws. -
Página 5: Wiring
ASSEMBLY INSTRUCTIONS WIRING 6b. EXTENDED DOWNROD INSTALLATION: 1. Insert receiver from the remote pack (K) into mounting bracket (A) with the flat side toward the If you are installing the fan with a longer ceiling. Connect the GREEN/GROUND wire from downrod (sold separately), insert it through Black the fan to the BARE/GREEN supply wire. - Página 6 FINAL INSTALLATION FINAL INSTALLATION 2. Attach blade (F) to a blade bracket (E) using 5. Connect the adapter plug of the BLUE wire three blade screws (BB). from the fan motor assembly (D) to the adapter plug of the BLACK wire from the light Repeat for remaining blade assemblies.
- Página 7 FINAL INSTALLATION FINAL INSTALLATION 11. Press the plug (XX) into the center hole of the 8. Remove the preassembled bowl cap (H) from Switch switch housing cover. the light kit (G). housing cover Switch housing cover plug (special order) 9. Place glass (J) on the preassembled pipe 12.
-
Página 8: Operating Instructions
OPERATING INSTRUCTIONS CARE AND MAINTENANCE • Important: Shut off main power supply before beginning any maintenance. NOTE: The remote control has already been paired to the fan for your convenience. If you have two of the same • Do not use water or detergents when cleaning the fan or fan blades. A dry dust cloth or model fans in your home, please follow the steps below lightly dampened cloth will be suitable for most cleaning. -
Página 9: Warranty
WARRANTY The manufacturer warrants this fan to be free from defects in workmanship and material present at time of shipment from the factory for lifetime limited from the date of purchase. This warranty applies only to the original purchaser. The manufacturer agrees to correct such defect at no charge or at our option replace the ceiling fan with a comparable or superior model. -
Página 10: Adjunte Su Recibo Aquí
ARTÍCULO #1158773 VENTILADOR DE TECHO KITSILANO MODELO #00960 MODELO UL #52-KITS Harbor Breeze es una marca registrada de LF, ® LLC. Todos los derechos reservados. ADJUNTE SU RECIBO AQUÍ Número de serie Fecha de compra ¿Preguntas, problemas, piezas faltantes? Antes de volver a la tienda, llame a nuestro Departamento de Servicio al Cliente al 1-866-473-4537, de lunes a jueves de 8 a.m. -
Página 11: Contenido Del Paquete
ÍNDICE CONTENIDO DEL PAQUETE Contenido del paquete ....................19 Aditamentos .......................20 Preparación......................20 Información de seguridad ..................21 Instrucciones de ensamblaje ..................22 Cableado......................25 Instalación final ......................25 Instrucciones de funcionamiento ................30 Cuidado y mantenimiento ..................31 Solución de problemas ....................31 Garantía ........................32 Lista de piezas de repuesto ..................32 PIEZA DESCRIPCIÓN CANTIDAD... -
Página 12: Aditamentos
ADITAMENTOS INFORMACIÓN DE SEGURIDAD LEA Y GUARDE ESTAS INSTRUCCIONES Lea y comprenda completamente este manual antes de intentar ensamblar, usar o instalar el producto. • Cuando use una caja de salida existente, asegúrese de que la caja esté sujeta de forma segura a la estructura del edificio y que pueda soportar el peso completo del ventilador para evitar potenciales lesiones graves o la muerte. -
Página 13: Instrucciones De Ensamblaje
INSTRUCCIONES DE ENSAMBLAJE INSTRUCCIONES DE ENSAMBLAJE 1. Determine el método de instalación que utilizará. 4. Instale el soporte de montaje (A) en la caja de salida (no se incluye) con los Montaje de varilla (techos estándar o en ángulo) dos tornillos que se incluyen con la caja Caja de IMPORTANTE: Si realiza el montaje en de salida. -
Página 14: Cableado
INSTRUCCIONES DE ENSAMBLAJE CABLEADO 6b. INSTALACIÓN DE VARILLA EXTENDIDA: 1. Inserte el receptor del paquete remoto (K) en el soporte de montaje (A) con el lado plano orientado hacia el techo. Si está instalando el ventilador con una Conecte el conductor VERDE/TIERRA del ventilador al varilla más larga (se vende por separado), Negro conductor del suministro DESNUDO/VERDE. - Página 15 INSTALACIÓN FINAL INSTALACIÓN FINAL 2. Fije un aspa (F) a un soporte del aspa (E) 5. Conecte el enchufe del adaptador del utilizando tres tornillos para aspa (BB). conductor AZUL del ensamble del motor del ventilador (D) al enchufe del adaptador del Repita para los ensambles de las aspas conductor NEGRO del kit de iluminación restantes.
- Página 16 INSTALACIÓN FINAL INSTALACIÓN FINAL 11. Presione el tapón (XX) del orificio central de la 8. Retire el remate de la tapa de la pantalla (H) del Cubierta de la kit de iluminación (G). cubierta de la carcasa del interruptor. carcasa del interruptor Enchufe de la cubierta de la carcasa del...
-
Página 17: Instrucciones De Funcionamiento
INSTRUCCIONES DE FUNCIONAMIENTO CUIDADO Y MANTENIMIENTO • Importante: antes de realizar cualquier trabajo de mantenimiento, desconecte el suministro de NOTA: para su comodidad, el control remoto ya se emparejó con el ventilador. Si tiene dos ventiladores del mismo modelo electricidad principal. en su hogar, siga los pasos a continuación para controlar cada •... -
Página 18: Garantía
GARANTÍA El fabricante garantiza que este ventilador no presenta defectos de fabricación ni en los materiales presentes en el momento del transporte desde la fábrica, durante un período limitado de por vida a partir de la fecha de compra. Esta garantía es válida solo para el comprador original.