Medela Symphony Instrucciones De Uso
Ocultar thumbs
Ver también para Symphony:
- Manual de instrucciones (244 páginas) ,
- Instrucciones de uso (216 páginas) ,
- Manual del usuario (126 páginas)
Tabla de contenido
Publicidad
Idiomas disponibles
Idiomas disponibles
Enlaces rápidos
Publicidad
Capítulos
Tabla de contenido
Solución de problemas

Manuales relacionados para Medela Symphony


Resumen de contenidos para Medela Symphony
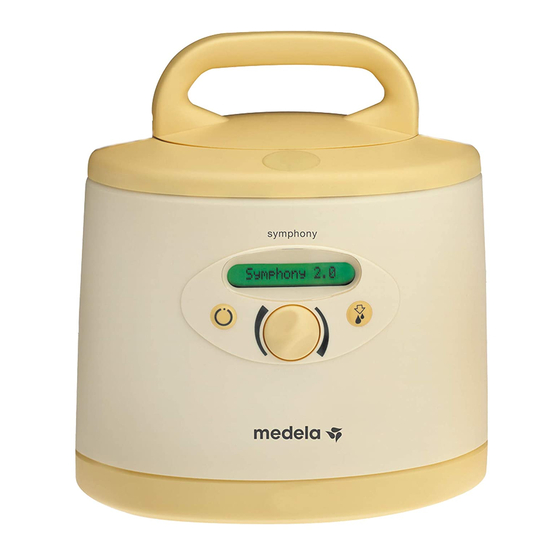
- Página 1 Symphony & ® Harmony ® Breast Pump Kit Instructions for use Instrucciones de uso WITHOUT *All parts that touch breast milk are made without BPA. *Todas las partes que tocan la leche materna están fabricadas sin BPA.
-
Página 2: Tabla De Contenido
6. Tubing Care ..........16-17 7. Assembly of Symphony Pump Kit......20-21 8. -
Página 3: Important
If you have medical reasons or other needs for exclusively pumping, it is recommended that you use a hospital grade (multi- user) breastpump such as our Symphony breastpump. To learn more, visit us at www.medelabreastfeedingus.com. Harmony Product Description Harmony is a personal use manual breastpump that includes 2-Phase Expression technology and is capable of single pumping. -
Página 4: Important Safeguards
Medela Customer Service at 1-800-435-8316. • Only use the power cord that comes with the Symphony. Make sure the voltage of the power cord is compatible with the power source. - Página 5 WARNING: To avoid health risk and reduce the risk of injury: • Breastpump kits are a personal care item intended for use by a single user only and should not be shared between users. • Inspect the breastpump kit components prior to each use. o Do not use the components if they are damaged.
-
Página 6: Accessories
O-Ring Assembly Harmony Manual Breast pump 67186 ™ Authentic Medela Spare Parts are made with the quality materials and workmanship you expect and trust, only from Medela. AUTHENTIC Non-Medela spare parts can vary significantly in terms of product medela spare parts design, materials, and workmanship;... -
Página 8: Cleaning Overview
Harmony for the first ® ® time*: 1. For Symphony models that include a rechargeable battery, fully charge the battery 12 hours uninterrupted. 2. Separate all parts. 3. Clean - see instructions: • Wash – section 4 • Sanitize – section 5 Note *Sterile kits are ready to use and do not require washing prior to first use. - Página 9 Warning Breastpump kits are a personal care item intended for use by a single user only and should not be shared between users. Questions? Visit www.medela.com or call us at 1-800-435-8316.
-
Página 10: Wash - Before First Use And After Each Use
4. Wash – Before first use and after each use* Supplies needed: • Mild dish soap • Clean dish cloth or soft brush • Wash basin • Drinking-quality water Parts to wash: Separate parts for washing. • Breast shields Caution •... - Página 11 • Store dry parts in a clean, cool place when not in use. Do NOT store wet or damp parts. Note Store the pump kit in a clean bag/container until next use. Questions? Visit www.medela.com or call us at 1-800-435-8316.
- Página 12 4. Wash (cont.) Harmony Handle Assembly Cleaning ® Care for your Harmony handle assembly after every few manual pumping sessions or when soiled. • Wash the Harmony handle assembly, which includes the Harmony handle, diaphragm stem, and o-ring with warm soapy water. •...
- Página 13 Questions? Visit www.medela.com or call us at 1-800-435-8316.
-
Página 14: Sanitize - Before First Use And Once Per Day
5. Sanitize – Before first use and once per day* Medela pump kit parts can be sanitized by boiling or Note: *Sterile kits are ready to use and do not require the contents must be cleaned prior to first use. - Página 15 Quick Clean Micro-Steam bag. Note Not for use with the Harmony handle Store the pump kit in a clean assembly. bag/container until next use. Questions? Visit www.medela.com or call us at 1-800-435-8316.
-
Página 16: Tubing Care
Parts needed: immediately after use if soiled or milk is observed • Tubing in the tubing. • If tubing becomes moldy, discontinue use and • Symphony pump ® replace tubing. Replacement parts can be • Membrane cap purchased at www.ShopMedela.com. - Página 17 Turn off breastpump. Unplug breastpump from power source. Remove tubing from breastshield. • Rinse tubing in cool water to remove breastmilk. • Once rinsed, place in a clean wash basin, dedicated to only cleaning breastpump parts. Do not place parts directly in the sink.
-
Página 18: Cleaning And Disinfecting The Breastpump And Pumping Area
6. Tubing Care (cont.) • Soak tubing in warm soapy water for 5 minutes. • Rinse tubing with clear water. • Hang to air dry. • Or shake out any drops of water from the tubing and let the pump run with tubing attached until dry. - Página 19 Wipe off the breastpump and pumping area with a clean, damp (not wet) cloth. Medela’s Disinfectant Spray or an alcohol based disinfectant agent may be used to disinfect the breastpump and pumping area (ex: countertop or table); follow the disinfectant agent’s instructions for use.
-
Página 20: Assembly Of Symphony Pump Kit
7. Assembly of Symphony Pump Kit ® Carry out all the steps with care and assemble the pump kit correctly for optimum performance. Parts Needed: • Tubing • Symphony pump ® • Breastshields. Caution • Breastmilk bottles/ containers Wash hands thoroughly with soap and water before touching breastpump, kit and breasts. - Página 21 Carefully push the white Push the breastshield onto the membrane onto the yellow valve connector. head until it engages and is laying flat. Screw connector onto the Insert the tubing into the bottle/container. corresponding opening in the connector. Warning Refer to breastpump instructions for use for important safeguards and operating information.
- Página 22 7. Assembly of Symphony Pump Kit (cont.) ® Open the lid of the breastpump. Position the membrane cap firmly u Press the oval button on the top on the breastpump membrane of the Symphony and lift the to form a seal. Center the tubing ®...
- Página 23 Refer to section 10 for breastmilk storage guidelines. *Pumping instructions are for Symphony Standard 2-Phase Expression® or when using the MAINTAIN program of Symphony PLUS® program card. Please refer to the Symphony BreastPump Instructions for Use, item # 1907724, for more detailed pumping instructions.
-
Página 24: Assembly Of Harmony Breast Pump
8. Assembly of Harmony Breast Pump ® Parts Needed: • Handle, Diaphragm, Stem, O-Ring Assembly • Conector/Pump Body • White membrane • Yellow valve • Breastmilk bottle and lid • Breastshield Wash hands before touching breastpump, kit and breasts and avoid touching the inside of Note containers or lids. - Página 25 Snap membrane onto valve until Push yellow valve securely onto membrane lies completely flat inner ring of pump body. on valve. Correct Incorrect If the handle components Hint: Make sure the oval shape is have been disassembled, place the lined up correctly in the diaphragm. oval shaped base of the stem into the diaphragm.
-
Página 26: Pumping With Harmony Breast Pump
9. Pumping with Harmony Breast Pump ® Caution • Wash hands thoroughly with soap and water before touching the breast and pump parts. • Always inspect breastshields, valves and membranes prior to use for cleanliness. If dirty, see Sections 3-5. •... - Página 27 The adjustable handle can be positioned for your maximum pumping comfort. The level of vacuum is controlled by the compression and the speed of the handle stroke. You decide the pumping rhythm that is best for you. Once let-down has begun, switch to the expression mode by pressing the bottom of the pump handle.
-
Página 28: Breast Shield Sizing
1. Medela’s PersonalFit sizing ™ Nipple Pumping should not hurt. For maximum comfort and pumping efficiency, Medela offers five breastshield sizes. Areola Visit MedelaBreastshields.com to view the full guide to help you determine your optimal size based on your nipple diameter. -
Página 29: Storing, Preparing & Feeding Breast Milk
11. Storing, Preparing & Feeding Breast Milk Storing breastmilk in a Medela Cooler Bag (not included) The Medela Cooler Bag requires one contoured ice pack (#87092) for cooling up to four 5 oz bottles of breastmilk. • As soon as you are finished pumping, place the breast milk bottles or breastmilk storage bags in the cooler bag with the ice pack. -
Página 30: Troubleshooting
Other Checks Inspect the following to check for damage and secure connections. • Secure tubing adapter to the breastshield connector. • Test vacuum. If suction is not improved, contact Medela Customer Service at 1-800-435-8316. Tubing Check • If damaged replace prior to pumping. -
Página 31: Supplemental Information
• Consult with a healthcare or lactation professional if expression does not occur. If you have not resolved the problem with your breastpump or your have further questions, please contact Medela Customer Service at 1-800-435-8316 or fill out the contact us form at www.medelabreastfeedingus.com. - Página 32 Inspect the following to check for damage and secure connections. • Tubing adapter to breastshield connector. • Inspect Symphony membranes. If membranes appear to be worn or have a tear they need to be replaced (Article # 67091). • Test vacuum. If suction is not improved, contact Medela Customer Service at 1-800-435-8316.
- Página 33 A listing of Lactation Professionals are available at www. medelalocator.com or call 1-800-TELL-YOU (1-800-835-5968). If assistance is still needed after reviewing this booklet, please call Medela Customer Service at (800) 435-8316 or (815) 363-1166.
-
Página 34: Warranty
90 days from the date of purchase. Warranty can only be claimed in the country of purchase. In the event of a defect, Medela will repair or, at Medela’s option, replace this product, without charge for such replacement, parts or labor. - Página 36 6. Cuidado del tubo ......... . . 50-53 7. Armado del kit del extractor Symphony ..... . 54-57 8.
-
Página 37: Importante
• No utilice la leche materna si las botellas o los componentes se dañan. Uso previsto del extractor Symphony ® El extractor de leche Symphony es un extractor eléctrico diseñado para que las mujeres extraigan y recolecten leche de sus pechos durante la lactancia. Descripción del producto Symphony Symphony es un extractor eléctrico de leche, multiusuario y de uso hospitalario,... -
Página 38: Medidas De Seguridad Importantes
• Ubique el dispositivo para garantizar una desconexión fácil del cable de alimentación de la corriente eléctrica. • Utilice únicamente accesorios originales Medela. • Symphony no tiene piezas internas que puedan ser reparadas por el usuario. NO INTENTE REPARARLO USTED MISMO. No está permitido realizar modificaciones al dispositivo. - Página 39 ADVERTENCIA: Para evitar riesgos a la salud y reducir el riesgo de sufrir lesiones: • Los kits de extractores de leche son artículos de cuidado personal diseñados para una sola usuaria, que no deberían compartirse entre varias usuarias. • Inspeccione los componentes del kit del extractor de leche antes de cada uso. o No utilice el extractor si los componentes están dañados.
-
Página 40: Accesorios
™ Extractor de leche manual Harmony 67186 ™ Las auténticas piezas de repuesto Medela están hechas con los materiales y la mano de obra de alta calidad en los que usted confía y que solo puede esperar de Medela. AUTÉNTICAS... -
Página 42: Descripción General De La Limpieza
Harmony ® ® primera vez*: 1. Para los modelos Symphony con batería recargable, cargue la batería totalmente durante 12 horas sin interrupción. 2. Separe todas las piezas. 3. Realice una limpieza siguiendo las instrucciones correspondientes: • Lavado – sección 4 •... - Página 43 Si el embalaje estéril está dañado, limpie el contenido antes de usarlo por primera vez. Advertencia Los kits de extractores de leche son artículos de cuidado personal diseñados para una sola usuaria, que no deberían compartirse entre varias usuarias. ¿Alguna duda? Visite www.medela.com o llámenos al +1-800-435-8316.
-
Página 44: Lavado: Antes Del Primer Uso Y Después De Cada Uso
4. Lavado: antes del primer uso y después de cada uso* Suministros necesarios: • Detergente suave para platos • Paño para platos limpio o cepillo suave • Recipiente • Agua potable Separe las piezas para el lavado. Piezas que deben lavarse: •... -
Página 45: Lavado En Un Recipiente Exclusivo
• Almacene las piezas secas en un lugar limpio y fresco cuando no las use. NO guarde las piezas mojadas o húmedas. Nota Guarde el kit del extractor en una bolsa o recipiente limpio hasta el siguiente uso. ¿Alguna duda? Visite www.medela.com o llámenos al +1-800-435-8316. -
Página 46: Limpieza Del Conjunto Del Mango Harmony
4. Lavado (cont.) Limpieza del conjunto del mango Harmony ® Realice las tareas de cuidado del conjunto del mango de Harmony después de algunas sesiones de extracción manual o cuando esté sucio. • Lave el conjunto del mango de Harmony, que incluye el mango, el vástago del diafragma y la base oval de Harmony, con agua jabonosa templada. - Página 47 ¿Alguna duda? Visite www.medela.com o llámenos al +1-800-435-8316.
-
Página 48: Desinfección: Antes Del Primer Uso Y Una Vez Al Día
5. Desinfección: antes del primer uso y una vez al día* Las piezas del kit del extractor Medela se pueden des (Se vende por separado) Nota: * Los kits estériles están listos para usarse; no e está dañado, limpie el contenido antes de usarlo por Suministros necesarios: •... - Página 49 Medela Quick Clean Micro-Steam ™ ™ es necesario lavarlos ni desinfectarlos antes del primer uso. Si el embalaje estéril primera vez. • Lávese bien las manos. • Llene una olla con agua suficiente para cubrir todas las piezas.
-
Página 50: Cuidado Del Tubo
• Tubo • Si aparecen hongos en el tubo, interrumpa su uso y reemplácelo. Las piezas de repuesto • Extractor de leche pueden comprarse en www.ShopMedela.com. Symphony ® • Tapa de la membrana • Membrana protectora Nota • El tubo debe lavarse si tiene suciedad o leche. - Página 51 Apague el extractor de leche. Desconecte el extractor de leche de la fuente de alimentación. Separe el tubo del embudo. • Enjuague el tubo con agua fría para eliminar la leche materna. • Después de enjuagarlo, colóquelo en un recipiente limpio que solo se utilice para limpiar las piezas del extractor de leche.
-
Página 52: Limpieza Y Desinfección Del Extractor De Leche Y De La Zona De Extracción
6. Cuidado del tubo (cont.) • Sumérjalo en agua jabonosa tibia durante 5 minutos. • Enjuague el tubo con agua limpia. • Cuélguelo y déjelo secar al aire. • O bien, elimine las gotas de agua del tubo sacudiéndolo y dejando que el extractor funcione con el tubo conectado hasta que esté... - Página 53 Limpie el extractor de leche y la zona de extracción con un paño limpio y húmedo (no mojado). Se puede usar el rociador desinfectante de Medela o un desinfectante a base de alcohol para desinfectar el extractor de leche y la zona de extracción (por ej.
-
Página 54: Armado Del Kit Del Extractor Symphony
7. Armado del kit del extractor Symphony ® Consejo Siga todos los pasos con cuidado y arme el kit del extractor de manera correcta para lograr un desempeño óptimo. Piezas necesarias: • Tubo • Extractor de leche Symphony ® Precaución •... - Página 55 Con cuidado, empuje la Presione el embudo contra el membrana sobre el cabezal de conector. la válvula amarilla hasta que se acople y quede plana. Enrosque el conector en la botella Inserte el tubo en la abertura o recipiente. correspondiente en el conector. Advertencia Consulte las instrucciones del extractor de leche para conocer...
- Página 56 7. Armado del kit del extractor Symphony (cont.) ® Abra la tapa del extractor de Coloque la tapa de membrana leche. firmemente en la membrana del u Presione el botón ovalado en extractor de leche para formar un la parte superior de la unidad sello.
- Página 57 Consulte la guía de almacenamiento de leche materna en la sección 10. * Las instrucciones de extracción se aplican al modelo Symphony Standard 2-Phase Expression o en los casos en que se utilice el programa MANTENER de ®...
-
Página 58: Armado El Extractor Del Leche Harmony
8. Armado el extractor del leche Harmony ® Piezas necesarias: • Mango, diafragma, pie, base oval • Cuerpo del conector/ extractor • Membrana blanca • Válvula amarilla • Botella para leche materna y tapa • Embudo Lávese las manos antes de tocar el extractor de leche, el kit y el pecho;... - Página 59 Coloque la membrana a presión Empuje la válvula amarilla con en la válvula hasta que encaje firmeza hacia el aro interior del perfectamente. cuerpo del extractor. Correcto Incorrecto Si desarmó los componentes del Sugerencia: Asegúrese de que mango, coloque la base de forma la forma ovalada esté...
-
Página 60: Extracción Con El Extractor De Leche Harmony
9. Extracción con el extractor de leche Harmony ® Precaución • Lávese bien las manos con agua y jabón antes de tocarse el pecho y las piezas del extractor. • Revise siempre los embudos, las válvulas y las membranas antes de utilizarlos para verificar que estén limpios. - Página 61 Se puede cambiar la posición del mango ajustable para mayor comodidad durante la extracción. El nivel de vacío se controla a través de la compresión y la velocidad del movimiento del mango. Usted es quien decide el ritmo de extracción que mejor se adecua a sus necesidades.
-
Página 62: Determinación Del Tamaño Del Embudo
Medela ™ La extracción de leche no debe doler. Para mayor comodidad y eficiencia de la extracción, Medela ofrece embudos de cinco tamaños. Areola Visite MedelaBreastshields.com para ver la guía completa que le ayudará a determinar cuál es el tamaño óptimo para usted según el diámetro de su pezón. -
Página 63: Almacenamiento, Preparación Y Alimentación Con Leche Materna
11. Almacenamiento, preparación y alimentación con leche materna Conservación de la leche materna en la hielera Medela (no incluida) La hielera Medela necesita un paquete de hielo moldeado (artículo 87092) para enfriar hasta cuatro botellas de 148 mL (5 onzas) de leche materna. -
Página 64: Solución De Problemas
• Asegure el adaptador del tubo al conector del embudo. • Pruebe el vacío. Si la succión no mejora, comuníquese con el Servicio al cliente de Medela al +1-800-435-8316. Revisión del tubo • Si hay daños, reemplace antes de la extracción de leche. -
Página 65: Información Complementaria
• Consulte a un profesional de atención médica o de lactancia si no se produce la extracción. Si no ha resuelto el problema con su extractor de leche o si tiene preguntas adicionales, comuníquese con el Servicio al cliente de Medela al +1-800-435-8316 o llene el formulario de contacto en www.medelabreastfeedingus.com. -
Página 66: Condensación O Leche En El Tubo
Otras comprobaciones Inspeccione lo siguiente para comprobar daños y conexiones seguras. • Adaptador del tubo al conector del embudo. • Inspeccione las membranas Symphony. Si las membranas parecen estar desgastadas o tienen grietas, deberán reemplazarse (Artículo n.º 67091). • Pruebe el vacío. Si la succión no mejora, comuníquese con el Servicio al cliente de Medela al +1-800-435-8316. -
Página 67: Conductos Obstruidos O Tapados
+1-800-TELL-YOU (+1-800-835-5968). Si todavía necesita ayuda después de revisar este folleto, llame al Servicio al cliente de Medela al +1 (800) 435-8316 o al +1 (815) 363-1166. Pueden ocurrir sustituciones dependiendo de la disponibilidad del producto. -
Página 68: Garantía
El comprador abonará los gastos de envío originados por la devolución a Medela de este producto. Esta garantía no cubre los productos utilizados comercialmente o que hayan estado expuestos a uso indebido, abuso o alteración. - Página 72 +1 (800) 435-8316 or +1 (905) 608-7272 info@medela.ca www.medela.ca Medela wordmark and logo, Lactina and Symphony are registered in the U.S. Patent and Trademark Office. PersonalFit, Quick Clean, Tender Care and Micro-Steam are trademarks of Medela. Medela wordmark and logo, Lactina and Symphony are registered in the U.S.