Tabla de contenido
Publicidad
Idiomas disponibles
Idiomas disponibles
Enlaces rápidos
FORNI PEP-TC ÷ PDP-TC
FOURS PEP-TC ÷ PDP-TC
PEP-TC ÷ PDP-TC OVENS
ПЕЧИ PEP-TC ÷ PDP-TC
HORNOS PEP-TC ÷ PDP-TC
ÖFEN PEP-TC ÷ PDP-TC
IT
Manuale di istruzioni, uso e manutenzione
(Istruzioni originali)
FR
Manuel d'instructions, d'utilisation et d'entretien
(Traduction de la notice originale)
EN
Instruction, use and maintenance manual
(Translation of the original instructions)
RU
Руководство по эксплуатации и техническому обслуживанию
(Перевод оригинальной инструкции)
ES
Manual de instrucciones, uso y manutención
(Traducción de las instrucciones originales)
DE
Bedienungs-, Gebrauchs- und Wartungsanleitung
(Übersetzung der Originalanleitung)
Publicidad
Capítulos
Tabla de contenido

Resumen de contenidos para GGM gastro PDP44TC
- Página 1 FORNI PEP-TC ÷ PDP-TC FOURS PEP-TC ÷ PDP-TC PEP-TC ÷ PDP-TC OVENS ПЕЧИ PEP-TC ÷ PDP-TC HORNOS PEP-TC ÷ PDP-TC ÖFEN PEP-TC ÷ PDP-TC Manuale di istruzioni, uso e manutenzione (Istruzioni originali) Manuel d'instructions, d'utilisation et d'entretien (Traduction de la notice originale) Instruction, use and maintenance manual (Translation of the original instructions) Руководство...
-
Página 3: Tabla De Contenido
ITALIANO INDICE 1 PREMESSA ..........................4 2 AVVERTENZE PER LA SICUREZZA ..................4 Avvertenze per l’installatore ......................4 Avvertenze per l’utilizzatore ......................4 Avvertenze per il manutentore ...................... 4 3 SPECIFICHE GENERALI ......................5 Caratteristiche ..........................5 Dati Tecnici ............................. 5 Schemi elettrici .......................... -
Página 4: Premessa
1 PREMESSA Gentile cliente, desideriamo innanzitutto ringraziarLa per la preferenza che ha voluto accordarci acquistando il nostro prodotto e ci congratuliamo con Lei per la scelta. Per consentirle di utilizzare al meglio il suo nuovo Forno, la invitiamo a seguire attentamente quanto descritto nel presente manuale. -
Página 5: Specifiche Generali
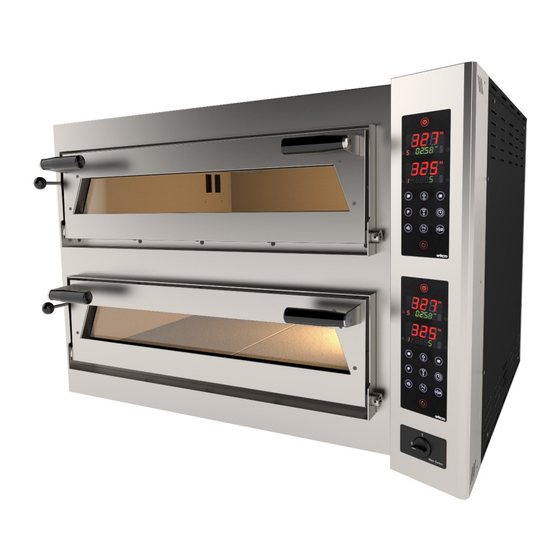
3 SPECIFICHE GENERALI Caratteristiche Qui di seguito le specifiche generali che caratterizzano il forno: 1. Interruttore generale; 2. Frontale comandi; 3. Piano di cottura; 4. Pomello valvola camino; 5. Camino uscita fumi; 6. Passacavo alimentazione; 7. Attacco equipotenziale; 8. Targhetta dati tecnici. Dati Tecnici Modello Caratteristiche tecniche... - Página 6 Modello Caratteristiche tecniche PDP44TC PDP66TTC PDP66BTC PDP99TC LxPxH Dimensioni 99x92x68 99x127x68 134x92x68 134x127x68 esterne (cm) LxPxH 70x70x15 70x105x15 105x70x15 105x105x15 Dimensioni camera (cm) Ø 34 cm Nr. pizze per camera Ø 50 cm 230V 1 230V 1 Alimentazione 230V 3...
-
Página 7: Schemi Elettrici
Schemi elettrici... -
Página 11: Installazione
4 INSTALLAZIONE Scarico e movimentazione del forno Lo scarico e la movimentazione del forno deve essere fatta tramite un carrello elevatore da personale qualificato. Posizionamento del forno L’installazione del forno deve essere fatta da personale qualificato secondo i regolamenti locali, nazionali ed europei. Assicurarsi che il piano d’appoggio del forno abbia un’adeguata capacità... -
Página 12: Allacciamento Agli Impianti (Collegamento Elettrico)
RIMUOVERE IL POLISTIROLO DA SOTTO LE PIETRE PRIMA DI ACCENDERE IL FORNO. Allacciamento agli impianti (collegamento elettrico) Il forno viene fornito privo di cavo di alimentazione. Il collegamento alla rete elettrica deve essere eseguito interponendo un interruttore magnetotermico differenziale con caratteristiche adeguate, nel quale la distanza d’ apertura minima tra i contatti sia di almeno 3 mm. -
Página 13: Messa A Terra
SEGUIRE INOLTRE LE SEGUENTI DISPOSIZIONI: • La presa della rete elettrica deve essere facilmente accessibile e non deve richiedere alcun spostamento. • Il collegamento elettrico deve essere facilmente accessibile anche dopo l’installazione del forno. • La distanza tra il forno e la presa deve essere tale da non provocare la tensione del cavo di alimentazione. Inoltre, il cavo stesso non deve trovarsi sotto il basamento del forno. -
Página 14: Funzionamento
Funzionamento ACCENSIONE E SPEGNIMENTO Premere e tenere premuto il pulsante per accendere o spegnere il dispositivo. DEL DISPOSITIVO Quando il LED sul pulsante è acceso, il dispositivo è spento. AVVIO E ARRESTO Premere e tenere premuto il pulsante per avviare o fermare il timer. Quando il DEL TIMER timer è... - Página 15 Regolazione dell’ora GIORNO DELLA SETTIMANA Impostazione del valore dell’ora il pulsante per 3 secondi per accedere al Quando il dispositivo è in funzione, premere e tenere menu per l’impostazione dell’ora. premuto Dopo aver effettuato le variazioni necessarie, premere e tenere premuto il pulsante per 3 secondi per salvare i nuovi valori e tornare alla schermata principale.
- Página 16 Regolazione dell’ora di accensione automatica VALORE TEMPERATURA SUPERIORE IMPOSTATO CON ACCENSIONE AUTOMATICA VALORE INFERIORE IMPOSTATO TEMPERA CON ACCENSIONE AUTOMATICA ACCENSIONE AUTOMATICA GIORNO DI ACCENSIONE AUTOMATICA Premere e tenere premuto il pulsante per 3 secondi per impostare l’ora di accensione automatica quando il dispositivo è...
-
Página 17: Errori E Anomalie
NOTA 2: Se il giorno corrente è prevista l’accensione automatica del dispositivo, sul display compare l’ora dell’accensione programmata per il giorno stesso. Se non è prevista alcuna accensione automatica durante il giorno, sul display compare “----”. NOTA 3: quando il dispositivo si accende automaticamente, si avvia con Pr.00. I valori di temperatura superiore e inferiore verranno impostati come da programma. -
Página 18: Indicazioni Generali Per La Cottura
Indicazioni generali per la cottura La pizza ed i prodotti similari, hanno tempi e temperature di cottura che dipendono dalla forma e dallo spessore della pasta, nonché dalla quantità e tipologia degli ingredienti aggiunti. Per tali motivi è sempre consigliabile effettuare preventivamente alcune prove di cottura, al fine di comprenderne al meglio le caratteristiche ed il funzionamento del forno. -
Página 19: Manutenzione Straordinaria Rivolta A Tecnici Specializzati
3. Pulire le parti esterne del forno come porte, maniglie della porta e frontale comandi con un panno morbido e un detergente delicato. Non utilizzare spugne abrasive. • Pulizia settimanale Pulire accuratamente tutte le parti esterne del forno con un panno morbido e un detergente delicato. Non utilizzare spugne abrasive. -
Página 20: Sostituzione Delle Sonda Di Temperatura Della Platea
Sostituzione delle sonda di tempera tura della platea 1. Togliere il pannello laterale destro; 2. Scollegare la sonda dalla scheda di potenza all’interno del vano impianto elettrico (vedi schema elettrico); 3. Sollevare la tavella in prossimità del lato destro della camera;... -
Página 21: Sostituzione Della Molla Porta
Sostituzione della molla porta Per sostituire la molla porta seguire prima le istruzione del capitolo precedente (Sostituzione vetro porta) per togliere la porta dal forno e smontare la controporta. • Una vola smontata la controporta togliere il seeger che blocca il perno molla (figura a sinistra); •... -
Página 22: Possibili Anomalie, Allarmi Ed Errori
8 POSSIBILI ANOMALIE, ALLARMI ed ERRORI Anomalia Possibile Causa Possibile Soluzione Verificare l’interruttore generale, la presa, Mancanza di energia elettrica la spina ed il cavo di alimentazione, la morsettiera interna al vano comandi L’interruttore generale è in posizione Portare l’interruttore generale in posizione Il forno non si accende, i display “0”... - Página 23 FRANÇAIS SOMMAIRE 1 AVANT-PROPOS ........................24 2 CONSIGNES DE SÉCURITÉ ..................... 24 Recommandations pour l’installateur ..................24 Recommandations pour l’utilisateur ..................24 Recommandations pour le personnel d'entretien ..............24 3 SPÉCIFICATIONS GÉNÉRALES ....................25 Caractéristiques ........................... 25 Données techniques ........................25 Schémas de câblage ........................
-
Página 24: Avant-Propos
1 AVANT-PROPOS Cher client, nous souhaitons tout d’abord vous remercier de la préférence que vous avez bien voulu nous accorder en achetant notre produit et souhaitons vous féliciter pour votre choix. Pour vous permettre de tirer le meilleur parti de votre nouveau four, veuillez suivre attentivement les instructions de ce manuel. -
Página 25: Spécifications Générales
3 SPÉCIFICATIONS GÉNÉRALES Caractéristiques Ci-après les spécifications générales qui caractérisent le four : Interrupteur général ; Panneau de commandes frontal ; Plan de cuisson ; Manette soupape cheminée ; Conduit de cheminée sortie de fumées ; Passe-câbles alimentation ; Prise de courant équipotentielle ; Plaque signalétique. - Página 26 Modèle Caractéristiques techniques PDP44TC PDP66TTC PDP66BTC PDP99TC LxPxH Dimensions 99x92x68 99x127x68 134x92x68 134x127x68 externes (cm) LxPxH Dimensions 70x70x15 70x105x15 105x70x15 105x105x15 chambre (cm) Ø 34 cm Nb pizzas par chambre Ø 50 cm 230 V 1 230 V 1 Alimentation...
-
Página 27: Schémas De Câblage
Schémas de câblage... -
Página 31: Installation
4 INSTALLATION Déchargement et manutention du four Le déchargement et la manutention du four doivent être effectués au moyen d'un chariot élévateur par du personnel qualifié. Positionnement du four L’installation du four doit être faite par du personnel qualifié selon les réglementations locales, nationales et européennes. S'assurer que le plan d'appui du four ait une capacité... -
Página 32: Raccordements Aux Circuits (Raccordement Électrique)
ENLEVER LE POLYSTYRÈNE EN DESSOUS DES PIERRES AVANT D’ALLUMER LE FOUR. Raccordements aux circuits (raccordement électrique) Le four est fourni sans cordon d'alimentation. Le raccordement au réseau électrique doit être effectué en interposant un interrupteur magnétothermique différentiel avec des caractéristiques appropriées, dans lequel la distance d’ouverture minimale entre les contacts soit d’au moins 3 mm. -
Página 33: Mise À La Terre
SUIVRE ÉGALEMENT LES DISPOSITIONS SUIVANTES: • La prise du réseau électrique doit être facilement accessible et ne doit demander aucun déplacement. • La connexion électrique doit être facilement accessible même après l'installation du four. • La distance entre le four et la prise doit être telle qu'elle ne provoque pas de tension sur le cordon d'alimentation.De plus, le câble lui-même ne doit pas se trouver sous la base du four. -
Página 34: Opération
Opération ALLUMER ET ÉTEINDRE L'APPAREIL Appuyer sur le bouton sans relâcher pour allumer ou éteindre l'appareil. Le témoin lumineux sur le bouton est allumé lorsque l'appareil est éteint. ALLUMER et ÉTEINDRE LA Appuyer sur le bouton sans relâcher pour allumer ou éteindre la minuterie. MINUTERIE Lorsque la minuterie est active, le témoin lumineux sur le bouton est allumé. - Página 35 Régler le temps réel TEMPS RÉEL JOUR DE LA SEMAINE Lorsque l'appareil est en fonction , enfoncer sans relâcher sur le bouton pendant 3 secondes et saisir le . Après avoir fait les changements nécessaires, enfoncer le bouton sans relâcher menu de réglage du temps pendant 3 secondes pour enregistrer les nouvelles valeurs et retourner sur l'écran principal.
- Página 36 Réglage du temps d'ouverture automatique VALEUR DE CONSIGNE DE TEMPÉRATURE INFÉRIEURE EN OUVERTURE AUTOMATIQUE VALEUR DE TEMPÉRATURE INFÉRIEURE EN OUVERTURE AUTOMATIQUE TEMPS D'OUVERTURE AUTOMATIQUE JOUR D'OUVERTURE AUTOMATIQUE Appuyer sans relâcher sur le pendant 3 secondes pour régler le temps d'ouverture automatique lorsque l'appareil est en fonction.
-
Página 37: Erreurs Et Anomalies
REMARQUE-2 : Si l'appareil doit être allumé automatiquement le jour même, l'heure d'allumage automatique de la journée en cours est affichée à l'écran. En l'absence d'allumage automatique pendant la journée, « ---- » apparaît à l'écran. REMARQUE-3 : Lorsque l'appareil est allumé automatiquement, il s'allume sur Pr.00. Les valeurs de température seront réglées sur les valeurs supérieures et inférieures de température. -
Página 38: Indications Générales De Cuisson
• Fermer toutes les portes et ouvrir au maximum les vannes de la cheminée ; • Régler la température sur 150° C ; • Régler le pourcentage de ciel et de sol à 100 % ; • Régler le temporisateur de cuisson sur 8:00 heures. Indications générales de cuisson La pizza et les produits similaires, ont des durées et des températures de cuisson qui dépendent de la forme et de l'épaisseur de la pâte, ainsi que de la quantité... -
Página 39: Entretien Extraordinaire Sous La Responsabilité Des Techniciens Spécialisés
Ne pas utiliser d'éponges abrasives. 3. Nettoyer l’extérieur du four, à savoir les portes, les poignées de porte et les commandes situées en façade avec un chiffon doux et un détergent délicat. Ne pas utiliser d'éponges abrasives. • Nettoyage hebdomadaire Nettoyer soigneusement toutes les parties extérieures du four avec un chiffon doux et un détergent délicat. -
Página 40: Remplacement De La Sonde De Température De La Sole
Remplacement de la sonde de température de la sole 1. Enlever le panneau latéral droit ; 2. Débrancher la sonde de la carte de puissance à l'intérieur du compartiment électrique (voir schéma électrique) ; 3. Soulever la brique qui se trouve à proximité du côté droit de la chambre ;... -
Página 41: Remplacement Du Ressort Porte
Remplacement du ressort porte Pour remplacer le ressort de la porte suivre auparavant les instructions du chapitre précédent (Remplacement de la vitre de la porte), enlever la porte du four et démonter la contreporte. • Une fois la contreporte démontée, enlever le seeger qui bloque le pivot à ressort (dessin à gauche) ; •... -
Página 42: Anomalies Possibles, Alarmes Et Erreurs
8 ANOMALIES POSSIBLES, ALARMES ET ERREURS Anomalie Cause possible Solution possible Vérifier l'interrupteur général, la fiche et le cordon d’alimentation ainsi que la plaque à Panne de courant bornes interne située dans le compartiment de commandes Le four ne s’allume pas, les Placer l'interrupteur général en position L'interrupteur général en position «... - Página 43 ENGLISH TABLE OF CONTENTS 1 PREMISE ............................ 44 2 SAFETY WARNINGS ......................... 44 Warnings for the installer ......................44 Warnings for the user ........................44 Warnings for the maintenance technician ................. 44 3 GENERAL SPECIFICATIONS ....................45 Features ............................45 Technical data ..........................
-
Página 44: Premise
1 PREMISE Dear customer, we would like to start by saying thank you and we congratulate you for having purchased our product. To enable you to use your new Oven in the best way possible, please carefully follow the information provided in this manual. The ovens to which this manual refers, have been exclusively designed to satisfy the requirements for cooking pizza and other similar products. -
Página 45: General Specifications
3 GENERAL SPECIFICATIONS Features The general specifications that characterise the oven are provided below: Main switch; Front control panel; Cooking surface; Chimney valve knob; Chimney flue; Power cable gland; Equipotential connector; Rating plate. Technical data Model Technical specifications PEP44TC PEP66TTC PEP66BTC PEP99TC WxDxH... - Página 46 Model Technical specifications PDP44TC PDP66TTC PDP66BTC PDP99TC WxDxH External 99x92x68 99x127x68 134x92x68 134x127x68 dimensions (cm) WxDxH Chamber 70x70x15 70x105x15 105x70x15 105x105x15 dimensions (cm) Ø 34 cm No. of pizzas per chamber Ø 50 cm 230 V 1 230 V 1...
-
Página 47: Wiring Diagrams
Wiring diagrams... -
Página 51: Installation
4 INSTALLATION Unloading and handling the oven Unloading and moving the oven must be done by qualified personnel with a forklift. Positioning the oven Installation of the oven must be done by qualified personnel and in accordance with local, national and European regulations. Ensure that the supporting surface of the oven is level and has an adequate supporting load capacity. -
Página 52: Connection To The Utilities (Electrical Connection)
REMOVE THE POLYSTYRENE FROM UNDER THE STONES BEFORE SWITCHING THE OVEN ON. Connection to the utilities (electrical connection) The oven is supplied without power supply cable. The connection to the power network must be performed by interposing a differential circuit breaker switch with suitable features, and minimum opening distance between the contacts of at least 3 mm. To connect the oven to the electricity supply it is necessary to proceed as follows: •... -
Página 53: Grounding
IN ADDITION, FOLLOW THESE INSTRUCTIONS: • The mains socket must be easily accessible and should not require moving the machine. • Electrical connection must be easily accessible even after the oven has been installed. • The distance between the oven and the socket must ensure that there is no tension in the supply cable. In addition, the cable must not be at risk of getting under the base of the oven. -
Página 54: Operation
Operation SWITCHING THE Press and hold the button to turn the device on or off. The LED on the button is lit DEVICE ON and OFF when it is off. STARTING and Press and hold the button to start or stop the timer. When the timer is active, the STOPPING THE TIMER LED on the button is lit. - Página 55 Adjusting The Real Time REAL TIME DAY OF THE WEEK When the device operates , press and hold button for 3 seconds and enter the real time setting menu. After making the necessary changes, press and hold the button for 3 seconds to save the new values and return to the main screen.
-
Página 56: Automatic Opening Time Adjustment
Automatic Opening Time Adjustment UPPER TEMPERATURE SET VALUE WHEN AUTOMATICALLY OPENED LOWER TEMPERATURE SET VALUE WHEN AUTOMATICALLY OPENED AUTOMATIC OPENING TIME AUTOMATIC OPENING DAY Press and hold the button for 3 seconds to set the automatic opening time when the device operates. -
Página 57: Errors And Anomalies
NOTE-2: If the device is to be switched on automatically on the same day, the automatic switch-on time of the current day is shown on the display. If there is no automatic powerup during the day, “----” appears on the display. NOTE-3: When the device is switched on automatically, it is switched on as Pr.00. -
Página 58: General Cooking Instructions
General cooking instructions Pizzas and similar products have cooking times and temperatures that depend on the shape and thickness of the dough, in addition to the quantity and type of added ingredients. For these reasons, it is always advisable to perform some cooking tests beforehand, in order to better understand how the oven works and its features. -
Página 59: Unplanned Maintenance To Be Performed By Specialised Technicians
• Weekly cleaning Thoroughly clean the external parts of the oven with a soft cloth and mild detergent. Do not use abrasive sponges. • Monthly cleaning Lubricate the pins and door spring with a non-toxic grease spray. To access the spring, open the left side panel. •... -
Página 60: Replacing The Bottom's Temperature Probe
Replacing the bottom’s temperature probe 1. Remove the right side panel; 2. Disconnect the probe from the power board inside the electrical system compartment (see the wiring diagram); 3. Remove the hollow tile near the right side of the chamber; 4. -
Página 61: Replacing The Door Spring
Replacing the door spring To replace the door spring, firstly follow the instructions provided in the previous chapter (Replacing the door glass) to remove the door from the oven, and then separate the inner door. • Once the inner door has been removed, remove the circlip that locks the spring pin (figure on the left); •... -
Página 62: Possible Anomalies, Alarms And Errors
8 POSSIBLE ANOMALIES, ALARMS AND ERRORS Anomaly Possible Cause Possible Solution Check the main switch, socket, plug, No electricity. power cable, and internal terminal board in the control compartment. The oven doesn’t switch on and The main switch is in position “0”. Turn the main switch to position “1”. - Página 63 РУССКИЙ ОГЛАВЛЕНИЕ 1 ПРЕДИСЛОВИЕ ........................64 2 ПРЕДУПРЕЖДЕНИЯ ПО ТЕХНИКЕ БЕЗОПАСНОСТИ ............64 Предупреждения для установщика ..................64 Предупреждения для пользователя ..................64 Предупреждения для специалиста по техническому обслуживанию ......64 3 ОБЩИЕ ХАРАКТЕРИСТИКИ ....................65 Характеристики .......................... 65 Технические данные ........................65 Электрические...
-
Página 64: Предисловие
1 ПРЕДИСЛОВИЕ Уважаемый клиент! В первую очередь хотим поблагодарить вас за выбор нашего изделия и поздравляем вас с приобретением. Чтобы обеспечить оптимальное применение Вашей новой печи, призываем внимательно следовать указаниям настоящего руководства по эксплуатации. Описанные в нем печи разработаны исключительно для удовлетворения требований к процессу выпекания пиццы и подобных... -
Página 65: Общие Характеристики
3 ОБЩИЕ ХАРАКТЕРИСТИКИ Характеристики Ниже приведены общие характеристики печи: 1. Главный выключатель; 2. Передняя панель управления; 3. Жарочная поверхность; 4. Ручка заслонки дымохода; 5. Дымоход; 6. Выход кабеля питания; 7. Эквипотенциальное соединение; 8. Табличка с техническими данными. Технические данные Модель Технические... - Página 66 Модель Технические характеристики PDP44TC PDP66TTC PDP66BTC PDP99TC ДхШхВ Внешние 99x92x68 99x127x68 134x92x68 134x127x68 размеры (см) ДхШхВ 70x70x15 70x105x15 105x70x15 105x105x15 Размеры камеры (см) Ø 34 см К-во пицц в камере Ø 50 см 230В 1 230В 1 230В 3 230В 3 Электропитание...
-
Página 67: Электрические Схемы
Электрические схемы... -
Página 71: Установка
4 УСТАНОВКА Разгрузка и перемещение печи Выгрузка и перемещение печи должны осуществляться силами квалифицированного персонала при помощи автопогрузчика. азмещение печи Операции установки печи должны осуществляться квалифицированным персоналом в соответствии с местными, государственными и европейскими нормами. Проконтролируйте, чтобы опорная поверхность места установки была ровной и достаточно прочной в расчете на вес машины. -
Página 72: Подсоединение К Системам (Электрическое Подключение)
ПЕРЕД ВКЛЮЧЕНИЕМ ПЕЧИ УДАЛИТЬ ПЕНОПЛАСТ ИЗ-ПОД КАМНЕЙ. Подсоединение к системам (электрическое подключение) Печь поставляется без кабеля питания. Подключение к электрической сети должно выполняться через дифференциальный термомагнитный выключатель с подходящими характеристиками. Расстояние минимального размыкания контактов в нем должно быть не менее 3 мм. Для... -
Página 73: Заземление
КРОМЕ ТОГО, НЕОБХОДИМО СОБЛЮДАТЬ СЛЕДУЮЩИЕ ПРЕДПИСАНИЯ: • Место соединения с сетью электропитания должно быть легкодоступным и не требовать никаких смещений. • Место подключения должно оставаться легко доступным и после установки машины. • Расстояние между машиной и местом подключения не должно требовать натяжения кабеля питания. Кроме того, сам... - Página 74 Операция ВКЛЮЧЕНИЕ И ВЫКЛЮЧЕНИЕ Нажмите и удерживайте кнопку , чтобы включить или выключить устройство. УСТРОЙСТВА Светодиод кнопки горит, когда устройство выключено. СТАРТ и Нажмите и удерживайте кнопку , чтобы запустить или остановить таймер. СТОП ТАЙМЕРА Когда таймер активен, светодиод кнопки горит. Когда...
-
Página 75: Настройка Реального Времени
Настройка реального времени РЕАЛЬНОЕ ВРЕМЯ ДЕНЬ НЕДЕЛИ кнопку в течение 3 секунд и войдите в меню Когда устройство работает, нажмите и удерживайте настроек реального времени. После выполнения необходимых изменений, нажмите и удерживайте кнопку в течение 3 секунд, чтобы сохранить новые значения и вернуться на главный экран. Настройка... -
Página 76: Настройка Времени Автоматического Включения
Настройка времени автоматического включения УСТАНОВЛЕННОЕ ЗНАЧЕНИЕ ТЕМПЕРАТУРЫ ВЕРХНЕЙ ЧАСТИ ПРИ АВТОМАТИЧЕСКОМ ВКЛЮЧЕНИИ УСТАНОВ НИЖНЕЙ ЧАСТИ ЛЕННОЕ ПРИ АВТОМАТИЧЕСКОМ ВКЛЮЧЕНИИ ВРЕМЯ АВТОМАТИЧЕСКОГО ВКЛЮЧЕНИЯ ДЕНЬ АВТОМАТИЧЕСКОГО ВКЛЮЧЕНИЯ Нажмите и удерживайте кнопку в течение 3 секунд, чтобы установить время автоматического включения при работе устройства. После выполнения необходимых изменений, нажмите и удерживайте кнопку в... -
Página 77: Ошибки И Аномалии
Установка дня автоматического включения: Используйте кнопки сбоку экрана, чтобы изменить день автоматического включения. ПРИМЕЧАНИЕ-1: Время автоматического включения должно быть установлено на «----» для нежелательного дня. ПРИМЕЧАНИЕ-2: Если устройство должно автоматически включаться в тот же день, на дисплее отображается время автоматического включения текущего дня. Если в этот день нет автоматического включения, на... -
Página 78: Общие Указания По Приготовлению
Общие указания по приготовлению Время и температура приготовления пиццы и аналогичных продуктов зависят от формы и толщины теста, а также от количества и вида добавленных ингредиентов. По этим причинам рекомендуется предварительно выполнить несколько проб приготовления, чтобы лучше понять характеристики и работу печи. Ориентировочно... -
Página 79: Внеплановое Техническое Обслуживание, Выполняемое Специализированными Техниками
2. Очистить внутреннюю и внешнюю поверхность стекла двери мягкой тряпкой и щадящим моющим средством; Запрещается использовать абразивные губки. 3. Очистить внешние части духовки, такие как двери, дверные ручки и переднюю панель мягкой тряпкой и щадящим моющим средством. Запрещается использовать абразивные губки. •... -
Página 80: Замена Датчика Температуры Верхней Части
Замена датчика температуры верхней части Снять правую боковую панель; Отсоединить датчик от силовой платы отсека электрической системы (см. электрическую схему); 3. Открутить крепежный винт датчика внутри камеры; 4. Извлечь датчик изнутри камеры; 5. Заменить датчик на новый, вставив его в камеру; 6. -
Página 81: Замена Стекла Двери
Замена стекла двери Снять переднюю панель управления, не отсоединяя провода. Вставить шлицевую отвертку в штифт пружины через указанное отверстие. Ослабить гайку, удерживающую штифт пружины, и повернуть отвертку против часовой стрелки, чтобы освободить пружину. Выкрутить винты с левой стороны двери и снять ее с Снять... -
Página 82: Замена Пружины Двери
Замена пружины двери Чтобы заменить пружину двери, вначале необходимо выполнить инструкции предыдущей главы (Замена стекла двери) для снятия двери с печи и демонтажа внутренней двери. • После демонтажа внутренней двери снять стопорное кольцо, блокирующее штифт пружины (рисунок слева); • Извлечь штифт, чтобы снять пружину; •... -
Página 83: Возможные Неисправности, Сигналы Тревоги И Ошибки
8 ВОЗМОЖНЫЕ НЕИСПРАВНОСТИ, СИГНАЛЫ ТРЕВОГИ и ОШИБКИ Неисправность Вероятная причина Способ устранения Проверить главный выключатель, розетку, Отсутствие электроэнергии вилку и кабель питания, внутреннюю клеммную колодку в отсеке управления Главный выключатель в положении Повернуть главный выключатель в «0» положение «1» Печь не включается, дисплеи остаются... - Página 84 ESPAÑOL ÍNDICE 1 PREMISA ............................ 85 2 ADVERTENCIAS DE SEGURIDAD ................... 85 Advertencias para el instalador ....................85 Advertencias para el usuario ...................... 85 Advertencias para el encargado del mantenimiento ..............85 3 REQUISITOS GENÉRICOS ....................... 86 Características ..........................86 Datos Técnicos ..........................
-
Página 85: Premisa
1 PREMISA Estimado cliente, antes que nada le agradecemos por la preferencia que ha realizado adquiriendo nuestro producto y lo felicitamos por la elección. Para poder usar mejor su nuevo horno, le invitamos a seguir atentamente la información que se describe en el presente manual. -
Página 86: Requisitos Genéricos
3 REQUISITOS GENÉRICOS Características A continuación, los requisitos genéricos que caracterizan el horno: Interruptor principal; Frontón mandos; Placa de cocción; Manilla de la válvula de la chimenea; Chimenea salida de humos; Protector de cable alimentación; Fijación equipotencial; Placa de datos técnicos. Datos Técnicos Modelo Características técnicas... - Página 87 Modelo Características técnicas PDP44TC PDP66TTC PDP66BTC PDP99TC LxPxH Dimensiones 99x92x68 99x127x68 134x92x68 134x127x68 externas (cm) LxPxH Dimensiones de la 70x70x15 70x105x15 105x70x15 105x105x15 cámara (cm) Ø 34 cm Núm. de pizzas por cámara Ø 50 cm 230V 1 230V 1 Alimentación...
-
Página 88: Esquemas Eléctricos
Esquemas eléctricos... -
Página 92: Instalación
4 INSTALACIÓN Descarga y movilización del horno La descarga y la movilización del horno debe ser realizada a través de un carro elevador por personal cualificado. Colocación del horno La instalación del horno debe ser realizada por personal cualificado en conformidad con los reglamentos locales, nacionales y europeos. -
Página 93: Conexión Con Las Instalaciones (Conexión Eléctrica)
REMOVER EL POLIESTIRENO DE DEBAJO DE LAS LOSAS NTES DE ENCENDER EL HORNO. Conexión con las instalaciones (conexión eléctrica) El horno carece de cable de alimentación. La conexión a la red eléctrica se debe realizar colocando un interruptor magnetotérmico diferencial con características adecuadas, donde la distancia de abertura mínima entre los contactos sea por lo menos de 3 mm. -
Página 94: Toma De Tierra
ADEMÁS, CUMPLIR CON ESTAS DISPOSICIONES: • La toma de la red eléctrica debe ser de fácil acceso y no debe ser necesario desplazarla. • La conexión eléctrica debe ser fácil de acceder incluso después de la instalación del horno. • La distancia entre el horno y la toma debe ser tal de no provocar la tensión del cable de alimentación. -
Página 95: Operación
Operación ENCENDER O APAGAR EL Mantenga presionado el botón para encender o apagar el dispositivo. El LED en el DISPOSITIVO botón se encenderá cuando el dispositivo esté apagado. COMENZAR y DETENER EL Mantenga presionado el botón para comenzar o detener el temporizador. El LED TEMPORIZADOR en el botón se encenderá... - Página 96 Ajuste de la hora real HORA REAL DÍA DE LA SEMANA el botón durante 3 segundos e introduzca los valores Cuando el dispositivo esté en presione y mantenga menú de configuración de la hora. Tras hacer las modificaciones necesarias, presione y mantenga el botón reales de funcionamiento,...
- Página 97 Configuración de hora de encendido automático VALOR DE TEMPERATURA SUPERIOR CONFIGURADO CUANDO SE ENCIENDE AUTOMÁTICAMENTE VALOR DE DE TEMPERATURA INFERIOR TEMPERA CONFIGURADO CUANDO SE ENCIENDE AUTOMÁTICAMENTE HORA DE ENCENDIDO AUTOMÁTICO DÍA DE ENCENDIDO AUTOMÁTICO Presione y mantenga el botón durante 3 segundos para configurar la hora de encendido automático cuando el dispositivo esté...
-
Página 98: Errores Y Anomalías
NOTA-2: Si el dispositivo se enciende automáticamente el mismo día, la hora de encendido automático del día actual se mostrará en la pantalla. Si no hay un encendido automático programado durante el día aparecerá “----” en la pantalla. NOTA-3: Cuando el dispositivo se enciende automáticamente, se enciende como Pr.00. Los valores de temperatura se configurarán como valores de temperatura superior e inferior. -
Página 99: Indicaciones Generales Para La Cocción
Indicaciones generales para la cocción La pizza y los productos similares tienen tiempos y temperaturas de cocción que dependen de la forma y del espesor de la pasta, así como de la cantidad y tipología de los ingredientes añadidos. Por estos motivos siempre se aconseja efectuar de manera preventiva algunas pruebas de cocción para comprender mejor las características y el funcionamiento del horno. -
Página 100: Mantenimiento Extraordinario Para Técnicos Especializados
Limpiar las partes exteriores del horno como puertas, tiradores de la puerta y frontón mando con un paño suave y un detergente delicado. No utilizar esponjas abrasivas. • Limpieza semanal Limpiar minusciosamente las partes exteriores del horno con un paño suave y un detergente delicado. No utilizar esponjas abrasivas. -
Página 101: Sustitución Del Sensor De Temperatura De La Platea
Sustitución del sensor de temperatura de la platea 1. Quitar el panel lateral derecho; 2. Desconectar el sensor de la placa de potencia del interior del compartimento del sistema eléctrico (vease el esquema eléctrico); 3. Levantar el baldosín cercano al lado derecho de la cámara;... -
Página 102: Sustitución Del Resorte De La Puerta
Sustitución del resorte de la puerta Para sustituir el resorte de la puerta hay que seguir las instrucciones del capítulo anterior (Sustitución del vidrio de la puerta) para retirar la puerta del horno y desmontar la contrapuerta. • Una vez la contrapuerta desmontada, retirar el seeger que bloquea el muelle (imagen de la izquierda); •... -
Página 103: Posibles Anomalías, Alarmas Y Errores
8 POSIBLES ANOMALÍAS, ALARMAS Y ERRORES Anomalía Posible Causa Posible Solución Comprobar el interruptor principal, el enchufe, la toma y el cable de alimentación, Falta de corriente eléctrica el borne interno y el compartimento de mandos El interruptor principal está en posición El horno no se enciende, la Poner el interruptor principal en posición «1»... - Página 104 DEUTSCH INHALTSVERZEICHNIS 1 VORBEMERKUNG ........................105 2 SICHERHEITSHINWEISE ......................105 Hinweise für den Installateur ....................105 Hinweise für den Benutzer ......................105 Warnhinweise für den Wartungstechniker ................105 3 ALLGEMEINE MERKMALE ..................... 106 Eigenschaften ..........................106 Technische Daten ........................106 Schaltpläne ..........................
-
Página 105: Vorbemerkung
1 VORBEMERKUNG Lieber Kunde, vor allem möchten wir uns bei Ihnen für den Vorzug beim Kauf unseres Produktes bedanken und gratulieren Ihnen zur Ihrer Wahl. Zum bestmöglichen Gebrauch Ihres neuen Ofens empfehlen wir, die Angaben des vorliegenden Handbuchs aufmerksam zu befolgen. -
Página 106: Allgemeine Merkmale
3 ALLGEMEINE MERKMALE Eigenschaften Im Anschluss die allgemeinen Merkmale, die den Ofen kennzeichnen: Hauptschalter; Frontales Bedienfeld; Backfläche; Knauf Kaminventil; Kamin Rauchgasaustritt; Kabelführung Stromversorgung; Anschluss Potentialausgleich; Typenschild technische Daten. Technische Daten Modell Technische Eigenschaften PEP44TC PEP66TTC PEP66BTC PEP99TC LxTxH 99x92x38 99x127x38 134x92x38 134x127x38 Außenabmessungen... - Página 107 Modell Technische Eigenschaften PDP44TC PDP66TTC PDP66BTC PDP99TC LxTxH Außenabmessungen 99x92x68 99x127x68 134x92x68 134x127x68 (cm) LxTxH Abmessungen der 70x70x15 70x105x15 105x70x15 105x105x15 Backkammer (cm) Ø 34 cm Anzahl Pizzen pro Kammer Ø 50 cm 230 V 1 230 V 1 230 V 3...
-
Página 108: Schaltpläne
Schaltpläne... -
Página 112: Installation
4 INSTALLATION Entladung und Handhabung des Ofens Das Abladen und Handling des Ofens muss mittels eines Gabelstaplers durch Fachpersonal erfolgen. Aufstellung des Ofens Die Installation des Ofens muss von qualifiziertem Personal gemäß den lokalen, nationalen und europäischen Vorschriften ausgeführt werden. Sicherstellen, dass die Auflagefläche des Ofens eine angemessene Tragfähigkeit besitzt und eben ist. -
Página 113: Anschluss An Die Anlagen (Stromanschluss)
VOR DEM EINSCHALTEN DES OFENS DAS POLYSTYROL UNTER DEN STEINEN ENTFERNEN. Anschluss an die Anlagen (Stromanschluss) Der Ofen wird ohne Versorgungskabel geliefert. Der Anschluss an das elektrische Stromnetz muss mit Zwischenschalten eines Differential-Thermoschutzschalters mit entsprechenden Eigenschaften, in dem der minimale Öffnungsabstand zwischen den Kontakten mindestens 3 mm beträgt. -
Página 114: Erdung
AUSSERDEM DIE FOLGENDEN VORSCHRIFTEN BEACHTEN: • Die Steckdose des elektrischen Stromnetzes muss leicht zugänglich sein und keinerlei Verlegung erfordern. • Der elektrische Anschluss muss auch nach der Installation der Presse leicht zugänglich sein. • Der Abstand zwischen Presse und Steckdose muss so sein, dass das Versorgungskabel nicht gespannt ist. Außerdem darf sich das Kabel nicht unter dem Untergestell der Presse befinden. -
Página 115: Bedienung Der Elektronischen Karte
Bedienung der elektronischen Karte DAS GERÄT - Taste gedrückt halten, um das Gerät an- oder auszuschalten. Das LED auf AN- UND AUSSCHALTEN der Taste leuchtet, wenn das Gerät ausgeschaltet ist. TIMER STARTEN UND - Taste gedrückt halten, um den Timer zu starten oder zu stoppen. Wenn STOPPEN der Timer aktiv ist, leuchtet das LED auf der Taste. - Página 116 Die Echtzeit einstellen ECHTZEIT WOCHENTAG Wenn das Gerät in Betrieb ist , die Taste für 3 Sekunden gedrückt halten und das Einstellungsmenü für die Echtzeit eingeben. Nach den vorgenommenen Änderungen die - Taste für 3 und das Einstellungsmenü für die Echtzeit eingeben. Sekunden gedrückt halten, um die neuen Werte zu speichern und zum Hauptfenster zurückzukehren.
- Página 117 Einstellung der automatischen Öffnungszeit EINSTELLUNG DER OBERTEMPERATUR BEI AUTOMATISCHEN ANSCHALTEN EINSTELLUNG DER UNTERTEMPERATUR BEI AUTOMATISCHEM ANSCHALTEN ZEIT DES AUTOMATISCHEN ANSCHALTENS TAG DES AUTOMATISCHEN ANSCHALTENS - Taste für 3 Sekunden gedrückt halten, während das Gerät im Betrieb ist, um die Zeit für das automatische Anschalten einzustellen.
-
Página 118: Fehler Und Anomalien
HINWEIS 2: Wenn das Gerät am selben Tag automatisch angeschaltet wird, wird die automatische Anschaltzeit des aktuellen Tages auf dem Bildschirm angezeigt. Wird das Gerät während des Tages nicht automatisch angeschaltet, erscheint „----“ auf dem Bildschirm. HINWEIS 3: Wenn sich das Gerät automatisch anschaltet, wird es als Pr. 00 angeschaltet. Die Werte werden wie die programmierte Ober- und Untertemperatur eingestellt. -
Página 119: Allgemeine Backhinweise
• Den Prozentsatz von Oberhitze und Unterhitze auf 100% einstellen; • Den Gartimer auf 8:00 Stunden einstellen. Allgemeine Backhinweise Die Backzeiten und -temperaturen von Pizzen und ähnlichen Produkten hängen von der Form und Dicke des Teigs sowie der Menge und Art der dazugegebenen Zutaten ab. Aus diesen Gründen ist es immer ratsam, zuvor einige Backversuche durchzuführen, um die Eigenschaften und den Betrieb des Ofens kennenzulernen. -
Página 120: Außerordentliche Instandhaltung Durch Fachtechniker
2. Die Türscheibe innen und außen mit einem weichen Tuch und einem sanften Reinigungsmittel reinigen; Keine Scheuerschwämme verwenden. 3. Die äußeren Ofenteile wie Türen, Türgriffe und frontales Bedienfeld mit einem weichen Tuch und einem sanften Reinigungsmittel reinigen. Keine Scheuerschwämme verwenden. •... -
Página 121: Auswechslung Der Temperatursonde Für Die Unterhitze
Auswechslung der Temperatursonde für die Unterhitze 1. Die rechte Seitenwand entfernen; 2. Die Sonde der Leistungsplatine im Fach der Elektroanlage abtrennen (siehe Schaltplan); 3. Den Hourdistein an der rechten Kammerwand anheben; 4. Die Befestigungsschraube der Sonde in der Kammer lösen; 5. -
Página 122: Auswechslung Der Türfeder
Auswechslung der Türfeder Bei der Auswechslung der Türfeder zuerst die Hinweise des vorangehenden Kapitels beachten (Auswechslung der Türscheibe), um die Ofentür zu entfernen und die Vortür auszumontieren. • Nach der Demontage der Vortür den Seeger-Ring abnehmen, der den Federstift sichert (Abbildung links); •... -
Página 123: Mögliche Störungen, Alarme Und Fehler
8 MÖGLICHE STÖRUNGEN, ALARME und FEHLER Störung Mögliche Ursache Mögliche Lösung Den Hauptschalter, die Steckdose, den Stromversorgung fehlt Stecker, das Netzkabel und die Klemmenleiste im Fach der Bedienelemente kontrollieren Der Hauptschalter ist auf „0“ Den Hauptschalter auf „1“ setzen Der Ofen schaltet sich nicht ein, die Displays bleiben ausgeschaltet Der Hauptschalter des Ofens ist defekt Den Hauptschalter des Ofens auswechseln... - Página 124 EPLSOSI e LISTE RICAMBI / EXPLODED VIEW and SPARE PARTS LIST...
- Página 128 P07EN13001-PEP44TC Pos. Code Description S40FN55033 ENTRY LH SIDE PANEL 4-6L MAX S40FN55025 ENTRY RH SIDE PANEL 4-6L MAX S35FN55042 ENTRY COMPLETE DOOR 4-6-8-12 MAX 03.01 S66PT55018 ENTRY DOOR ASSEMBLY 4-6-8-12 MAX 03.02 S34FN55020 COUNTERDOOR ASSEMBLY 4-6-8-12 MAX 03.03 A90MI65003 ELESA HANDLE I 280/115 M12 03.04 A00PT57001 ENTRY GLASS CERAMIC PLATE 4-6-8-12...
- Página 129 P07EN13003-PEP66BTC Pos. Code Description S40FN55007 ENTRY LH SIDE PANEL 4-6L MAX S40FN55005 ENTRY RH SIDE PANEL 4-6L MAX S35FN55045 ENTRY COMPLETE DOOR 6L÷9÷12L÷18 MAX 03.01 S66PT55019 ENTRY DOOR ASSEMBLY 6L÷9÷12L÷18 MAX 03.02 S66CG55013 COUNTERDOOR ASSEMBLY 6L÷9÷12L÷18 MAX 03.03 A90MI65003 ELESA HANDLE I 280/115 M12 03.04 A00PT59001 ENTRY GLASS CERAMIC PLATE 4-6-8-12...
- Página 130 P07EN13005-PDP44TC Pos. Code Description S40FN55037 ENTRY LH SIDE PANEL 8-12L MAX S40FN55029 ENTRY RH SIDE PANEL 8-12L MAX S35FN55042 ENTRY COMPLETE DOOR 4-6-8-12 MAX 03.01 S66PT55018 ENTRY DOOR ASSEMBLY 4-6-8-12 MAX 03.02 S34FN55020 COUNTERDOOR ASSEMBLY 4-6-8-12 MAX 03.03 A90MI65003 ELESA HANDLE I 280/115 M12 03.04...
- Página 131 P07EN13007-PDP66BTC Pos. Code Description S40FN55037 ENTRY LH SIDE PANEL 8-12L MAX S40FN55029 ENTRY RH SIDE PANEL 8-12L MAX S35FN55045 ENTRY COMPLETE DOOR 6L÷9÷12L÷18 MAX 03.01 S66PT55019 ENTRY DOOR ASSEMBLY 6L÷9÷12L÷18 MAX 03.02 S66CG55013 COUNTERDOOR ASSEMBLY 6L÷9÷12L÷18 MAX 03.03 A90MI65003 ELESA HANDLE I 280/115 M12 03.04 A00PT59001 ENTRY GLASS CERAMIC PLATE 4-6-8-12...
- Página 132 A82FN55008-LIBRETTO PEP-TC ÷ PDP-TC 2019_GGM GASTRO_MULTILINGUA_Rev.2020 03/2020 12VAC LAMP from S/N 0243483...