Publicidad
Enlaces rápidos
Multistrada 1200
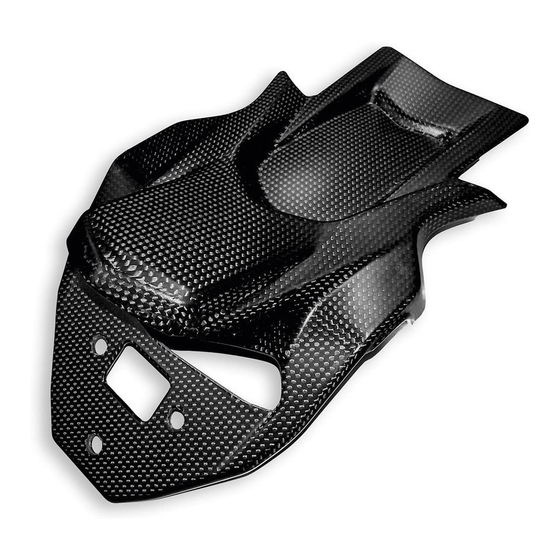
Kit portatarga in carbonio
Carbon number plate holder kit
Simbologia
Per una lettura rapida e razionale sono stati impiegati simboli che
evidenziano situazioni di massima attenzione, consigli pratici o
semplici informazioni.
Prestare molta attenzione al significato dei simboli, in quanto la
loro funzione è quella di non dovere ripetere concetti tecnici o
avvertenze di sicurezza. Sono da considerare, quindi, dei veri e
propri "promemoria" .
Consultare questa pagina ogni volta che sorgeranno dubbi sul loro
significato.
Attenzione
La non osservanza delle istruzioni riportate può creare una
situazione di pericolo e causare gravi lesioni personali e anche la
morte.
Importante
Indica la possibilità di arrecare danno al veicolo e/o ai suoi
componenti se le istruzioni riportate non vengono eseguite.
Note
Fornisce utili informazioni sull'operazione in corso.
Riferimenti
I particolari evidenziati in grigio e riferimento numerico (Es.
rappresentano l'accessorio da installare e gli eventuali componenti
di montaggio forniti a kit.
I particolari con riferimento alfabetico (Es.
componenti originali presenti sul motoveicolo.
Tutte le indicazioni destro o sinistro si riferiscono al senso di marcia
del motociclo.
Avvertenze generali
Attenzione
Le operazioni riportate nelle pagine seguenti devono essere
eseguite da un tecnico specializzato o da un'officina autorizzata
DUCATI.
Attenzione
Le operazioni riportate nelle pagine seguenti se non eseguite a
regola d'arte possono pregiudicare la sicurezza del pilota.
Note
Documentazione necessaria per eseguire il montaggio del Kit
è il MANUALE OFFICINA, relativo al modello di moto in vostro
possesso.
Note
Nel caso fosse necessaria la sostituzione di un componente del kit
consultare la tavola ricambi allegata.
1
)
A
) rappresentano i
ISTR - 681 / 00
Symbols
To allow quick and easy consultation, this manual uses graphic
symbols to highlight situations in which maximum care is required,
as well as practical advice or information.
Pay attention to the meaning of the symbols since they serve to
avoid repeating technical concepts or safety warnings throughout
the text. The symbols should therefore be seen as real reminders.
Please refer to this page whenever in doubt as to their meaning.
Warning
Failure to follow these instructions might give raise to a dangerous
situation and provoke severe personal injuries or even death.
Caution
Failure to follow these instructions might cause damages to the
vehicle and/or its components.
Notes
Useful information on the procedure being described.
References
Parts highlighted in grey and with a numeric reference
1
(Example
) are the accessory to be installed and any assembly
components supplied with the kit.
Parts with an alphabetic reference (Example
components fitted on the vehicle.
Any right- or left-hand indication refers to the vehicle direction of
travel.
General notes
Warning
Carefully perform the operations on the following pages since they
might negatively affect rider safety.
Warning
Carefully perform the operations on the following pages since they
might negatively affect rider safety.
Notes
The following documents are necessary for assembling the Kit:
WORKSHOP MANUAL of your bike model.
Notes
Should it be necessary to change any kit parts, please refer to the
attached spare part table.
96980731A
A
) are the original
1
Publicidad

Manuales relacionados para DUCATI Performance 96980731A


Resumen de contenidos para DUCATI Performance 96980731A
- Página 1 Multistrada 1200 ISTR - 681 / 00 96980731A Kit portatarga in carbonio Carbon number plate holder kit Simbologia Symbols Per una lettura rapida e razionale sono stati impiegati simboli che To allow quick and easy consultation, this manual uses graphic...
- Página 2 Pos. Denominazione Description Portatarga in carbonio Carbon number plate holder ISTR 681 / 00...
- Página 3 OPEN Smontaggio componenti originali Removing the original components Smontaggio sella passeggero e sella pilota Rider seat and passenger seat disassembly Inserire la chiave (A) nella serratura sella e ruotarla in senso orario Insert the key (A) into the seat lock and turn it clockwise until the fino a sentire lo scatto del gancio, come indicato in figura (X1).
- Página 4 ISTR 681 / 00...
- Página 5 Smontaggio gruppo portatarga Removing the number plate holder unit Scollegare il connettore cavo luci posteriori (B1) dal ramo cablaggio Disconnect the rear light cable connector (B1) from rear light luci posteriori (C). wiring branch (C). Svitare le n.4 viti superiori (B2) con rondelle (B3). Loosen no.
- Página 6 Smontaggio coperchio portatarga Removing the number plate holder cover Rimuovere la targa (F) dal piatto portatarga (E). Remove the number plate (F) from number plate holder plate (E). Svitare le n.3 viti (E1) e rimuovere il piatto portatarga (E). Loosen no. 3 screws (E1) and remove number plate holder plate Svitare le n.4 viti (D1) e rimuovere il coperchio portatarga (D) dal (E).
- Página 7 Rimuovere le n.2 clip (D2), le n.4 clip (D3) e i n.2 tamponi in Remove no. 2 clips (D2), no. 4 clips (D3) and no. 2 rubber blocks gomma (D4) dal coperchio portatarga (D). (D4) from number plate holder cover (D). Recuperare tutti i componenti rimossi.
- Página 8 6 Nm ± 10% 3 Nm ± 10% 3 Nm ± 10% ISTR 681 / 00...
- Página 9 Montaggio componenti kit Kit installation Importante Caution Verificare, prima del montaggio, che tutti i componenti risultino Check that all components are clean and in perfect condition puliti e in perfetto stato. before installation. Adottare tutte le precauzioni necessarie per evitare di danneggiare Adopt any precaution necessary to avoid damages to any part of qualsiasi parte nella quale ci si trova ad operare.
- Página 10 6 Nm ± 10% 6 Nm ± 10% 6 Nm ± 10% ISTR 681 / 00...
- Página 11 Montaggio gruppo portatarga Fitting the number plate holder unit Inserire il cavo cablaggio luci posteriori (B6) nell’apertura (G1) Insert the rear light wiring cable (B6) in the opening (G1) on the presente sulla vasca componenti elettrici, come mostrato nel electrical components compartment, as shown in the figure. riquadro.
- Página 12 Rimontaggio sella pilota Rider seat reassembly Posizionare la parte anteriore della sella pilota (A), provvista di Position the front side of rider seat (A), provided with slots (A6), asole (A6), nelle guide (A3) ed inserire il perno (A4) nella sede (A5). into guides (A3) and insert pin (A4) into its seat (A5).
- Página 13 Rimontaggio sella passeggero Passenger seat reassembly Lubrificare la sede (T1) del perno (A7) con SHELL RETINAX HD2. Lubricate the seat (T1) of the pin (A7) with SHELL RETINAX HD2. Posizionare la sella passeggero (A1) e inserire la linguetta (A8) Position passenger seat (A1) and insert the tab (A8) into the nell’alloggio (T2) presente all’interno della vasca portaoggetti.
- Página 14 NOTE / NOTES ISTR 681 / 00...
- Página 15 Multistrada 1200 ISTR - 681 / 00 96980731A Kit support de plaque d’immatriculation en carbone Kit Kennzeichenhalter aus Kohlefaser Symboles Symbole Pour faciliter la consultation de ce manuel, des symboles signalent Zum schnellen und übersichtlichen Lesen werden Symbole des situations exigeant le maximum d'attention, des conseils verwendet, die außerordentlich wichtige Situationen, praktische...
- Página 16 Pos. Designation Bezeichnung Support de plaque d'immatriculation en carbone Kennzeichenhalter aus Kohlefaser ISTR 681 / 00...
- Página 17 OPEN Dépose composants d'origine Ausbau der Original-Bestandteile Dépose selle passager et selle pilote Abnahme von Beifahrer- und Fahrersitzbank Insérer la clé (A) dans la serrure de la selle et la tourner dans le Den Schlüssel (A) in das Sitzbankschloss einstecken und so lange sens des aiguilles d'une montre jusqu'à...
- Página 18 ISTR 681 / 00...
- Página 19 Dépose de l'ensemble support de plaque d'immatriculation Abnahme der Kennzeichenhaltereinheit Débrancher le connecteur câble feux arrière (B1) du brin de Den Verbinder des Kabels der Rücklichter (B1) vom câblage feux arrière (C). Verkabelungszweig der Rücklichter (C) trennen. Desserrer les 4 vis supérieures (B2) avec rondelles (B3). Die 4 oberen Schrauben (B2) mit Unterlegscheiben (B3) lösen.
- Página 20 Dépose du couvercle support de plaque d'immatriculation Abnahme der Kennzeichenhalterabdeckung Déposer la plaque d'immatriculation (F) de la platine de support Das Kennzeichen (F) von der Kennzeichenhalterplatte (E) entfernen. plaque d'immatriculation (E). Die 3 Schrauben (E1) lösen und die Kennzeichenhalterplatte (E) Desserrer les 3 vis (E1) et déposer la platine de support plaque entfernen.
- Página 21 Déposer les 2 clips (D2), les 4 clips (D3) et les 2 tampons en Die 2 Klammern (D2), die 4 Klammern (D3) und die 2 caoutchouc (D4) du couvercle support de plaque d'immatriculation Gummistopfen (D4) von der Kennzeichenhalterabdeckung (D) (D). entfernen.
- Página 22 6 Nm ± 10% 3 Nm ± 10% 3 Nm ± 10% ISTR 681 / 00...
- Página 23 Pose composants kit Montage der Komponenten des Kits Important Wichtig Vérifier, avant la pose, que tous les composants sont propres et en Vor der Montage überprüfen, dass sich alle Komponenten im parfait état. sauberen und perfekten Zustand befinden. Adopter toutes les précautions nécessaires pour éviter Alle erforderlichen Vorsichtsmaßnahmen treffen, um eine d'endommager la surface externe des composants où...
- Página 24 6 Nm ± 10% 6 Nm ± 10% 6 Nm ± 10% ISTR 681 / 00...
- Página 25 Pose de l'ensemble support de plaque d'immatriculation Montage der Kennzeichenhaltereinheit Insérer le câble câblage feux arrière (B6) dans l'ouverture (G1) Das Kabel der Verkabelung der Rücklichter (B6) in die Öffnung (G1) présente sur le bac composants électriques, comme l'encadré le der Aufnahme der elektrischen Komponenten, wie im Ausschnitt montre.
- Página 26 Repose de la selle pilote Montage der Fahrersitzbank Positionner la partie avant de la selle pilote (A), dotée de crans Den vorderen Teil der Fahrersitzbank (A), der mit Langlöchern (A6) (A6), dans les guides (A3) et insérer le pivot (A4) dans le logement versehen ist, in den Führungen (A3) anordnen und den Bolzen (A4) (A5).
- Página 27 Repose selle passager Montage der Beifahrersitzbank Lubrifier le logement (T1) du pivot (A7) avec SHELL RETINAX HD2. Den Sitz (T1) des Bolzen (A7) mit SHELL RETINAX HD2 schmieren. Positionner la selle passager (A1) et insérer la languette (A8) dans Die Beifahrersitzbank (A1) anordnen und die Lasche (A8) in die le logement (T2) qui se trouve à...
- Página 28 REMARQUES HINWEIS ISTR 681 / 00...
- Página 29 Multistrada 1200 ISTR - 681 / 00 96980731A Conjunto porta-matrícula de carbono Carbon number plate holder kit Símbolos Symbols Para uma leitura rápida e racional, foram utilizados símbolos que To allow quick and easy consultation, this manual uses graphic evidenciam situações de máxima atenção, conselhos práticos ou symbols to highlight situations in which maximum care is required, simples informações.
- Página 30 Pos. Descrição Description Porta-matrícula de carbono Carbon number plate holder ISTR 681 / 00...
- Página 31 OPEN Desmontagem dos componentes originais Removing the original components Desmontagem o assento do passageiro e o assento do Rider seat and passenger seat disassembly condutor Insert the key (A) into the seat lock and turn it clockwise until the Insira a chave (A) na fechadura do assento e rode-a no sentido seat catch disengages with an audible click, as shown in the figure horário até...
- Página 32 ISTR 681 / 00...
- Página 33 Desmontagem do grupo porta-matrícula Removing the number plate holder unit Desligue o conector do cabo das luzes traseiras (B1) da Disconnect the rear light cable connector (B1) from rear light ramificação da cablagem das luzes traseiras(C). wiring branch (C). Desatarraxe os 4 parafusos superiores (B2) com as anilhas (B3). Loosen no.
- Página 34 Desmontagem da tampa porta-matrícula Removing the number plate holder cover Remova a matrícula (F) do prato porta-matrícula (E). Remove the number plate (F) from number plate holder plate (E). Desatarraxe os 3 parafusos (E1) e remova o prato porta-matrícula Loosen no. 3 screws (E1) and remove number plate holder plate (E).
- Página 35 Remova os 2 clips (D2), os 4 clips (D3) e os 2 tampões de borracha Remove no. 2 clips (D2), no. 4 clips (D3) and no. 2 rubber blocks (D4) da tampa porta-matrícula (D). (D4) from number plate holder cover (D). Recupere todos os componentes removidos.
- Página 36 6 Nm ± 10% 3 Nm ± 10% 3 Nm ± 10% ISTR 681 / 00...
-
Página 37: Montagem Dos Componentes
Montagem dos componentes Kit installation Importante Caution Verifique, antes da montagem, se todos os componentes estão Check that all components are clean and in perfect condition limpos e em perfeito estado. before installation. Adote todas as precauções necessárias para evitar danificar Adopt any precaution necessary to avoid damages to any part of qualquer peça com a qual deve trabalhar. - Página 38 6 Nm ± 10% 6 Nm ± 10% 6 Nm ± 10% ISTR 681 / 00...
- Página 39 Montagem do grupo porta-matrícula Fitting the number plate holder unit Insira o cabo da cablagem das luzes traseiras (B6) na abertura (G1) Insert the rear light wiring cable (B6) in the opening (G1) on the presente no compartimento dos componentes elétricos, conforme electrical components compartment, as shown in the figure.
- Página 40 Remontagem do assento do piloto Rider seat reassembly Coloque a parte dianteira do assento do piloto (A), equipado com Position the front side of rider seat (A), provided with slots (A6), olhais (A6), nas guias (A3) e introduza o pino (A4) na sede (A5). into guides (A3) and insert pin (A4) into its seat (A5).
- Página 41 Remontagem do assento do passageiro Passenger seat reassembly Lubrifique a sede (T1) do pino (A7) com SHELL RETINAX HD2. Lubricate the seat (T1) of the pin (A7) with SHELL RETINAX HD2. Coloque o assento do passageiro (A1) e introduza a lingueta (A8) Position passenger seat (A1) and insert the tab (A8) into the no alojamento (T2) presente no interior do compartimento porta- housing (T2) present inside the glove compartment.
- Página 42 NOTAS / NOTES ISTR 681 / 00...
-
Página 43: Advertencias Generales
Multistrada 1200 ISTR - 681 / 00 96980731A Kit porta-matrícula de carbono カーボン製ナンバープレートホルダーキット Símbolos シンボル Para una lectura rápida y racional se han empleado símbolos que 素早くかつ合理的に読み進めることができるように、本マニュア evidencian situaciones de máxima atención, consejos prácticos o ルではいくつかのシンボルを導入し、最大限の注意を払う必要が simples informaciones. Prestar mucha atención al significado de ある状況や、推奨事項、または一般情報を明確にしてあります。... - Página 44 Pos. Denominacion 説明 Porta-matrícula de carbono カーボン製ナンバープレートホルダー ISTR 681 / 00...
- Página 45 OPEN Desmontaje componentes originales オリジナル部品の取り外し Desmontaje asiento pasajero y asiento piloto パッセンジャーシートおよびライダーシートの取り外し Introducir la llave (A) en la cerradura y girarla en el sentido de las シートロックにキー (A) を差し込み、図 (X1) のようにカチっと agujas del reloj hasta oír el chasquido del gancho, como indica la 音がするまで時計方向に回します。...
- Página 46 ISTR 681 / 00...
- Página 47 Desmontaje grupo porta-matrícula ナンバープレートホルダーユニットの取り外し Desconectar el conector del cable de las luces traseras (B1) del テールライトケーブルコネクター (B1) をテールライトの分岐配 tramo de cableado de las luces traseras (C). 線 (C) から切り離します。 Desatornillar los 4 tornillos superiores (B2) con arandelas (B3). 4 本の上側スクリュー (B2) を緩め、ワッシャー (B3) と一緒に Desatornillar los 2 tornillos inferiores (B4) con casquillos (B5).
- Página 48 Desmontaje tapa porta-matrícula ナンバープレートホルダーカバーの取り外し Quitar la matrícula (F) del plato porta-matrícula (E). ナンバープレート (F) をナンバープレートホルダーフレーム (E) Desatornillar los 3 tornillos (E1) y quitar el plato porta-matrícula (E). から取り外します。 Desatornillar los 4 tornillos (D1) y quitar la tapa porta-matrícula (D) 3 本のスクリュー (E1) を緩めて外し、ナンバープレートホルダ del porta-matrícula inferior (B).
- Página 49 Quitar los 2 clips (D2), los 4 clips (D3) y los 2 tapones de goma 2 個のクリップ (D2)、4 個のクリップ (D3)、2 個のゴム製パッ (D4) de la tapa porta-matrícula (D). ド (D4) をナンバープレートホルダーカバー (D) から取り外しま Recuperar todos los componentes extraídos. す。 取り外したすべての部品を回収します。 ISTR 681 / 00...
- Página 50 6 Nm ± 10% 3 Nm ± 10% 3 Nm ± 10% ISTR 681 / 00...
- Página 51 Montaje componentes kit キット部品の取り付け 重要 Importante 取り付け前にすべての部品に汚れがなく、完璧な状態であること Controlar, antes del montaje, que todos los componentes se を確認します。作業する部品の外側表面を傷つけないために、必 encuentren limpios y en perfecto estado. 要な予防措置を取ってください Adoptar todas las precauciones necesarias para evitar daños en la superficie exterior de los componentes donde se debe operar. 注記...
- Página 52 6 Nm ± 10% 6 Nm ± 10% 6 Nm ± 10% ISTR 681 / 00...
- Página 53 Montaje grupo porta-matrícula ナンバープレートホルダーユニットの取り付け Introducir el cable del cableado de las luces traseras (B6) en la 図のように、テールライトの配線ケーブル (B6) をエレクトリッ apertura (G1) presente en el compartimiento de los componentes ク部品ボックスの開口部 (G1) に挿入します。 eléctricos, como se indica en el recuadro. テールライトケーブルコネクター (B1) をテールライトの分岐配 Desconectar el conector del cable de las luces traseras (B1) del 線...
- Página 54 Montaje asiento piloto ライダーシートの取り付け Posicionar la parte delantera del asiento piloto (A), que tiene ojales ライダーシート (A) の溝 (A6) が設けられている前部をガイド (A6) en las guías (A3) e introducir el perno (A4) en el alojamiento (A3) に配置し、ピン (A4) を所定の位置 (A5) に差し込みます。 (A5). ライダーシート...
- Página 55 Montaje asiento pasajero パッセンジャーシートの取り付け Lubricar el alojamiento (T1) del perno (A7) con SHELL RETINAX ピン (A7) の取り付け位置 (T1) を SHELL RETINAX HD2 で潤滑し HD2. ます。 Posicionar el asiento pasajero (A1) e introducir la lengüeta (A8) パッセンジャーシート (A1) を配置し、小物入れの内側に設けら en el alojamiento (T2) presente en el interior del compartimiento れた取り付け位置...
- Página 56 NOTAS NOTAS 参考 参考 ISTR 681 / 00...
- Página 57 DUCATI PERFORMANCE レース専用部品 ご注文書 ご注文商品 商品名 P/N P/N 商品名 商品名 P/N P/N 商品名 P/N 商品名 お客様ご記入欄 私は上記レース専用部品を下記車両に装着し、サーキット走行のみに 利用し、一般公道には利用しません。 車台番号 ZDM モデル名 お客様署名 ご注文日 ドゥカティ正規ネットワーク店記入欄 お客様に上記レース専用部品を販売し、レース専用部品のご利用方法を 説明いたしました。 販売店署名 販売日 年 月 日 販売店様へお願い 1. 上記ご記入の上、弊社アフターセールス部までFAXしてください。FAX:03-6692-1317 1. 上記ご記入の上、弊社アフターセールス部までFAXしてください。FAX:03-6692-1317 2. 取り付け車両1台に1枚でご使用ください。...