
Manuales relacionados para Beko BBIS13400XMSWAE


Resumen de contenidos para Beko BBIS13400XMSWAE
- Página 1 Built-in Oven User Manual Horno incorporado Manual del usuario BBIS13400XMSWAE 385441726_2/ EN/ ES/ R.AA/ 24/10/2022 11:46 7768287824...
-
Página 2: Tabla De Contenido
Table of Contents 6 General Information About Bak- ing ........... 1 Safety Instructions......General Warnings About Baking Intended Use ......... in the Oven ........Child, Vulnerable Person and Pet 6.1.1 Pastries and oven food..... 38 Safety ..........6.1.2 Meat, Fish and Poultry....41 Electrical Safety ...... - Página 3 Welcome! Dear Customer, Thank you for choosing the Beko product. We want your product, manufactured with high quality and technology, to offer you the best efficiency. Therefore, carefully read this manual and any other documentation provided before using the product.
-
Página 4: Safety Instructions
1 Safety Instructions • This section includes the Intended Use safety instructions necessary • This product is designed to be to prevent the risk of personal used at home. It is not suitable injury or material damage. for commercial use. •... -
Página 5: Electrical Safety
they are supervised or trained • When the door is open, do not about the safe use and haz- put any heavy objects on it or ards of the product. allow children to sit on it. You • Children should not play with may cause the oven to tip over the product. -
Página 6: Transportation Safety
• The product must not be • If the power cable is damaged, plugged into the outlet during it must be replaced by the installation, repair, and trans- manufacturer, an authorized portation. service or a person to be spe- • Plug the product into an outlet cified by the importer com- that meets the voltage and pany in order to prevent pos-... -
Página 7: Installation Safety
• The product is heavy, carry the • Keep the surroundings of all product with at least two ventilation ducts of the people. product open. • Do not use the door and / or • To prevent overheating, the handle to transport or move product should not be in- the product. -
Página 8: Temperature Warnings
• The oven handle is not a towel • Always use heat resistant dryer. When using the product, oven gloves while placing food do not hang towels, gloves or in the hot oven, or removing similar textiles on the handle. the food from the hot oven, •... -
Página 9: Steam System
after cooking. Otherwise it grill fire. Also, do not place the may cause food poisoning or food too far in the back of the diseases. grill. This is the hottest area • Do not heat closed tins and and fatty foods may catch fire. glass jars in the oven. -
Página 10: Maintenance And Cleaning Safety
• Be careful not to spill water on water left in the chamber in the oven surface or unwanted the next cooking creates prob- surfaces when removing or lems in terms of hygiene. placing the water tank. • Do not wash the water tank in the dishwasher. -
Página 11: Environmental Instructions
mended that you clean the oven with Vinegar Water and cloth. 2 Environmental Instructions aging waste with the household or other 2.1 Waste Directive wastes, take it to the packaging material 2.1.1 Compliance with the WEEE Dir- collection points designated by the local ective and Disposing of the authorities. -
Página 12: Your Product
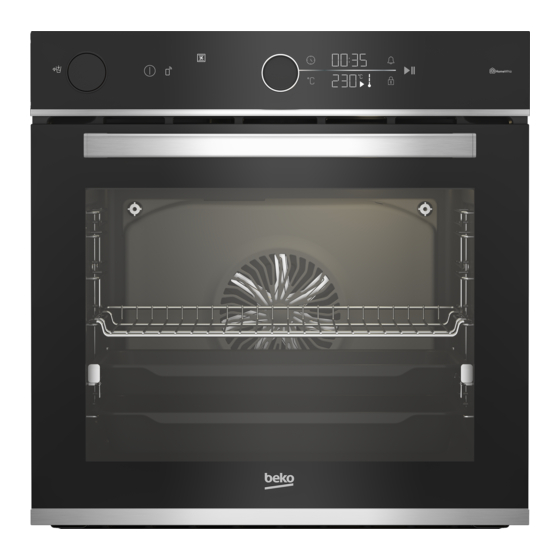
3 Your product 3.1 Product Introduction 1 Control panel 2 Lamp 3 Wire shelves 4 Fan motor (behind the steel plate) 5 Door 6 Handle 7 Shelf positions 8 Steam exit hole 9 Upper heater 10 Ventilation holes 11 Water tank 3.2 Product Control Panel Introduc- Varies depending on the model. -
Página 13: Control Panel
3.2.1 Control Panel 1 Water tank 2 On/off key 3 Function display 4 Oven control knob 5 Temperature setting key 6 Temperature indicator area 7 Key lock key 8 Baking start/stop key 9 Alarm key 10 Timer/duration indicator area 11 Time and settings key 12 Remove control key If there are knob(s) controlling your Function display... -
Página 14: Oven Operating Functions
: Baking time/time of day symbol : Quick heating (booster) symbol : Alarm symbol : Door lock symbol * : Remove control symbol * : Settings symbol : Key lock symbol : Wifi symbol * : It varies depending on the product model. It may : Symbol of baking with eco fan not be available on your product. -
Página 15: Product Accessories
The small grill on the oven ceiling works. It is suitable for Low grill 40-280 grilling smaller amounts. The large grill on the oven ceiling works. It is suitable for Full grill 40-280 grilling in large amounts. The hot air heated by the large grill is quickly distributed into the oven with the fan. -
Página 16: Use Of Product Accessories
On models with wire shelves : Wire grill It is used for frying or placing the food to be baked, fried and stewed on the desired shelf. On models with wire shelves : On models without wire shelves : On models without wire shelves : Meat probe Placing the wire grill on the cooking When cooking meat dishes, the thin long... - Página 17 On models without wire shelves : It is crucial to place the wire grill on the side shelves properly. The wire grill has one direction when placing it on the shelf. While placing the wire grill on the desired shelf, the open section must be on the front.
- Página 18 towards yourself until it reaches the front side. You must pass over this stopping socket to remove it completely. Proper placement of the wire grill and tray on the telescopic rails-On models with wire shelves and telescopic models Thanks to telescopic rails, trays or the wire grill can be easily installed and removed.
-
Página 19: Technical Specifications
3.6 Technical Specifications General specifications Product external dimensions (height/width/depth) (mm) 595 /594 /567 Oven installation dimensions (height / width / depth) 590 - 600 /560 /min. 550 (mm) Voltage/Frequency 220-240 V ~; 50 Hz Cable type and section used/suitable for use in the min. -
Página 20: First Use
4 First Use Before you start using your product, it is ð The minutes field and the sym- recommended to do the following stated in bol flash on the timer/duration the following sections respectively. display. 4.1 First Timer Setting Always set the time of day before using your oven. -
Página 21: Using The Oven
5. Wait for the oven to cool. NOTICE: Some detergents or cleaning agents may cause damage to the surface. 6. Wipe the surfaces of the product with a Do not use abrasive detergents, cleaning wet cloth or sponge and dry with a powders, cleaning creams or sharp objects cloth. -
Página 22: Function Display
1 Water tank 2 On/off key 3 Function display 4 Oven control knob 5 Temperature setting key 6 Temperature indicator area 7 Key lock key 8 Baking start/stop key 9 Alarm key 10 Timer/duration indicator area 11 Time and settings key 12 Remove control key It varies depending on the product model. - Página 23 ð The symbol flashes on the tem- If no setting is made on this dis- perature display. play, the oven turns off in approx- imately 5 minutes and the time of day is shown on the display. Turning off the oven Turn off the oven by touching the key.
- Página 24 stage of the symbol will light up. ure, push the oven control knob once or The oven does not switch off automat- touch the key and turn the oven con- ically since manual baking is done trol knob to the right/left. without setting the baking time.
- Página 25 each stage of the symbol will light up. When the adjusted baking time is completed, “End” text ap- pears on the temperature display, the timer gives an audible warning and baking stops. 9. The warning sounds for one minute. If you touch the key while the audible To adjust the baking time quickly,...
- Página 26 3. You can change the set temperature Automatic baking dishes: and set the baking time as described in A01 is automatically displayed on the con- the previous sections. Then you can trol panel. For other modes, you can cook start baking. by selecting through the "HomeWhiz"...
-
Página 27: Steam Assisted Cooking
Activating the Automatic baking function When automatic baking has fin- ished, you can touch the key to 1. Turn on the oven by touching the continue baking for an additional 5 key. minutes. A countdown of 5 ap- 2. Activate the lower row operating func- pears on the display. - Página 28 For steam assisted cooking: 8. Activate the lower row operating func- tions by touching the “Extra function ac- 1. Start your baking after checking the tivation” on the function display. steam assisted cooking table and set- ting the function, temperature and time according to the food you want to cook.
- Página 29 11.You can switch the steam level to low 14.You can set your baking time or cook depending on the type of food. Touch manually by controlling the baking Steam function to switch. yourself. To set the baking time, see “Baking by setting the baking time” section.
-
Página 30: Settings
“End” text is displayed on the temper- 5.4 Settings ature display, the oven continues oper- ating indefinitely. Turn off the oven by The 3-2-1 countdown is shown on touching the key. If any key is the display in the menus or set- touched except for these, the audible tings that should be activated by warning stops. - Página 31 Deactivating the key lock 1. Touch the key until the symbol ap- pears on the timer/duration display. ð A countdown of 3-2-1 appears on the display. When the countdown is over, symbol disappears on the timer/ duration display and the key lock is ð...
- Página 32 ð A countdown of 3-2-1 appears on the display. When the countdown is over, the settings menu is activ- ated. 2. Turn the oven control knob to the right/ left until “b-1” or “b-2” appears on the timer/duration display. 2. Turn the oven control knob to the right/ left until “d-1”, “d-2”...
- Página 33 1. With the oven turned off (while the time 5. Confirm the preheating (booster) set- of day appears on the display), touch ting by touching the key again or key for about 3 seconds to activ- pushing the oven control knob once. ate the settings menu.
- Página 34 ð The minutes field and the sym- bol flash on the timer/duration display. ð When the oven switches to the setup mode, an animation is dis- played on the display where some lines flash. 4. Set the minute by turning the oven con- trol knob to right/left.
-
Página 35: Using The Meat Probe
CE declaration of conformity Arçelik A.Ş. declares that this product complies with the 2014/53/EU Directive. A detailed RED Declaration of Con- formity is available online in the support.beko.com website within the additional documents in the product page for your product. - Página 36 • If you have set the oven timer for a spe- 1. Turn the oven on by touching the cific baking period before using the meat key. probe, this period is cancelled automat- 2. Slide the slot cover (4) on the side wall ically when the meat probe is installed.
-
Página 37: General Information About Baking
ð The symbol next to the meat probe temperature flashes. 5. 75 °C, which is the recommended tem- perature for the meat probe, and is displayed on the timer/duration indic- 9. To start the baking touch the key. ator display. The recommended tem- perature for the selected operating function is displayed on the temperat- ure indicator display. -
Página 38: General Warnings About Baking In The Oven
Plus, this section describes some of the • For good baking performance, place your foods tested as producers and the most food on the recommended correct shelf. appropriate settings for these foods. Ap- Do not change the shelf position during propriate oven settings and accessories baking. - Página 39 • If the cake is moist, use a small amount • If the pastry is getting cooked slowly, of liquid or reduce the temperature by make sure that the thickness of the 10°C. pastry you have prepared does not over- •...
- Página 40 Food Accessory to be Operating func- Shelf position Temperature (°C) Baking time used tion (min) (approx.) Glass / metal rect- Top and bottom 2 or 3 30 … 40 Lasagne angular container heating on wire grill ** Round black metal mould, 20 cm in Top and bottom 50 …...
-
Página 41: Meat, Fish And Poultry
6.1.2 Meat, Fish and Poultry • After the cooking time is expired, keep the meat in the oven for approximately The key points on grilling 10 minutes. The juice of the meat is bet- • Seasoning it with lemon juice and pep- ter distributed to the fried meat and does per before cooking whole chicken, turkey not come out when the meat is cut. -
Página 42: Steam Assisted Cooking
General warnings • Place the pieces to be grilled on the wire grill or wire grill tray by distributing them • Food not suitable for grilling carries a without exceeding the dimensions of the fire hazard. Grill only food that is suitable heater. -
Página 43: Test Foods
Suggestions for baking with a single tray Food Access- Shelf Operating Temper- Amount of Stea Water in- Baking Approx. ory to be posi- function ature (°C) water to be take time time (min) food used tion used (ml) level (mins.)** (approx.) weight (g) Whole... - Página 44 Cooking table for test meals Suggestions for baking with a single tray Food Accessory to be Operating func- Shelf position Temperature (°C) Baking time used tion (min) (approx.) Shortbread (sweet Top and bottom Standard tray * 20 … 30 cookie) heating On models with wire shelves :3...
-
Página 45: Maintenance And Cleaning
Grill Food Accessory to be Shelf position Temperature (°C) Baking time (min) used (approx.) Meatball (veal) - 12 20 … 30 Wire grill amount Toast bread Wire grill 1 … 3 It is recommended to preheat for 5 minutes for all grilled food. Turn pieces of food after 1/2 of the total grilling time. -
Página 46: Cleaning Accessories
Catalytic surfaces • Do not use hard metal scrapers and ab- rasive cleaners. They may damage the • The side walls in the cooking area can surfaces. only be covered with enamel or catalytic • Ensure that the joints of the components walls. -
Página 47: Steam Cleaning
described in the "General Cleaning Inform- 2. Push the water reservoir on the control ation" section according to the side wall panel of your oven and remove the surface type. reservoir from its slot. Fill the reservoir with 200 ml of water. To remove the side wire shelves: 1. -
Página 48: Cleaning The Oven Door
11.( It varies depending on the product model. It may not be available on your product.) After the condensation inside the oven, puddle or moisture may occur in the pool channel under the oven. Wipe this pool channel with a damp cloth after use and dry it. -
Página 49: Removing The Inner Glass Of The Oven Door
8. Pull the removed door upwards to re- lease it from the right and left hinges and remove it. Illustration 4: Hinges - open position 6. (C) type hinge is available in soft open- To reattach the door, the proced- ing/closing door types. ures applied when removing it must be repeated from the end to the beginning, respectively. -
Página 50: Cleaning The Oven Lamp
7.8 Cleaning the Oven Lamp In the event that the glass door of the oven lamp in the cooking area becomes dirty; clean using dishwashing detergent, warm water and a soft cloth or sponge and dry with a dry cloth. In case of oven lamp fail- ure, you can replace the oven lamp by fol- lowing the sections that follow. -
Página 51: Troubleshooting
3. If your oven lamp is type (A) shown in the figure below, rotate the oven lamp as shown in the figure and replace it 3. Lift the lamp's protective glass cover with a new one. If it is type (B) model, with a screwdriver. - Página 52 Oven light is not on. "HomeWhiz" application does not show the oven status right. • Oven lamp may be faulty. >>> Replace oven's lamp. • Your link may be interrupted for a while. • No electricity. >>> Ensure the mains is >>>...
- Página 54 Ajustes .......... 84 Tabla de contenidos Uso de la sonda para carne ..89 1 Instrucciones de Seguridad..56 6 Información general sobre el Uso Previsto........56 horneado ........Seguridad de niños, personas Advertencias generales sobre la vulnerables y mascotas ....cocción en el horno ......
- Página 55 ¡Bienvenido! Estimado cliente, Gracias por elegir el producto Beko . Queremos que el aparato, fabricado con alta calidad y tecnología, le ofrezca la mejor eficiencia. Para ello, lea atentamente este manual y cual- quier otra documentación proporcionada antes de utilizar el producto.
-
Página 56: Instrucciones De Seguridad
1 Instrucciones de Seguridad • Esta sección incluye las ins- • No realice modificaciones téc- trucciones de seguridad nece- nicas en el producto. sarias para evitar el riesgo de Uso Previsto lesiones personales o daños materiales. • Este producto está diseñado •... -
Página 57: Seguridad Eléctrica
nas discapacidades físicas, • Mantenga los materiales de sensoriales o mentales, o que embalaje fuera del alcance de carezcan de experiencia y co- los niños. Existe un riesgo de nocimientos, siempre que se- lesiones y asfixia. an supervisados o entrenados •... - Página 58 eléctrica a la que está conec- calientes. De lo contrario, el tado el producto, que cumpla aislamiento de los cables pue- con la normativa eléctrica y de fundirse y provocar un in- que separe todos los polos de cendio como resultado de un la red.
-
Página 59: Seguridad En Transporte
• No tocar nunca el enchufe con partes que se pueden quitar o las manos húmedas. Nunca móviles del aparato y el apa- desenchufe tirando del cable, rato se dañen. tire siempre sujetando el en- • Compruebe el aspecto general chufe. -
Página 60: Avisos De Temperatura
conexiones de electricidad / Se debe tener cuidado para gas del aparato y llame al ser- evitar tocar el producto y los vicio técnico autorizado. elementos de calentamiento. • No utilice el producto si el Los niños menores de 8 años cristal de la puerta delantera no deben acercarse al aparato está... -
Página 61: Seguridad En La Cocción
• Los accesorios pueden dañar • Coloque el papel antigrasa en el cristal de la puerta al cerrar una batería de cocina o en el la puerta del aparato. Empuje accesorio de horno (bandeja, siempre los accesorios hasta parrilla, etc.) con la comida y el final del área de cocción. -
Página 62: Sistema De Vapor
la zona más caliente y los ali- • No utilice accesorios que pue- mentos grasos pueden incen- dan corroerse con el vapor diarse. mientras cocina. • Tenga cuidado de no derramar 1.10 Sistema de vapor agua en la superficie del horno o en superficies no deseadas •... -
Página 63: Instrucciones Medioambientales Directiva De Residuos
• Mantenga siempre el panel de el tanque y se deja durante 1 control limpio y seco. Una su- hora. Luego, se lava con abun- perficie húmeda y sucia puede dante agua y se seca. Se reco- causar problemas en el mane- mienda aplicar este procedi- jo de las funciones. -
Página 64: Información De Embalaje
aparato correctamente ayuda a evitar con- • Descongele los alimentos congelados secuencias negativas para el medio am- antes de hornearlos. biente y la salud humana. • En el horno, utilice recipientes oscuros o esmaltados que transmitan mejor el ca- lor. Cumplimiento de Directiva RoHS: •... -
Página 65: Su Aparato
3 Su aparato 3.1 Información de Producto 1 Panel de control 2 Cordero 3 Estantes de rejilla 4 Motor del ventilador (detrás de la placa de acero) 5 Puerta 6 Mango 7 Posiciones de estante 8 Orificio de salida de vapor 9 Calefacción superior 10 Los agujeros de ventilación 11 Depósito de agua... -
Página 66: Panel De Control
3.2.1 Panel de control 1 Depósito de agua 2 Tecla de encendido/apagado 3 Pantalla de la función 4 Perilla de control del horno 5 Tecla de ajuste de la temperatura 6 Zona del indicador de temperatura 7 Llave de bloqueo de teclas 8 Tecla de inicio/parada de cocción 9 Tecla de alarma 10 Área del indicador de tiempo/dura-... -
Página 67: Funciones De Funcionamiento Del Horno
: Tecla de tiempo y ajustes : Símbolo de cocción : Tecla de ajuste de la temperatura : El símbolo de la temperatura : Llave de bloqueo de teclas : Símbolo de temperatura en el horno : Símbolo de calentamiento rápido (booster) : Tecla de alarma : Símbolo de bloqueo de la puerta * : Tecla de inicio/parada de cocción... -
Página 68: Accesorios Del Producto
El calentador inferior y el ventilador funcionan. Es adecuado Función para pizzas 40-280 para la cocción de la pizza. Funcionan las funciones de calefacción superior, calefacción inferior y calefacción del ventilador. Cada lado del producto a Función "3D" 40-280 cocinar se cocina por igual y rápidamente. La cocina se hace con una sola bandeja. -
Página 69: Uso De Los Accesorios Del Pro- Ducto
Sonda para carne Cuando se cocinan platos de carne, el ex- tremo largo y delgado se pega a la carne y el otro extremo se utiliza fijando el otro ex- tremo a su toma en la pared lateral del chasis. Bandeja honda Se utiliza para pasteles, fritura de grandes trozos, comida jugosa o para la recogida... - Página 70 Colocando la parrilla en los estantes de Colocando la bandeja en los estantes de la cocción cocina En los modelos con estantes de alam- En los modelos con estantes de alam- bre : bre : Es crucial colocar correctamente la parrilla También es crucial colocar correctamente en los laterales de los estantes de rejilla.
- Página 71 tirar de ella hacia delante hasta que llegue al punto de parada. Debes pasar por enci- ma de este punto para eliminarlo por com- pleto. En los modelos con estantes de alam- bre : Colocación correcta de la parrilla y la ban- deja en las guías telescópicas-En mode- los con estantes de alambre y modelos telescópicos...
-
Página 72: Especificaciones Técnicas
3.6 Especificaciones Técnicas Características técnicas generales Dimensiones externas del producto (altura/anchura/ 595 /594 /567 profundidad) (mm) Dimensiones de la instalación del horno (altura / anchu- 590 - 600 /560 /min. 550 ra / profundidad) (mm) Tensión/Frecuencia 220-240 V ~; 50 Hz Tipo y sección del cable utilizado/apto para el producto min. -
Página 73: Primer Uso
4 Primer uso Antes de empezar a utilizar el producto, se recomienda hacer lo que se indica en los siguientes apartados respectivamente. 4.1 Primer ajuste del temporizador Ajuste siempre la hora del día an- tes de utilizar su horno. Si no lo 4. -
Página 74: Uso Del Horno
6. Limpie las superficies del aparato con vos, polvos de limpieza, cremas de limpie- un paño o esponja húmedos y séquelas za ni objetos punzantes durante la limpie- con un paño. NOTICE: Durante el primer uso, puede sa- Antes de utilizar los accesorios: lir humo y olor durante varias horas. - Página 75 hornear rápidamente. Para el ajuste de precalentamiento rápido, consulte la sección "Ajustes". 1 Depósito de agua 2 Tecla de encendido/apagado 3 Pantalla de la función 4 Perilla de control del horno 5 Tecla de ajuste de la temperatura 6 Zona del indicador de temperatura 7 Llave de bloqueo de teclas 8 Tecla de inicio/parada de cocción 9 Tecla de alarma...
- Página 76 ratura, presione una vez el botón de Si no se realiza ningún ajuste en control del horno o toque la tecla y gire esta pantalla, el horno se apaga en el botón de control del horno hacia la aproximadamente 5 minutos y se derecha/izquierda.
- Página 77 3. Si la función que desea activar no se encuentra entre las funciones de fun- cionamiento que aparecen en primer lu- gar en la pantalla de funciones, puede activar las funciones de funcionamiento de la fila inferior tocando "" ð Su horno comenzará a funcionar in- mediatamente con la función y la tem- peratura seleccionadas.
- Página 78 El tiempo de horneado aumenta en 1 minuto en los primeros 15 minu- tos y en 5 minutos después de 15 minutos. 8. Una vez ajustado el bloqueo de teclas, si se toca cualquier tecla o se pulsa el mando de control del horno, aparecen 6.
- Página 79 2. Toque y mantenga la función de opera- 3. Puede cambiar la temperatura estable- ción "" en la pantalla de funciones du- cida y ajustar el tiempo de horneado rante 3 segundos. como se ha descrito en los apartados anteriores. A continuación, puede em- pezar a hornear.
-
Página 80: Cocción Asistida Por Vapor
ð El modo "A01" se activa en la pan- • Para que esta función funcione correcta- mente, el horno debe estar frío. Si el hor- talla. Utilice la aplicación para se- no no está suficientemente frío, al tocar leccionar un modo según el tipo la tecla para iniciar la cocción automáti- de alimento que esté... - Página 81 hornear alimentos de pastelería como tor- tas, pasteles, pan, mientras que el nivel de vapor alto se recomienda para hornear ali- mentos de tipo cárnico (como piezas gran- des de carne, pollo entero). Esta función puede depender de los alimentos que coci- ne.
- Página 82 12.La temperatura predefinida para la fun- ción operativa seleccionada aparece en la pantalla. Toque la tecla y gire el man- do de control del horno a la derecha/iz- quierda para cambiar esta temperatura. ð El símbolo parpadea en el indica- dor de temperatura.
- Página 83 15.Después de ajustar la función operativa suena durante un minuto. Si toca la te- cla mientras se emite el aviso acústico y la temperatura, toque la tecla para iniciar el horneado. y se muestra el texto "Fin" en la panta- lla de temperatura, el horno continúa funcionando indefinidamente.
-
Página 84: Ajustes
5.4 Ajustes Desactivar el bloqueo de teclas 1. Toque la tecla hasta que aparezca el La cuenta atrás de 3-2-1 se mues- símbolo en la pantalla del temporiza- tra en la pantalla en los menús o dor/duración. ajustes que deben activarse pul- ð... - Página 85 3. Ajuste la hora girando el mando del 1. Con el horno apagado (mientras la hora horno hacia la derecha/izquierda. To- del día aparece en la pantalla), toque la que la tecla de nuevo para confirmar tecla durante unos 3 segundos para ac- el ajuste.
- Página 86 Ajuste del brillo de la pantalla 5. Confirme el brillo tocando de nuevo la tecla o pulsando una vez el mando del Puede cambiar el brillo de la pantalla de la horno. unidad de control. Su horno debe estar apagado para realizar este ajuste. Ajustar la función de precalentamiento rá- pido (Booster) 1.
- Página 87 ð El campo del temporizador y el símbolo parpadean en la pantalla del temporizador/duración. 4. Gire el ajuste "OFF" de la pantalla a "ON" girando el mando de control del horno hacia la derecha/izquierda. 3. Ajuste la hora del día girando el mando del horno a la derecha/izquierda y acti- ve el campo de los minutos pulsando el mando del horno una vez o tocando la...
- Página 88 1. Toque la tecla una vez mientras se Puede completar el procedimiento muestra el símbolo en la pantalla. para conectar su horno a una red inalámbrica y activar el control re- ð En la pantalla, se mostrará el símbolo moto del horno siguiendo las ins- con el símbolo juntos.
-
Página 89: Uso De La Sonda Para Carne
Arçelik A.Ş. declara que este producto cumple con la Directiva 2014/53/UE. Una detallada Declaración de Confor- midad RED está disponible en línea en el sitio web support.beko.com dentro de los documentos adicionales en la página del producto para su producto. - Página 90 Rare 60-62 carne se muestran en la pantalla de funciones. Toque la función con la que Medium rare 63-70 desea operar la sonda de carne. Medium 71-76 Bien hecho 77-81 Overcooked ≥ 82 1. Encienda el horno tocando la tecla "". 2.
-
Página 91: Información General Sobre El Horneado
ð El símbolo junto a la temperatura interna de la sonda de carne que de la sonda de carne parpadea. usted ha ajustado se mostrarán alternativamente con intervalos de aproximadamente 3 segundos. El sensor de la sonda de carne de- tecta que la temperatura interna de la carne alcanza la temperatura establecida para la sonda de car-... -
Página 92: Pasteles Y Alimentos Para El Horno
horneado. Utilice el papel antigrasa que • Coloque su comida en el estante apro- usará en el rango de temperatura espe- piado recomendado en la mesa de coc- cificado. ción. Consulte el estante inferior del hor- • Para una buena cocción, coloque los ali- no como estante 1. - Página 93 Tabla de cocción para alimentos de pastelería y horno Sugerencias para hornear con una sola bandeja Comida Accesorio a utili- Función de fun- Posición de la Temperatura (°C) Tiempo de coc- cionamiento estantería ción (min) (aprox.) Pastel en la ban- Calentamiento su- Bandeja estándar 30 …...
-
Página 94: Sugerencias Para Cocinar Con Dos Bandejas
Comida Accesorio a utili- Función de fun- Posición de la Temperatura (°C) Tiempo de coc- cionamiento estantería ción (min) (aprox.) Molde redondo de metal negro de 20 Calentamiento por 50 … 65 Tarta de manzana cm de diámetro en ventilador la parrilla de alam- bre ** Calentamiento su-... -
Página 95: Carne, Pescado Y Aves De Corral
Comida Accesorio a utilizar Posición de la es- Temperatura (°C) Tiempo de cocción tantería (min) (aprox.) 25 … 35 Pequeños pasteles Bandeja estándar * 25 … 35 Galletas Bandeja estándar * 45 … 55 Pastas Bandeja estándar * 35 … 45 Bollo Bandeja estándar * * Es posible que estos accesorios no se incluyan en el aparato. -
Página 96: Parrilla
Comida Accesorio a utili- Función de fun- Posición de la Temperatura (°C) Tiempo de coc- cionamiento estantería ción (min) (aprox.) 25 mins. 250/ Bandeja estándar Pavo (5,5 kg) max, después 180 150 … 210 Función "3D" … 190 Parrilla * Calentamiento in- ferior/superior Coloque una ban-... -
Página 97: Cocción Asistida Por Vapor
Comida Accesorio a utilizar Posición de la es- Temperatura (°C) Tiempo de cocción tantería (min) (aprox.) 4 - 5 20 … 25 Chuletas de cordero Parrilla Bistec - (cubos de 4 - 5 25 … 30 Parrilla carne) 4 - 5 25 …... -
Página 98: Alimentos De Prueba
Comida Acceso- Posi- Función de Tempera- Cantidad de Nivel Tiempo Tiempo Peso rio a utili- ción de funciona- tura (°C) agua a utili- de toma de coc- aproxi- la es- miento zar (ml) vapor de agua ción (min) mado del tantería (mins.)** (aprox.) - Página 99 Mesa de cocción para comidas de prueba Sugerencias para hornear con una sola bandeja Comida Accesorio a utili- Función de fun- Posición de la Temperatura (°C) Tiempo de coc- cionamiento estantería ción (min) (aprox.) Shortbread (galleta Calentamiento su- Bandeja estándar 20 …...
-
Página 100: Mantenimiento Y Limpieza
Se recomienda precalentar todos los alimentos. *Es posible que estos accesorios no se incluyan en el aparato. **Estos accesorios no están incluidos en el aparato. Son accesorios disponibles en el mercado. Parrilla Comida Accesorio a utilizar Posición de la es- Temperatura (°C) Tiempo de cocción tantería... -
Página 101: Limpieza De Los Accesorios
• Los limpiadores rociados/aplicados a la seco. Los restos de detergente pueden superficie deben limpiarse inmediata- dañar la superficie del cristal la próxima mente. Los limpiadores abrasivos que se vez. dejan en la superficie hacen que ésta se • En ningún caso se deben limpiar los re- vuelva blanca. -
Página 102: Limpiar El Interior Del Horno (Área De Cocción)
parte inferior para limpiar el panel. El pa- nel de control y los mandos pueden es- tar dañados. • Durante la limpieza de los paneles inox con mando, no utilice productos de lim- pieza inox alrededor del mando. Los in- dicadores que rodean el mando se pue- den borrar. -
Página 103: Limpieza De La Puerta Del Horno
se un charco o humedad en el canal de la piscina bajo el horno. Limpie este ca- nal de la piscina con un paño húmedo después de su uso y séquelo. 3. Coloque el depósito de agua en su ra- nura. - Página 104 Ilustración 1: Bisagras - posición cerrada Ilustración 4: Bisagras - posición abierta 6. (C) la bisagra tipo está disponible en los tipos de puerta de apertura/cierre sua- Ilustración 2: Bisagras - posición abierta 5. (La bisagra tipo B está disponible en los tipos de puerta de cierre suave. Ilustración 5: Bisagras - posición cerrada Ilustración 3: Bisagras - posición cerrada Ilustración 6: Bisagras - posición abierta...
-
Página 105: Retirar El Cristal Interior De La Puerta Del Horno
8. Tire de la puerta retirada hacia arriba 3. Como se muestra en la ilustración, le- para liberarla de las bisagras derecha e vante suavemente el vaso más interno izquierda y retírela. (1) hacia 'A' y luego, retírelo tirando ha- cia 'B'. -
Página 106: Limpieza De La Lámpara Del Horno
7.8 Limpieza de la lámpara del horno En caso de que se ensucie la puerta de cristal de la bombilla del horno en el área de cocción, límpiela con detergente para vajilla, agua tibia y un paño suave o una esponja y séquela con un paño seco. -
Página 107: Solución De Problemas
4. Si la bombilla del horno es del tipo (A) que se muestra en la ilustración de abajo, gire la bombilla del horno como se muestra en la ilustración y reemplá- cela por una nueva. Si se trata de un modelo de tipo (B), extráigalo como se muestra en la figura y sustitúyalo por uno nuevo. - Página 108 Después de iniciar la cocción el símbolo >>> Desconecte los modos de instala- ción de los demás aparatos y continúe parpadea en la pantalla y hay un aviso so- noro. utilizando sólo un aparato con el modo de instalación activado. •...